Droip offers extensive customization options, but there are times when you may require additional custom blocks of code. That’s where the Code element comes in handy.
Using this element, you can easily add code in the form of HTML, CSS, and Javascript to your page. And not only can you use this to add custom code but also to embed third-party elements like Bootstrap Components, Social Buttons, Maps, and more.
Adding the Code Element
To add the Code element, follow these steps:
- Open the Elements panel.
- Scroll down to the Advanced section.
- Drag & drop the Code element onto your canvas.
Custom Code Editor
To open the custom code editor, click on the button at its center or the ellipsis icon on its inline editor. On the resulting pop-up window, you’ll find two tabs — Code and Web URL.
Code Tab
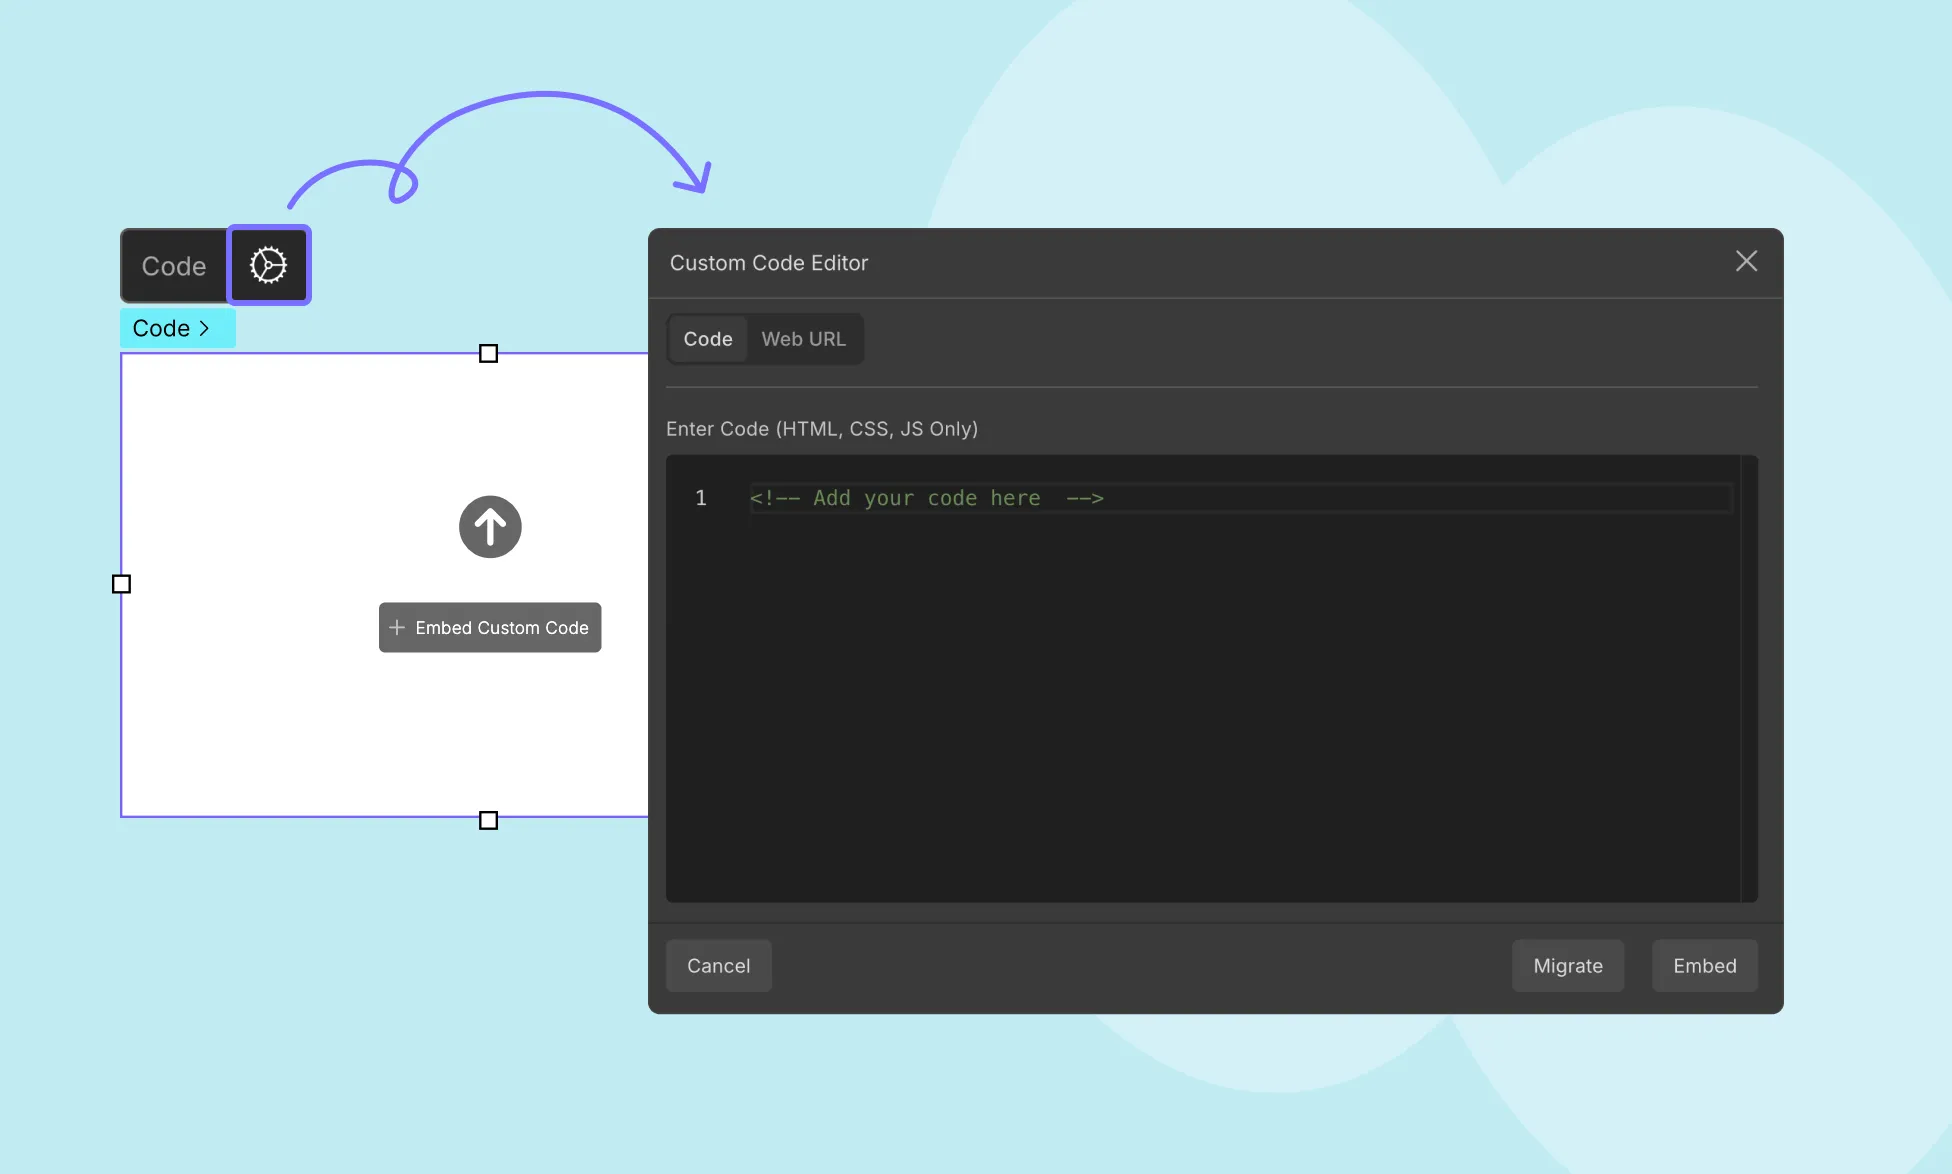
This is the custom code editor. Here, you can directly paste your HTML, CSS, and JS code and then simply click on the Embed button to save.
Web URL Tab

Here, instead of typing in the full code, you can instead paste the URL where the block of code you want to add is written. To do that:
- In the same pop-up window, switch to the Web URL tab.
- Instead of typing the full code, paste the URL where the desired code is hosted. Please ensure the code is publicly accessible on the web.
How to Embed Custom Code
Follow these steps to embed custom code:
Step 1: Copy the Custom Code
Start by copying the custom code you want to embed, either from your own code editor or a third-party resource. For example, consider the following HTML table:
| User | Country | |
|---|---|---|
| Tessa H. | California, USA | [email protected] |
| Elend V. | Scotland, UK | [email protected] |
Step 2: Add the Code Element
- Go to the Elements Panel.
- Drag and drop the Code element onto your page.
Step 3: Paste the Custom Code
- Click on the ellipsis icon in the Code element.
- Switch to the Code tab.
- Paste the copied code here.
Step 4: Save Your Actions
Finally, click the Embed button to save the custom code.
Bonus: Adding Style
You can also Style this element by copying the Style code and going to the Pages Panel. Then, click on the ellipsis icon that’s beside the current page’s label. Select Settings and navigate to Custom Code. Paste the copied style code into the Inside Tag section.
To apply styles to the Code element, follow these additional steps:
- Copy the style code.
- Go to the Pages Panel.
- Click on the ellipsis icon beside the current page’s label.
- Select Settings and navigate to Custom Code.
- Paste the copied style code into the Inside Tag section.
- Save your changes.
Once it’s saved, you’ll be able to see the end result by clicking on the preview button on the top right.
Remember to exclude , , or tags in your custom code, as they may interfere with the native code of the page and cause issues.
💡Tip: You can easily reuse custom code blocks by converting them into reusable elements using Symbols.
Was this page helpful?