Using a variety of fonts is essential for web design, and the ability to upload custom fonts adds even more flexibility.
To access the Font Library, click on the dropdown icon next to Droip’s logo in the Topbar.
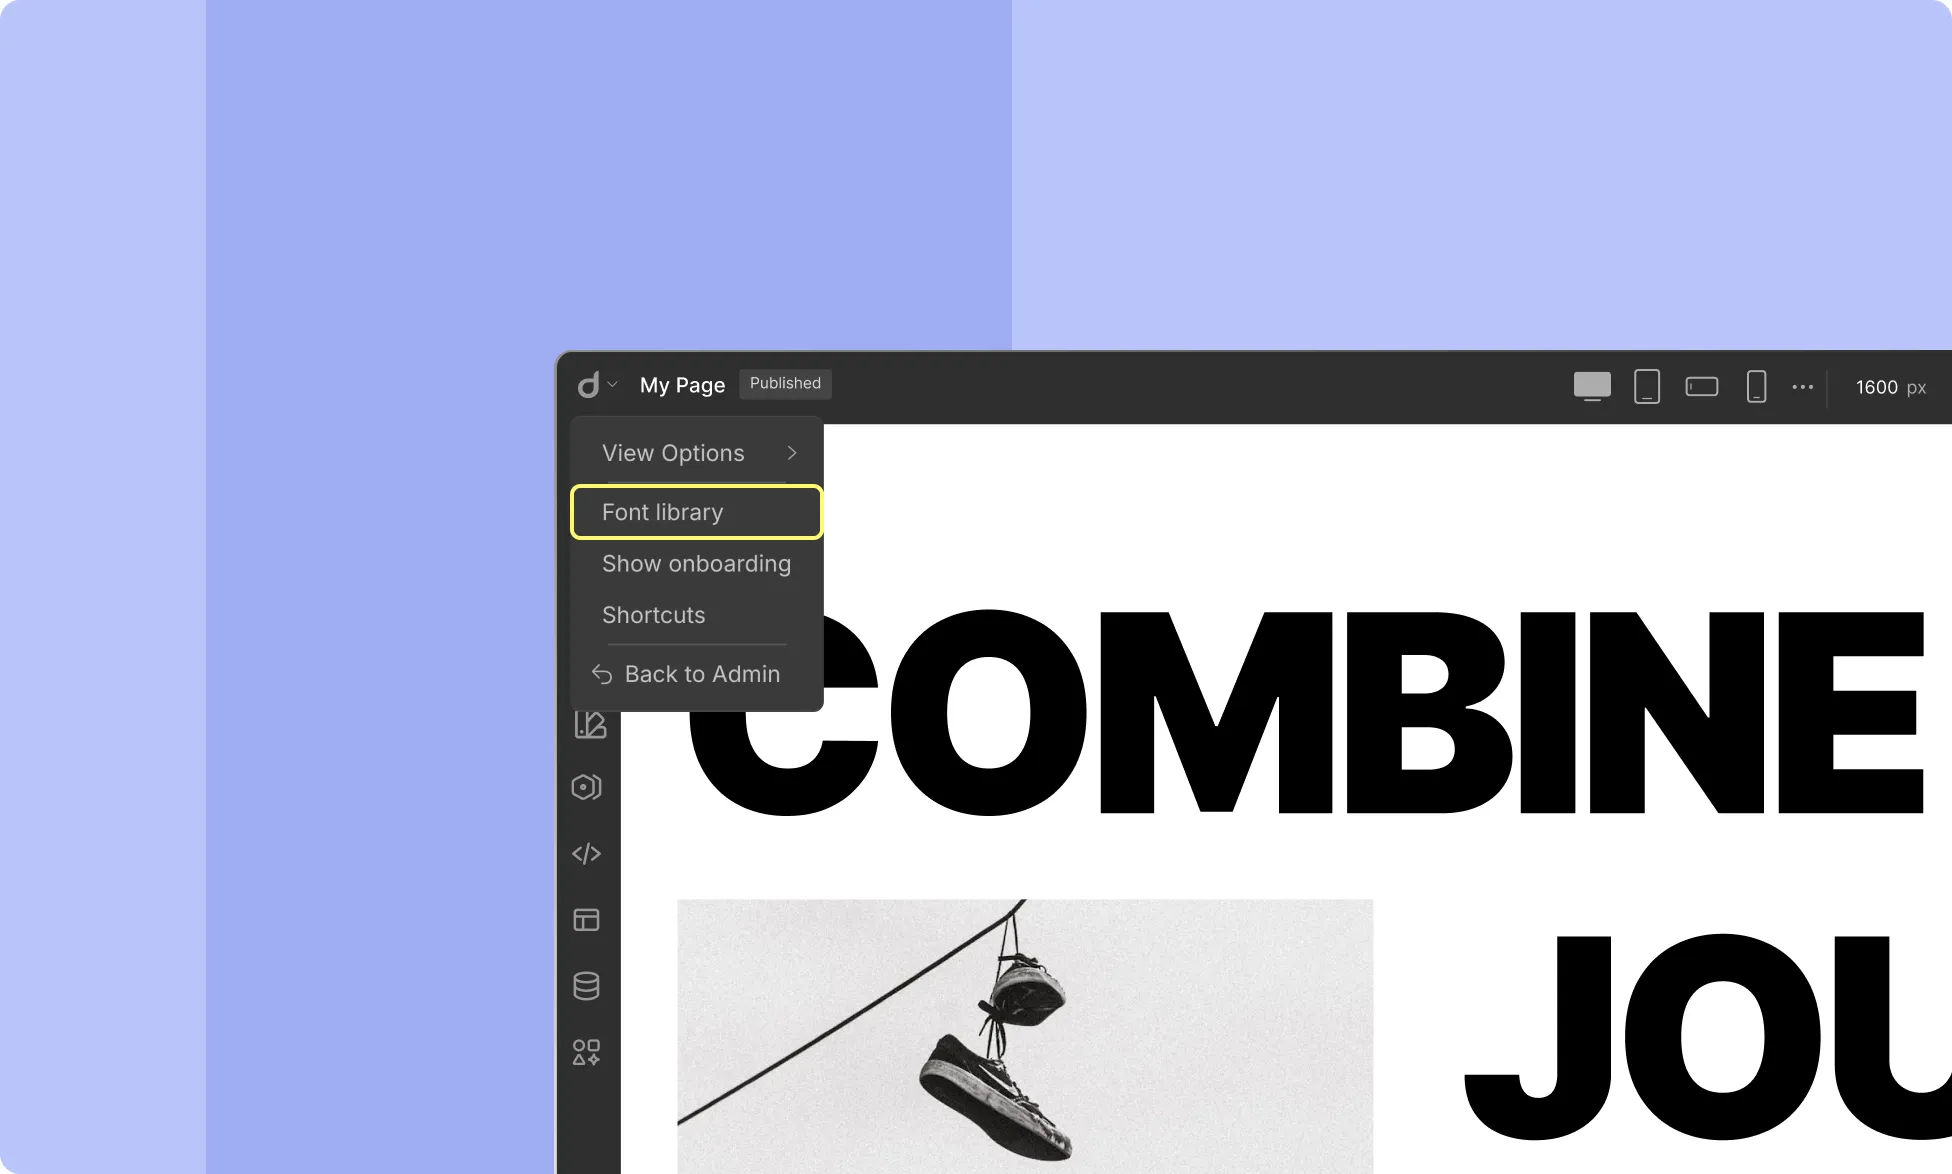
Font Library Tabs
The Font Library consists of three main tabs:
1. Google Fonts
This tab provides access to a wide range of open-source fonts from Google Fonts. You can select and incorporate these fonts into your project for use in website text, branding elements (including logos), and more.
2. Installed Fonts
The Installed Fonts tab displays a list of all fonts that are already installed in your project. If you need to remove any fonts, simply click the Remove button located at the bottom-right corner.
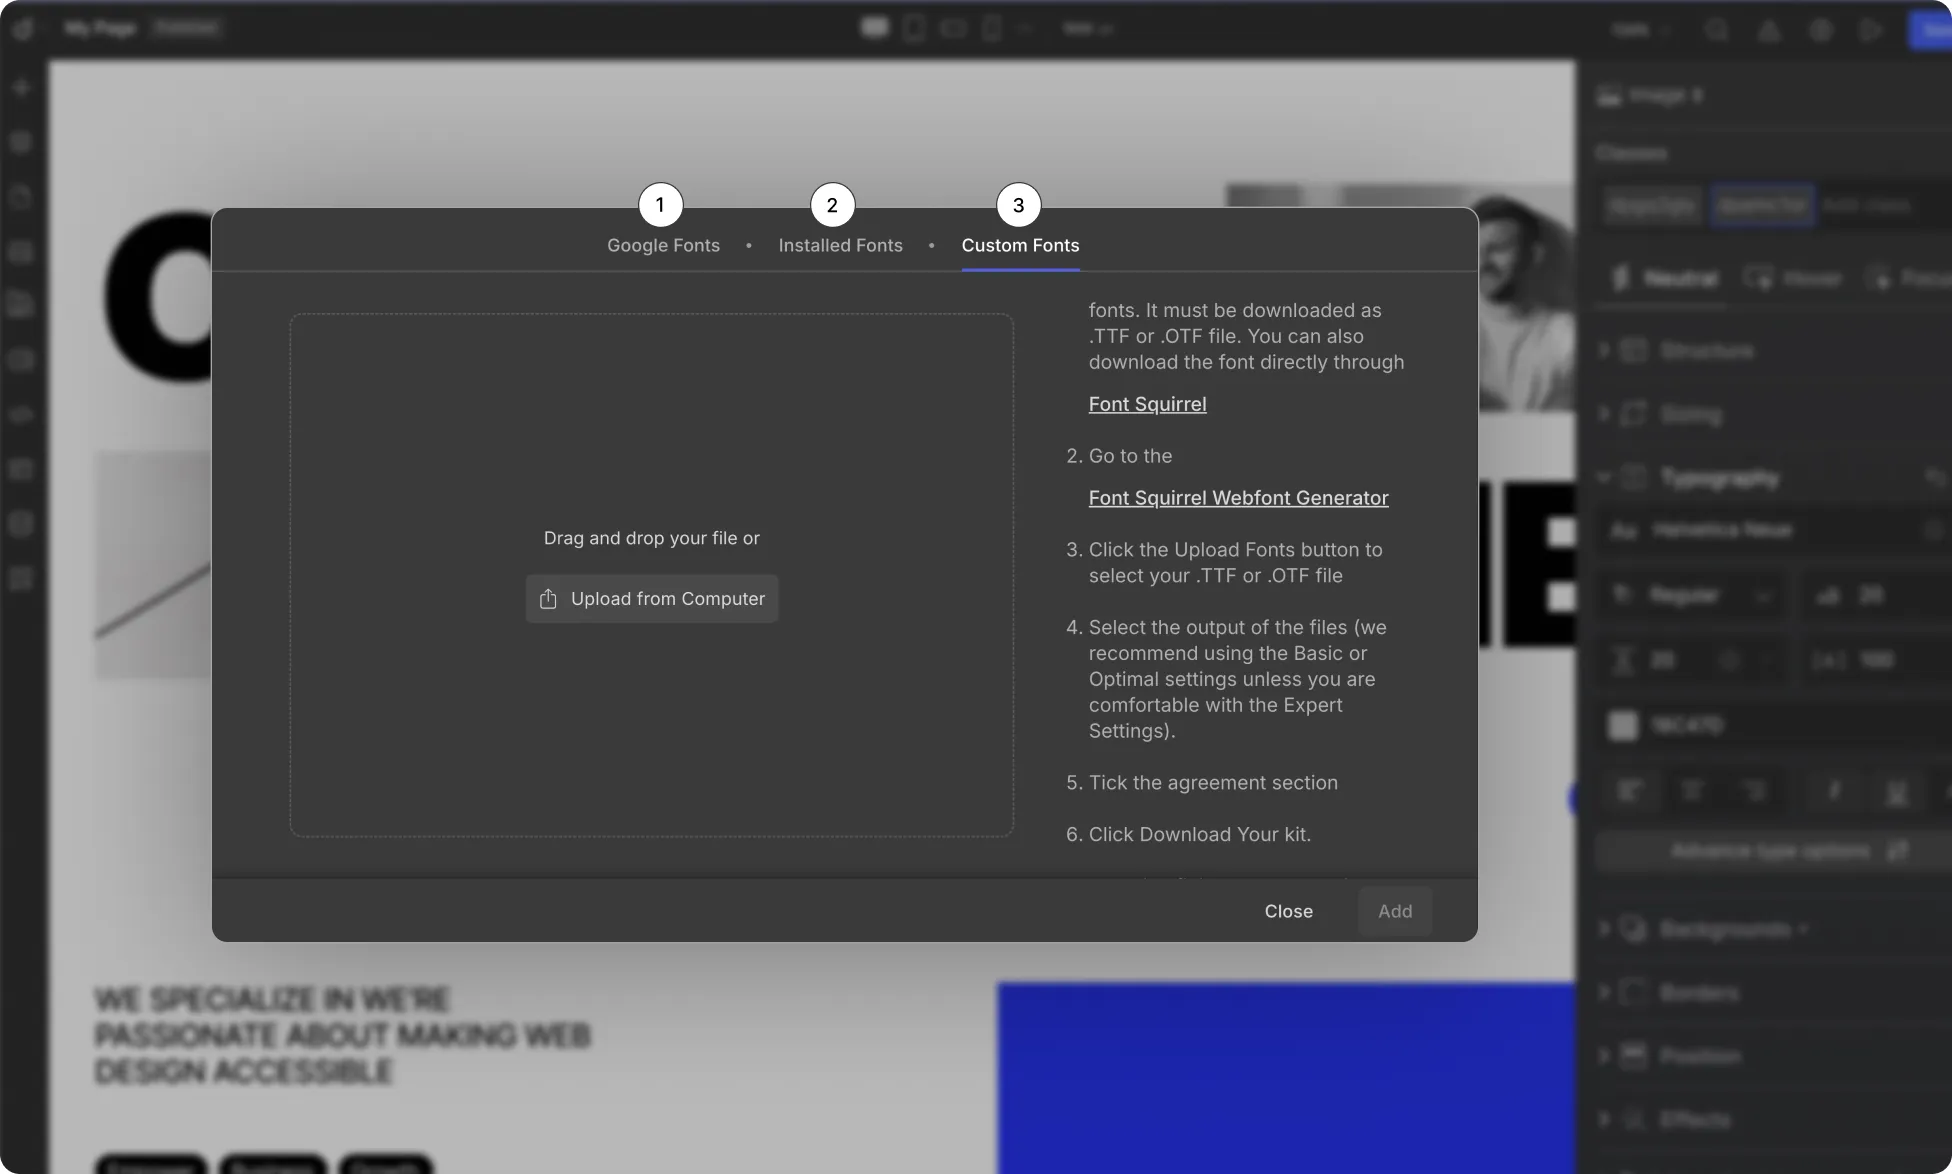
3. Custom Fonts
This tab allows you to upload and use your own custom fonts in your Droip projects, giving you full creative control over typography.
📝 Note: You can also access the Font Library from the Typography panel under the Font dropdown.

How to Upload Custom Fonts
Follow the steps below to upload and integrate custom fonts into your webpage.
- From the Font Library and select Custom Fonts.
- On the right-hand side, you’ll find a link to the Font Squirrel Webfont Generator. Click on it.
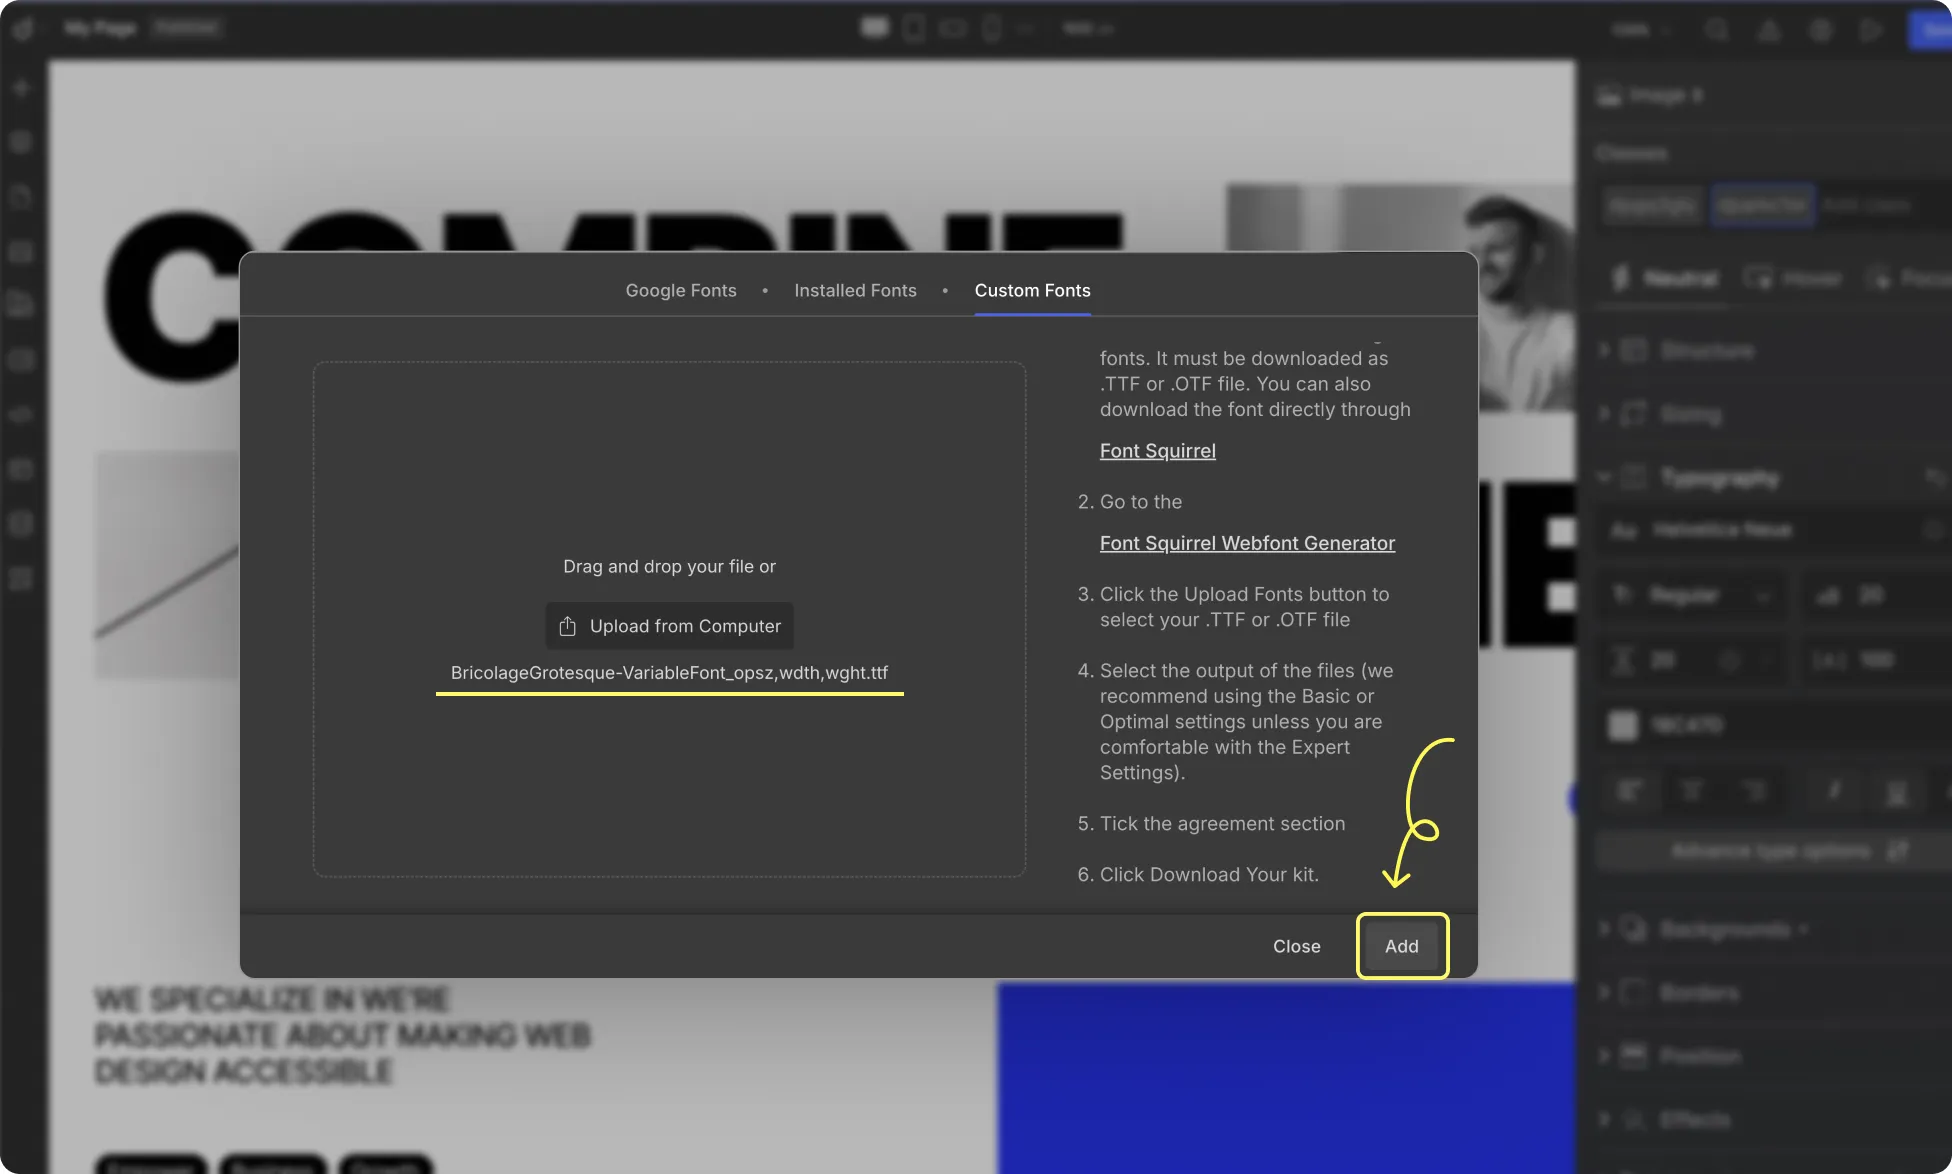
- Upload your .OTF or .TTF file to the Font Squirrel Webfont Generator.
- Choose between Basic or Optimal settings. Advanced users can explore Expert settings.
- Confirm your legal rights to use the font for web embedding by checking the eligibility box.
- Download the Webfont Kit zip file.
- Return to Droip and click Upload From Computer to upload the Webfont Kit.
Using Your Custom Fonts
To apply your uploaded custom fonts in your project:
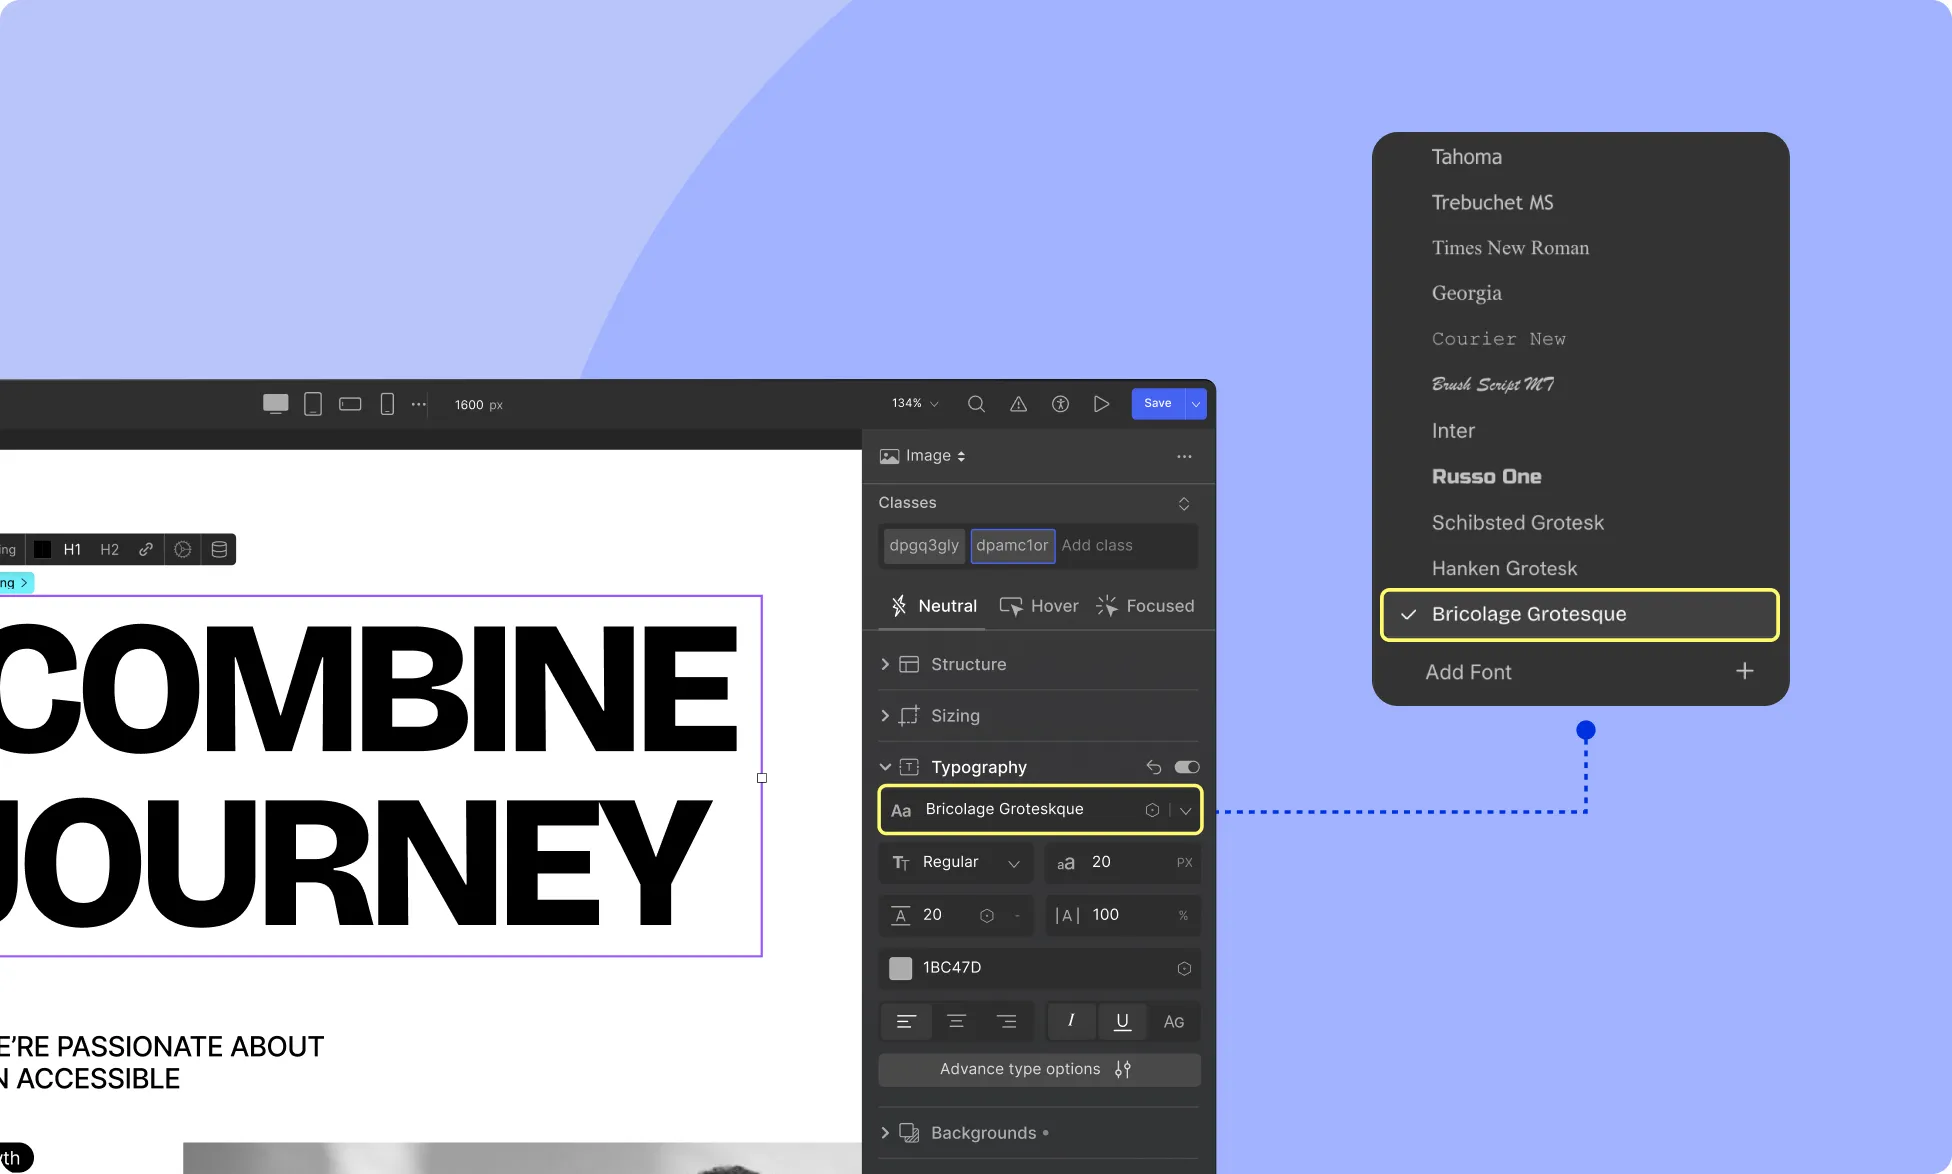
- Select the text element where you want to use the custom font.
- Go to Style Panel > Typography.
- Under the Font dropdown, your custom fonts will appear alongside the available fonts.
With the Font Library, you can easily enhance your design with a wide selection of fonts or upload your own for a truly unique look.
Was this page helpful?