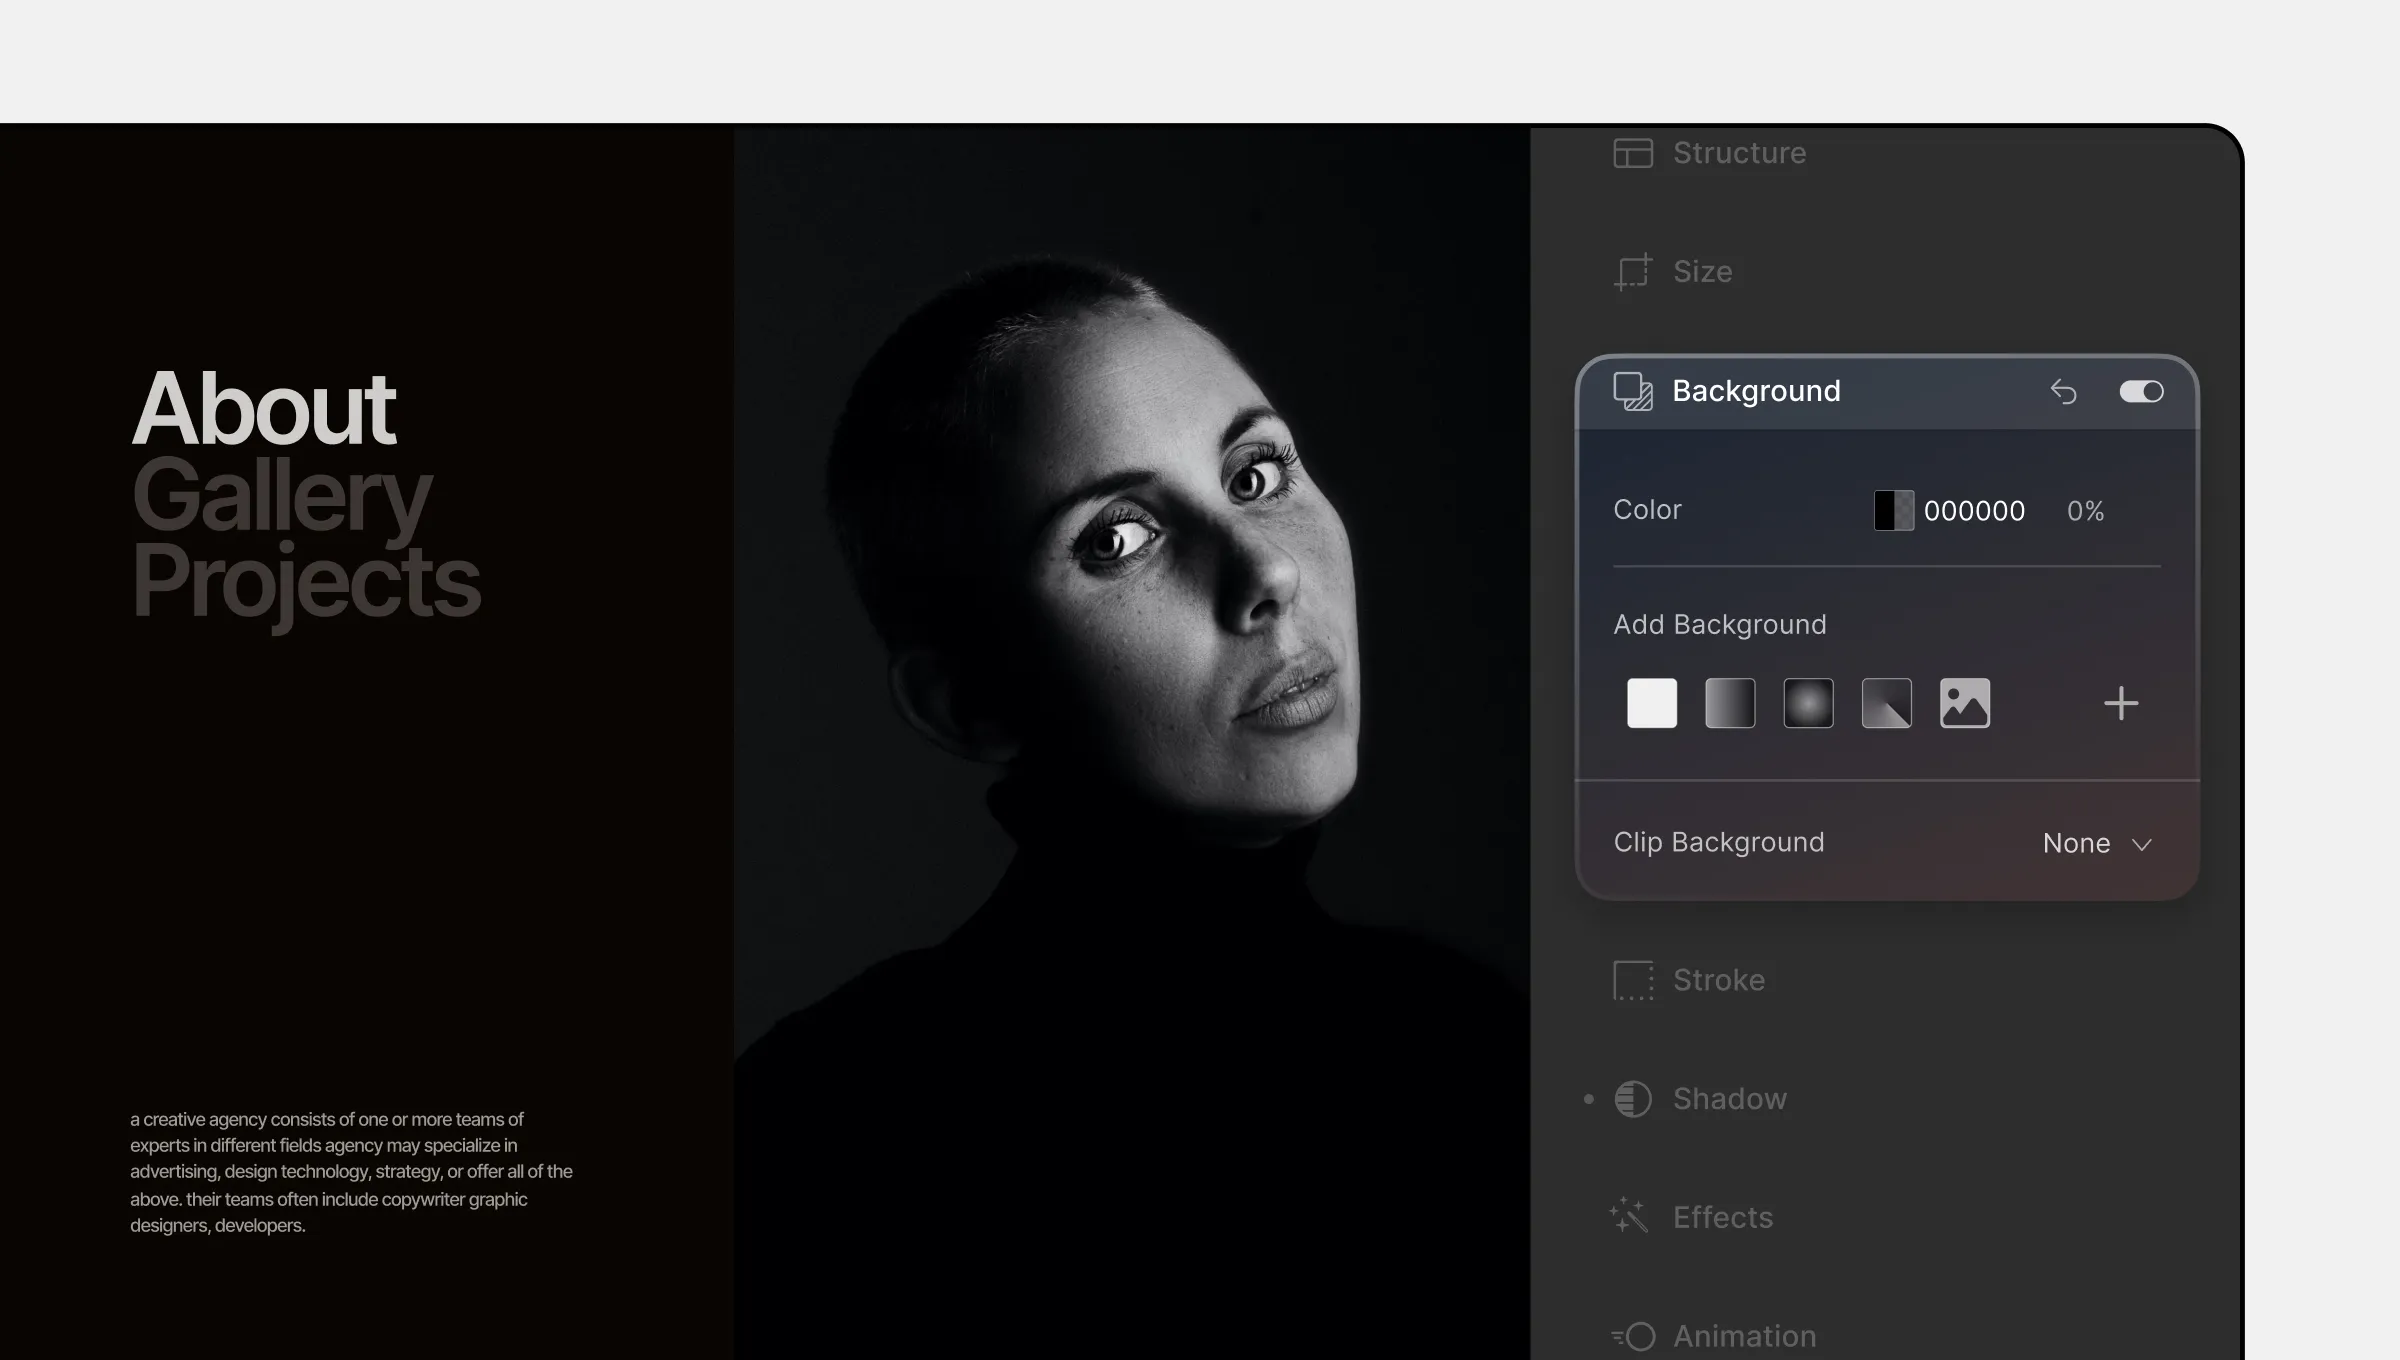
From the Style Panel > Background section, you can customize the background color and style of elements according to your preferences.
Background Types
Within this section, users have the ability to select from various background styles, each offering distinct visual effects. The following options are available:
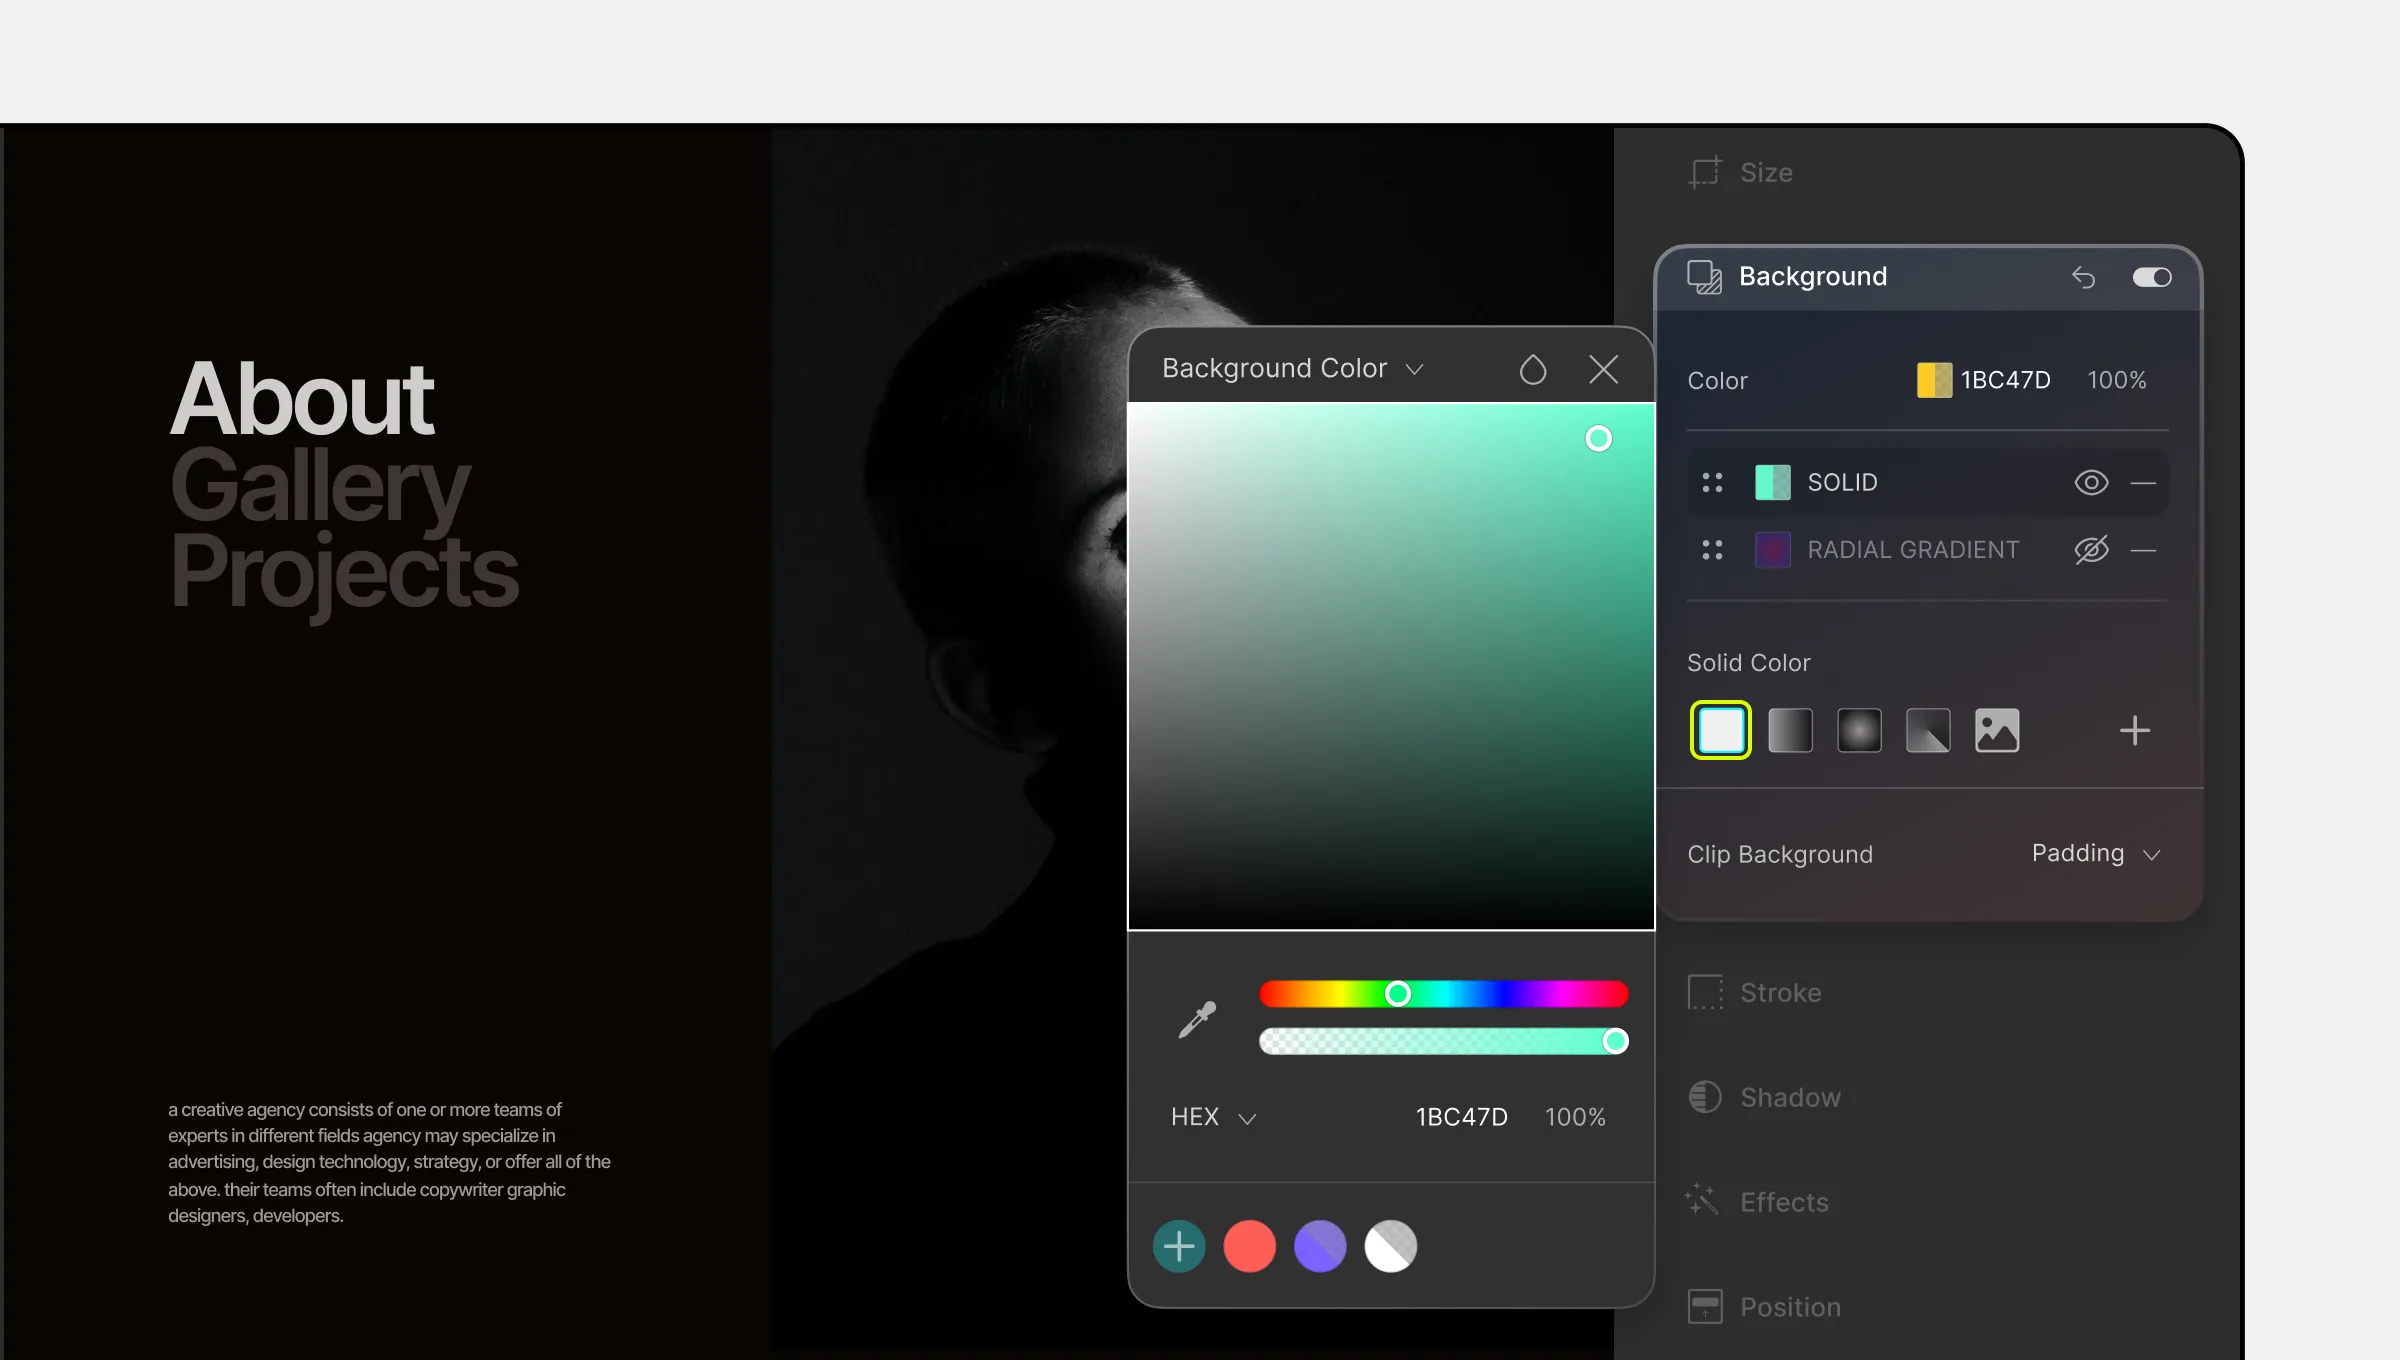
- Solid Color: Establish a background composed of a single, consistent color.
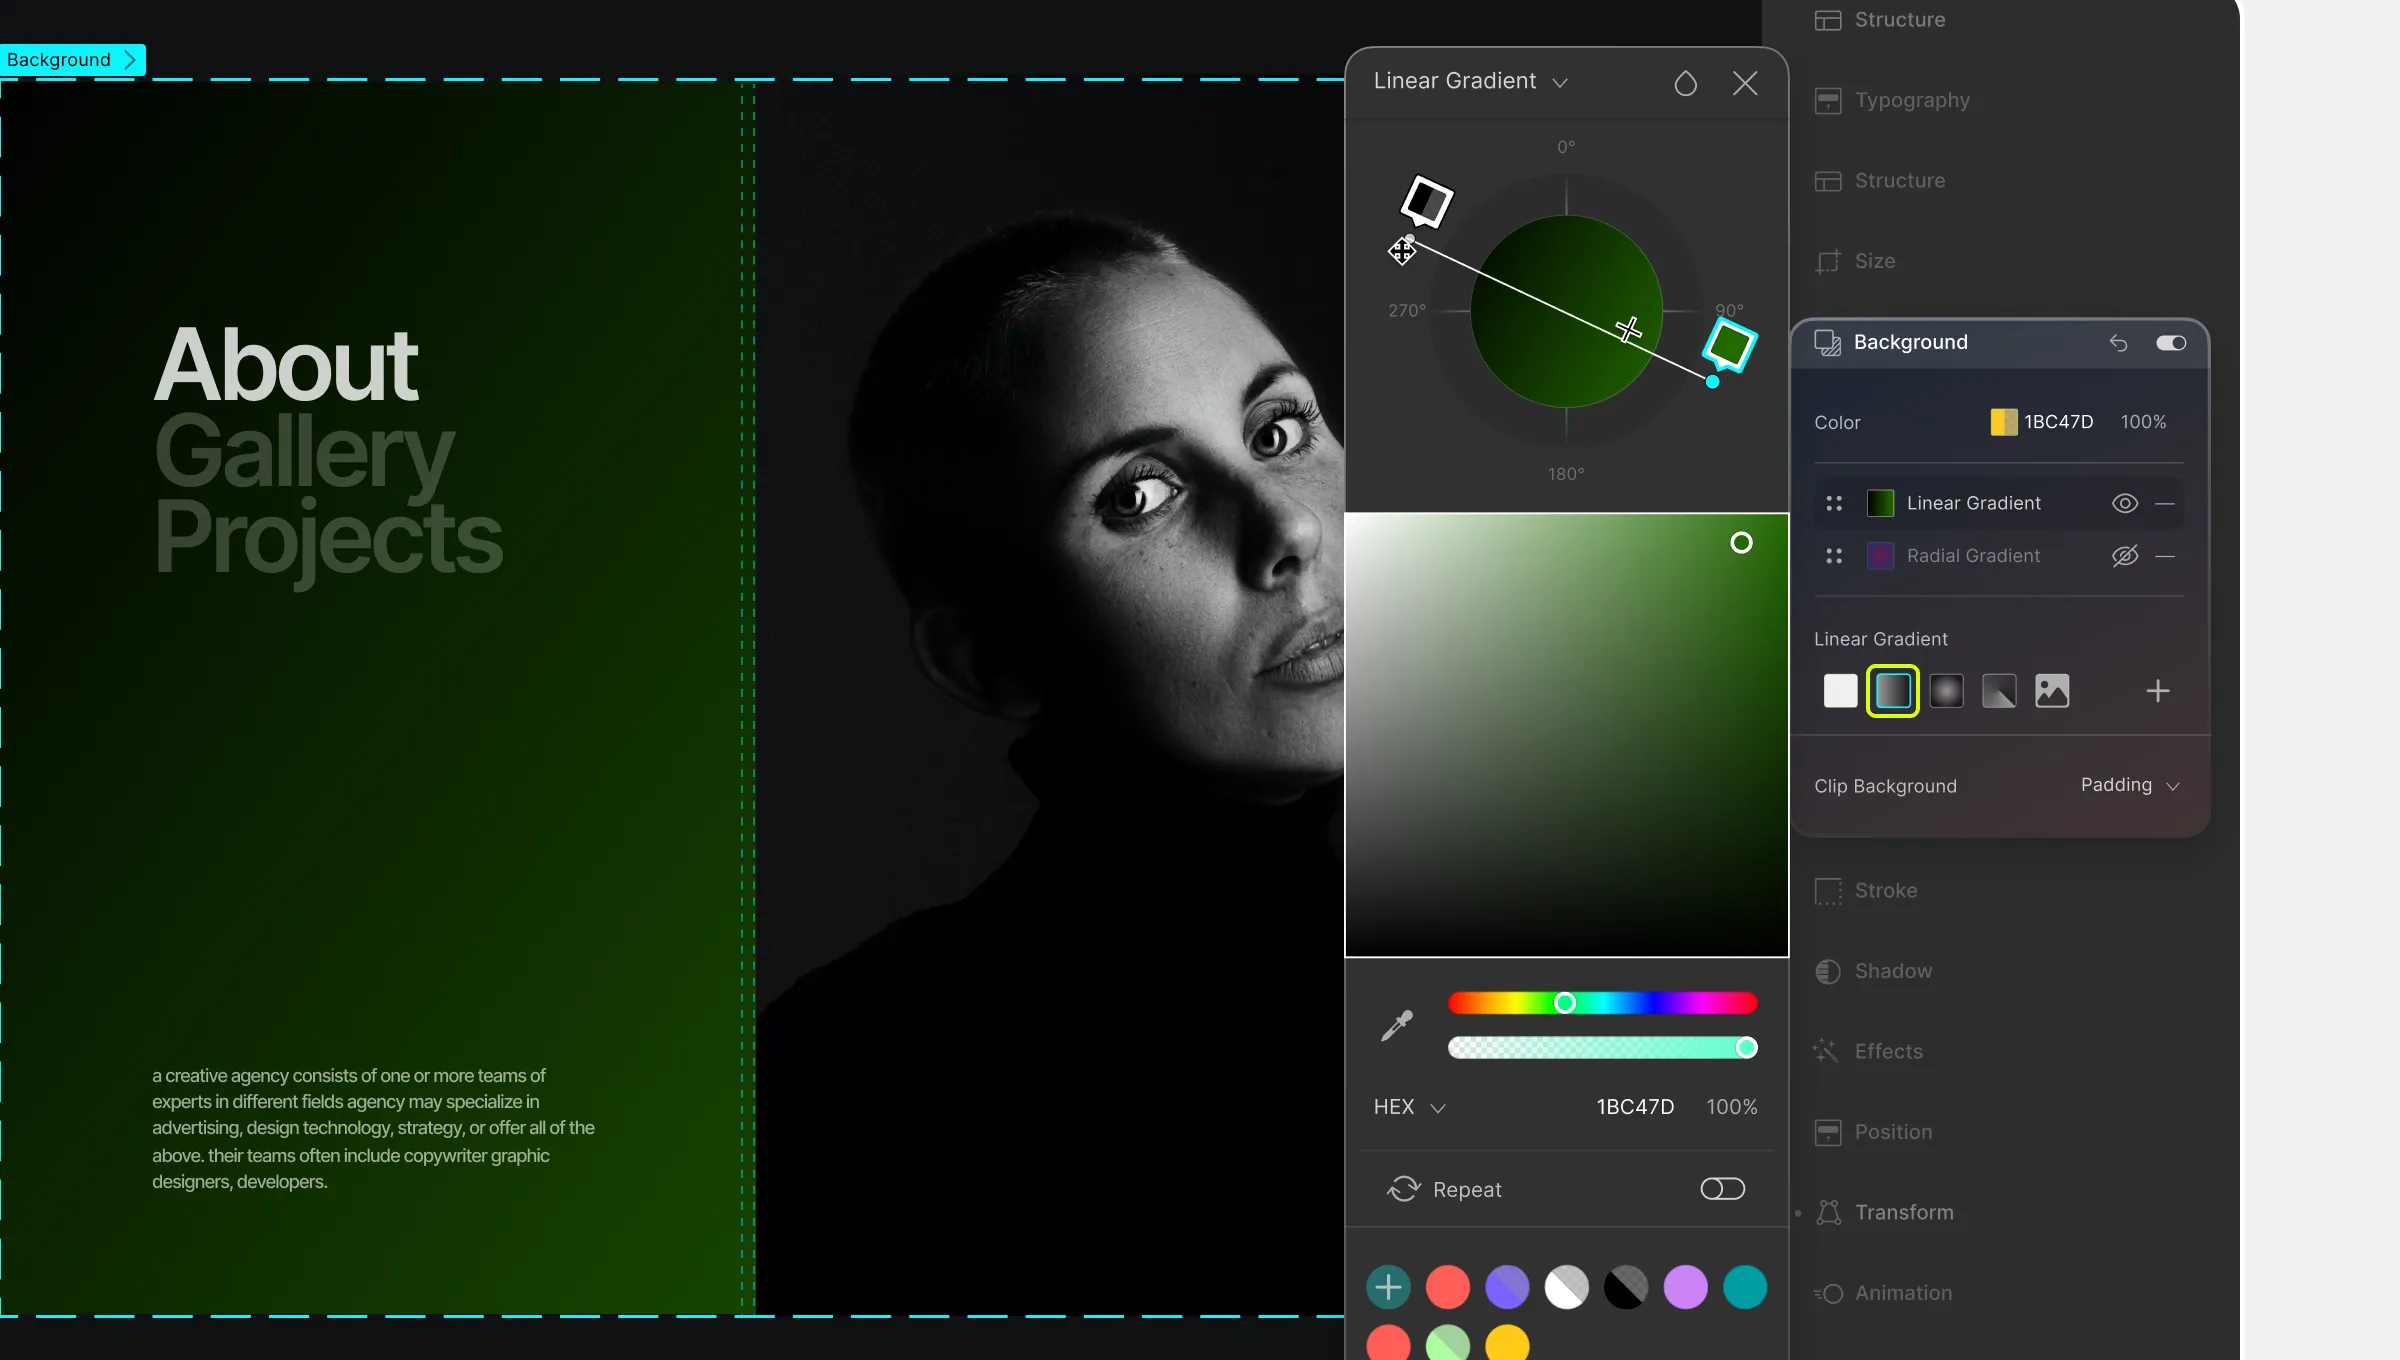
- Linear Gradient: Craft a background featuring a linear transition between two or more colors.
- Radial Gradient: Create a background with a circular transition of two or more colors.
- Conic Gradient: Form a background where colors rotate around a central point.
- Image: Utilize an image as the background element.
Adding a Background
Select your element and then select the background type you want to add from this section. Then, click on the + icon on the right to add it to your element.
Solid Color Background
For a Solid Color background, the Color Picker will appear. Users can opt for any color of their choosing to serve as the background.
Gradient Types
If any Gradient style is selected, the corresponding Gradient Settings will emerge. Users can then define the colors for their gradients and make adjustments to positioning and angles.
Learn more about Color Settings.
Image Type Background
You can also choose an Image type background. This will open Background Image Settings where you can set your Image and adjust it to suit your taste.
Background Image Settings
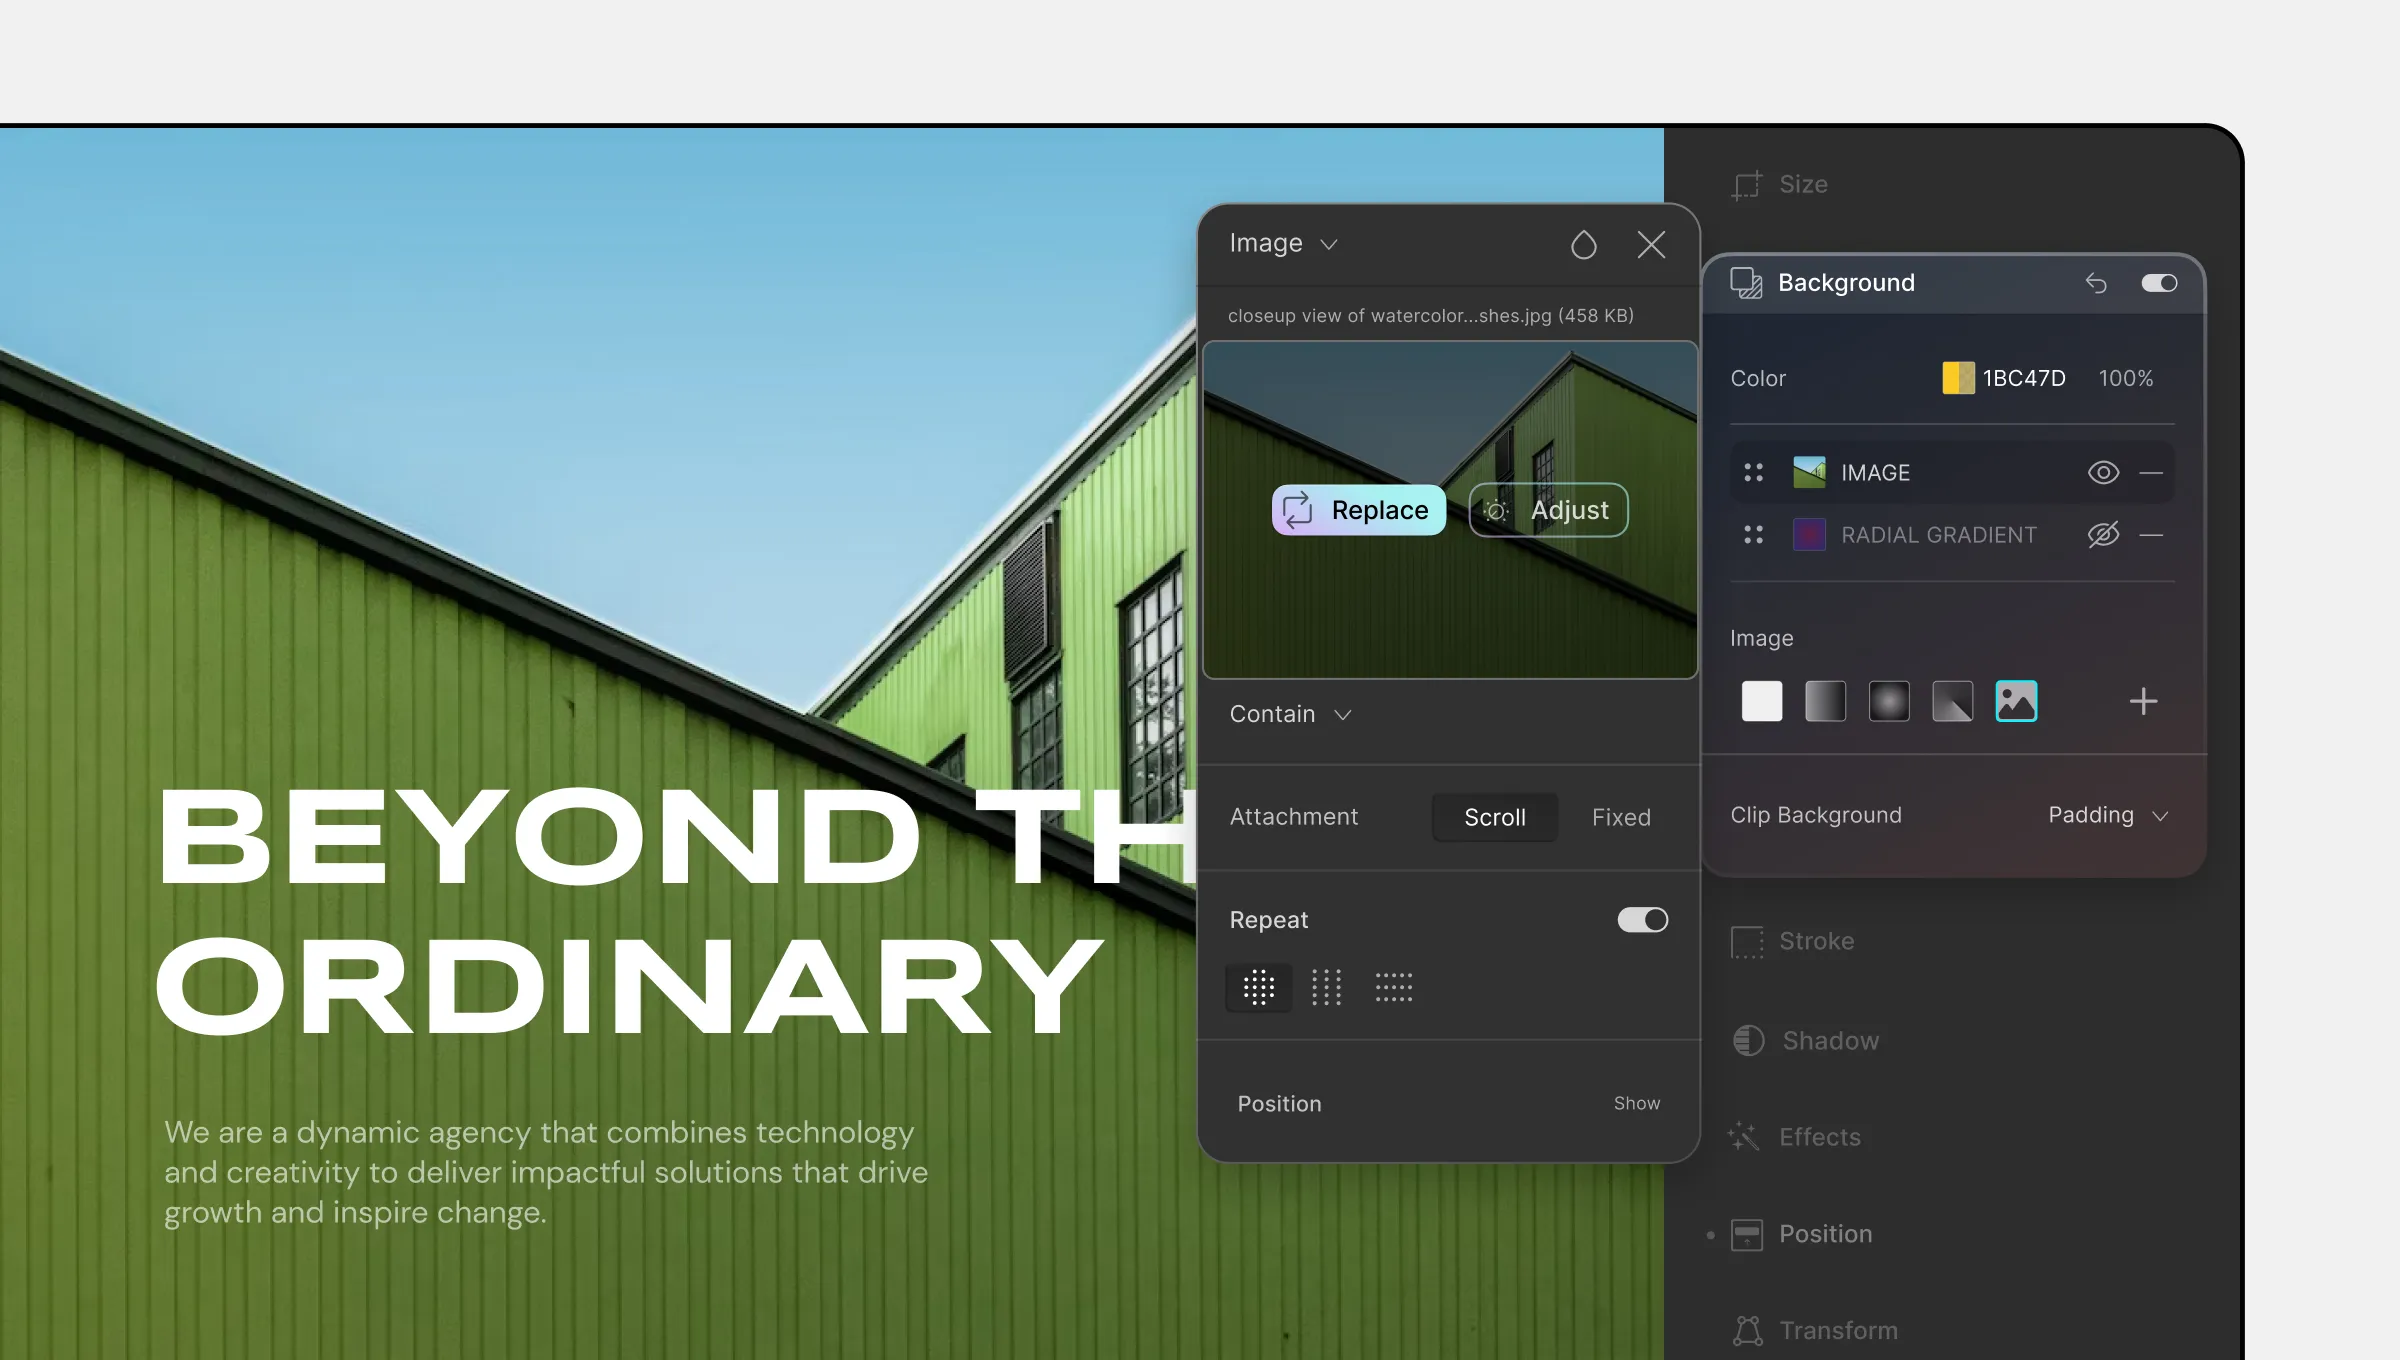
Selecting the Image background option opens the Background Image Settings. In this interface, users can upload their preferred image and tailor it to align with their preferences.
- Add+: Click to upload an image using the Media Manager.
- Background Image Size: Choose from preset options:
- Auto: Original image dimensions.
- Cover: Image is scaled to cover the background, ignoring width/height.
- Contain: Image scaled to fit within the element, ignoring width/height.
- Initial: Default property value.
- Attachment: Set image attachment as Scroll (scrolls with the page) or Fixed (stays in place).
- Repeat: Toggle to allow the image to repeat, and choose repeat style: Round, Vertical, or Horizontal.
- Position: Define image position using the Position interface.
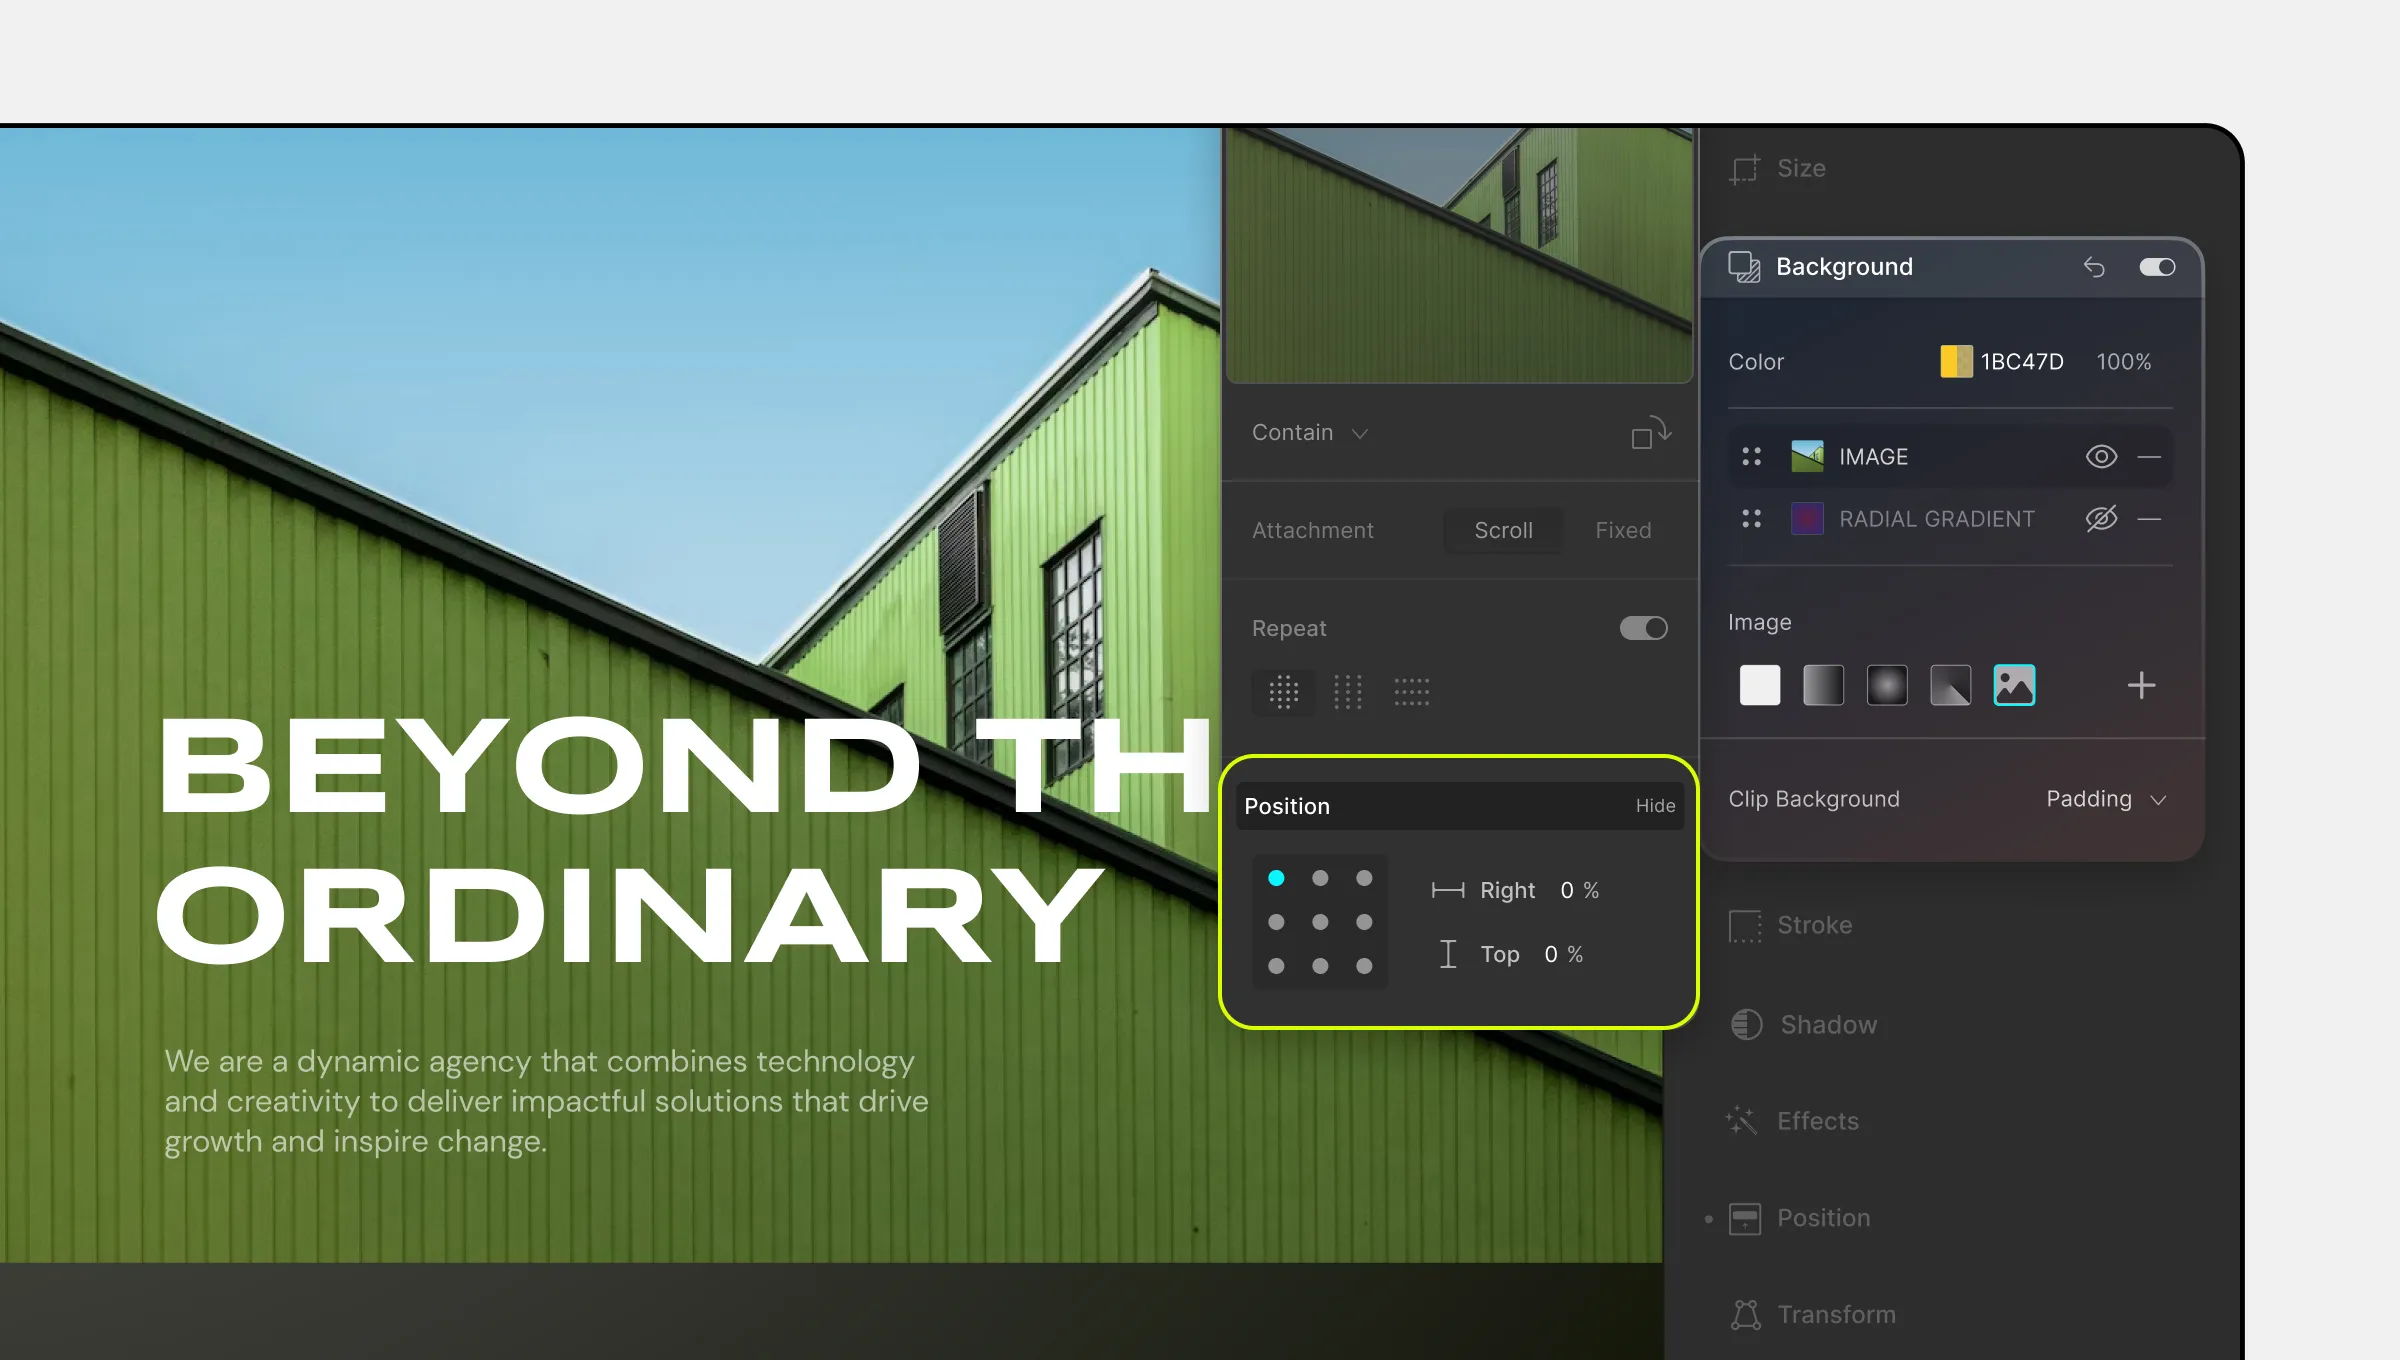
Read detailed documentation on Position.
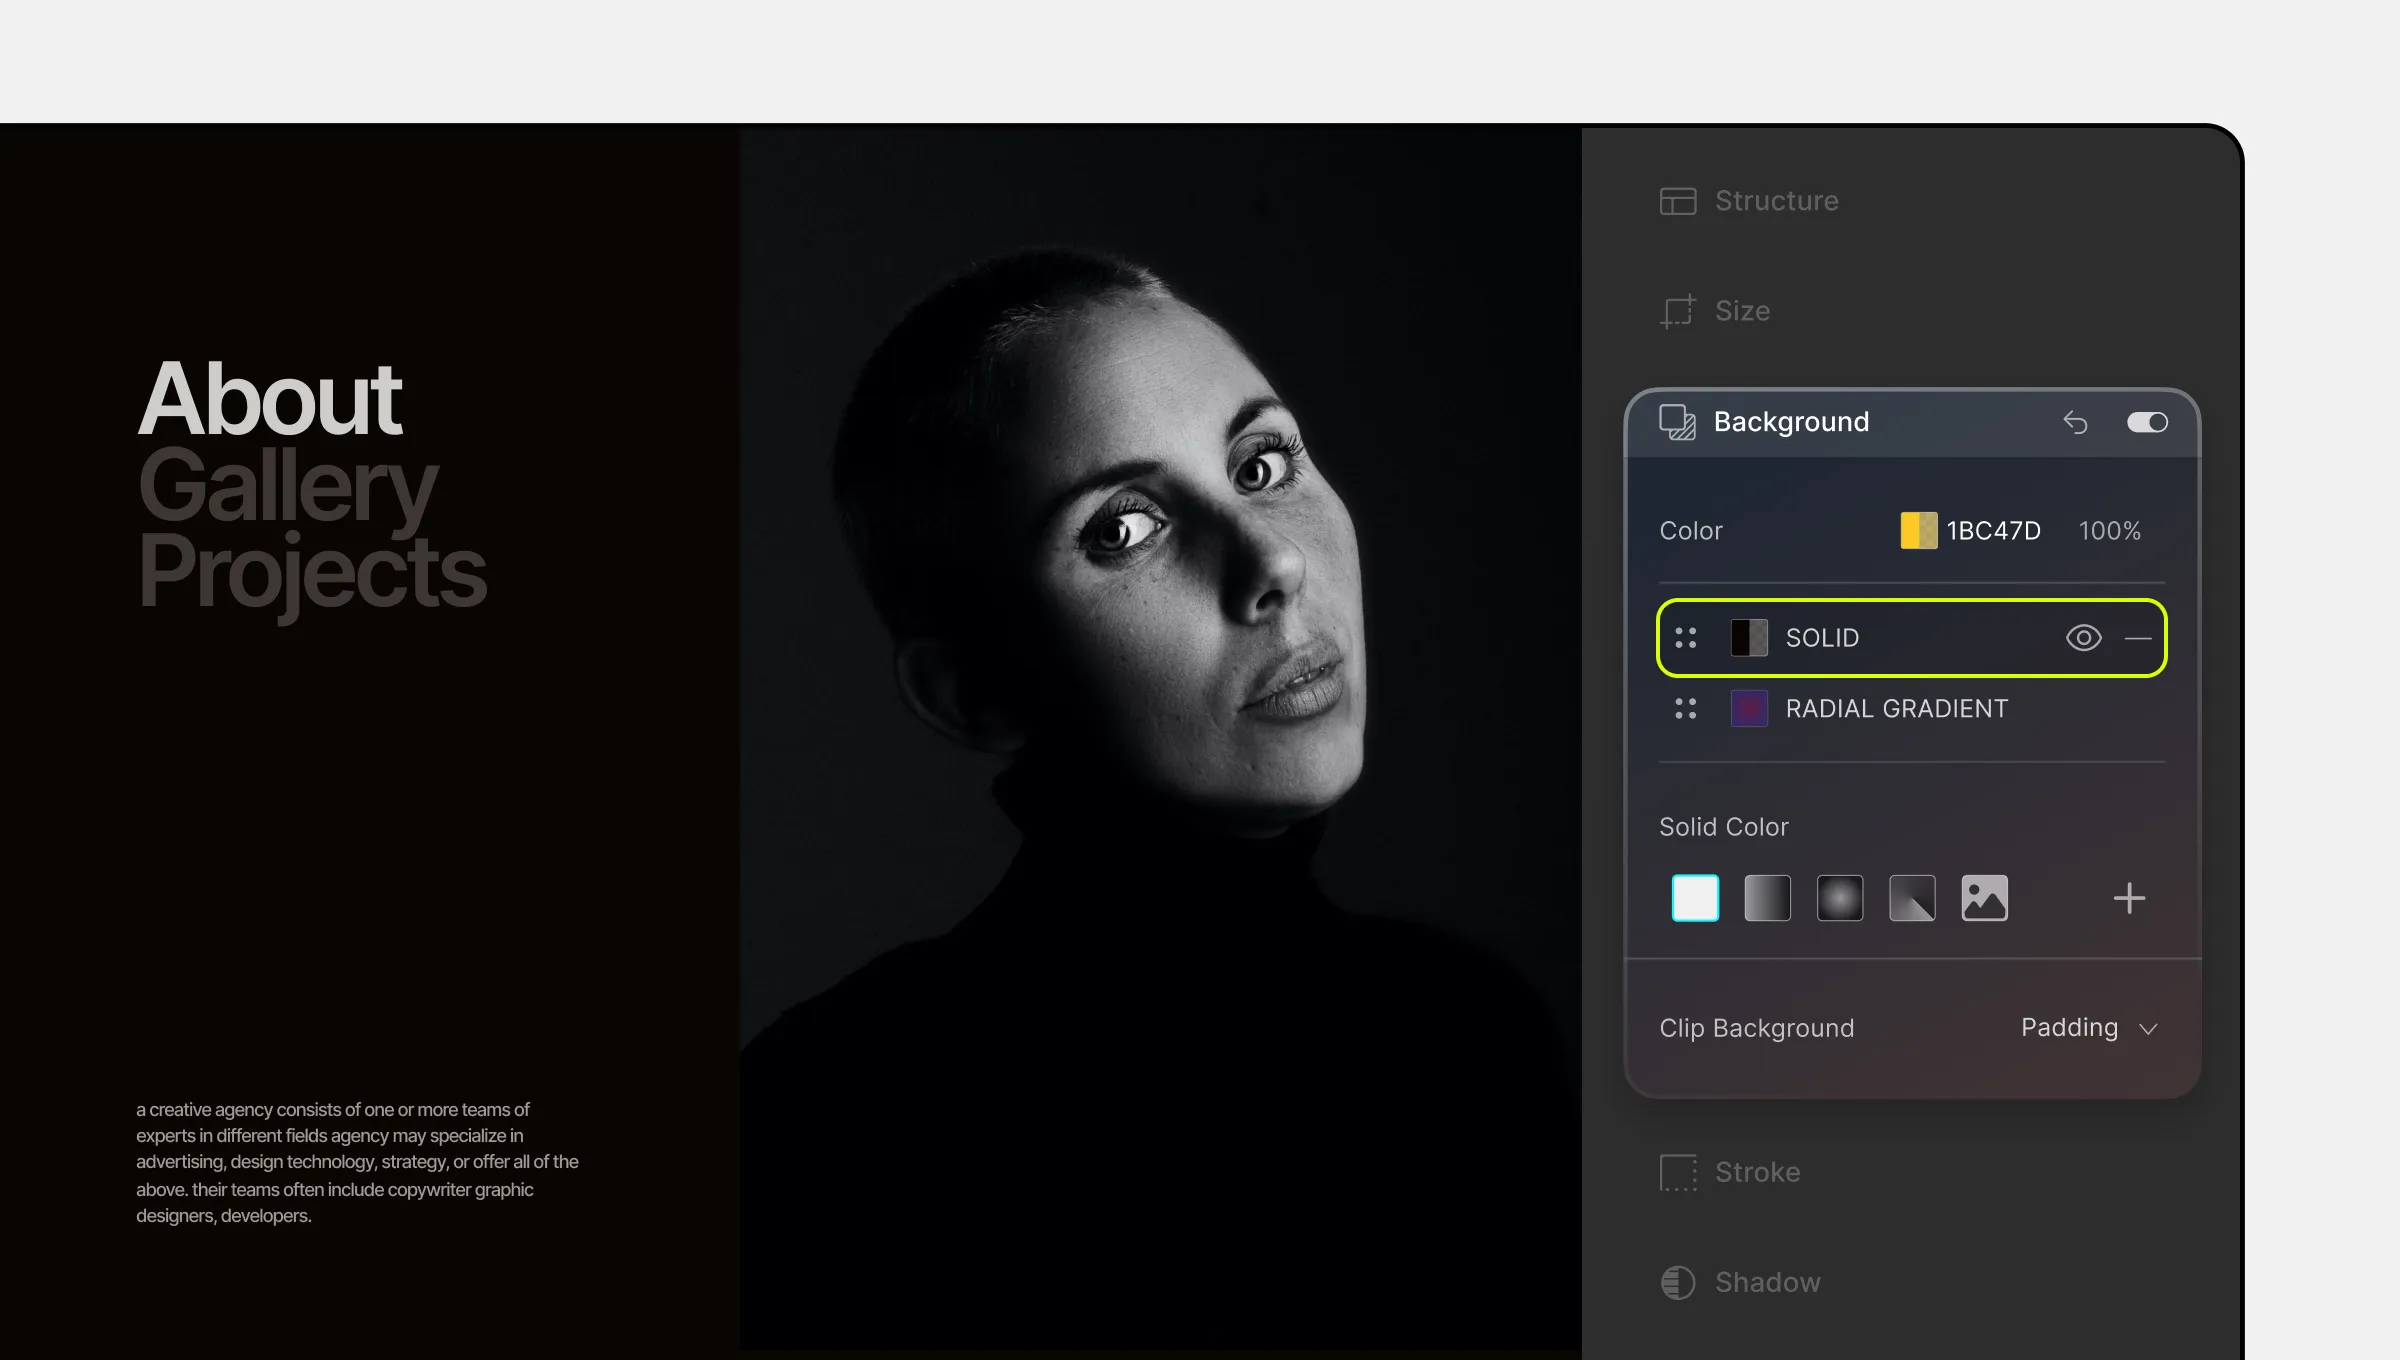
Background Layer Management
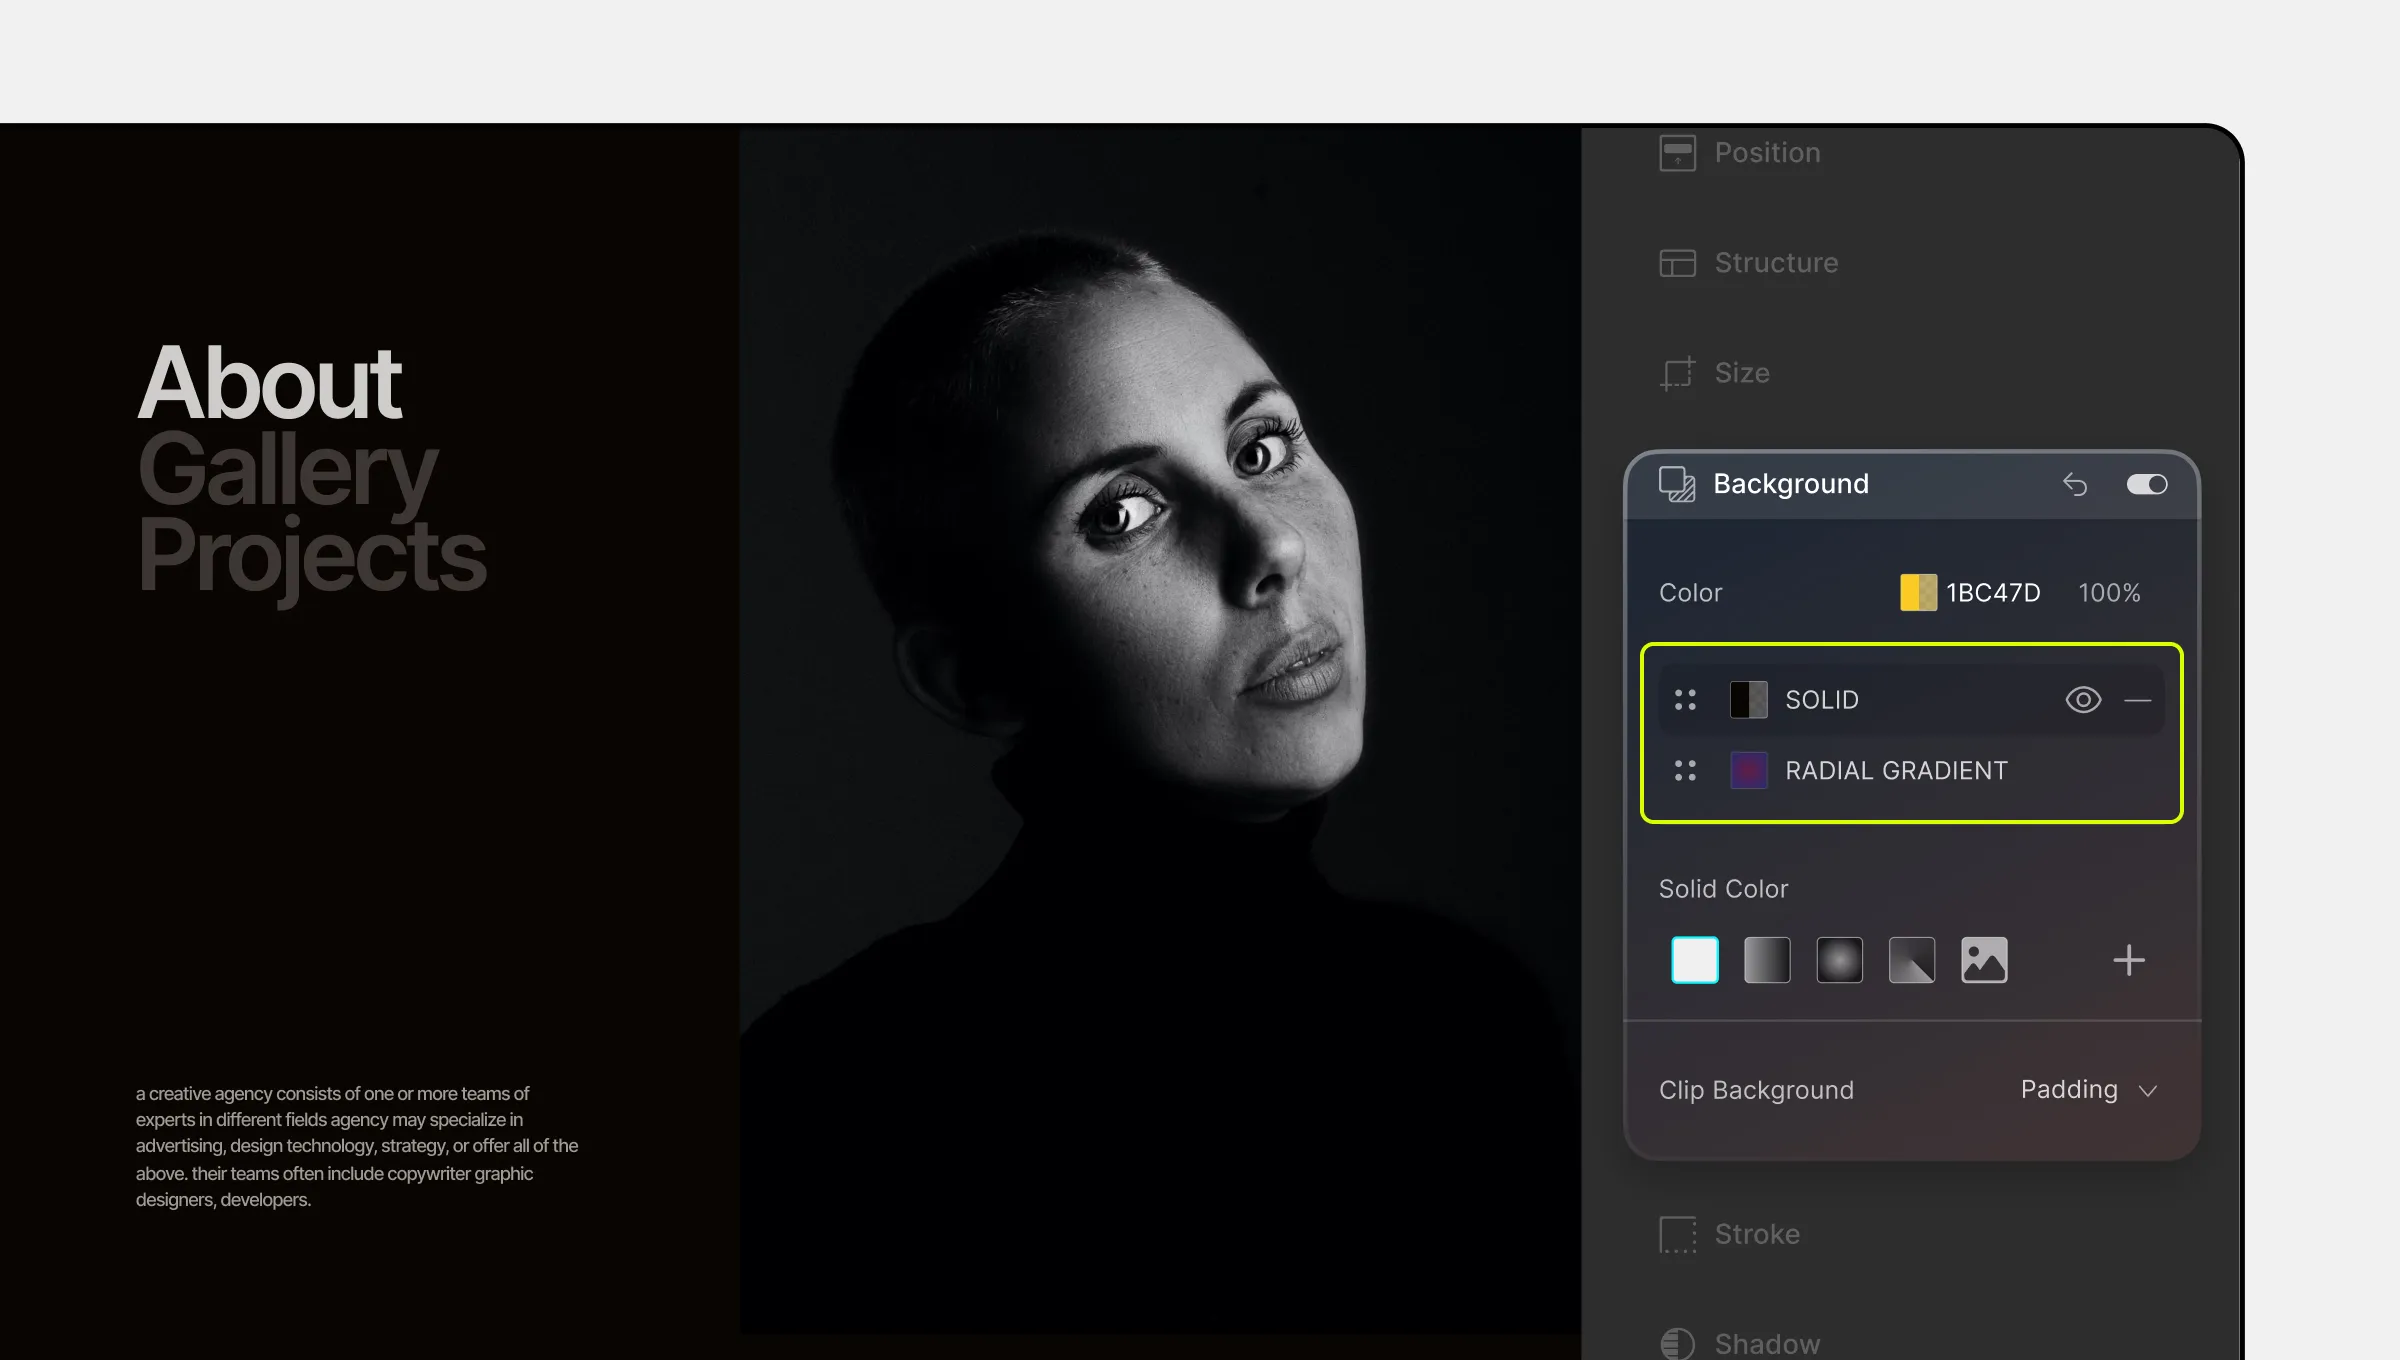
Multiple backgrounds of varying types can be added, with each background acting as a layer. For these layers, you can:
- Reorder Backgrounds: Click the four-dot icon to drag and adjust the order.
- Visibility: Enable/disable background visibility using the eye icon.
- Remove Background: Delete a background layer using the dash icon.
Switching Background Styles
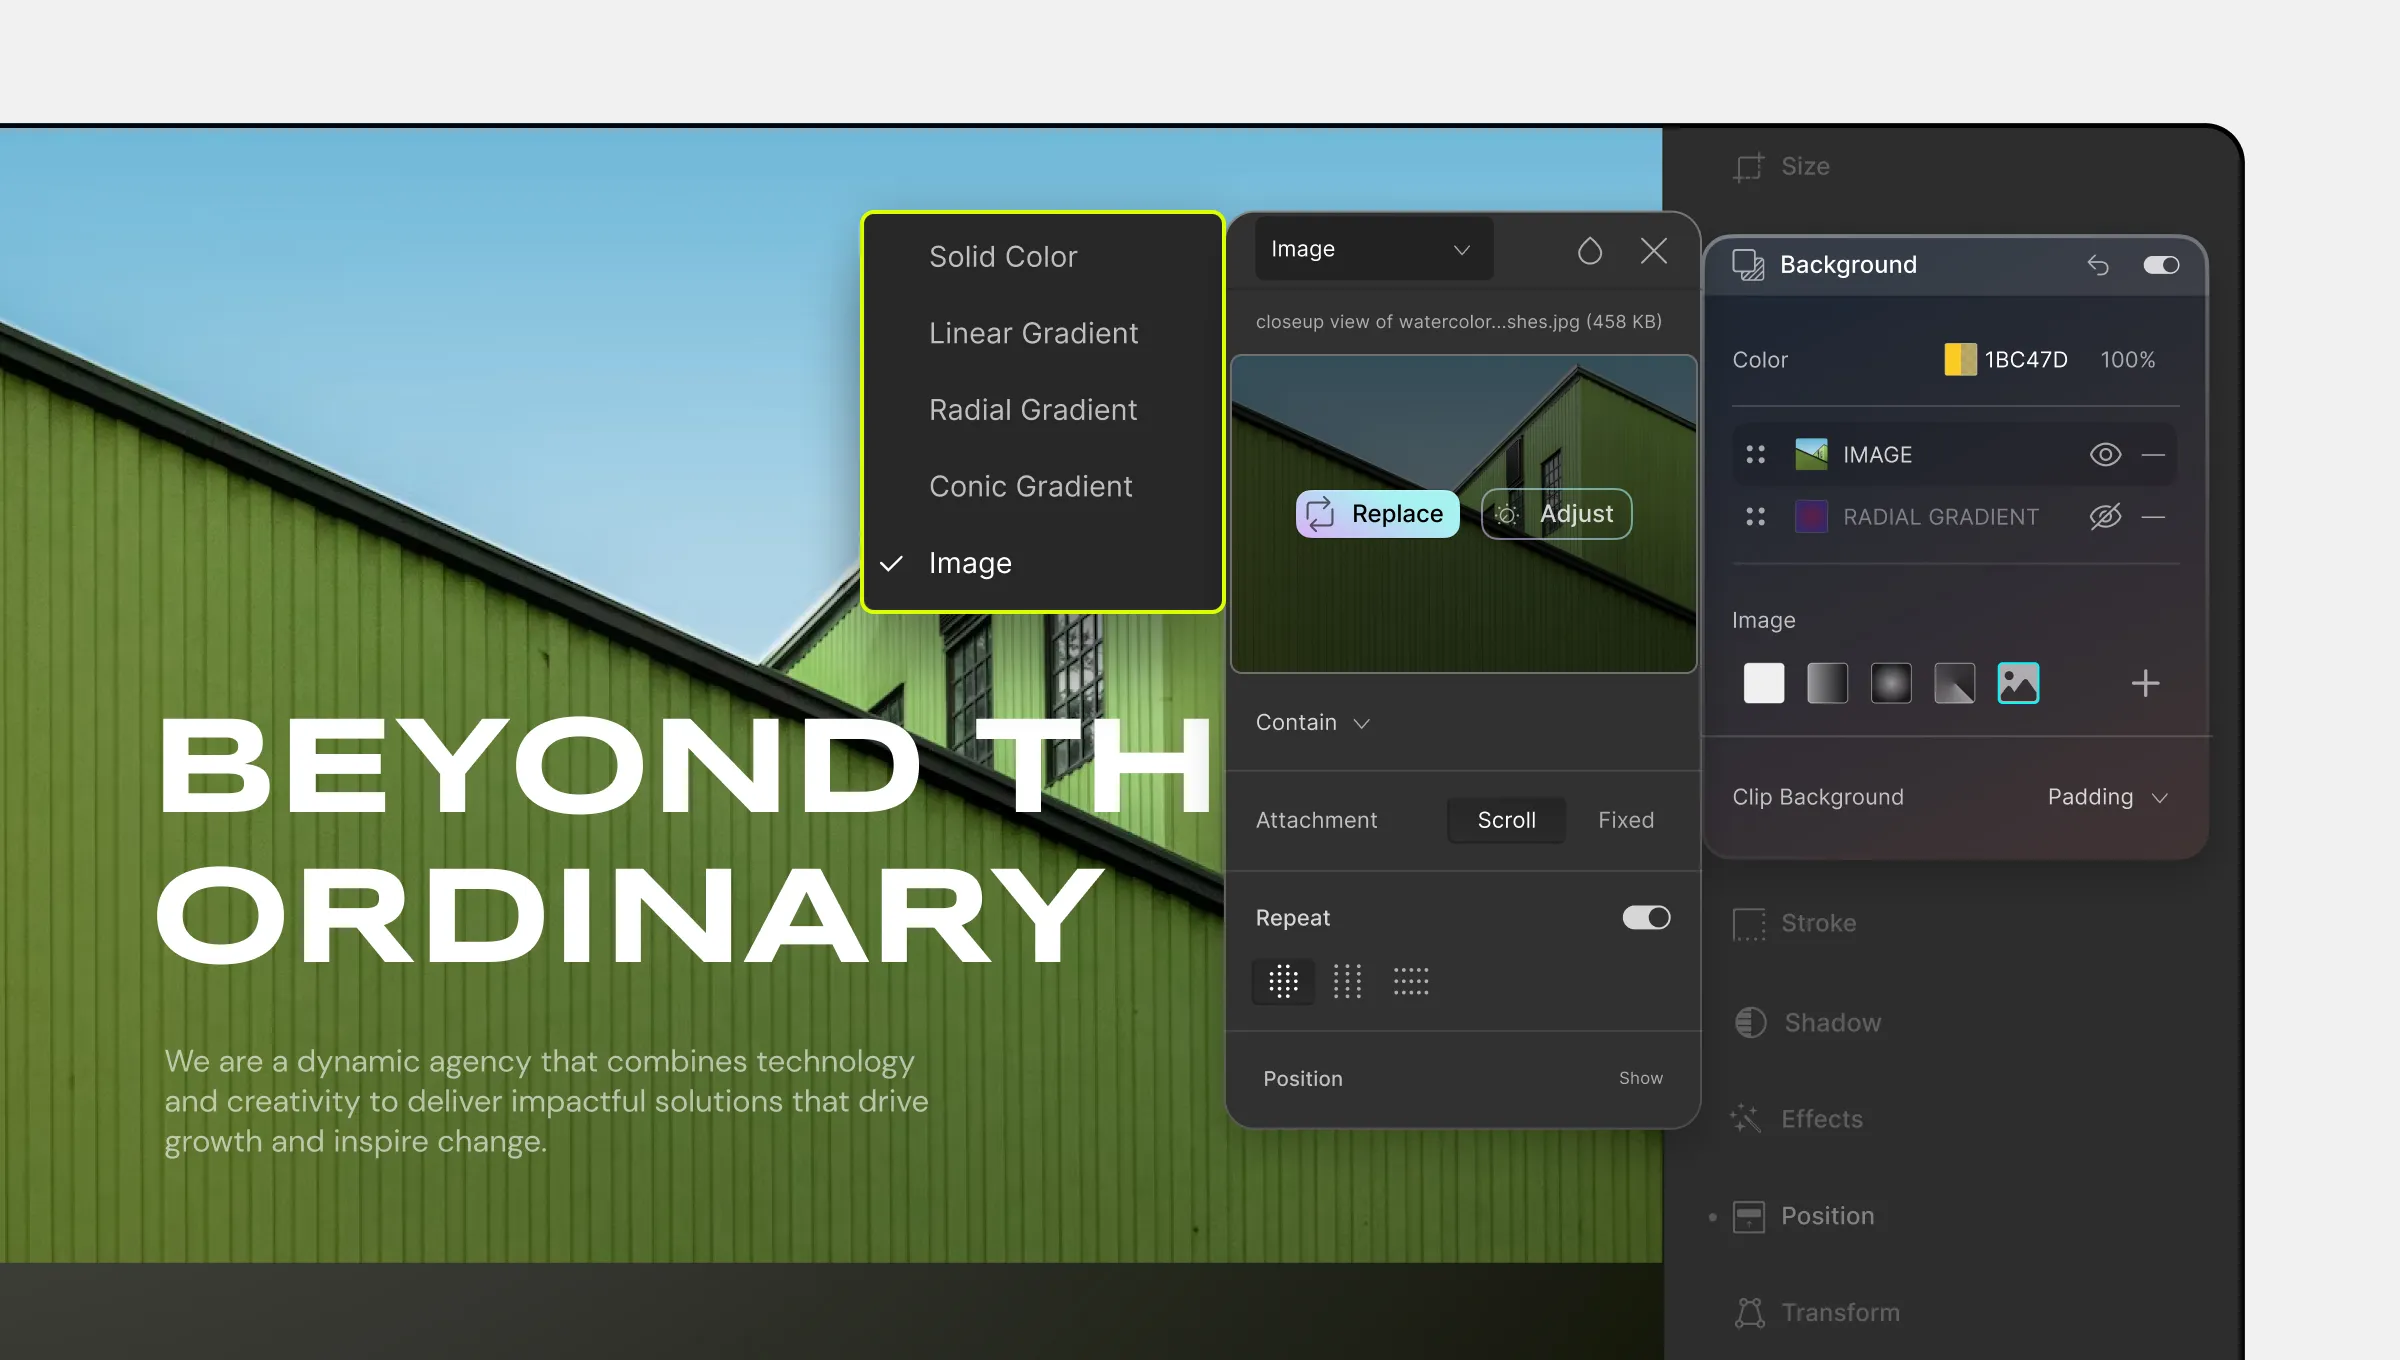
To change the background type, open the dropdown in the top-left corner of the editing window and select the background type you want to switch to.
Background Blend Mode
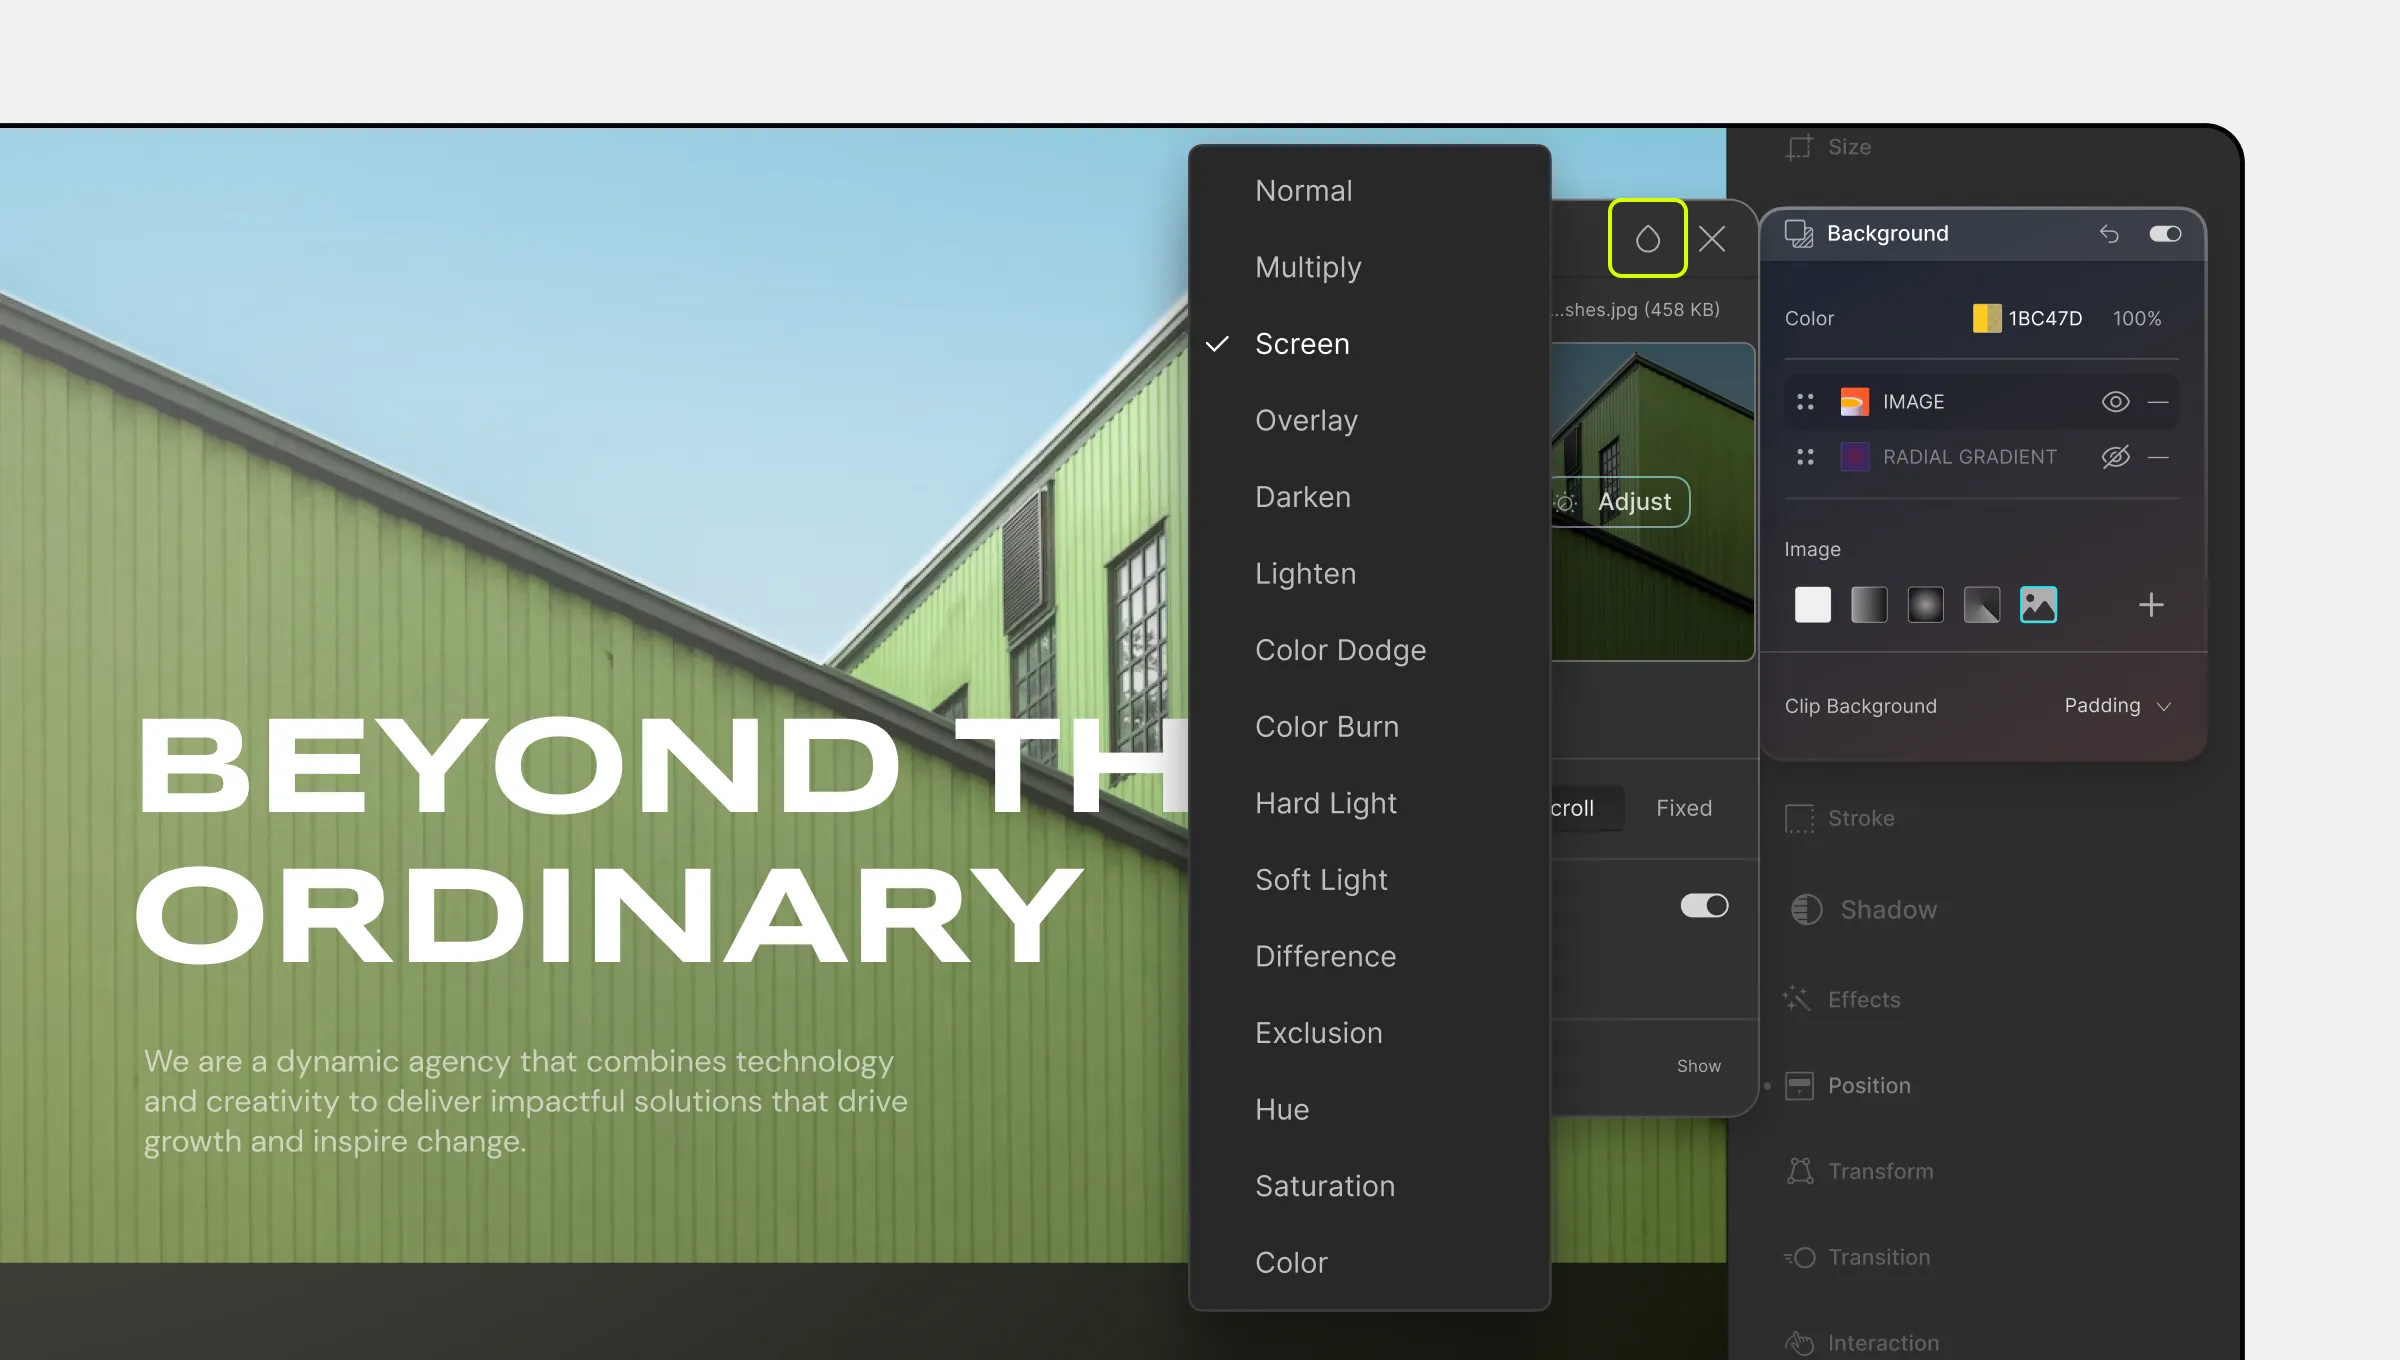
You can also define how the current background layer that you’re editing will blend (overlap) with the background layer below it. To do so, simply click on the drop icon that’s on the top right corner of the background edit panel.
This will open up a dropdown list containing all of the Blend Mode options that are available:
- Normal: Default value. The layer below does not bleed through the current layer.
- Multiply: The current layer and the layer below are multiplied, so this usually means a darkened effect.
- Screen: The current layer and the layer below are both inverted, multiplied, and inverted once again.
- Overlay: The current layer and the layer below are mixed together to show their lightness or darkness.
- Darken: If the current layer is darker than the layer below then the current layer is replaced, else no changes are applied.
- Lighten: If the current layer is lighter than the layer below then the current layer is replaced, else no changes are applied.
- Color Dodge: The layer below is divided by the inverse of the current layer.
- Color Burn: The layer below is inverted, divided by the current layer, and then inverted once more.
- Hard Light: If the current layer is lighter than the layer below then the effect applied is Multiply else it is Screen.
- Soft Light: Similar to Hard Light but with a more diffused spotlight effect.
- Difference: Subtraction of the darkest color of the current layer and the layer below from the lightest one. The result is a high contrast effect.
- Exclusion: Similar to Difference but with lower contrast.
- Hue: The current layer’s hue is combined with the luminosity and saturation of the layer below.
- Saturation: Mixes hue and luminosity of the current layer and layer below while keeping saturation of the current layer.
- Color: Keeps the current layer’s hue and saturation and the layer below’s luminosity.
Clip Background
Use the Clip Background feature to define whether the backgrounds will extend underneath its padding, content, border, or text.
- Padding: Select this option to ensure the background extends up to the outer edge of the padding. (No background beneath the outer edge).
- Content: Choose the Content option if you want the background to be clipped to the content box.
- Border: Use this option to extend the background to the outer edge of the border. Note that the background will appear underneath the border but it’ll only be visible if the border has transparent sections or partially opaque sections (because of border style).
- Text: Select the text option to clip the background to the text element i.e. paint the background within the text.
Clip Images to Text
Droip provides a convenient way to clip images to text for contemporary design trends. To achieve this, follow these steps:
- Select your Text or Heading element.
- Go to Style > Backgrounds and choose Image type background.
- From the Image Background Settings, add your Background Image.
- Open the Clip Background dropdown and select the Text option.
- Go back to the image background settings to configure its placement.
And voila, you’ve successfully clipped your image background to your text!
