In Droip, you have the flexibility to adjust the placement of elements using Position. This property is accessible in the Style Panel on the right-hand side.
Types of Position
Click on the dropdown at the top of this section to select the Position Type. Below is the list of the 5 different values the Position property has to offer:
Static

Elements are positioned based on the usual flow of the document. Other values have no effect. This is set as the default value for Position.
Relative
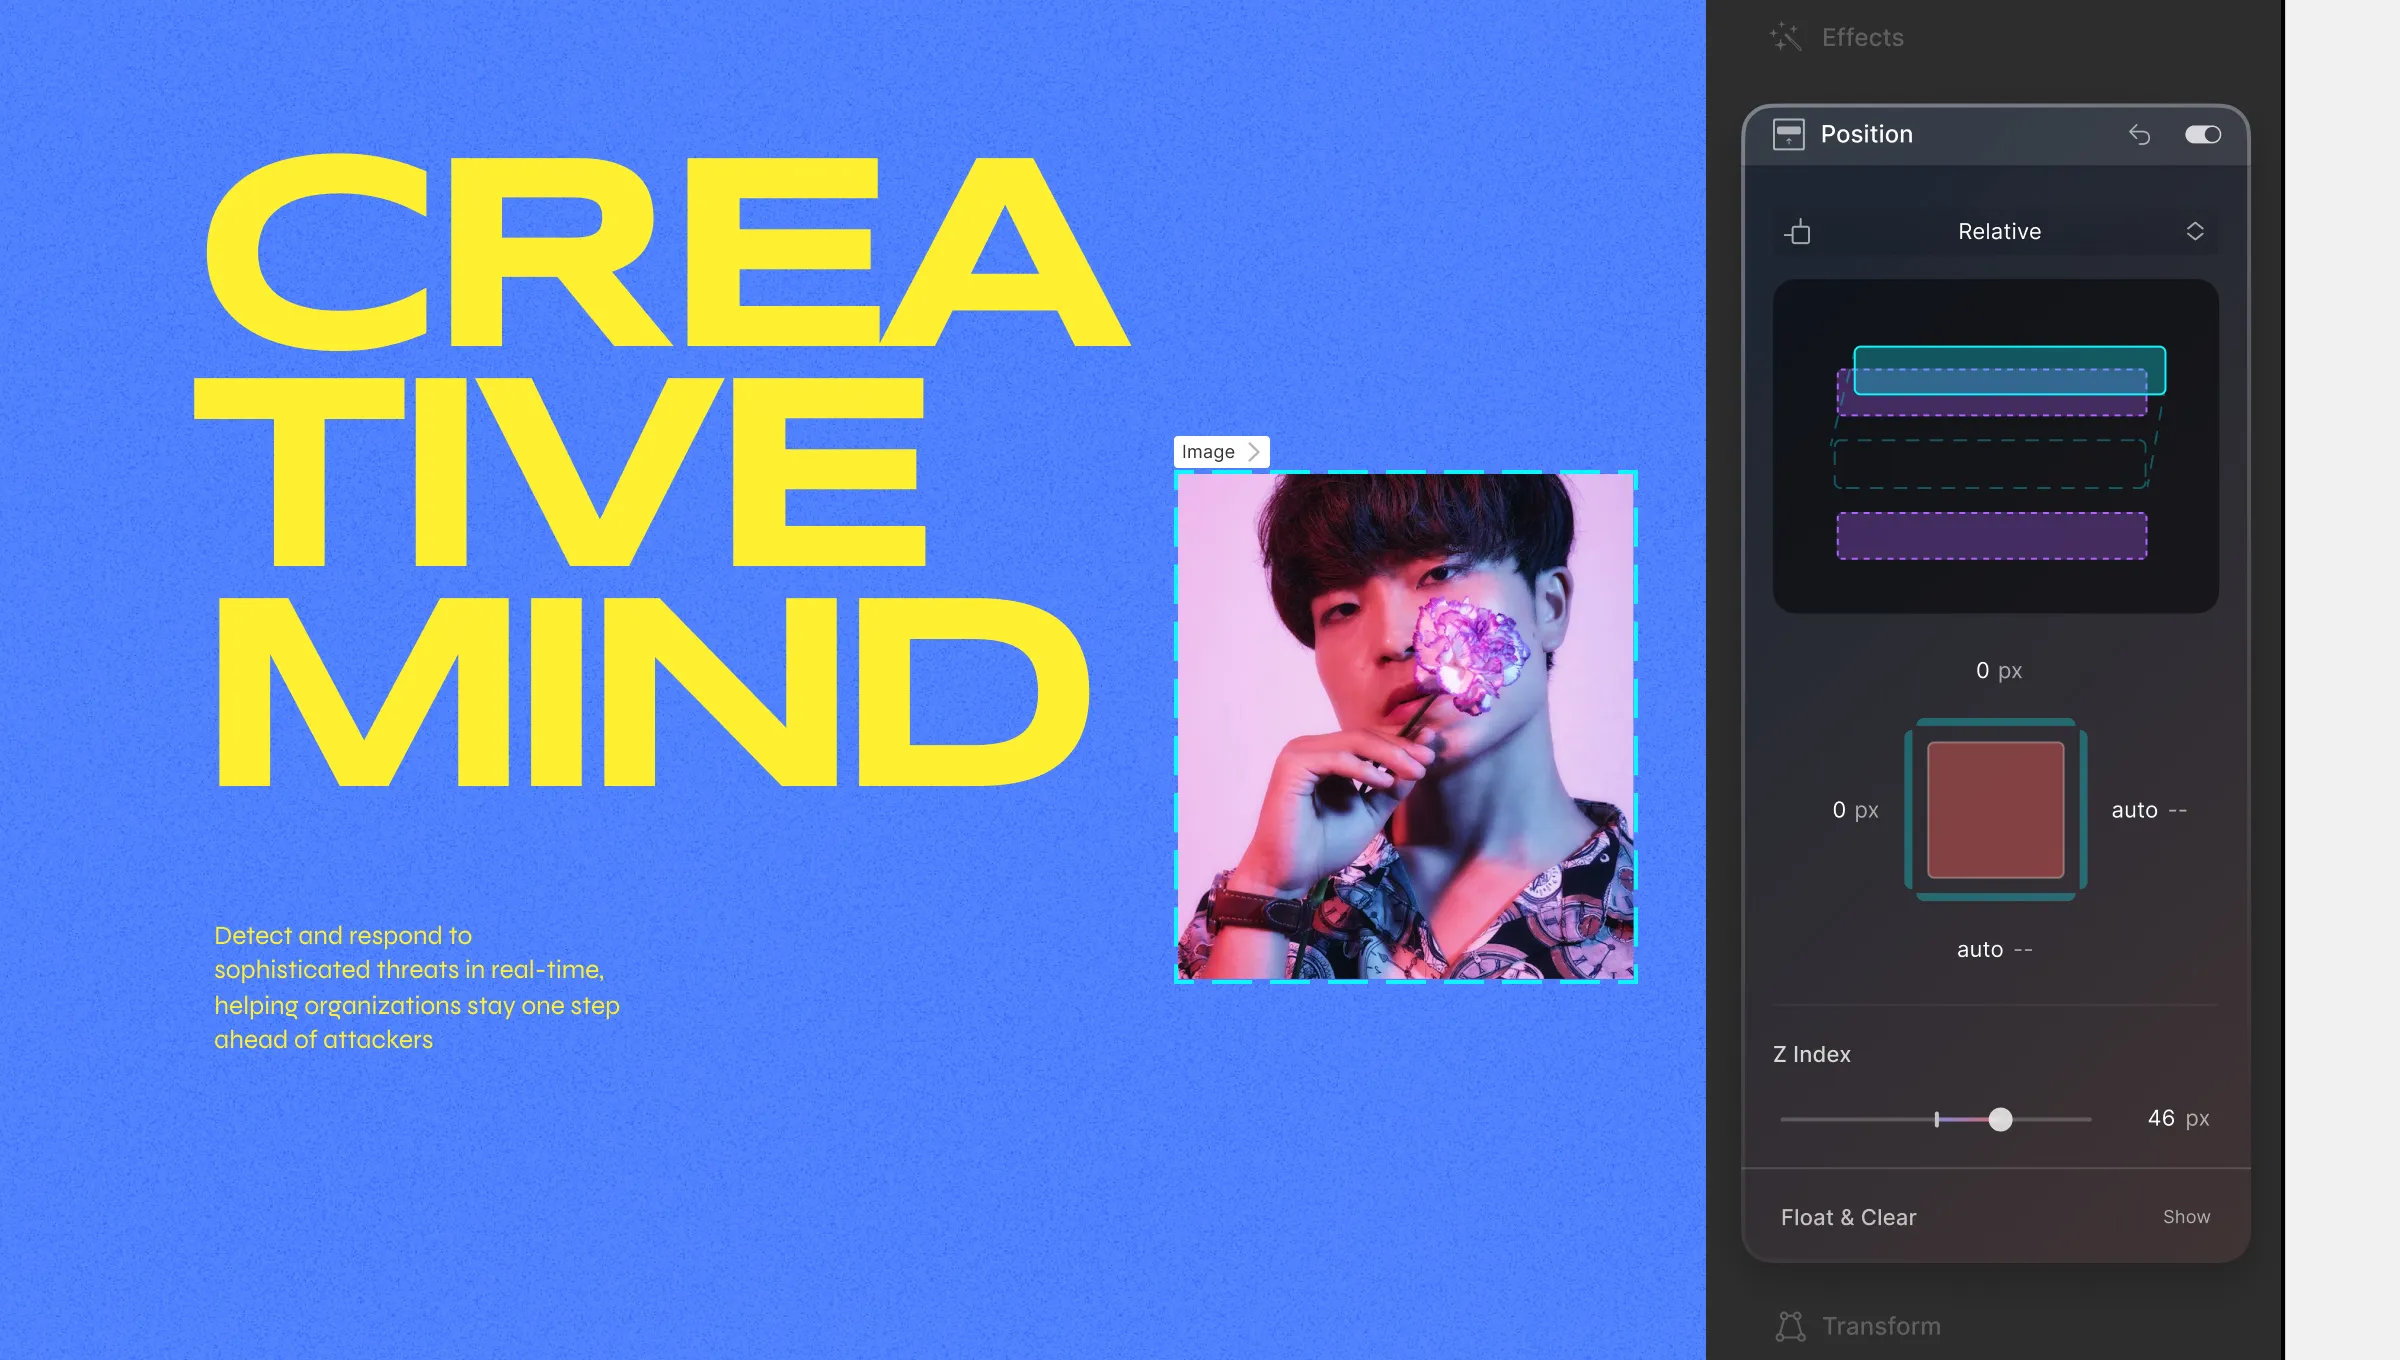
Elements flow normally but can be offset using top, right, bottom, and left values. This means that other elements will behave as if it is taking their usual position even when its offset.
Absolute
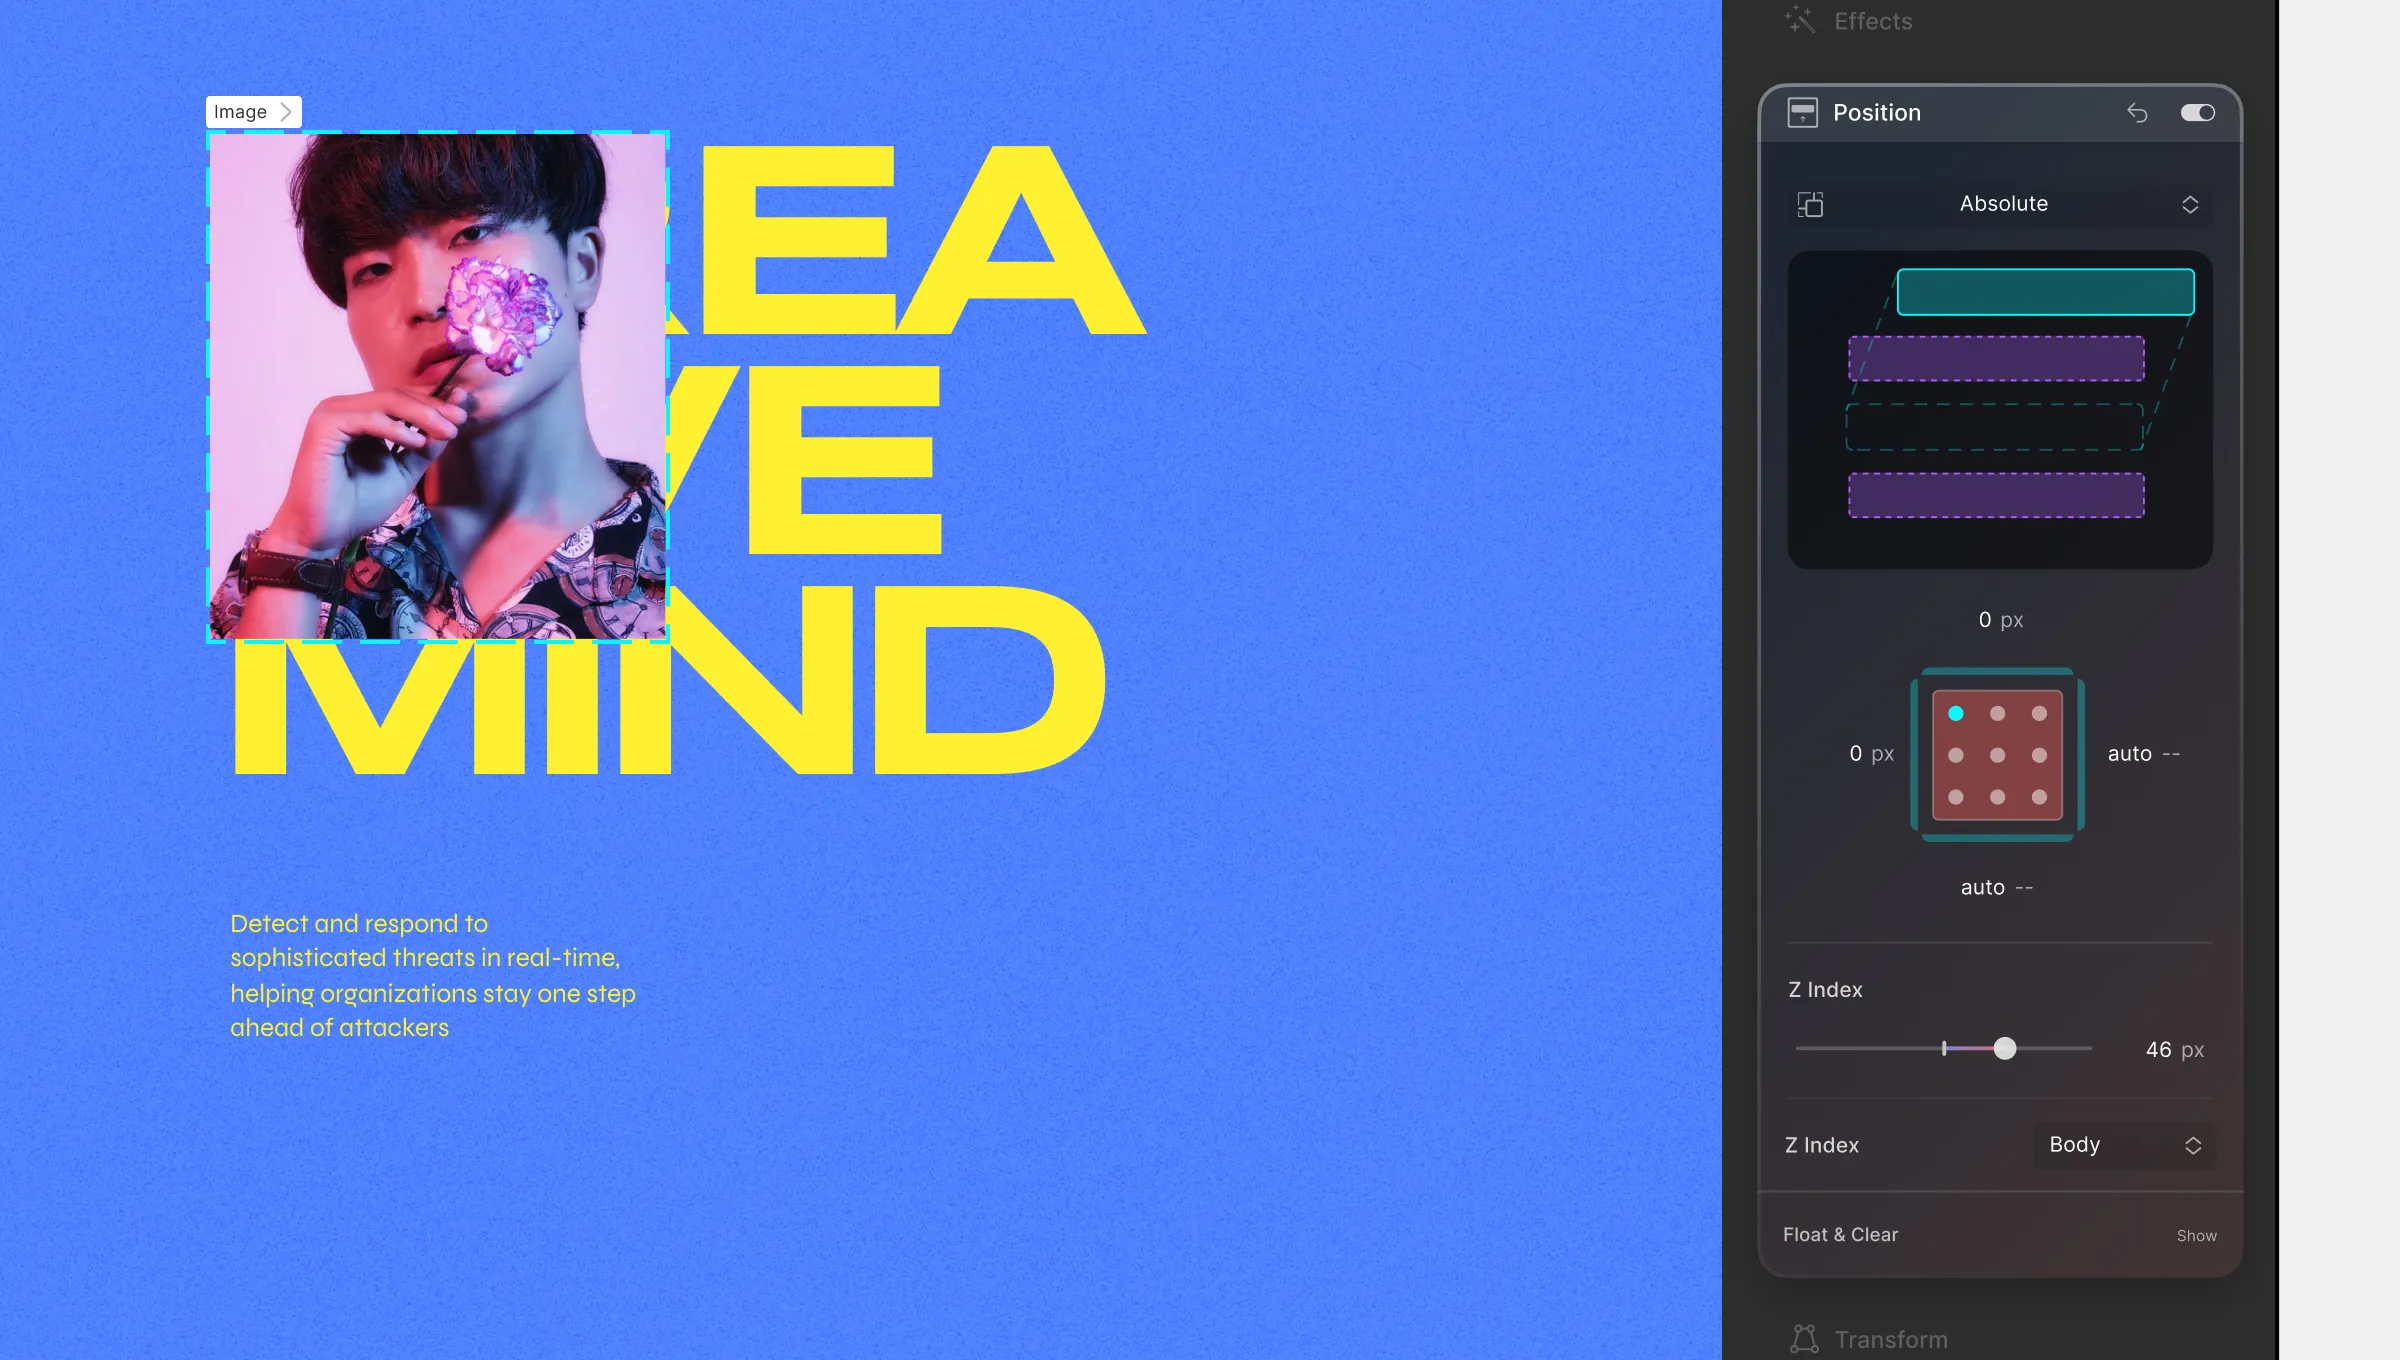
Elements are removed from the usual flow of the document and positioned relative to their closest ancestor if any or placed relative to the initial containing block.
The final Position is based on the top, right, bottom, and left values.
Fixed
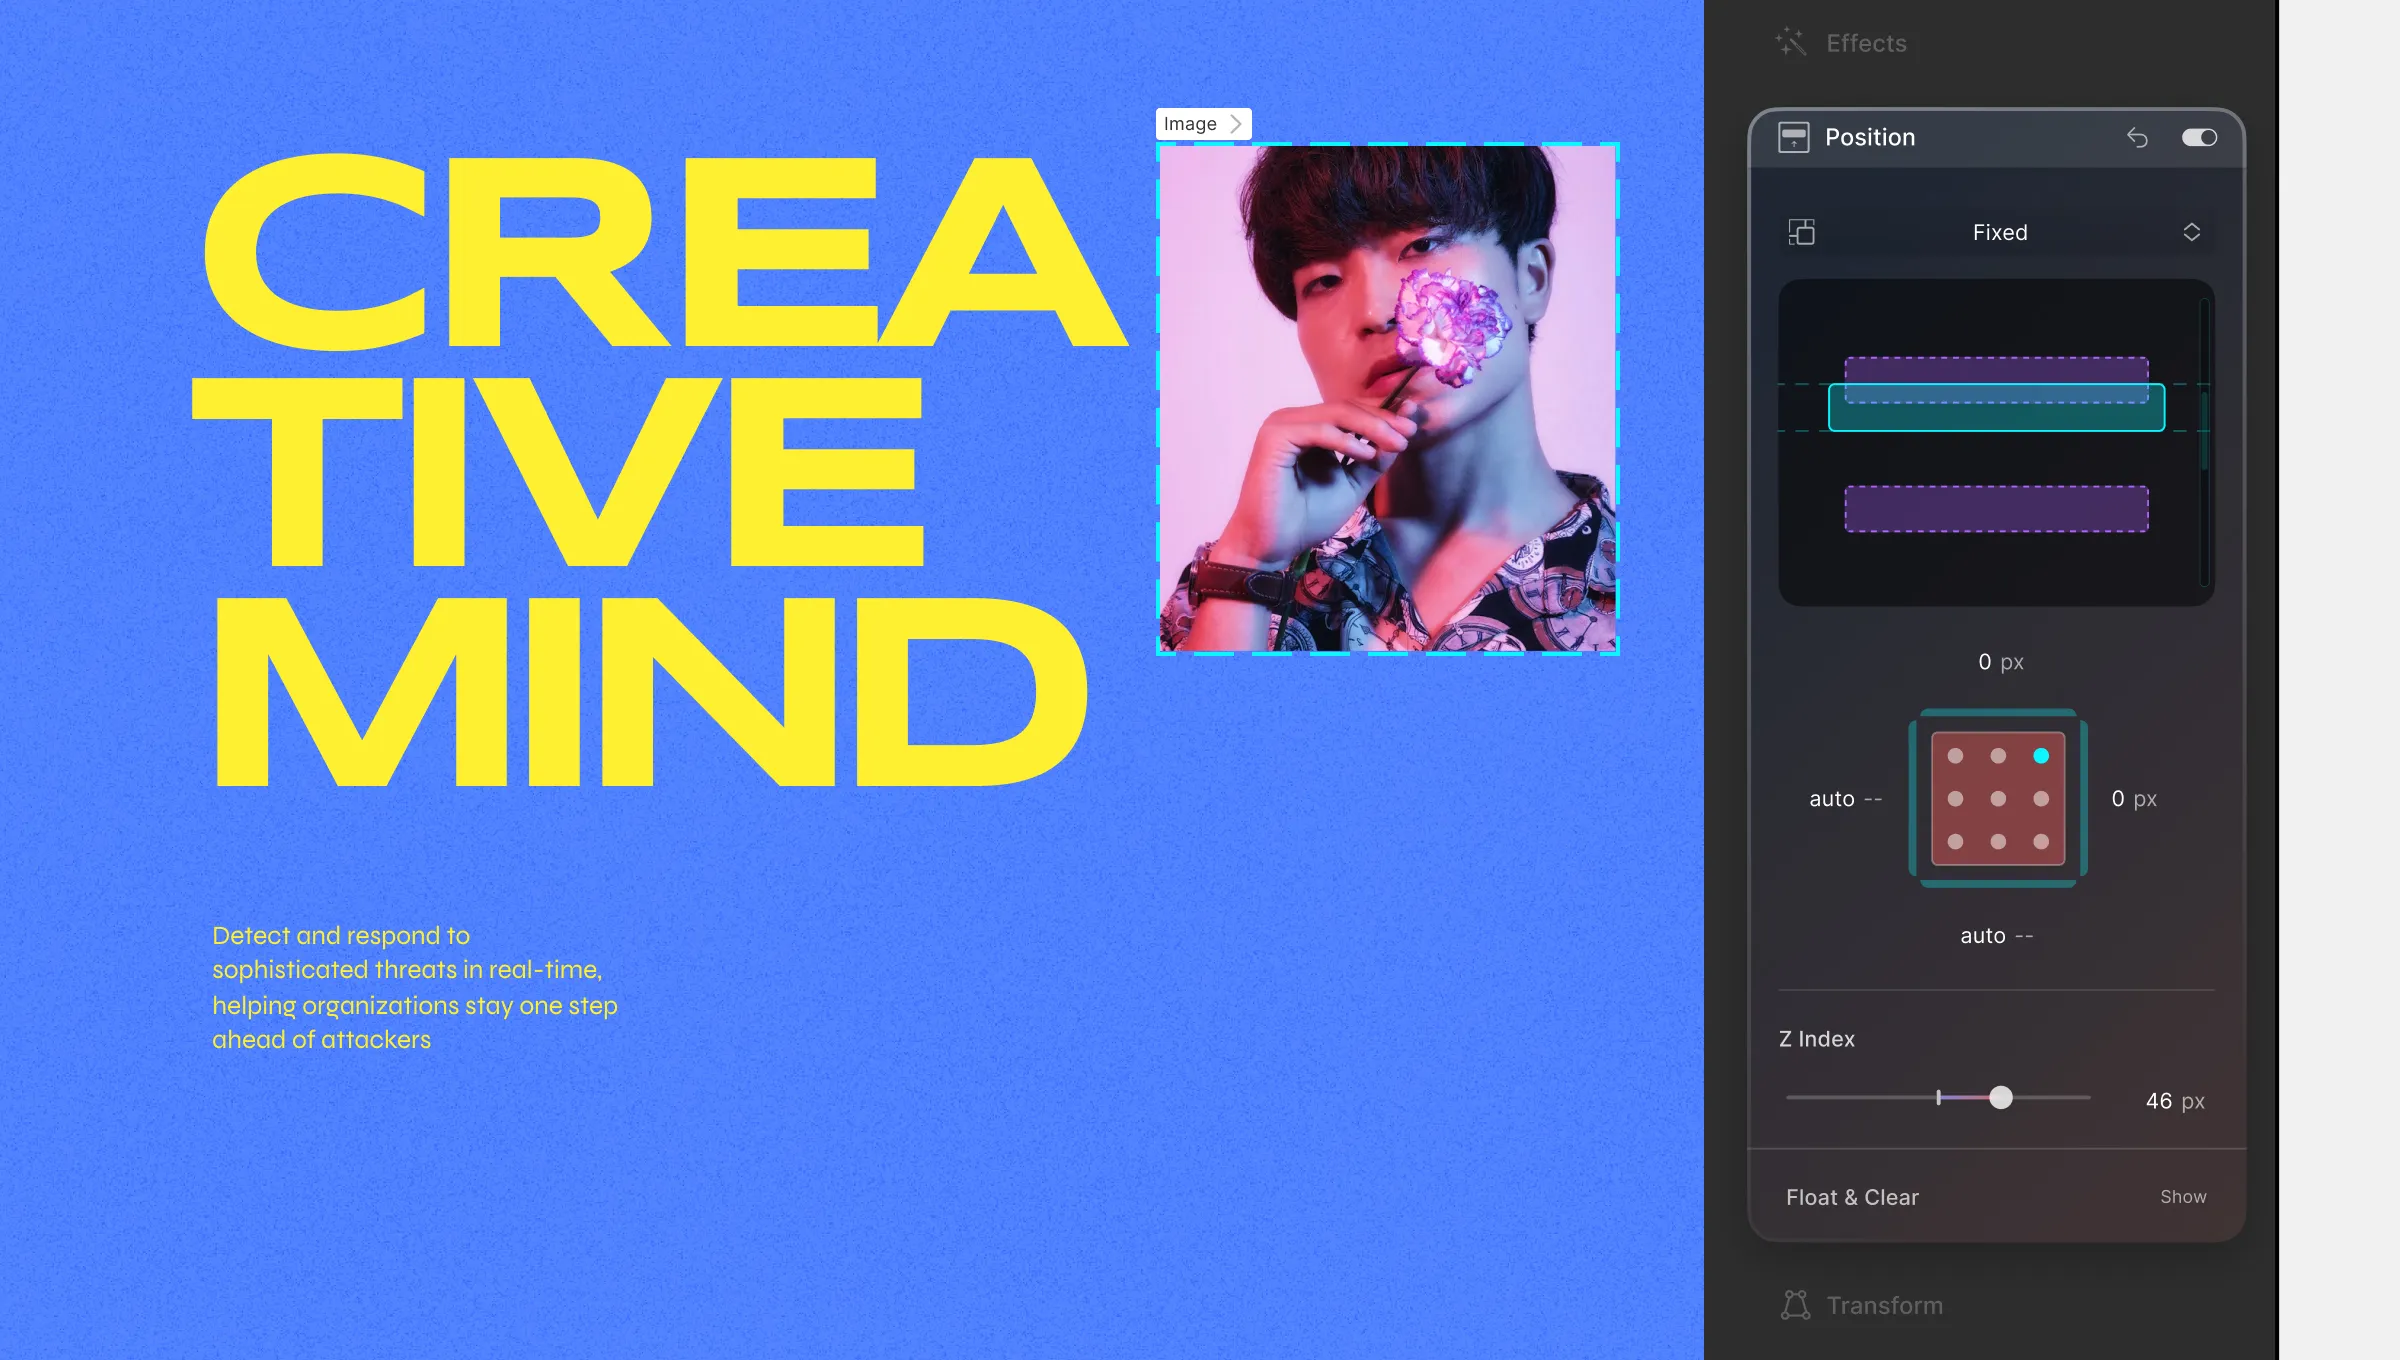
Fixed positioning removes an element from the normal document flow and positions it relative to the viewport, which means it remains fixed in its position even when the page is scrolled. This is true regardless of the ancestor elements’ properties like transform, perspective, filter, or will-change.
The element’s final position is determined solely by the values specified for top, right, bottom, and left, without considering the properties of their ancestor elements.
Sticky

Elements are positioned based on the usual flow of the document and then offset relative to the nearest scrolling ancestor and containing block based on top, right, bottom, and left values. Other elements’ Position is not affected by this offset.
Adjust Position Using Offset Values
You can adjust an element’s position using the following offset values:
- Top: Click on the top edge of the box model and drag upwards to increase its value and downwards to decrease it. You can also directly enter the value in its input field.
- Right: Click on the right edge of the box model and drag to the right to increase its value and to the left to decrease it. You can also directly enter the value in its input field.
- Bottom: Click on the bottom edge of the box model and drag it downwards to increase its value and upwards to decrease it. You can also directly enter the value in its input field.
- Left: Click on the left edge of the box model and drag to the left to increase its value and to the right to decrease it. You can also directly enter the value in its input field.
- Z Index: Drag the slider range to set the Z Index or enter the value into its input field.
Float & Clear

Click on the Float & Clear button to open its settings. From here you can set the value for Float and Clear.
Float
Choose how elements should align within their container:
- None: Element follows its natural position.
- Right: Element floats to the right.
- Left: Element floats to the left.
Clear
Set whether an element should be moved below floating elements that precede it. In other words, this defines what will happen to an element that’s next to a floating element. Also, this property applies to both floating and non-floating elements.
For this property, you can set any one of the following three:
- Both: Element is pushed below both left and right floating elements.
- Left: Element is pushed below left floating elements.
- Right: Element is pushed below right floating elements.
Was this page helpful?