Scalable Vector Graphics (SVG) is an XML-based vector image format for 2D graphics with support for interactivity and animation.
Why Use SVG Shapes?
There are several reasons why you might want to use SVG shapes on your website:
- Scalability: SVG shapes are vector-based, which means they can be scaled to any size without losing quality. This is especially useful when creating graphics that need to be displayed on different devices with different screen sizes.
- Interactivity and Animation: SVG shapes can be animated and made interactive, making them a great choice for creating dynamic graphics and user interfaces.
- Small File Size: SVG shapes are usually smaller in file size than bitmap images, which can improve your website’s loading speed.
- Accessibility: SVG shapes can be made accessible for users with disabilities, for example, by adding descriptive text for screen readers.
- Style Control: You can easily control the appearance of SVG shapes making it easy to match your website’s style and brand.
- Reusability: You can reuse SVG shapes across multiple website pages, saving time and resources compared to creating multiple images.
These are just a few of the benefits of using SVG shapes on your website. By using SVGs, you can create visually appealing, fast-loading, and interactive graphics that enhance the user experience on your website.
SVG Elements
In Droip, we have two elements that are in the SVG file format. They are:
- Icon element
- SVG element
So let us go over how you can add and use these for your website.
How to Add Icons
- Add the Icon element to your canvas.
- Click on +Add From Media to open the Icon Library in the Media Manager
- Choose from a wide selection of icons provided by Droip.
📝 Note: Keep in mind that these Icons are fetched from a local pool and not from an external library that’s been called. This means that your Icon load time will be that much faster.
To learn more about the Icon Library, check out its section on the Media Manager documentation.
How to Add SVG Shapes From Media
- Place the SVG element on your canvas.
- Click on +Add From Media to open the Clip-Path & Shape editor, which is also accessible from the Media Manager.
- Under SVG Shapes, select a shape that suits your needs.
- Customize the shape by dragging its control points (vertices) to adjust or add more vertices as required.
- Use the right side panel to modify attributes such as Fill, Stroke Color, and Stroke Weight.
On the right side panel you’ll find the following options:
- Fill: Set the color & the opacity of your shape from here.
- Stroke Color: Set the color & the opacity of your shape’s outline from here.
- Stroke Weight: Set the weight of the stroke by entering into the field below the Stroke Color toggle.
How to Add SVG Shapes Using Paste SVG
- Open your SVG file using your preferred IDE and copy its code.
- Then, select the SVG element and click on the Paste SVG option from the inline editor.
- Finally, paste the code and click on Update.
Uploading SVG Files
If you want to upload and use your own SVG files in your designs and layouts, you can do that as well.
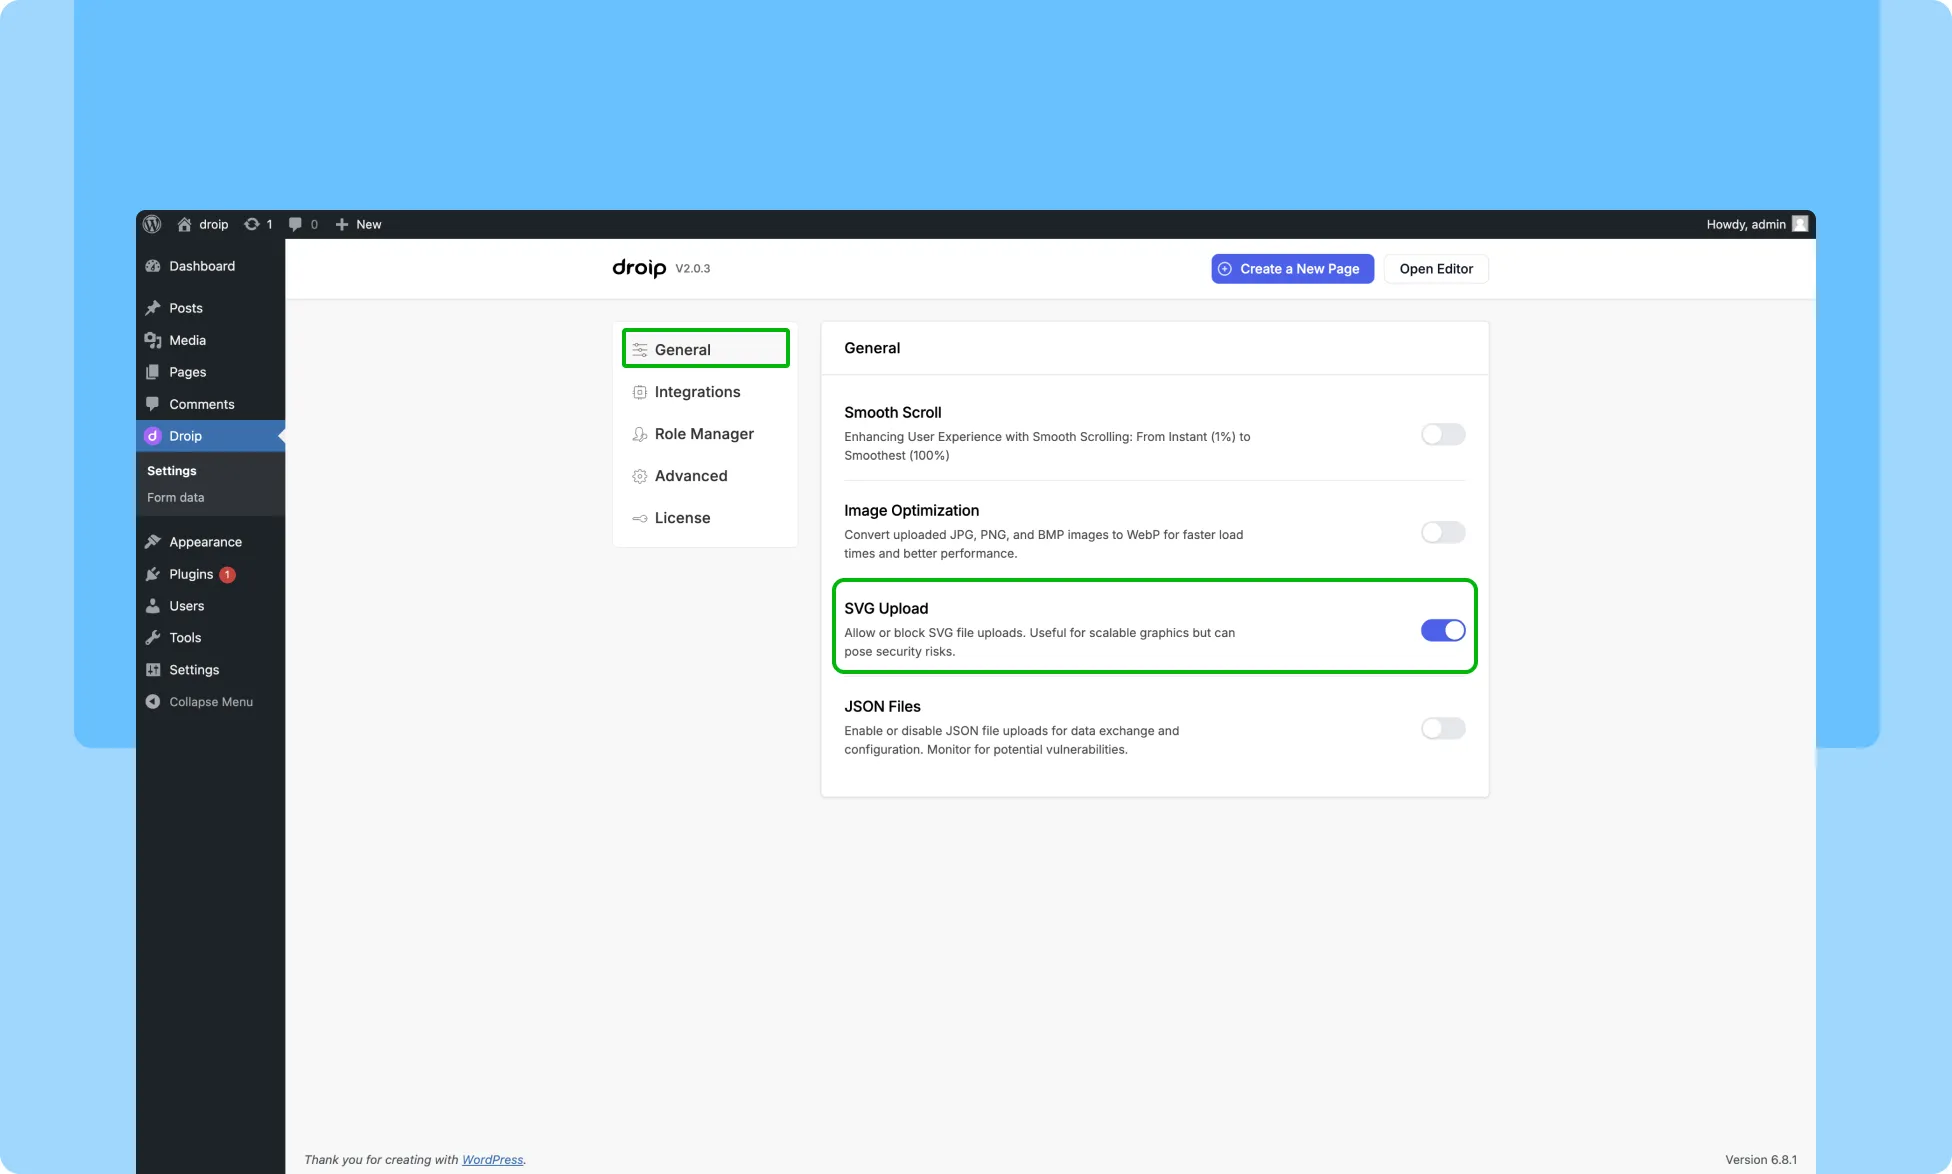
To do that, you have to first enable the SVG Upload option from Droip WordPress dashboard > Settings > General.
Was this page helpful?