For every element, you’ll find the following Custom Properties options which you can access by clicking on the ellipsis icon from their inline editor.
Visibility
Visibility: Use this option to show or hide your elements on the canvas. To show it, select Visible and to hide it, select Hidden.
Custom Attributes
Custom Attributes allow you to enhance your standard HTML elements by adding additional information to define more characteristics. This comes in handy when you need to achieve specific functionalities that are not readily available through built-in options.
How to Add a Custom Attribute
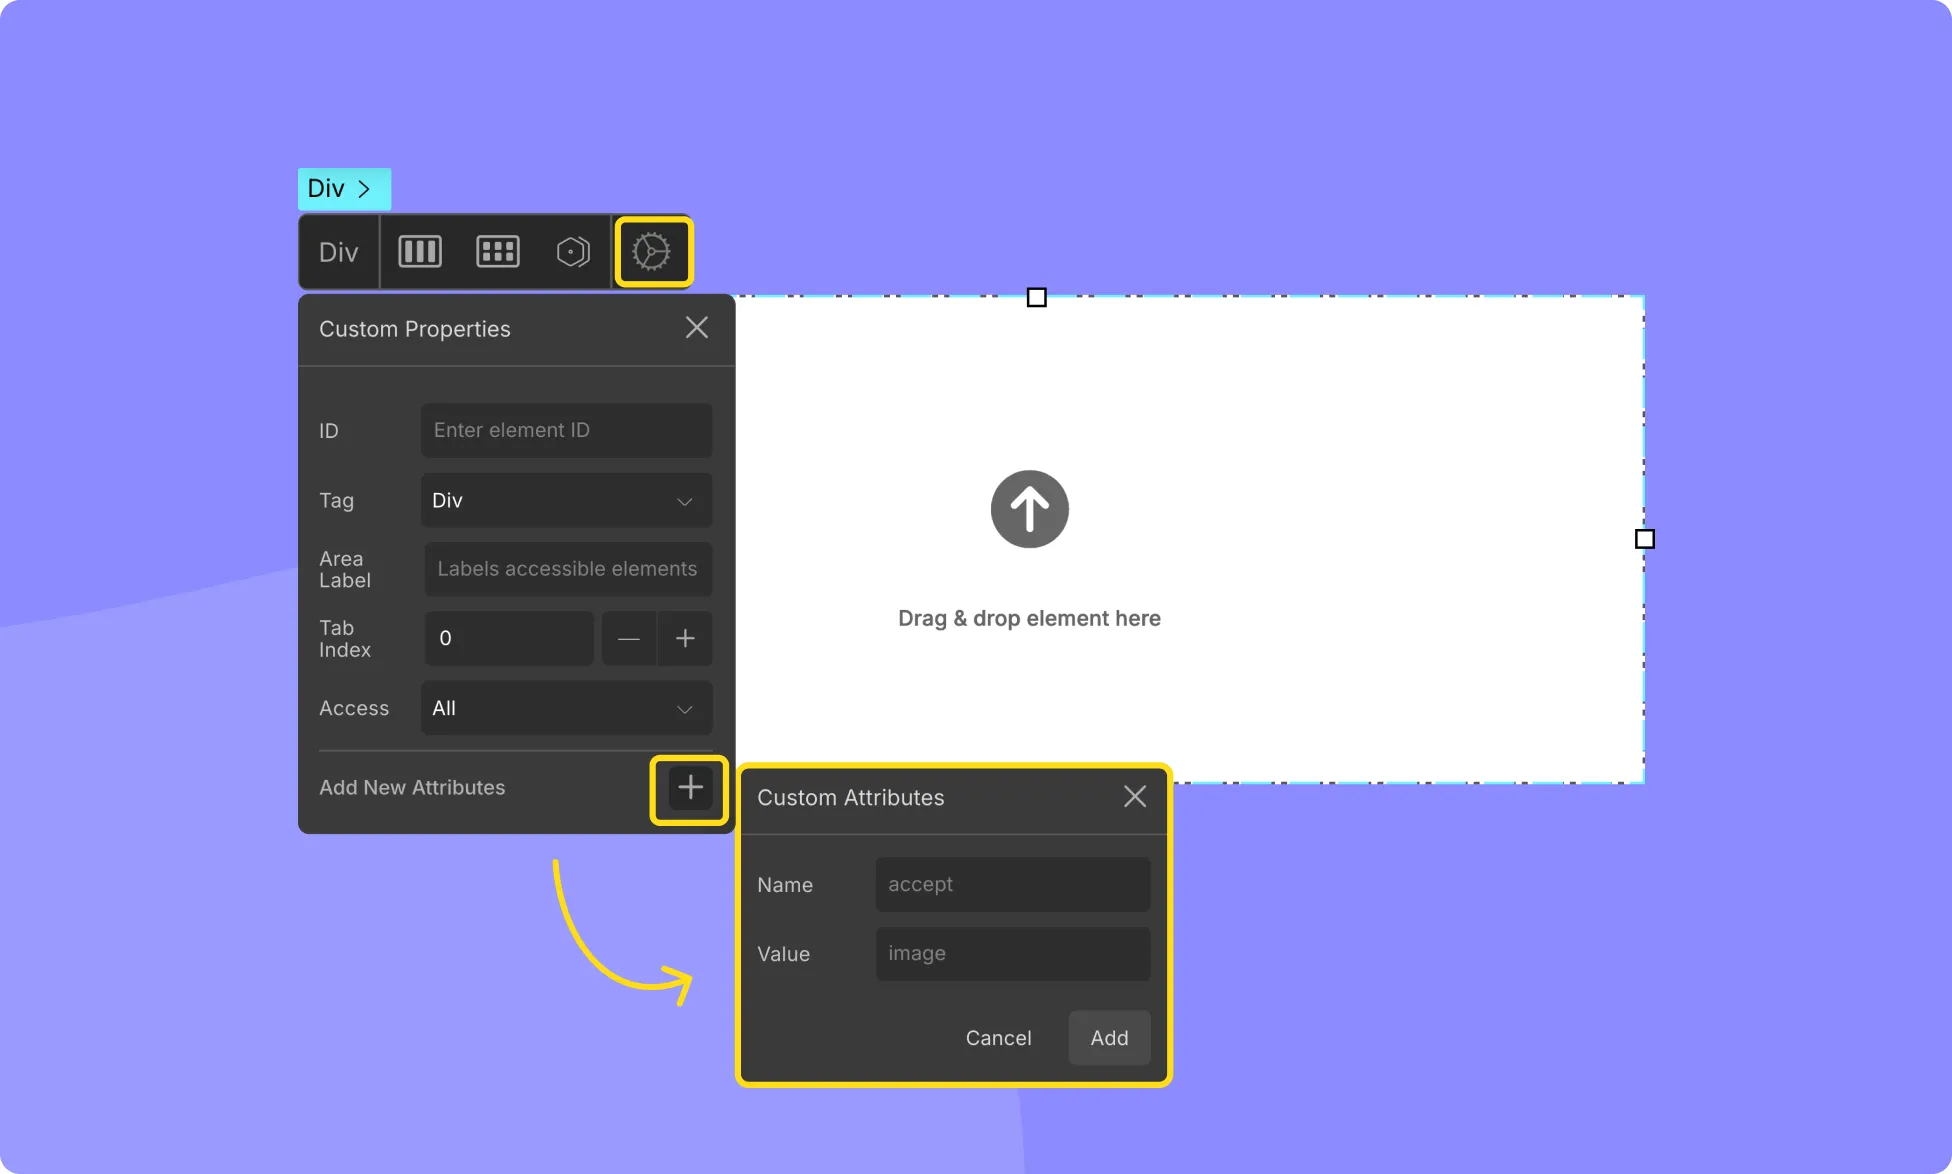
To add a Custom Attribute to any element on your canvas, follow these steps:
- Select the element you wish to modify.
- Access the inline editor and click on the settings icon to open its settings.
- Click on Add New Attributes to add a new attribute and specify its Name and Value.
- The Name field should contain the name of the desired attribute (pre-defined in the system), while the Value field should contain any parameters associated with this attribute.
- Press Add to save the custom attribute, and it will be listed in the settings window.
Managing Custom Attributes
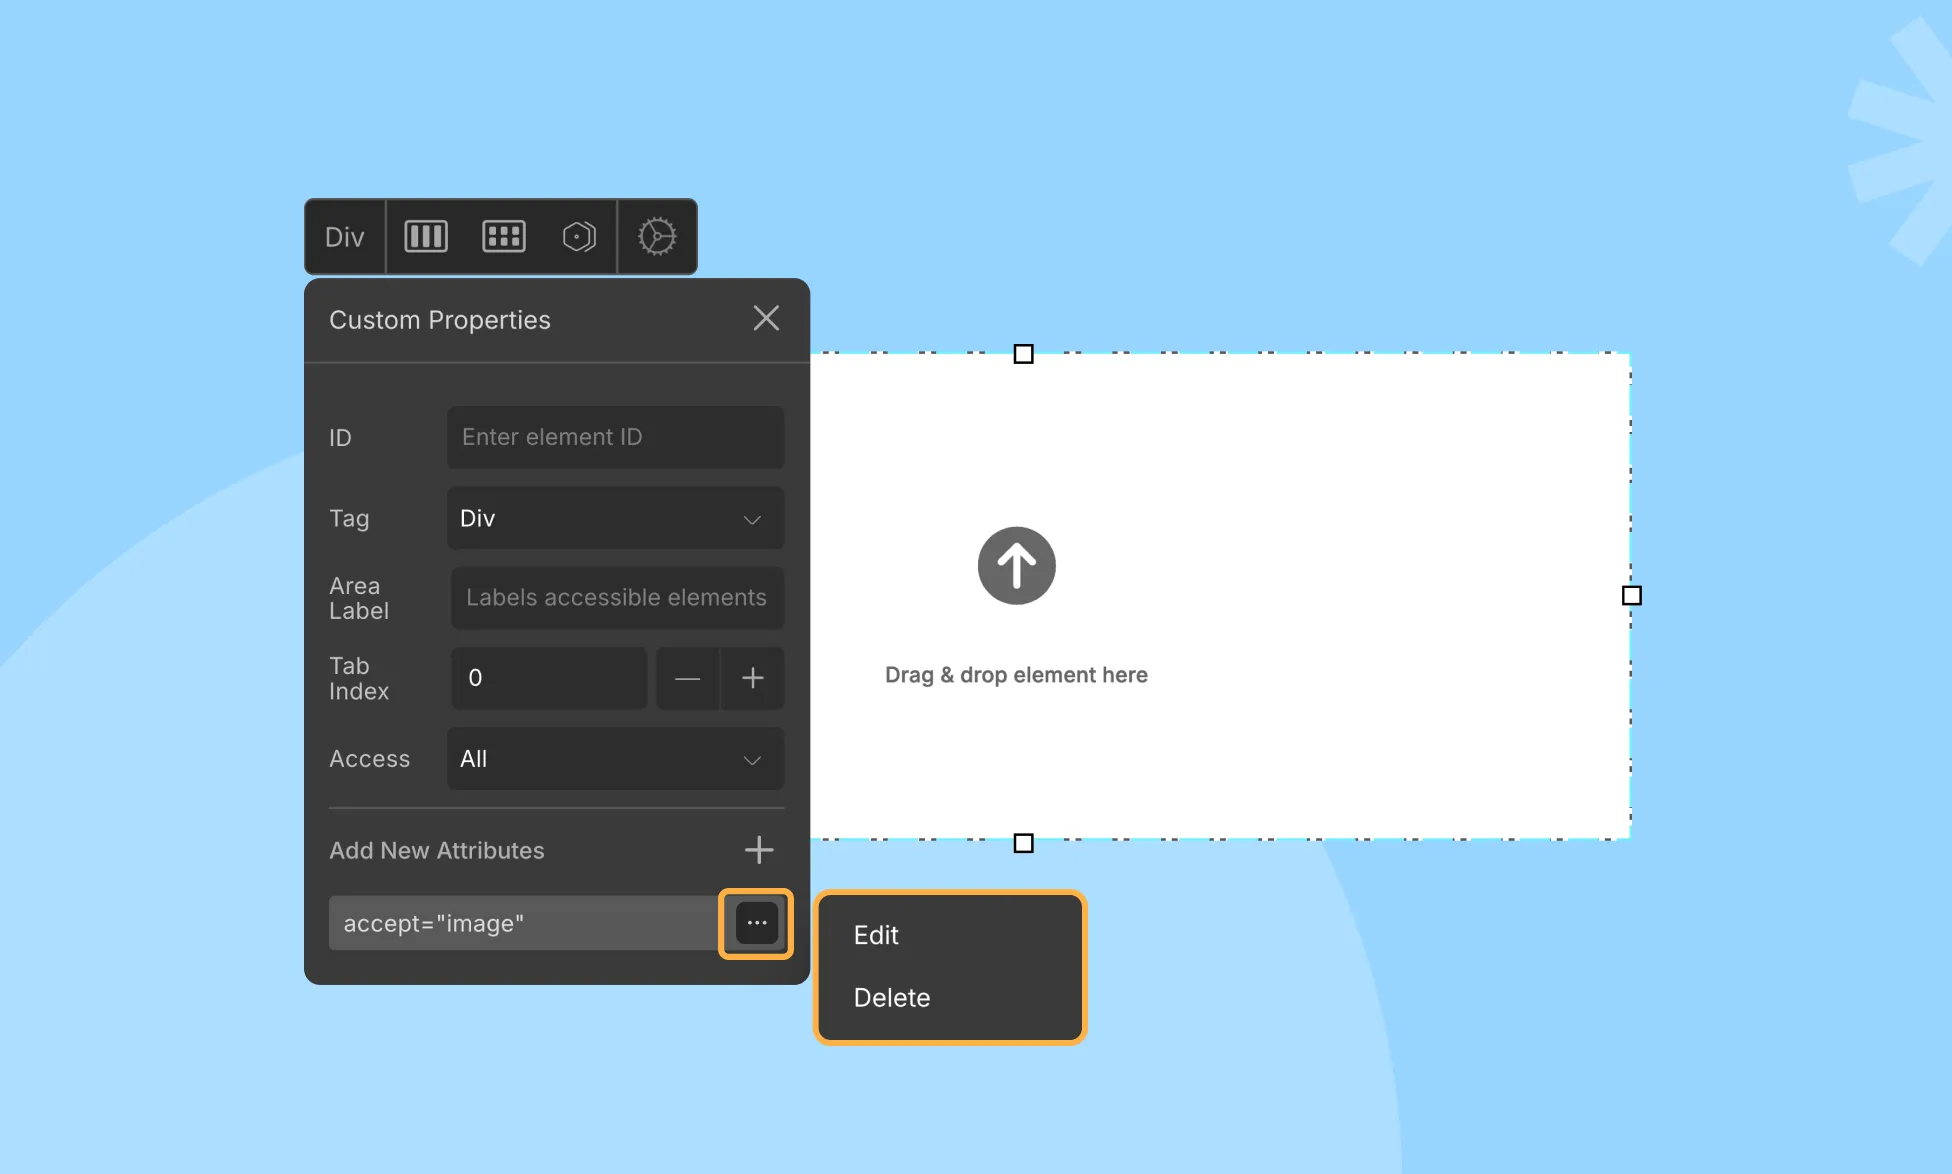
Click on the ellipsis icon beside any of the attributes on the settings window to access the Edit and Delete options.
Custom Attribute Use Cases
There are many Custom Attributes available out there, and while we can’t cover them all, we’ve tried our best to highlight some useful ones that may come in handy in various situations.
Adding Tooltips
Tooltips provide context and purpose when users hover over elements. You can add a Tooltip to any element using Custom Attributes.
Select the element and access its settings. Open Custom Attributes and click on Add New Attribute.
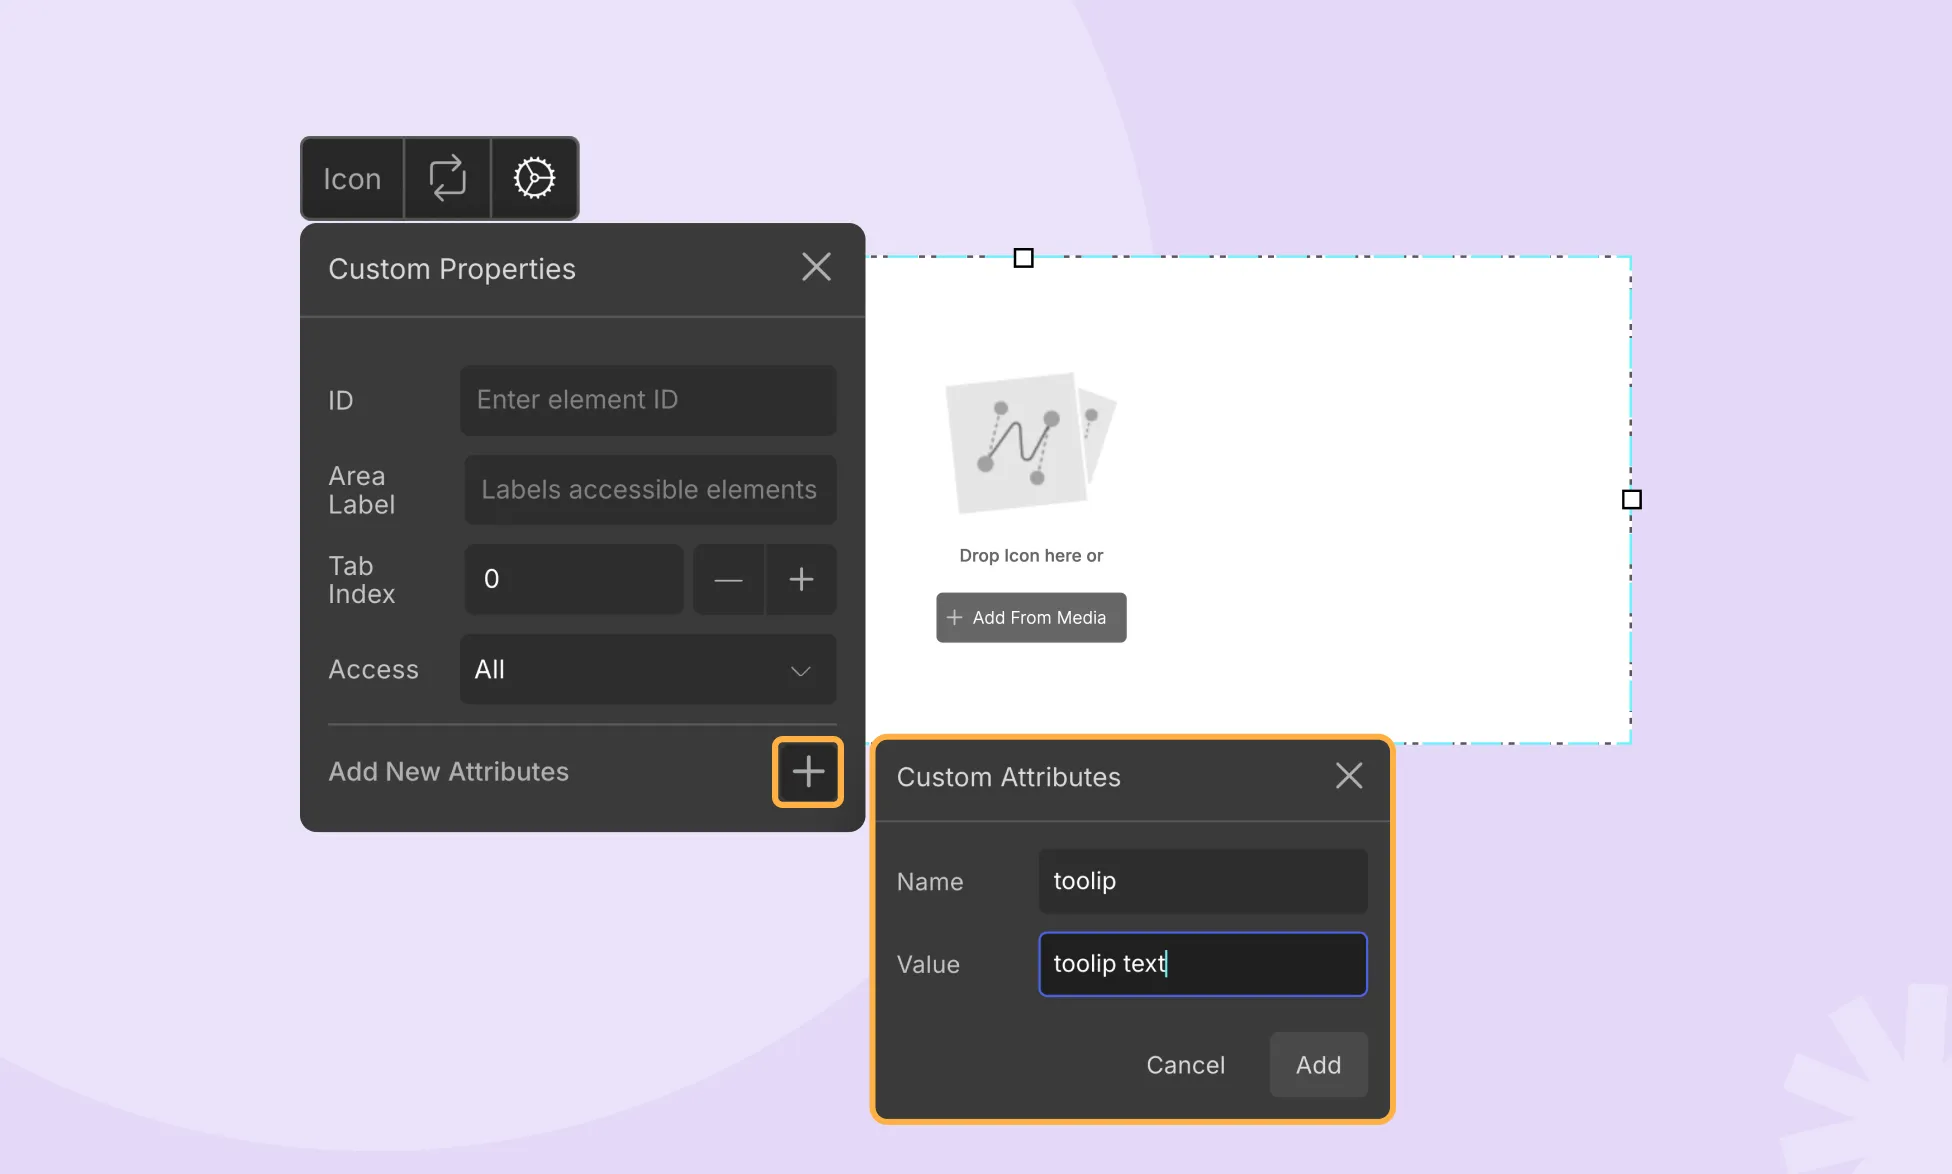
Set the Name of the attribute as title and the Value as your Tooltip text, providing a brief definition or purpose. Hit Add, and the tooltip text will appear when users hover over the element
Now when you hover over your element, this tooltip text should appear.
Turn Off Spellcheck
You can also turn off spellcheck for any Input Field using the Custom Attribute feature.
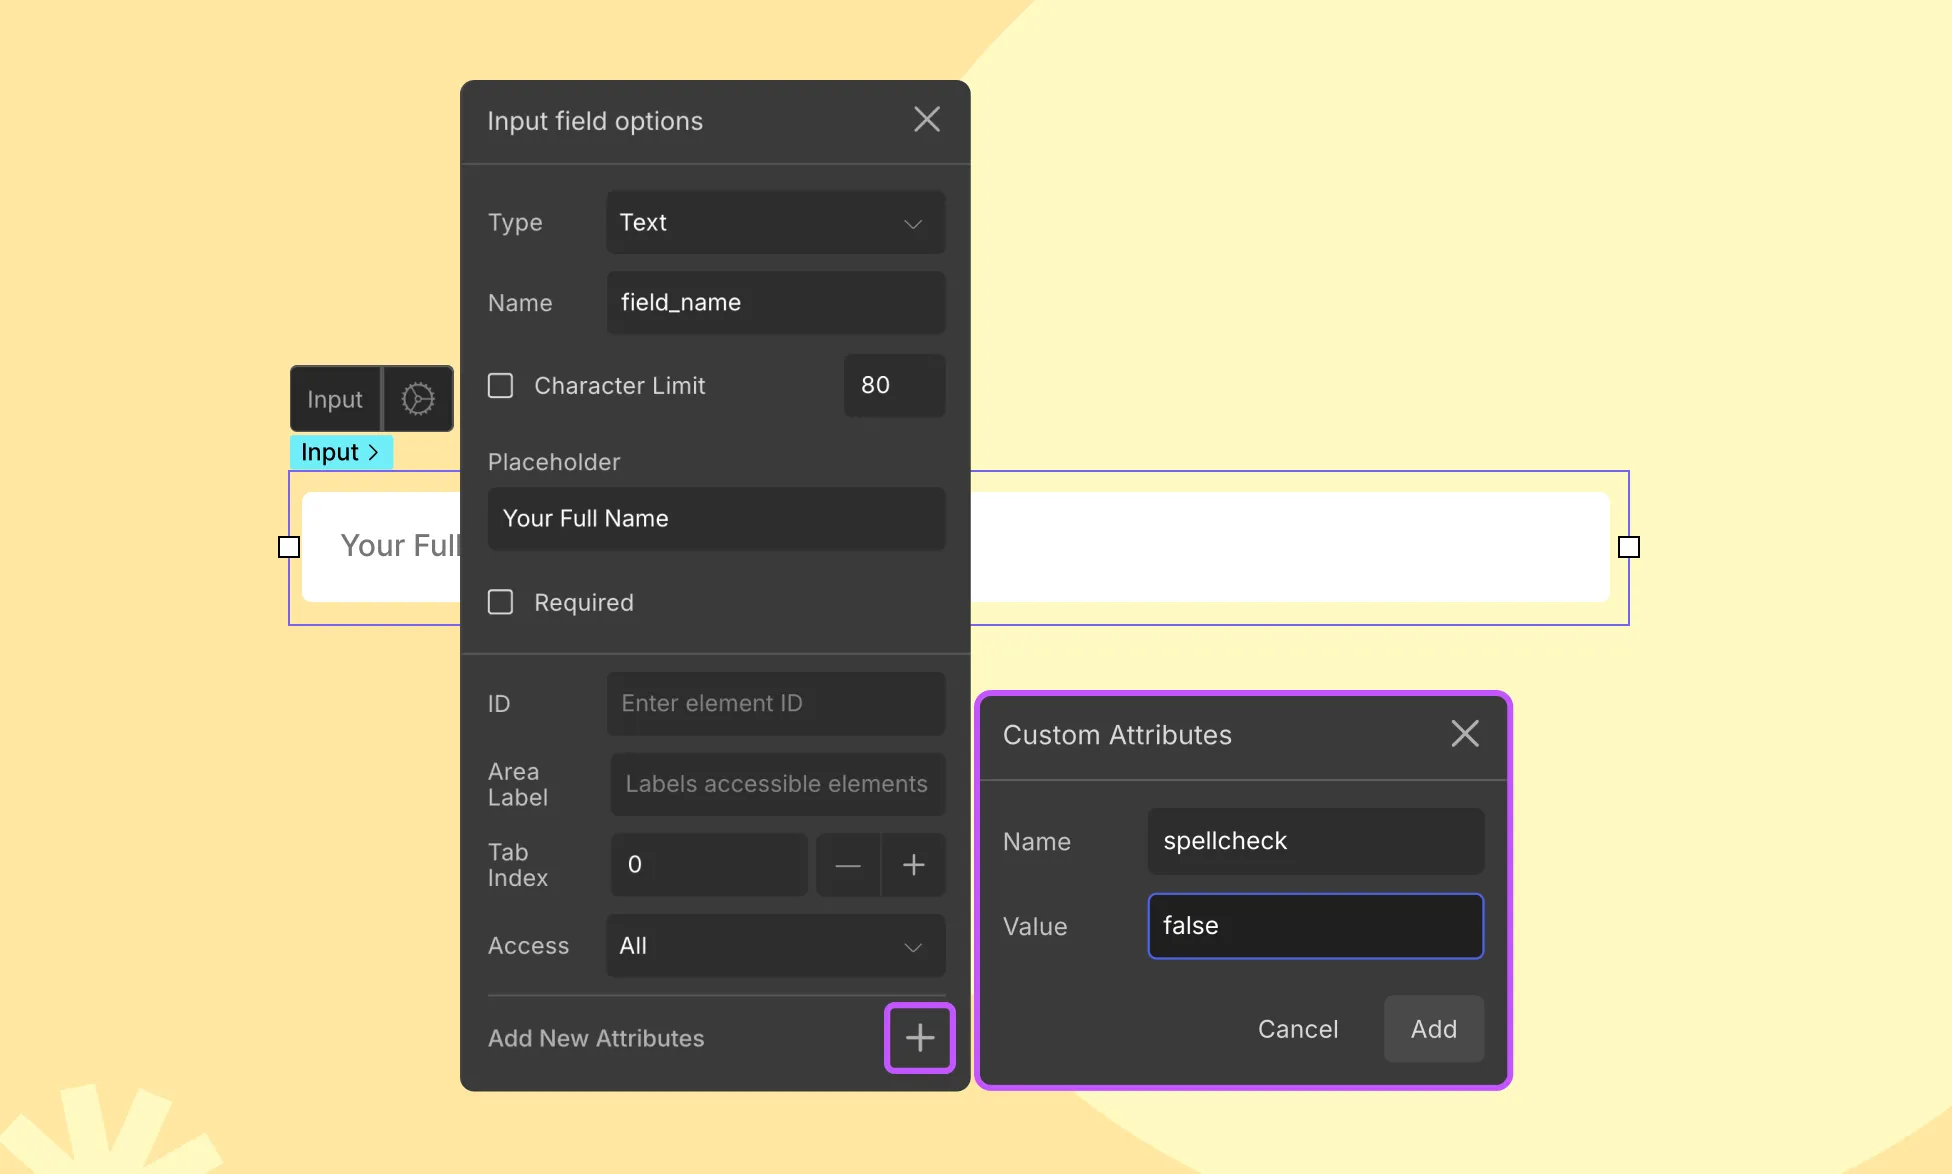
- Select the text field element and open the Input Field Options.
- Click on Add New Attributes.
- Set the Name as spellcheck and the Value as false.
- Hit Add to save this attribute, and the spellcheck will be turned off for the input field.
Renaming A Download File
Custom Attributes can also be used to rename files when users download them by clicking on a button or link:
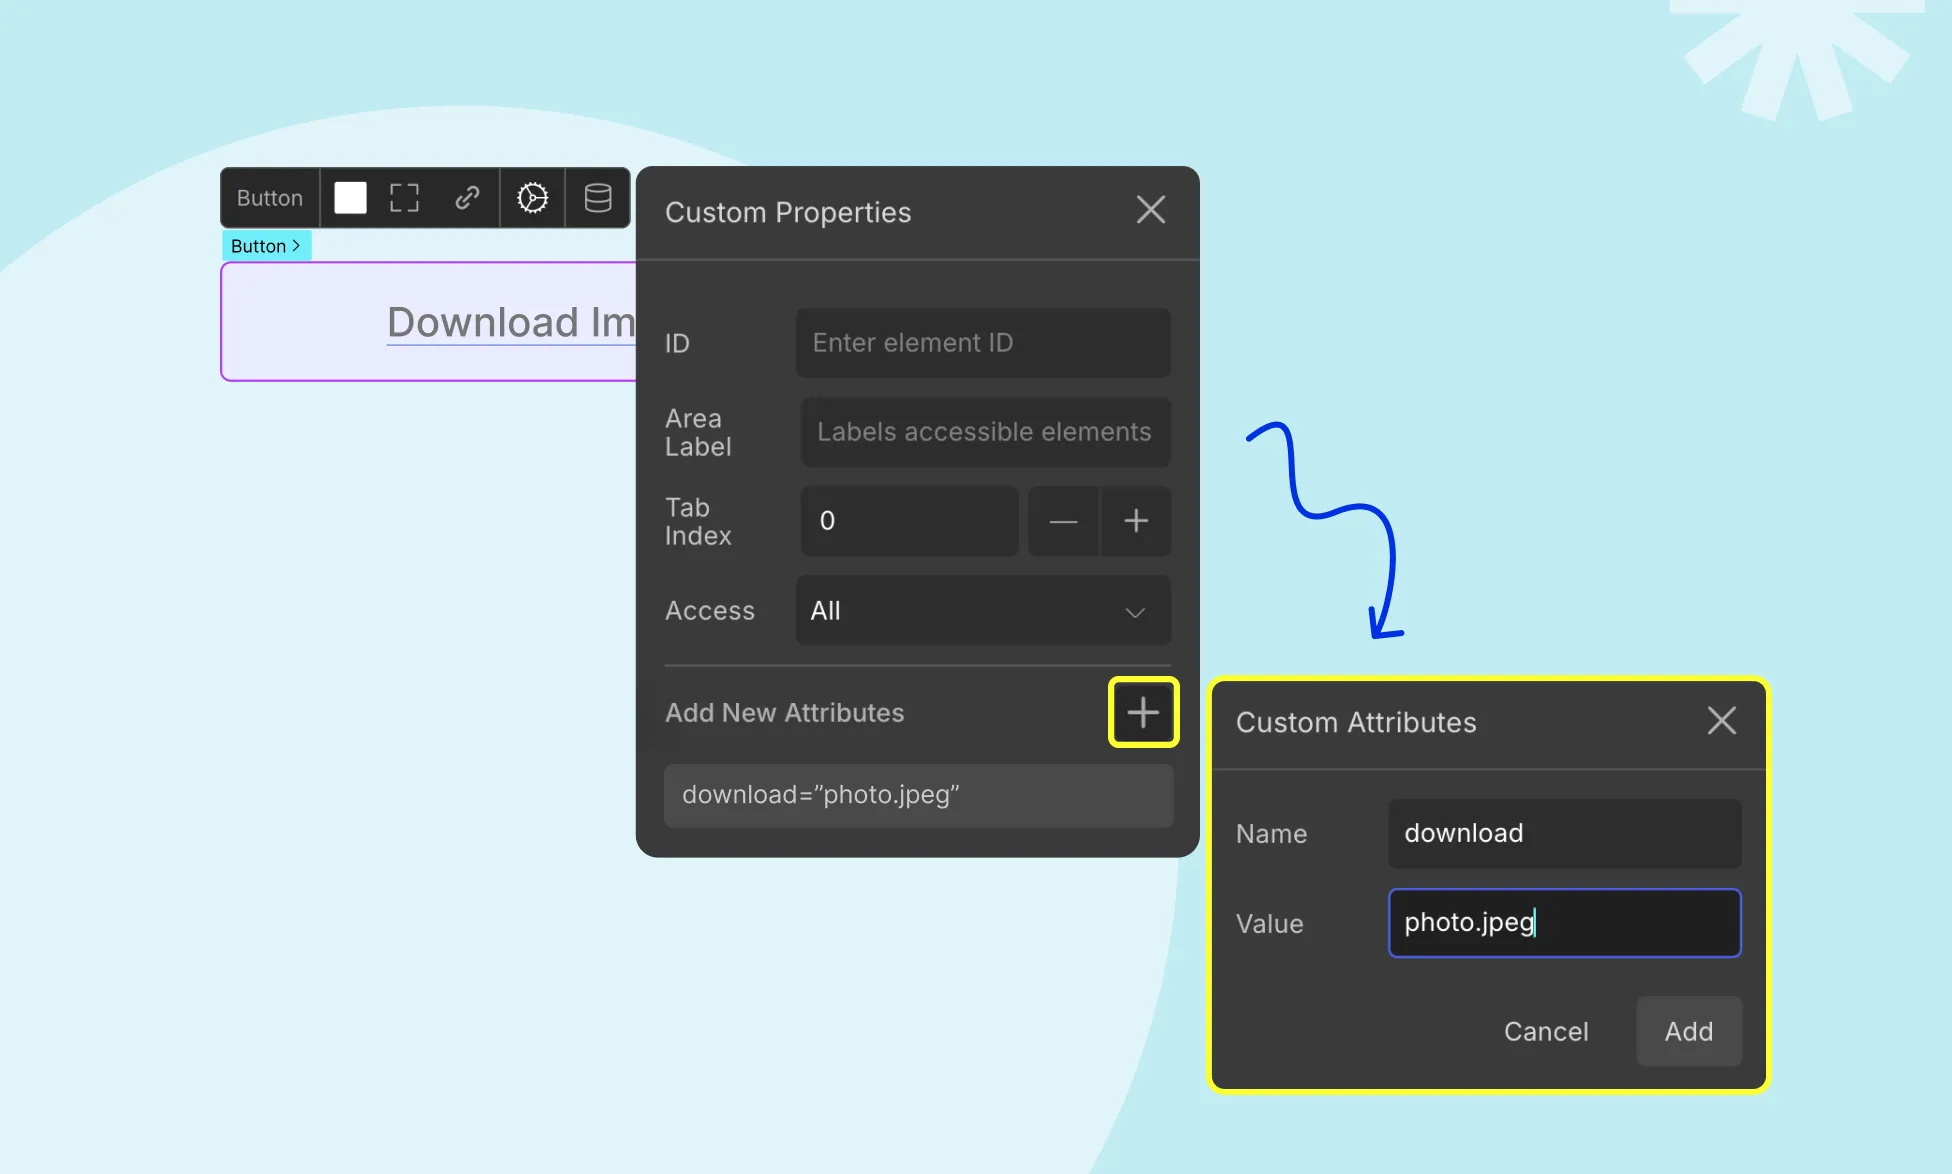
- Select the button or link element and access its settings.
- Click on Add New Attributes.
- Set the Name of the attribute as download and the Value to the desired filename.
- Hit Add, and the file will be renamed accordingly upon download.
Creating a Descending Ordered List
To display Ordered Lists in reverse order, follow these steps:
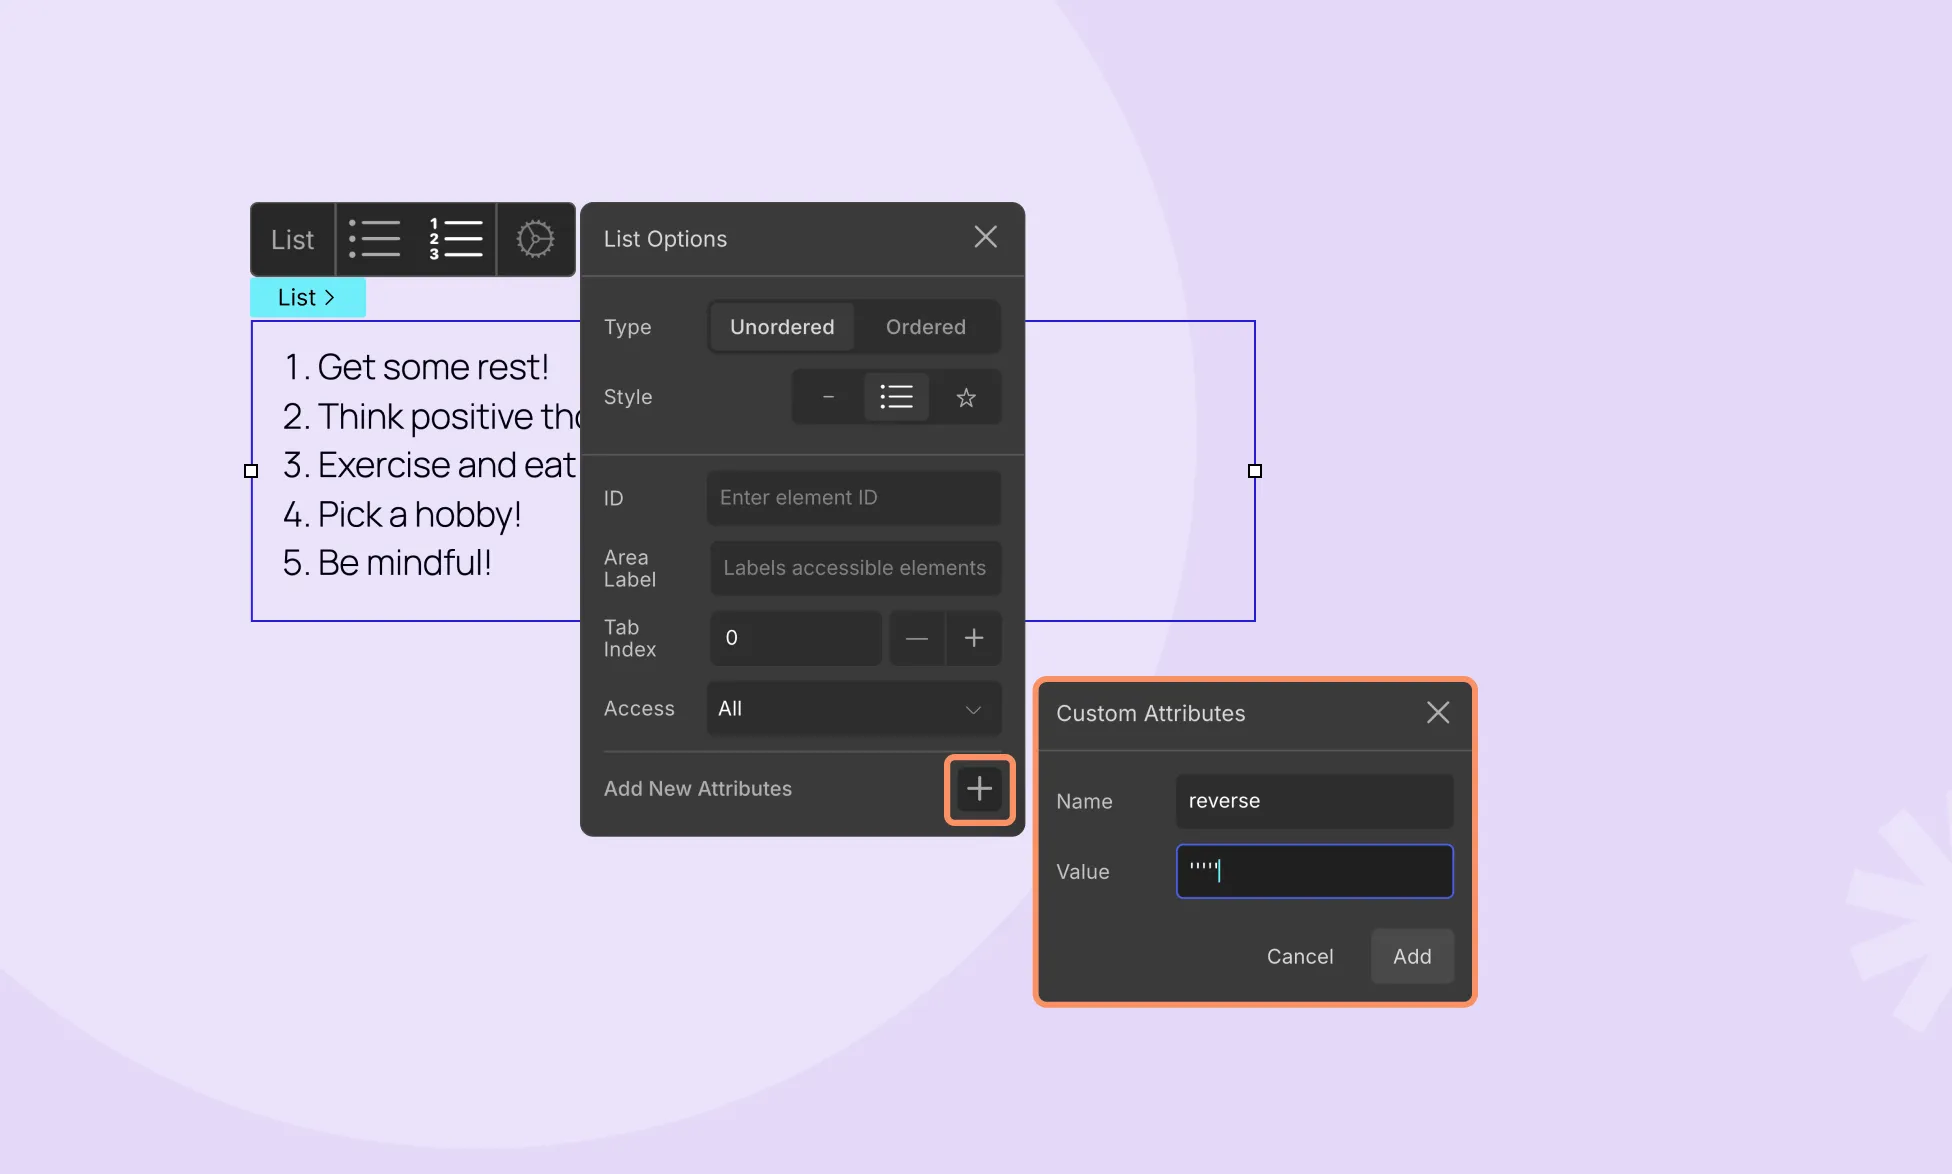
- Select your Ordered List element.
- Click on the ellipsis icon to open List Options and add a new attribute.
- Set the Name of the attribute as reversed (parameter not needed) and click Add to save your attribute.
- Your list will now be resorted in descending order.
Summary
Custom Attributes offer vast possibilities for enhancing your website’s functionality and user experience. To explore even more ways to customize your elements, refer to the list of All HTML Attributes that you can use.
📝 Note: Do keep in mind that some of these attributes may already be in use for the built-in Droip features so do double-check in case that option is already available.
Was this page helpful?