Adding images to your webpage makes your content more engaging and visually appealing for your visitors.
Use the Image element of Droip to add images to your webpage. This element allows you to upload an image file from your computer or choose a pre-existing image from the media library. You can also adjust the size, position, and other properties of the image.
How to Add an Image
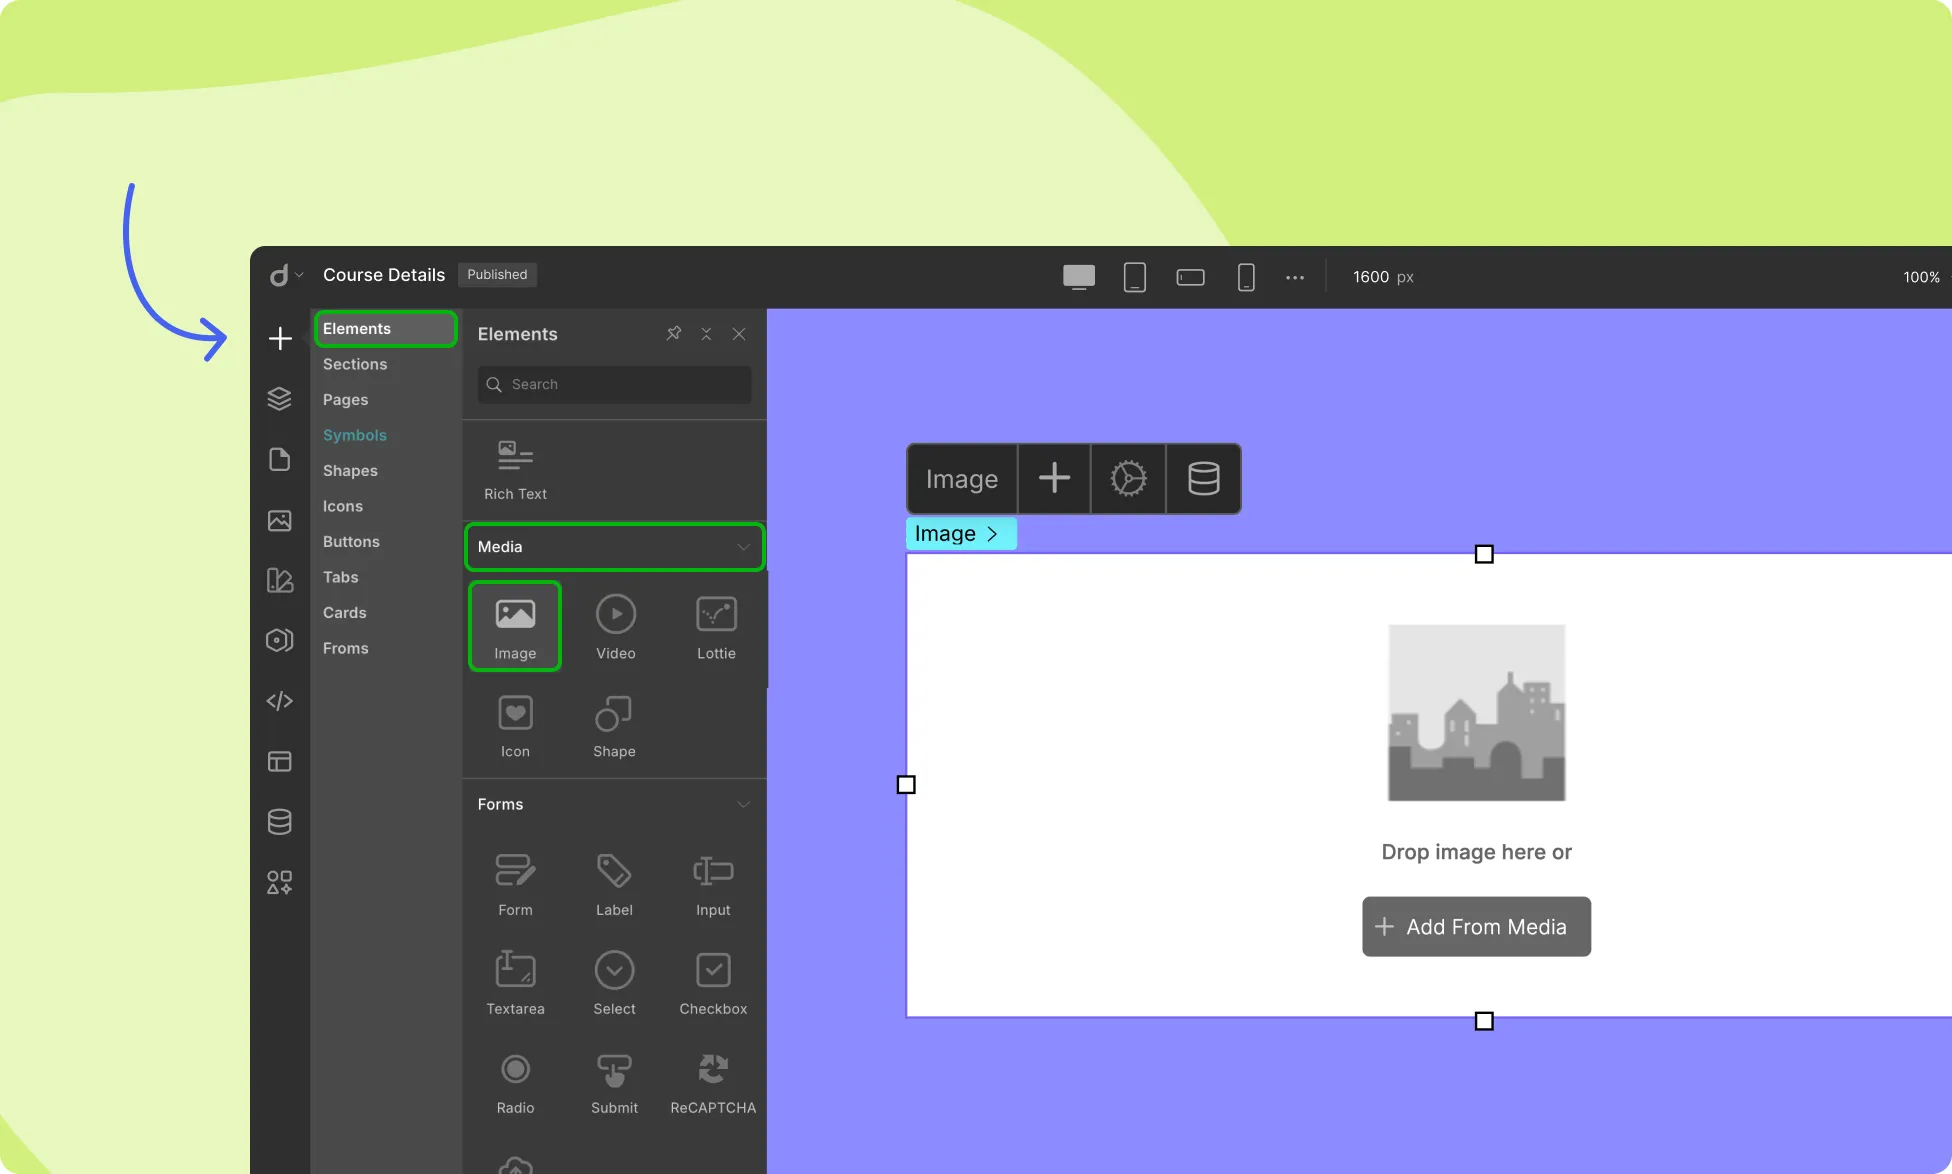
To add an Image element to your page, follow these simple steps:
- Access the Insert > Elements panel and locate the Image element.
- Drag and drop the Image element to the desired location on your canvas.
- You can then either drag and drop your image file into this element or click on the + Add From Media button to upload or choose an existing image from the media library.
Use Built-in Image Editor to Enhance Images
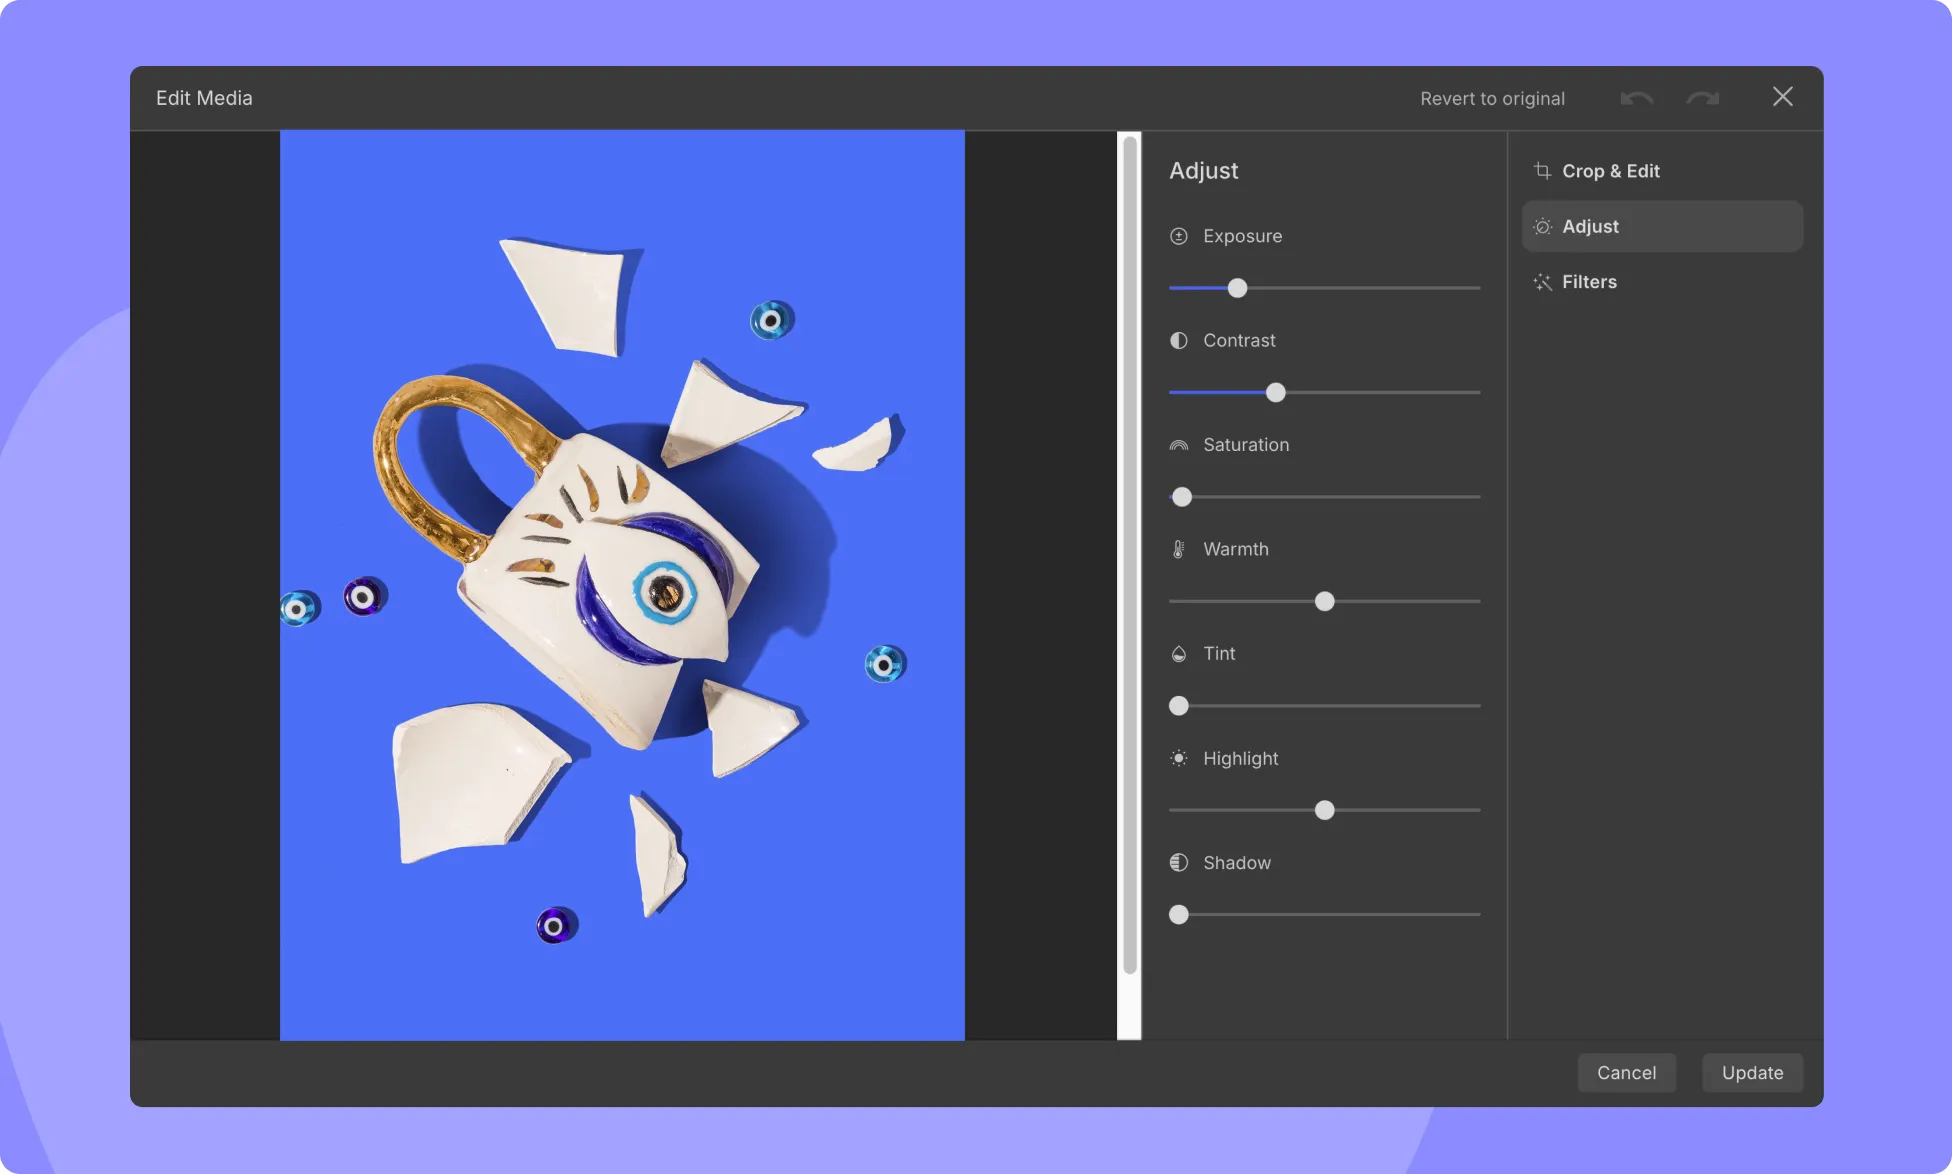
Droip comes with built-in image editing capabilities to optimize images for your website. You can crop the image to the desired size, adjust the brightness, contrast, and saturation levels, apply various filters to enhance the overall look of the image, and more!
Learn more about Droip’s built-in image editor.
Applying Effects

Effects can be utilized to enhance an image or create a specific mood or aesthetic. Here’s a brief overview of each effect that you can apply to your image:
- Opacity: The opacity property controls how transparent or opaque an element is.
- Blur: The blur property applies a blur effect to the element, making it appear out of focus.
- Brightness: The brightness property adjusts the brightness of the element.
- Contrast: The contrast property adjusts the contrast of the element.
- Saturation: The saturation property adjusts the intensity of the element’s colors.
- Invert Color: The invert property inverts the colors of the element, making it black & white, and vice versa.
- Grayscale: The grayscale property removes all color from the element, leaving a grayscale image.
- Hue Rotate: The hue-rotate property rotates the hue of the element’s colors, giving it a different color effect.
- Sepia: The sepia property applies a sepia tone to the element, giving it a vintage, yellowed effect.
Adding Links to Images
Adding links to images can be a useful way to provide additional information to users or direct them to other parts of your website or external sites. To add a link to an image:
- Click on the Link icon on the image inline editor.
- Link the image to a webpage, website, pop-up, etc.
- Choose how the link opens, such as from the same page or in a new tab.
- Optionally, specify the Rel attribute to define the relationship between the image and the linked resource.
Replacing Images
The “Replace Image” option allows you to swap an existing image with a new one:
- Click on the Replace Image button.
- Select the new image file from your computer or the media library.
Blending Modes
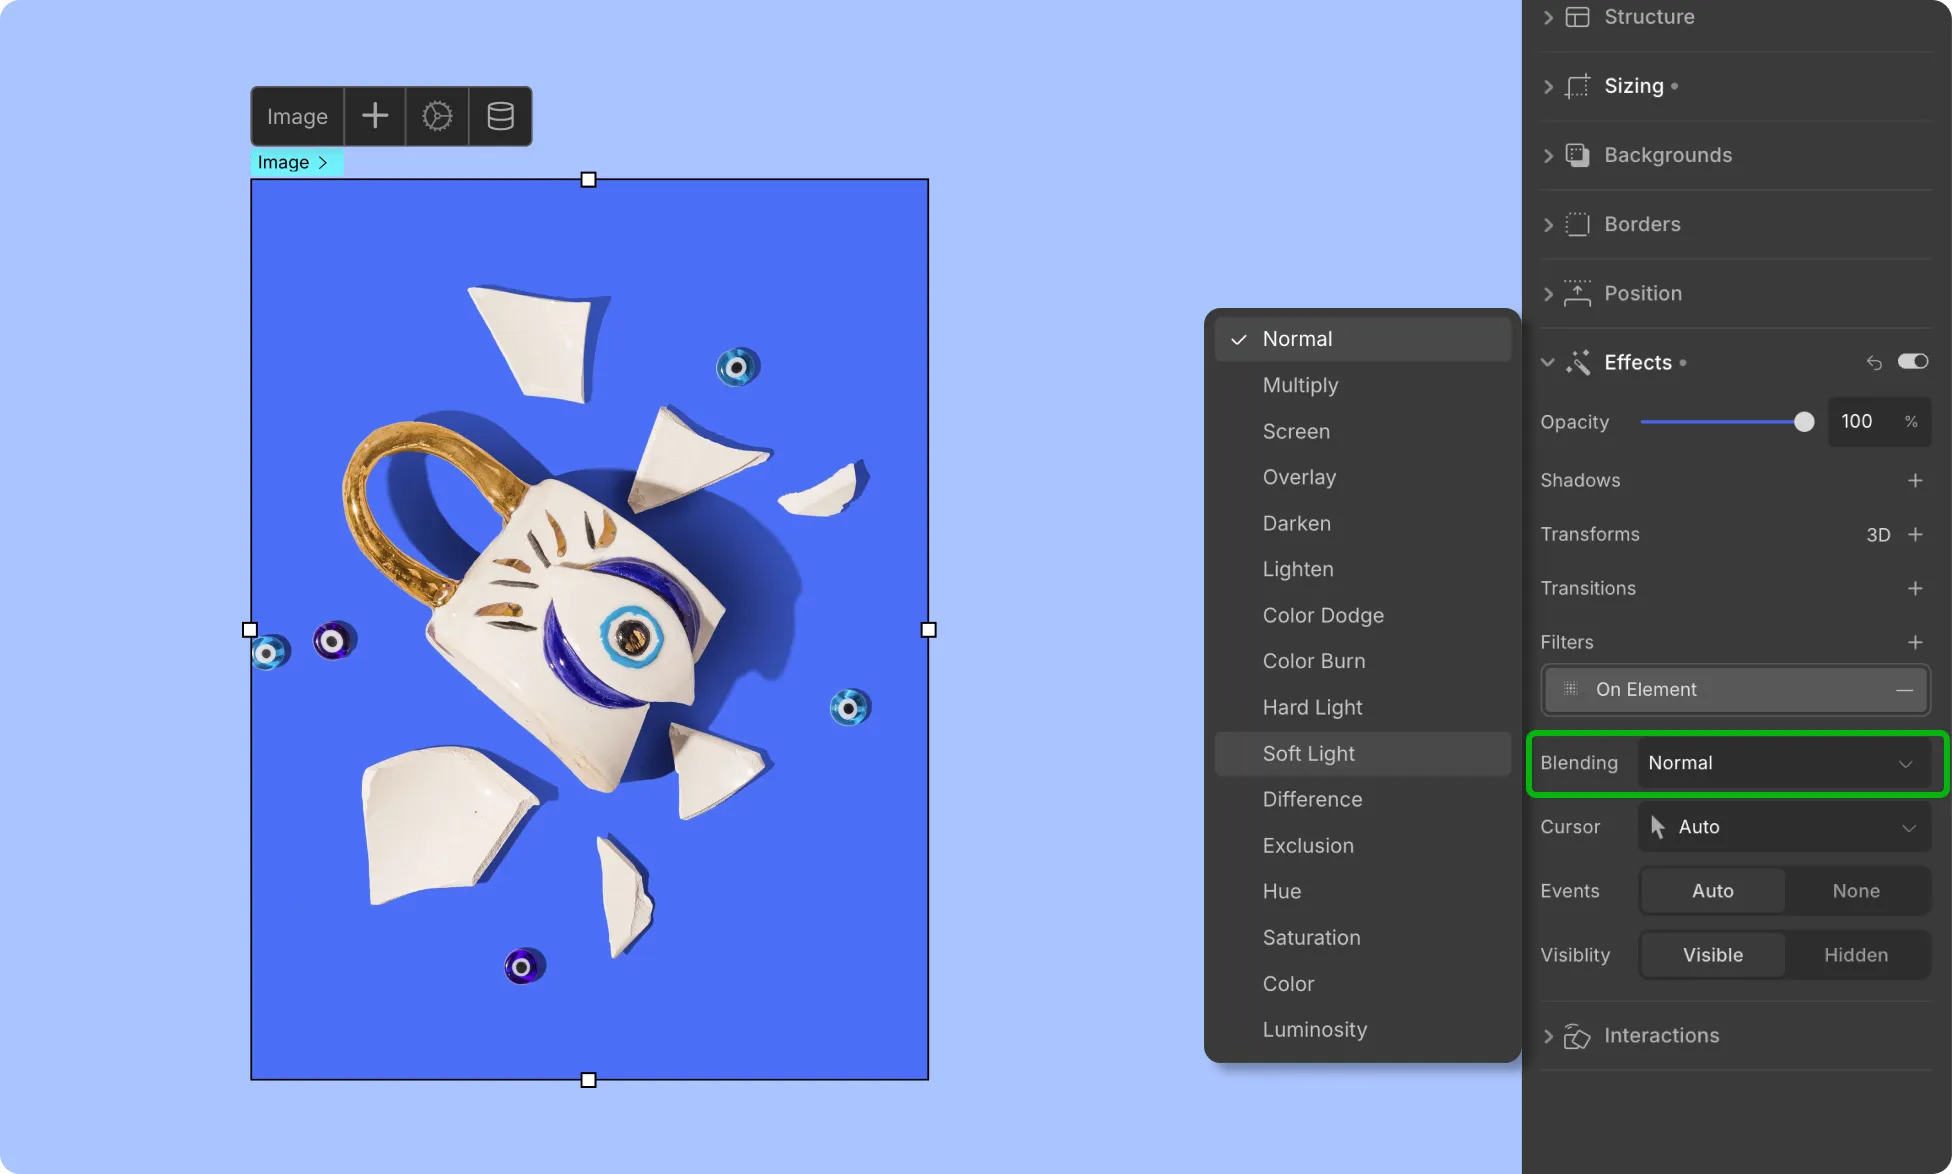
Blending Modes enable you to adjust the appearance of an image by applying different blending techniques. Each blending mode has unique properties that achieve various effects.
The available blending modes are:
- Normal: This is the default blending mode, which means that the layer’s pixels are displayed without any blending with underlying layers.
- Multiply: Multiplies the base color with the blend color, resulting in a darker color.
- Screen: Multiplies the inverse of the base color with the inverse of the blend color, resulting in a lighter color.
- Overlay: Combines Multiply and Screen blending modes, depending on the brightness of the underlying layers.
- Darken: Compares the colors of the base and the blend layers and selects the darker of the two.
- Lighten: Compares the colors of the base and the blend layers and selects the lighter of the two.
- Color Dodge: Lightens the base color by decreasing the contrast between the base and blend colors.
- Color Burn: Darkens the base color by increasing the contrast between the base and blend colors.
- Hard Light: Lightens or darkens the underlying pixels depending on the brightness of the blend color.
- Soft Light: Similar to Overlay, but with a softer and more subtle effect.
- Difference: Subtracts the blend color from the base color, resulting in an image that highlights the differences between the two.
- Exclusion: Creates an effect similar to the Difference mode, but with lower contrast and less color intensity.
- Hue: Applies the hue of the blend color to the base color, while using the saturation and luminosity of the base color.
- Saturation: Applies the saturation of the blend color to the base color, while using the hue and luminosity of the base color.
- Color: Applies the hue and saturation of the blend color to the base color, while using the luminosity of the base color.
Image Settings
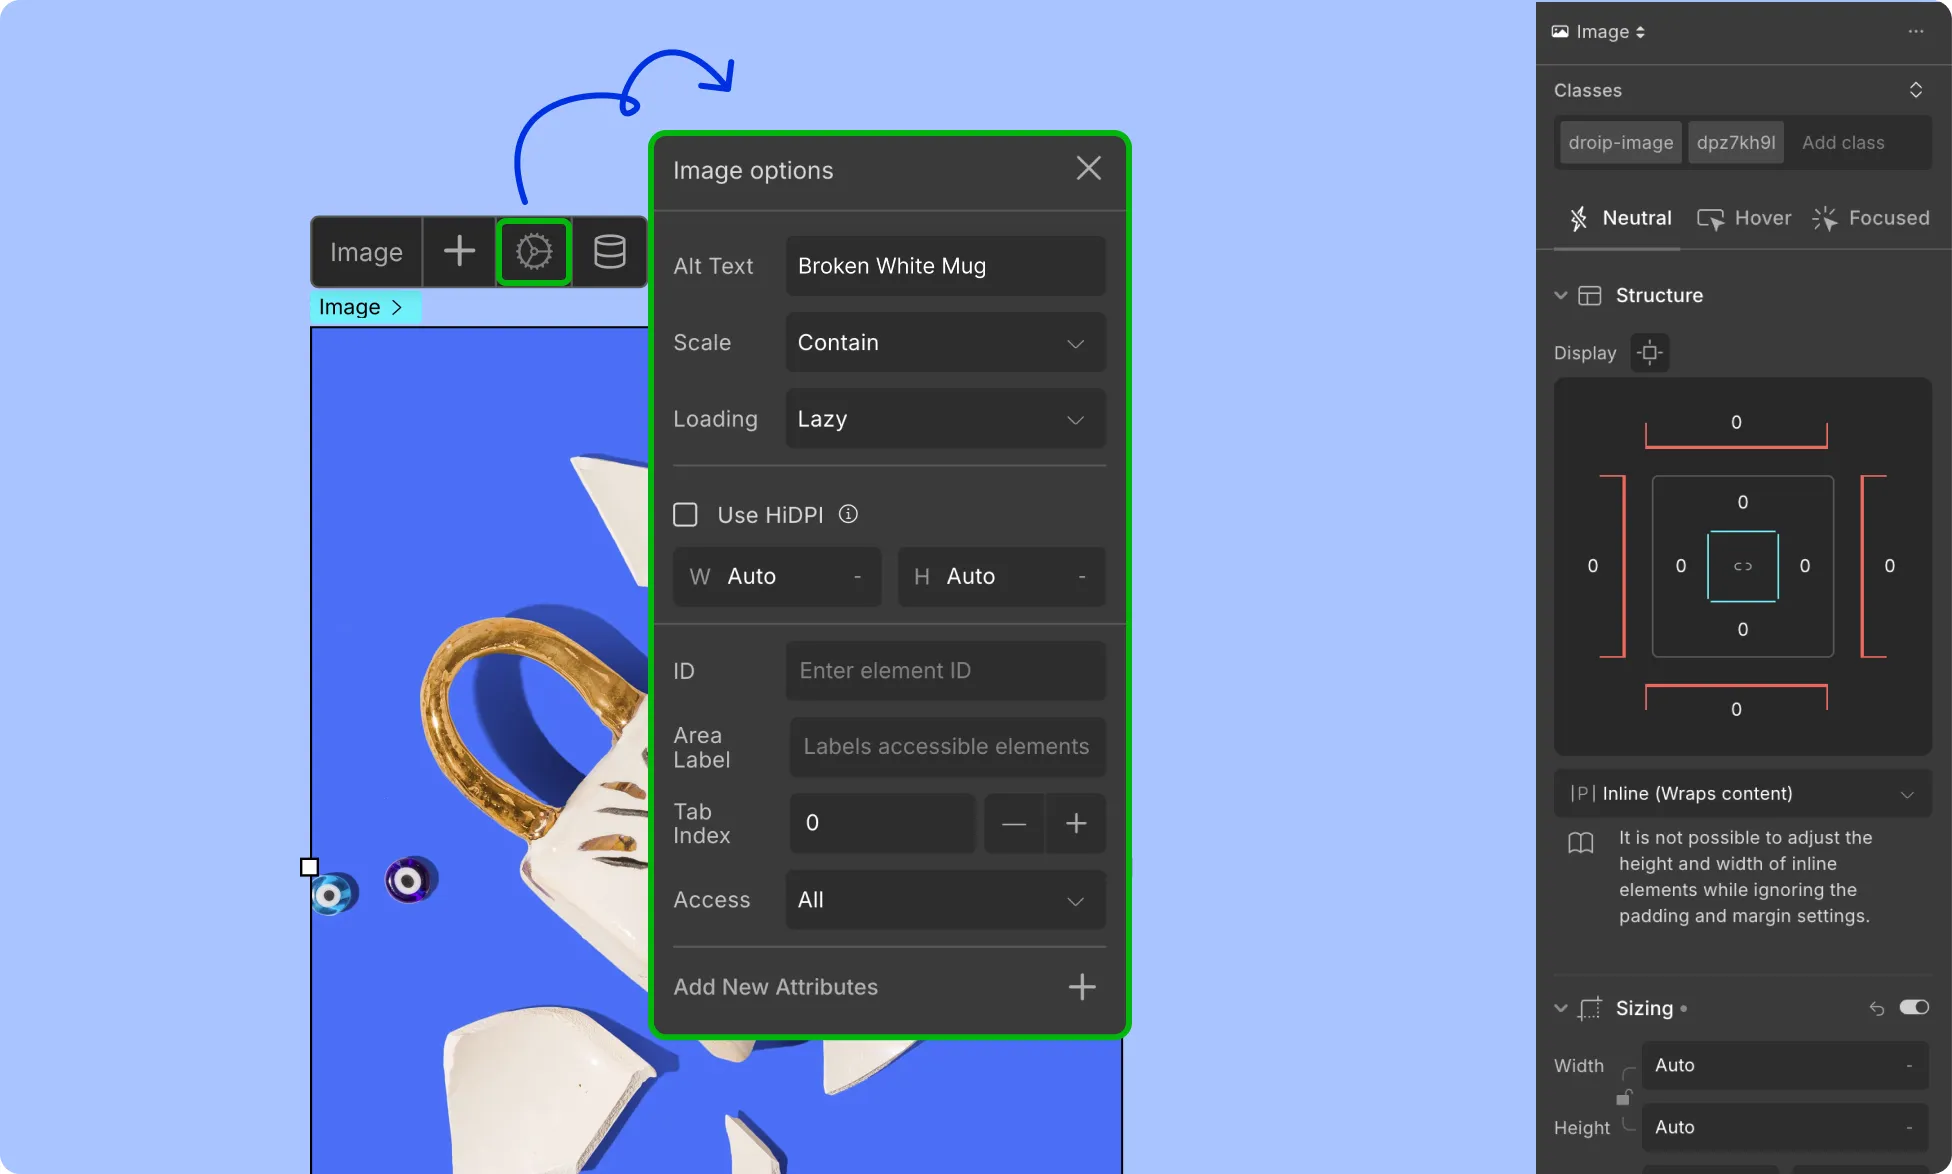
First up in the Image Settings, you get a drop-down to choose how you want to display the image. These options allow you to control how an image is displayed on a website by adjusting its size and position within a designated space.
- Fill: This option resizes the image to fill the available space maintaining the aspect ratio of the image. Potentially cropping the image if its aspect ratio does not match the available space.
- Contain: This option resizes the image so that it fits within the available space without cropping the image. It always shows the whole image, even if that leaves a little space to the sides or bottom.
- Cover: This option resizes the image to completely cover the available space even if this means stretching or distorting the image to cover the entire space.
- Initial: This option sets the image to its original size, without resizing it. This means that the image will be displayed at its original dimensions, regardless of the available space.
Rotate button: The “rotate” option in image settings allows you to rotate an image by 15 degrees per rotation.
Load: Set how you want your images to load when a user visits this web page using this option.
- Auto: Auto set the method to load the images.
- Eager: Load images without delay as per usual. This is the default option.
- Lazy: Put off loading images until they’re nearly within viewport distance.
Width: Define the width of your image.
Height: Define the height of your image.
Add ALT Text: This option allows you to add alternative text that describes the content or purpose of the image. Adding alt text to images is important for accessibility and SEO.
Attachment: The Attachment option controls how the image is positioned relative to the surrounding content as the user scrolls the page.
It offers two values:
- Scroll: With this option, the image will scroll along with the content as the user scrolls the page.
- Fixed: With this option, the image will remain fixed in position on the page, even as the user scrolls.
The Attachment option can be useful for creating certain visual effects or layouts, depending on the specific design and content of the website.
For example, using the “fixed” option for a header or background image can create a parallax scrolling effect, where the background image appears to move more slowly than the rest of the content as the user scrolls, creating a sense of depth and motion. On the other hand, using the “scroll” option for an image within a block of text can help ensure that the image remains in the correct position relative to the text as the user scrolls.
Was this page helpful?