Color your Typography, Backgrounds, Stroke, and more in any way you desire using Droip’s highly sophisticated Color options!
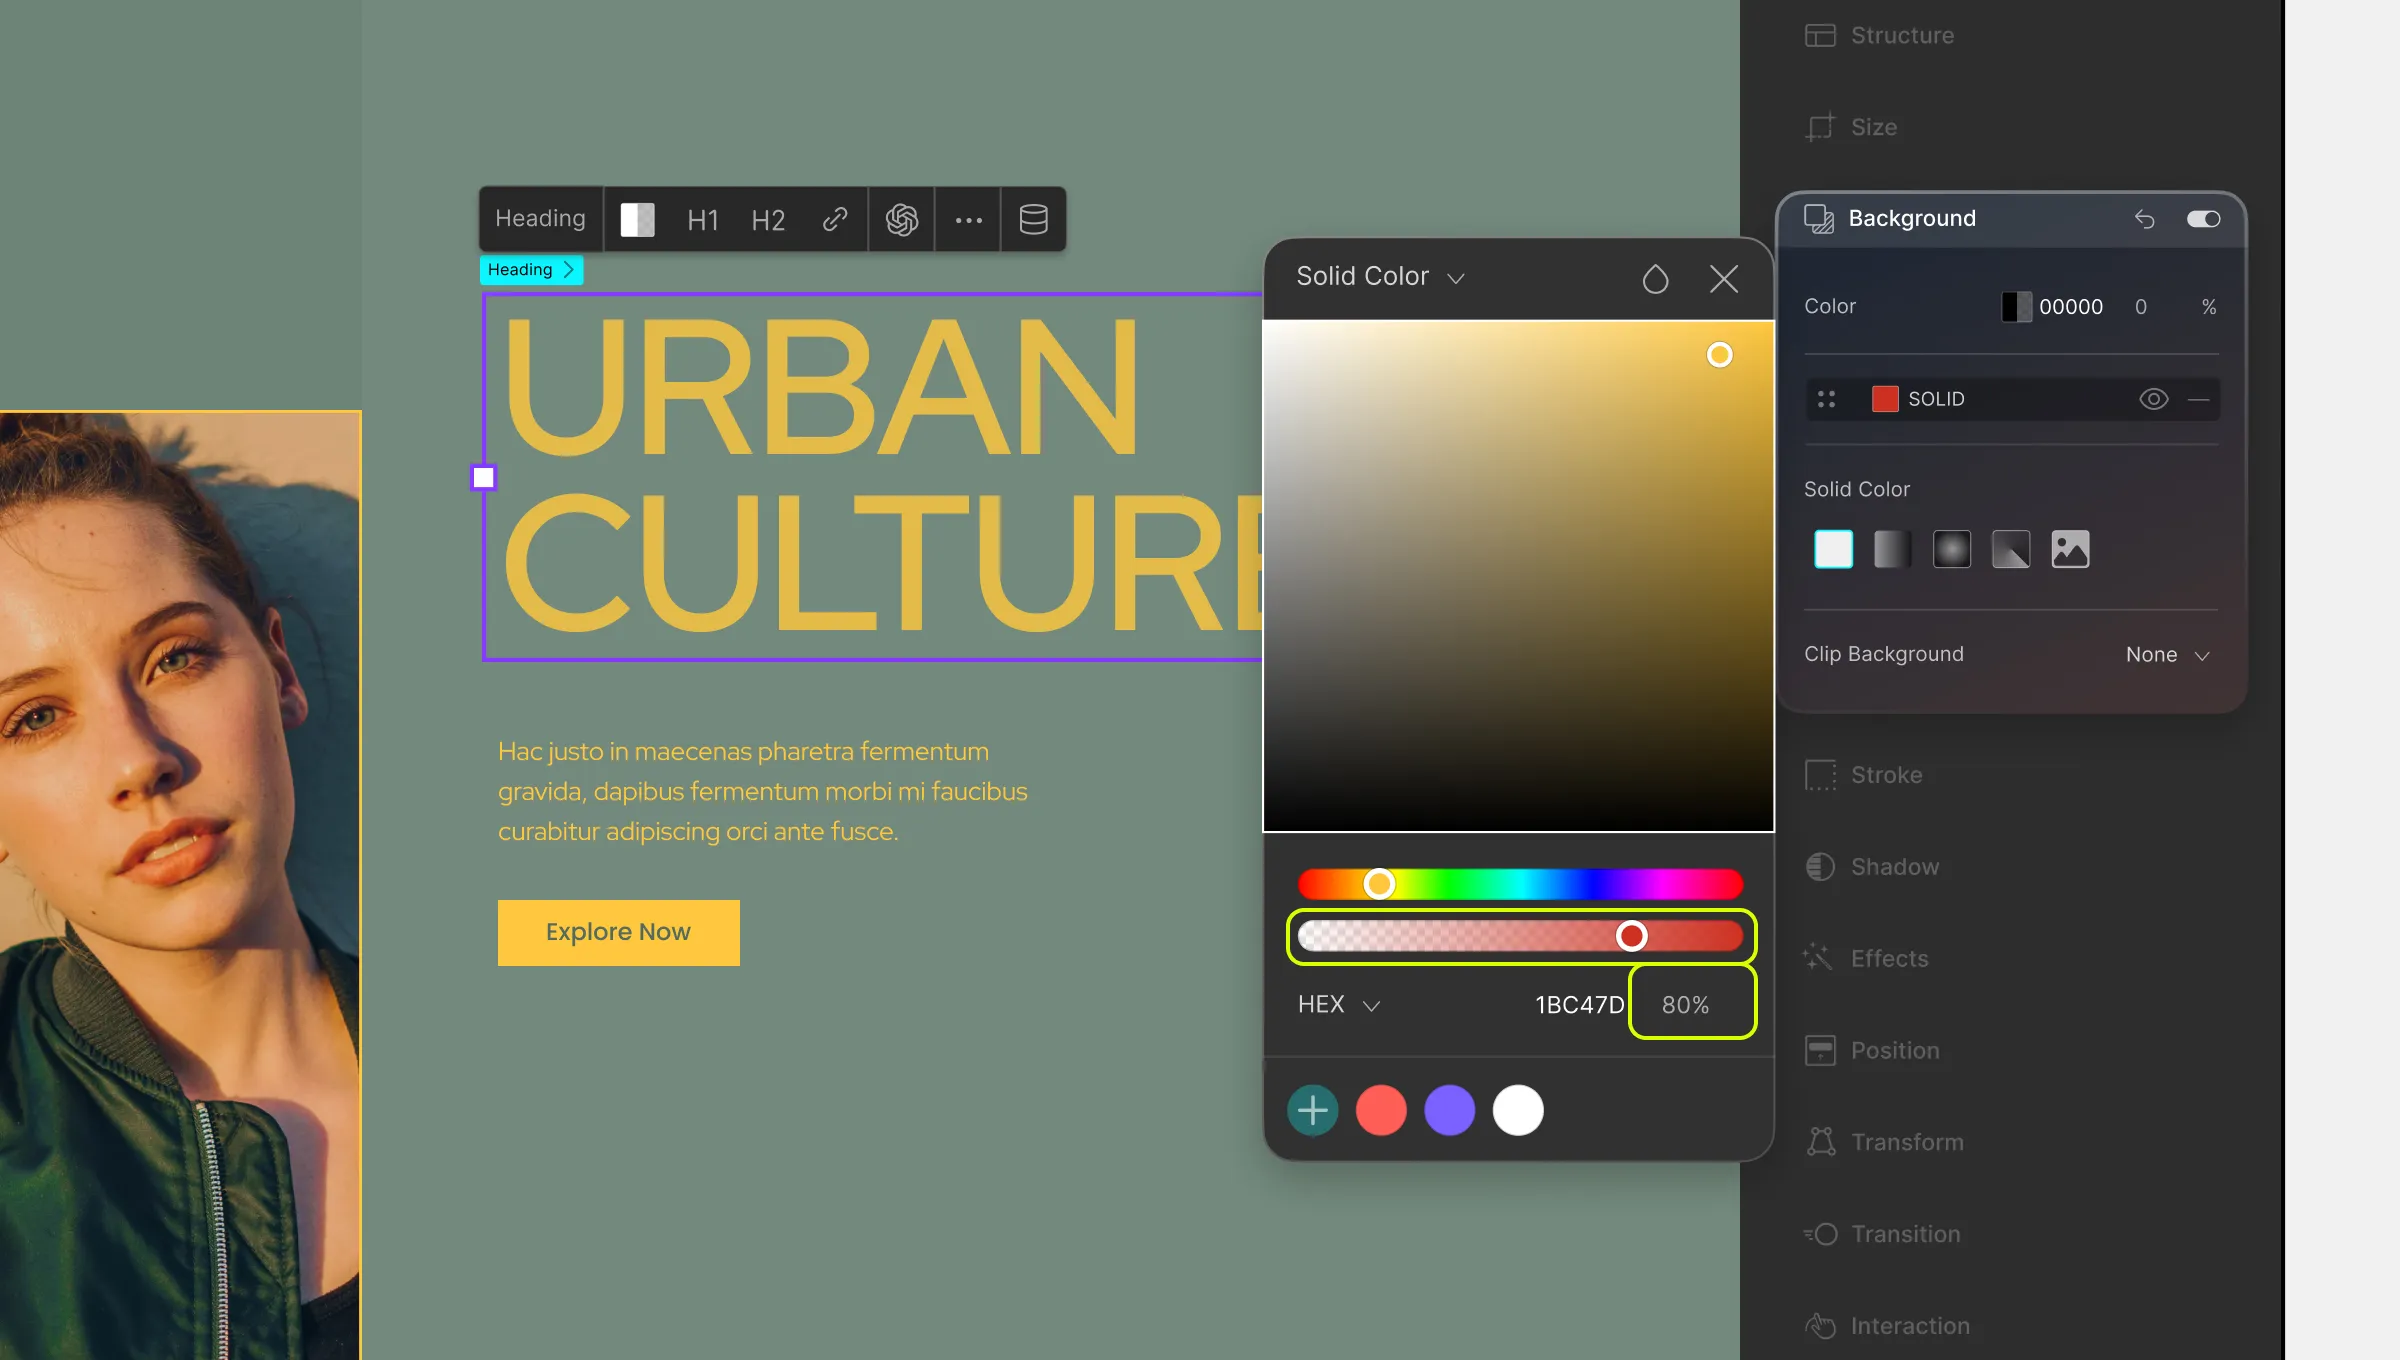
Use these settings to give your elements’ text or background a simple solid color. Or, go all out by using any one of three gradient styles to add an extra flair to your element!
Color Picker
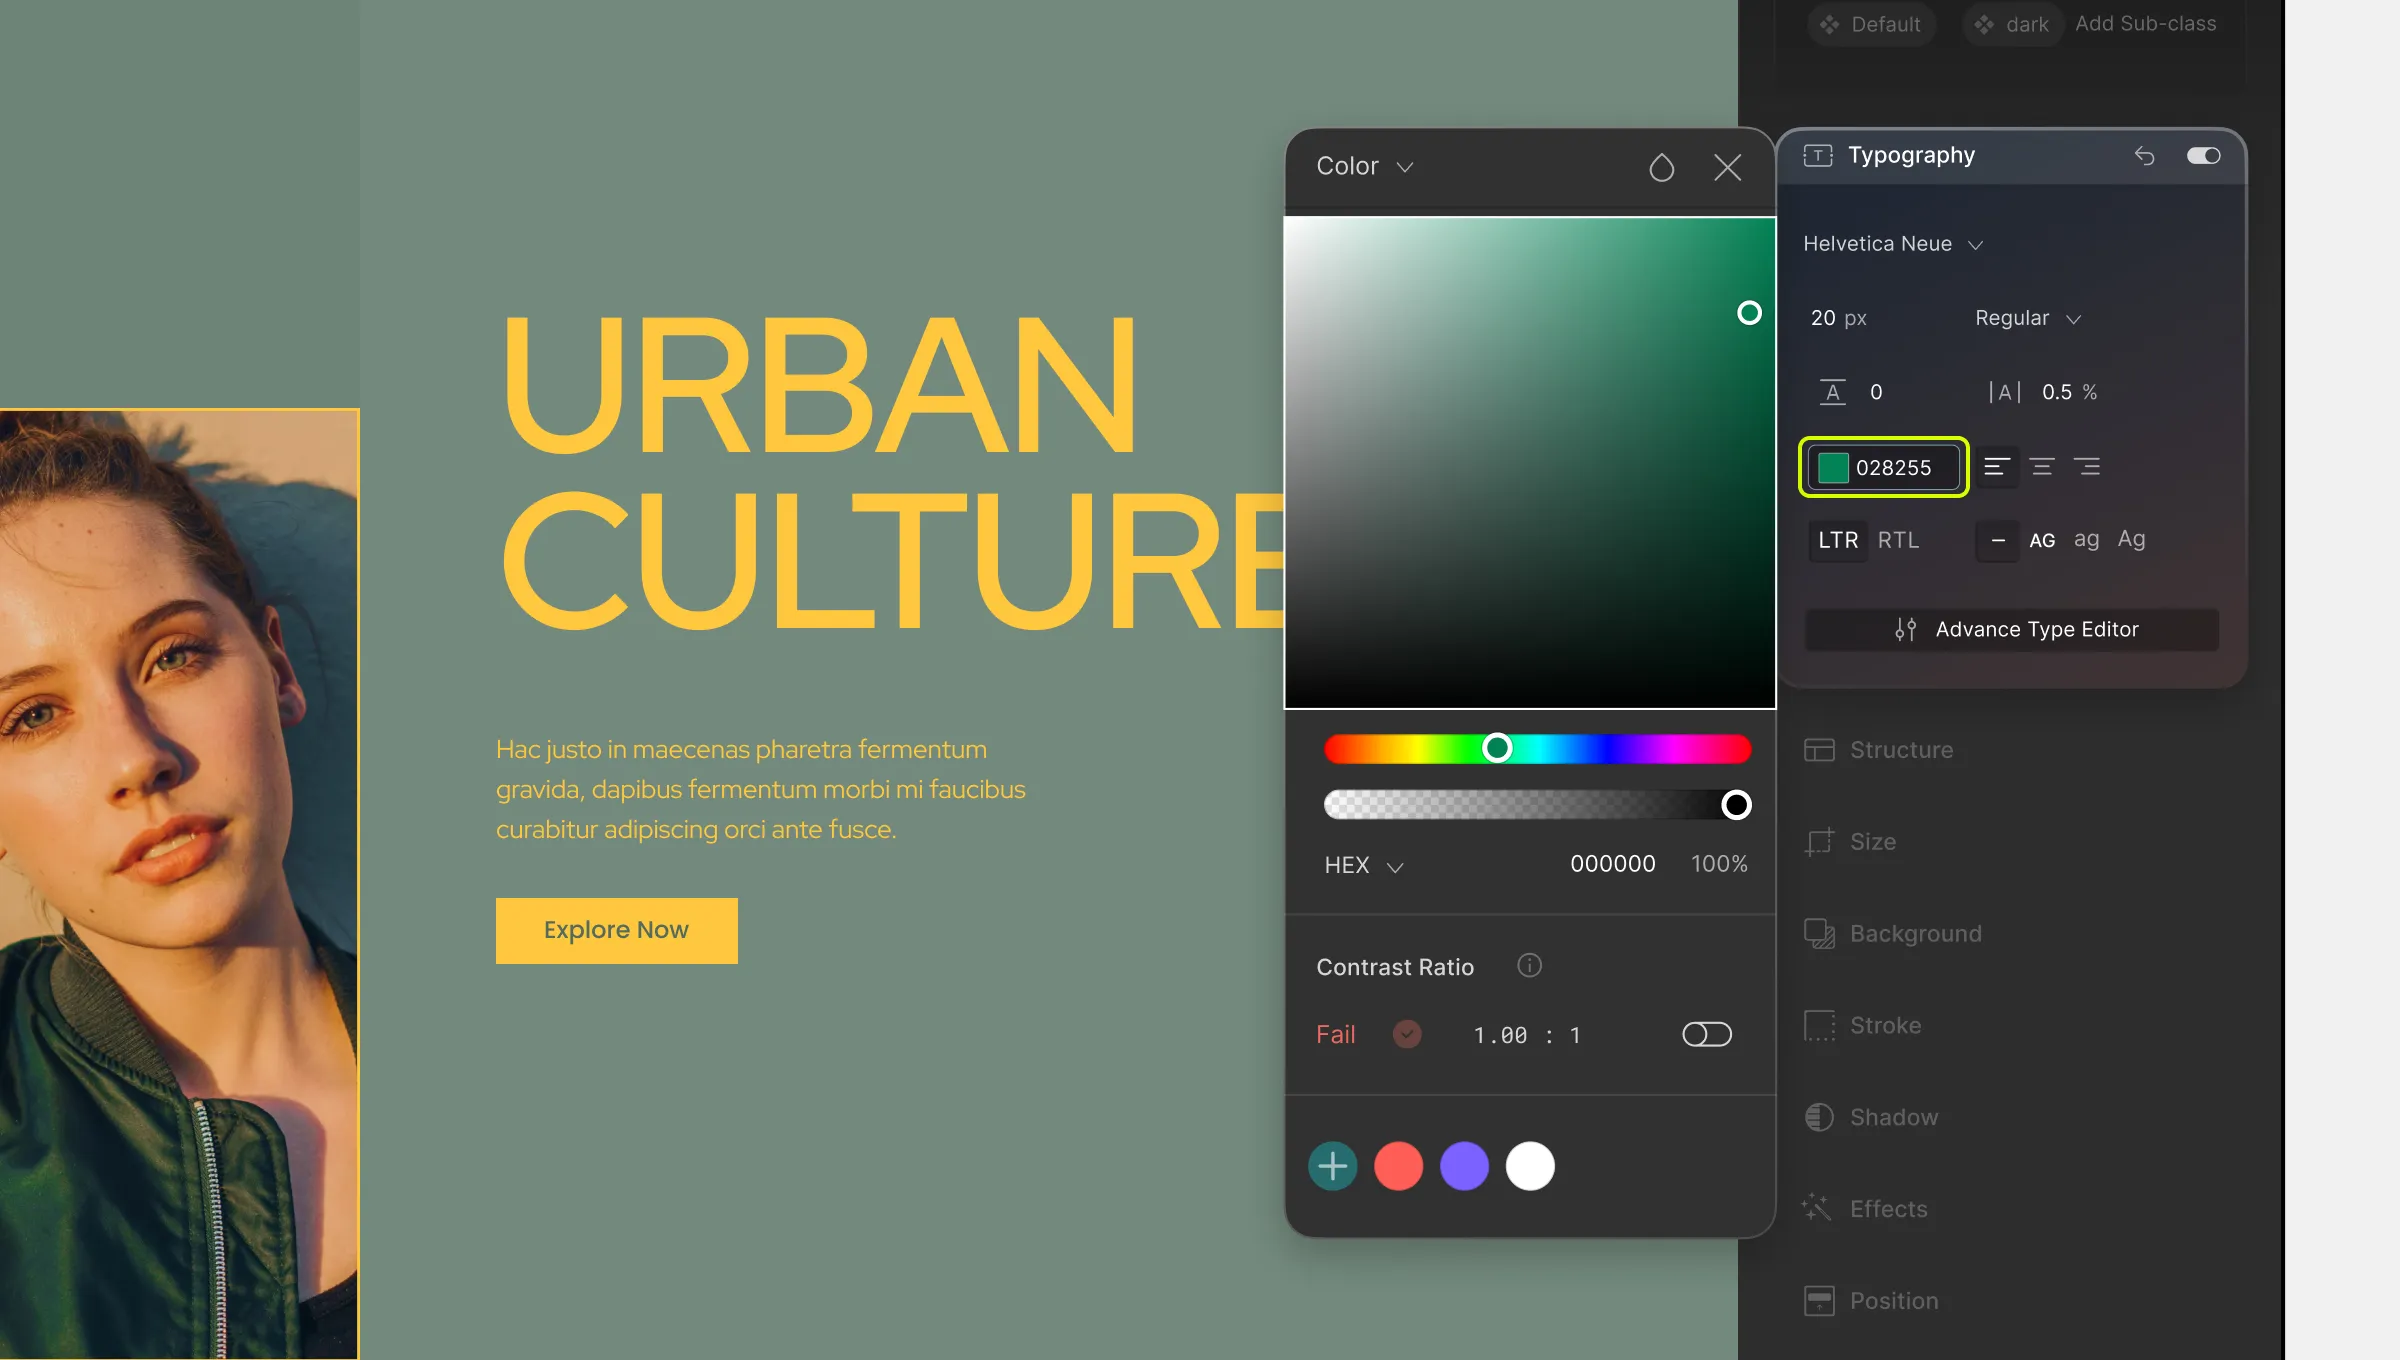
Using Color Picker, you can choose a solid color for your element’s style. To open, simply select the element and go to the relevant section on the Style Panel that you want to customize (Typography, Background, etc), and click on the Color option.
Pick a Color
To pick a color, do one of the following:
- Drag the rainbow color slider to a hue of your choice and select a shade from the color canvas.
- Or simply enter the color value in the field below. Use the dropdown to select HEX or RGB format.
Set Opacity
You can also use the second color slider to adjust your color’s opacity. You should be able to see its percentage value displayed on the right of the color value input field.
Contrast Ratio
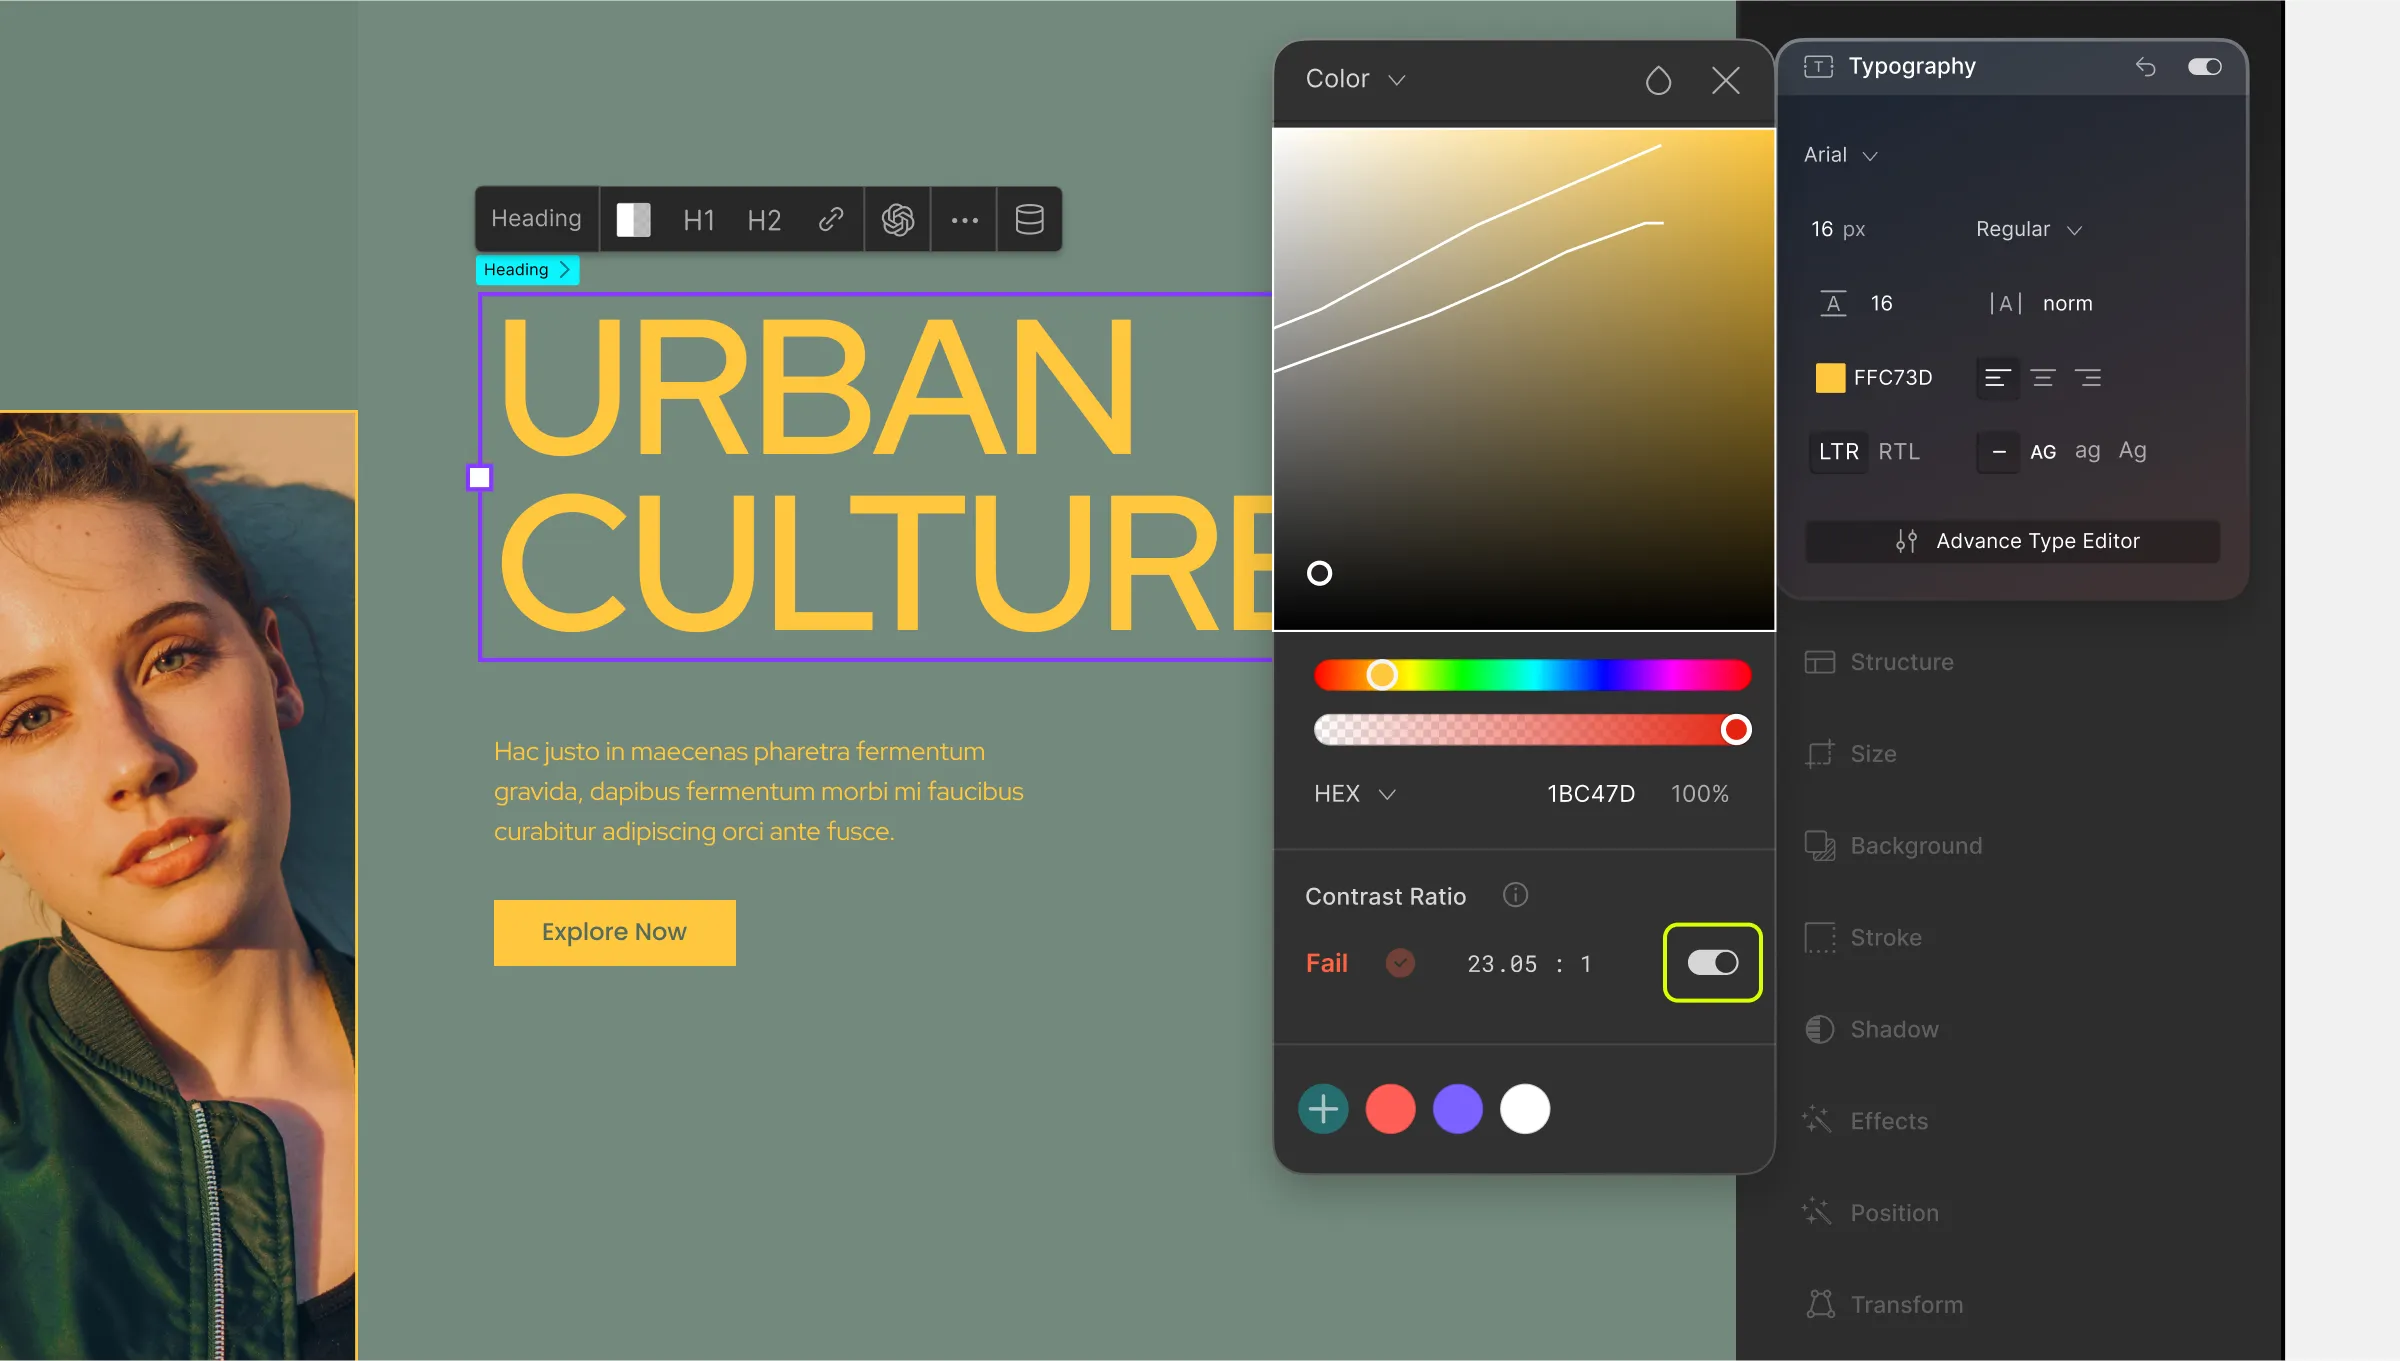
When you choose any color, you’ll also be able to see the color Contrast Ratio and the WCAG (Web Content Accessibility Guidelines) rating from the Color Picker.
This will make it easier to ensure that your page’s design is accessible and user-friendly.
You can also use the toggle on the right to see the contrast ratio division lines. These can help you easily identify the low-contrast, mid-contrast, and high-contrast colors.
Color Swatch
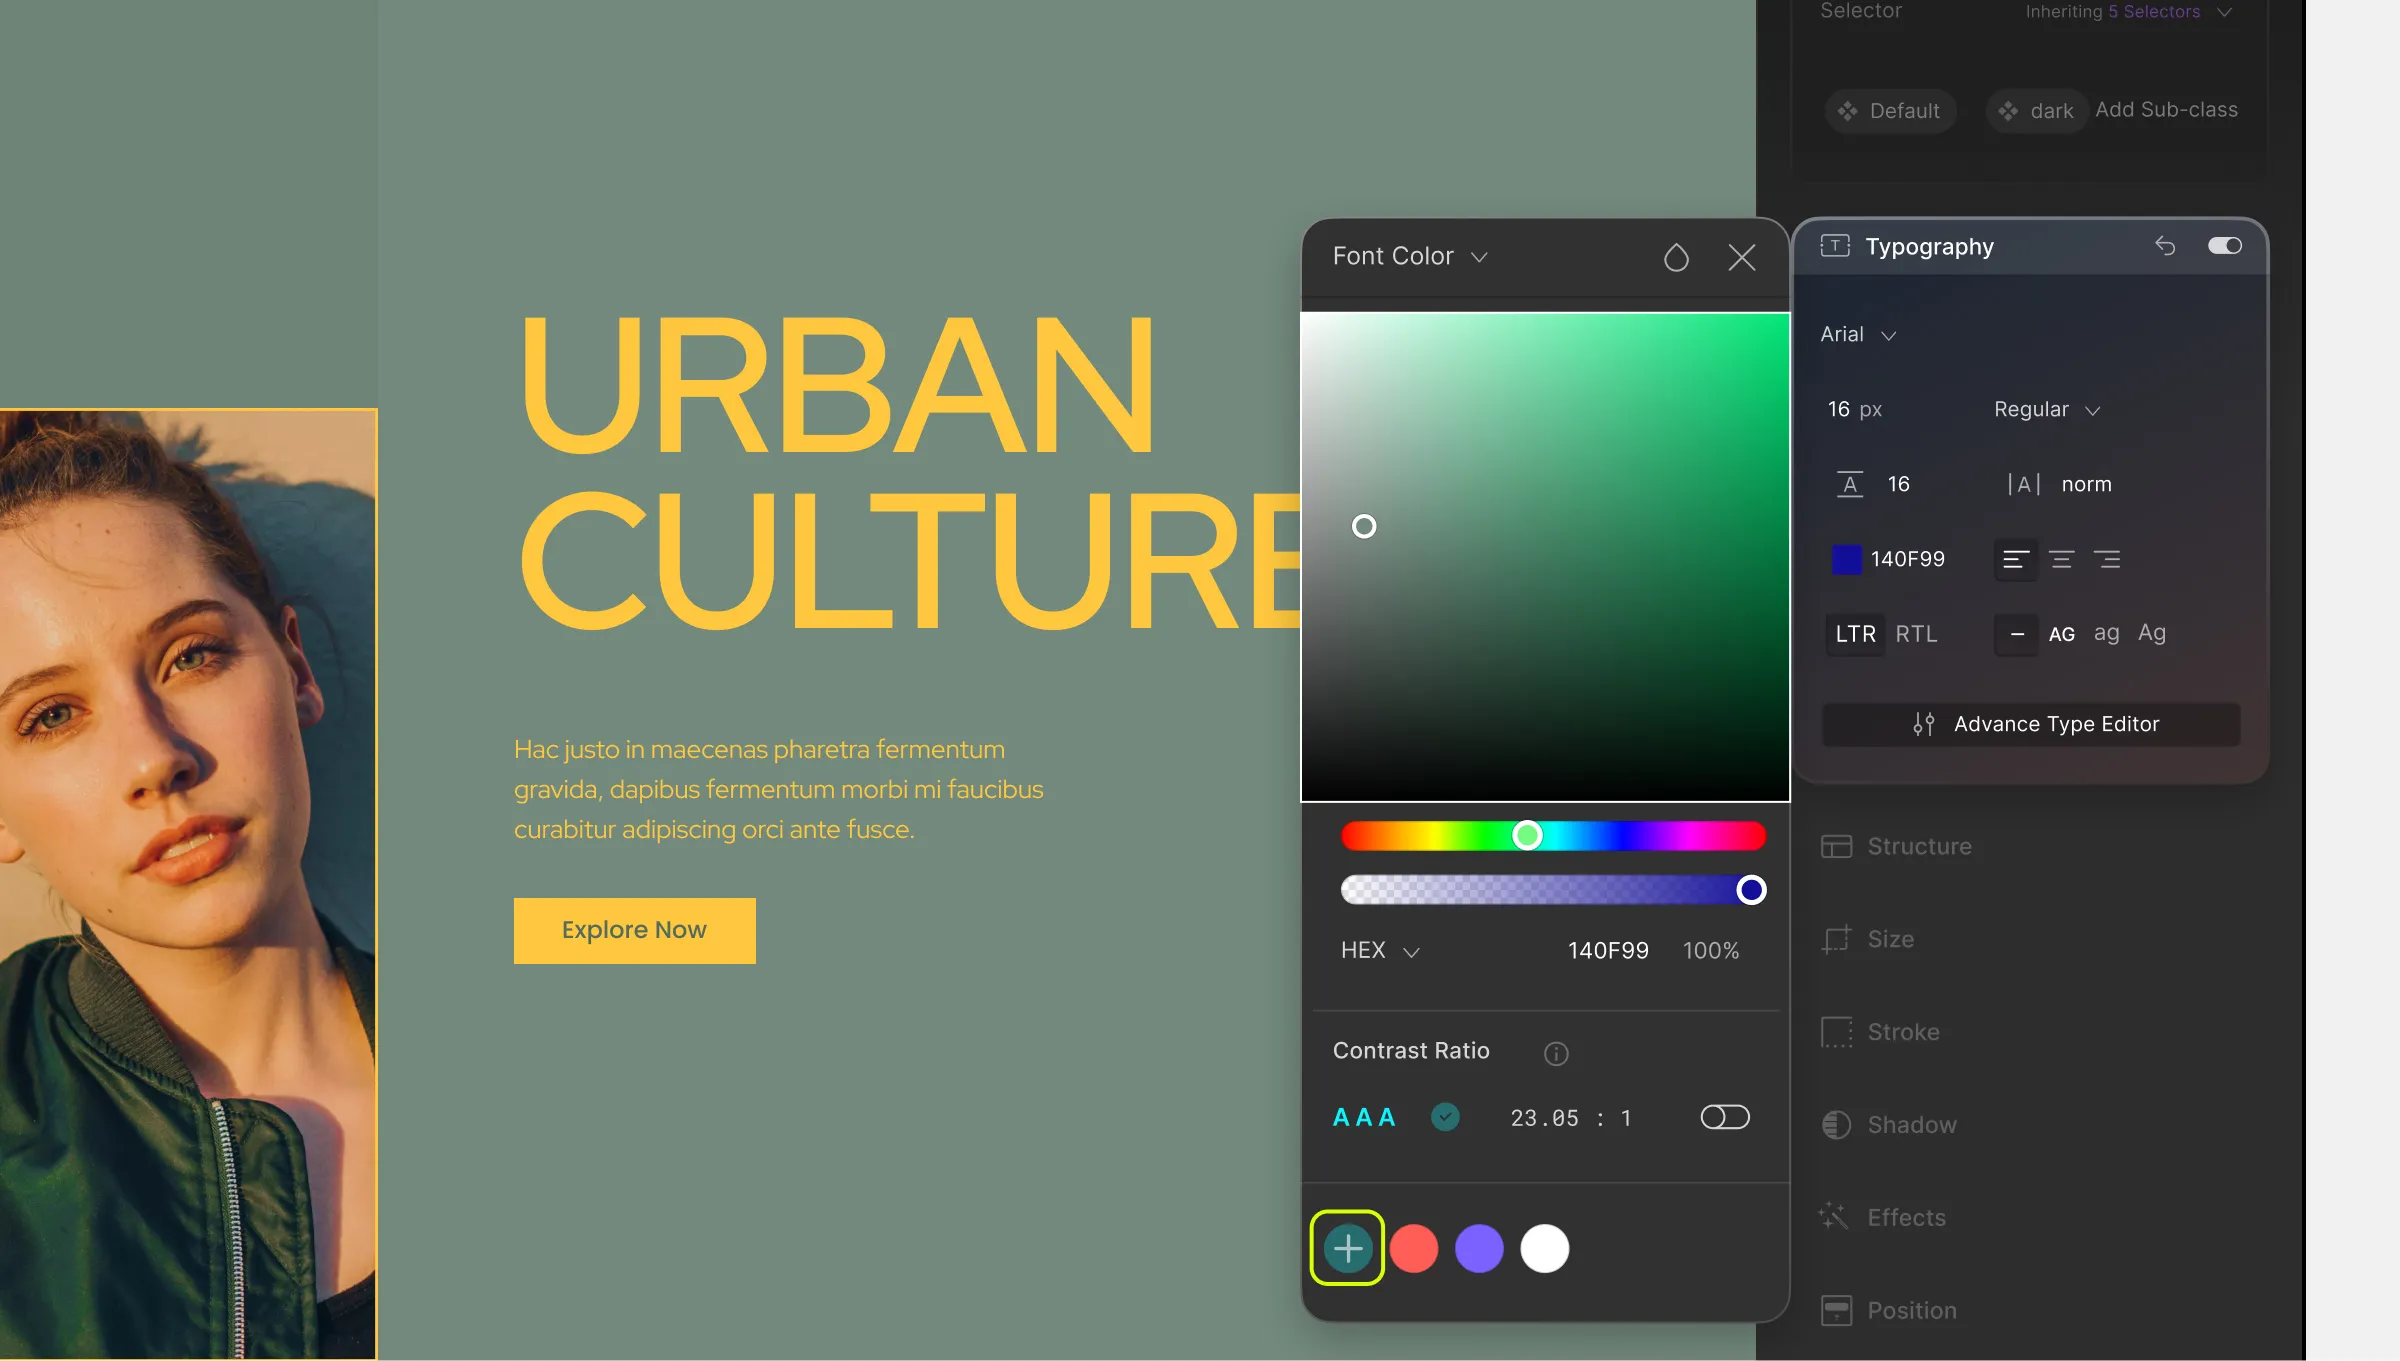
Lastly, we have the Color Swatch where you can add colors to create your own Color Palette. This will make it easier for you to access the colors that you frequently need throughout the design process.
To add one, select your color and then click on the + icon at the bottom. The swatch works like a queue where you’ll be able to add up to seven colors and once you cross this limit, the oldest saved color will be removed from the swatch to make space for a new one.
Gradients
Now let’s go over the three Gradient variations we have available:
- Linear: Gradient with color transition in one direction based on a defined angle.
- Radial: Gradient with color transition in the shape of a circle i.e. radiating from the center.
- Conic: Gradient with color transitions rotated around a center point.

To access the Gradient panels, open the dropdown in the top left corner and select any one of the three gradient styles.
Linear Gradient
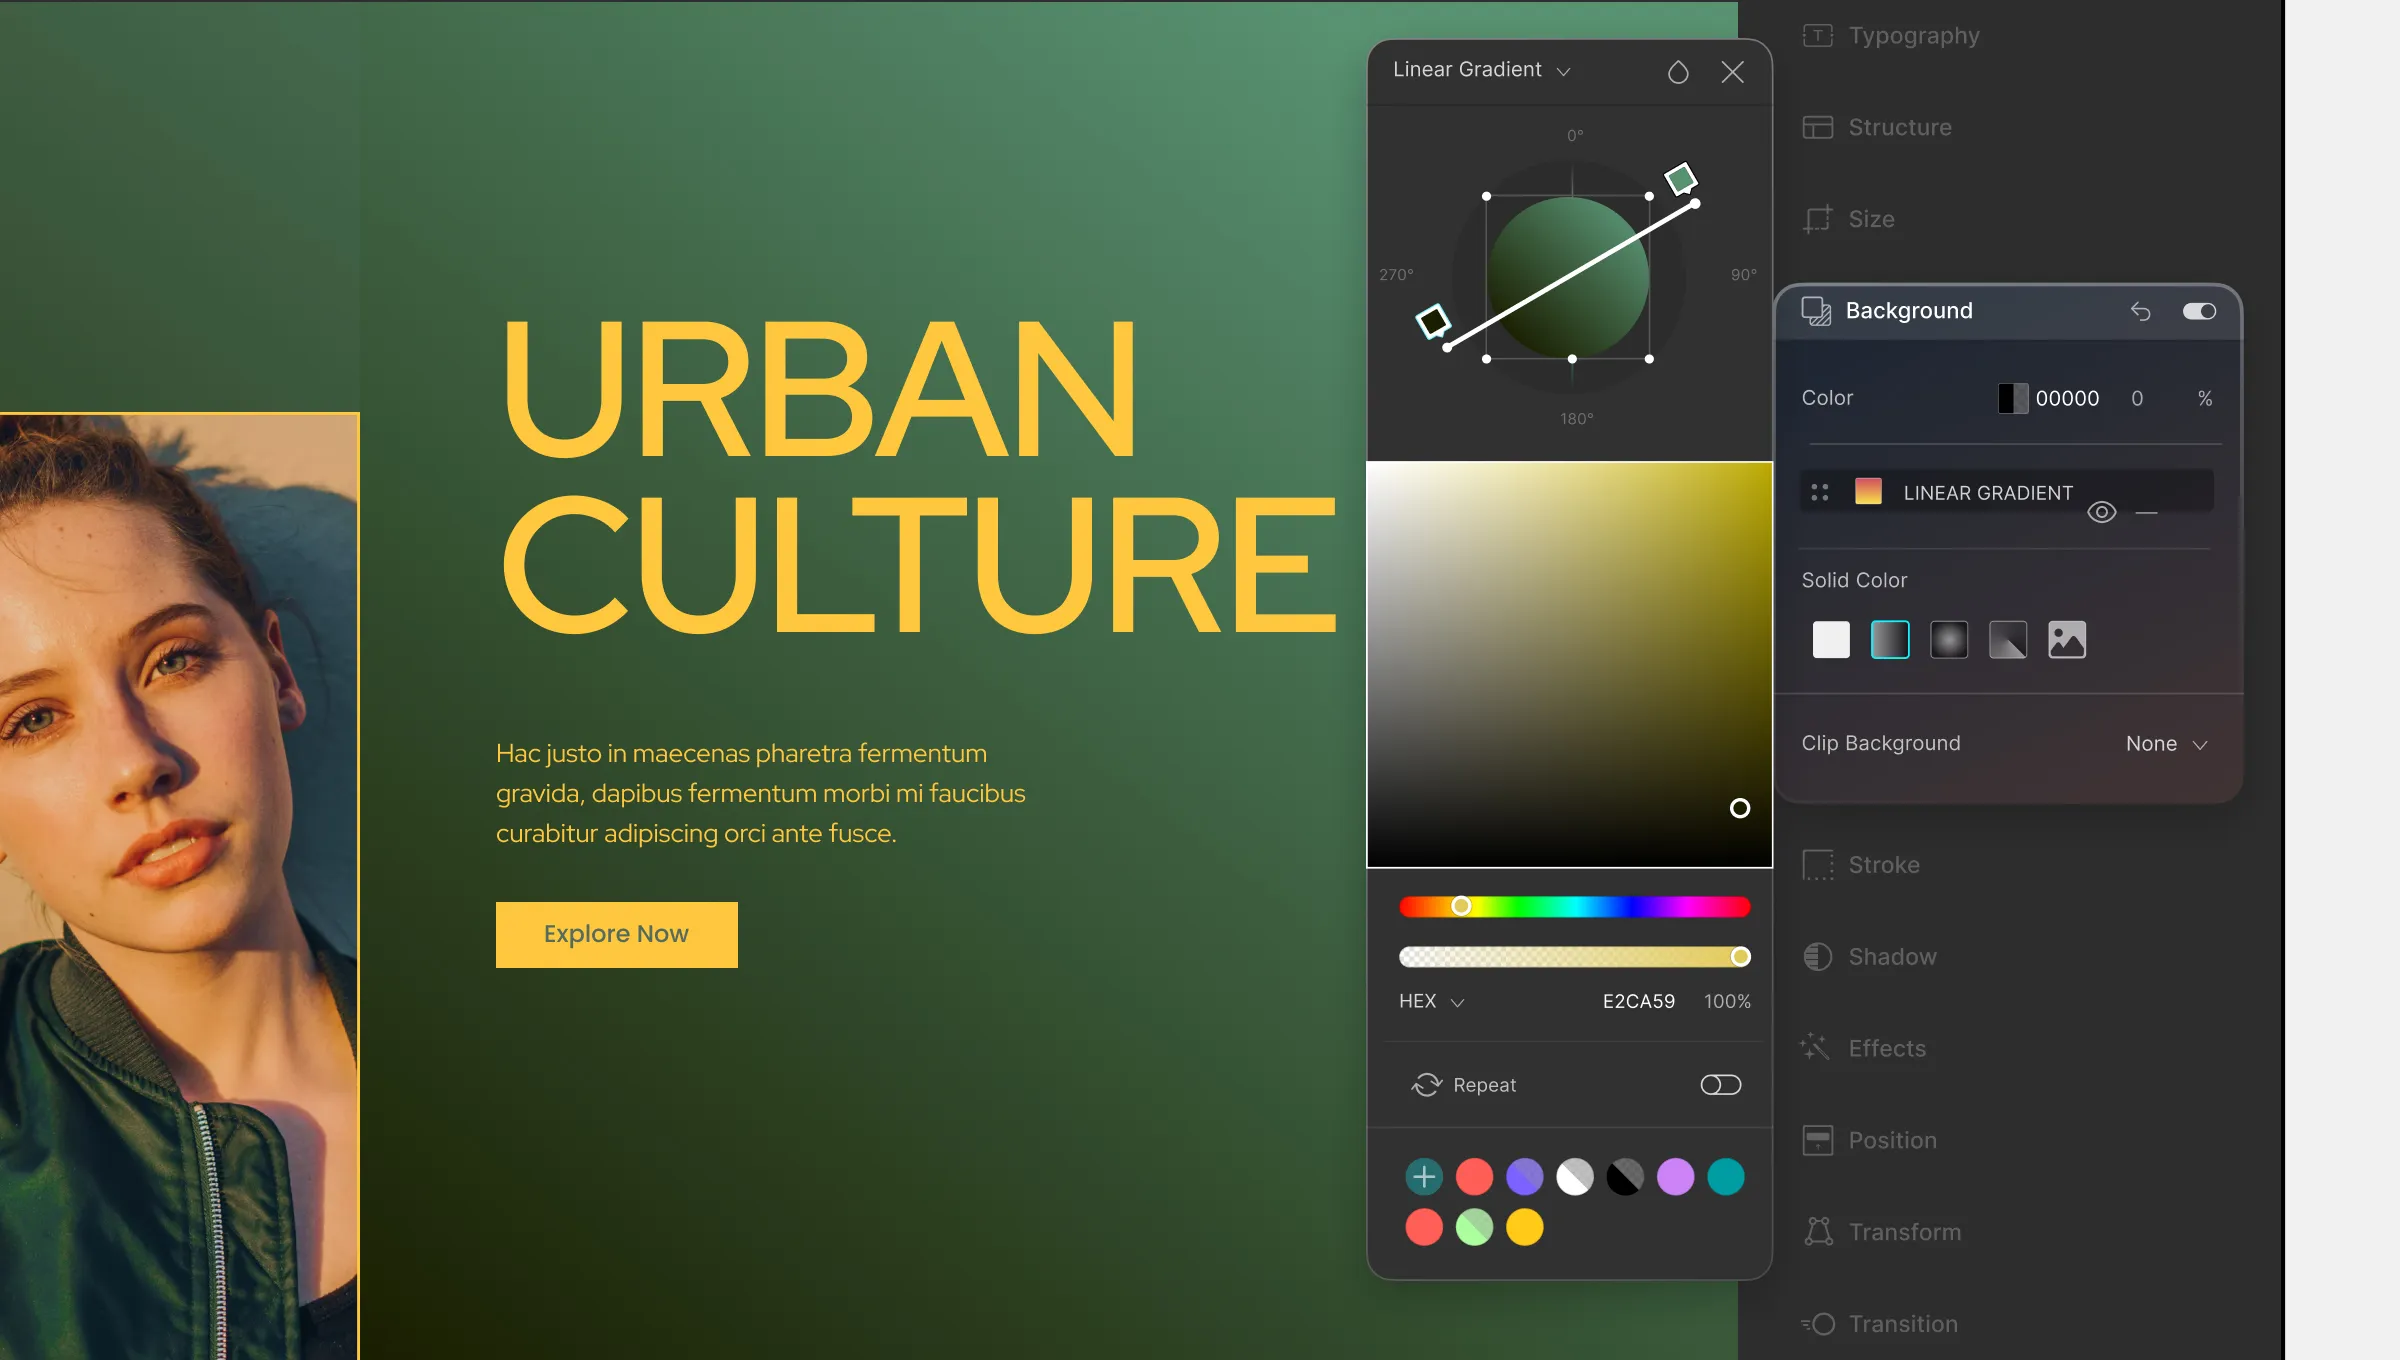
On the Linear Gradient window, you’ll see the usual features like the color canvas, color sliders, etc. What’s new here is the Gradient Ramp.
Picking a Color for a Color Stop:
To pick a color, click on any color stop to select it, and then choose your color using either color sliders and the color canvas or by directly defining the color code.
Repeat the same process to pick colors for all the other color stops.
Adding a Color Stop:
By default, you should have two color stops (start & end) to work with but you can add more by clicking anywhere on the gradient ramp.
You can remove these extra stops by selecting them and pressing the delete button.
You can also drag the color stops along the ramp to adjust the location from where they’ll start or end.
Setting the Angle:
You should notice that the gradient ramp overlays a circular shape marked with the angles 0, 90, 180, and 270 degrees. By default, the angle is zero i.e. the gradient is horizontal. To change it, simply grab any one of the ends of the gradient ramp and drag it up or down.
The circle shape will reflect all of these customizations you apply to your gradient so you’ll be able to see what it will look like.
Repeat:
Right below the color sliders, you should notice a new toggle called Repeat.
When the “Repeat” option is enabled, the gradient pattern will repeat itself seamlessly, creating a continuous effect.
This means that for a Linear Gradient, suppose you have two color stops at the start and end points, enabling “Repeat” will cause the gradient to repeat in a seamless manner as it progresses beyond the endpoint, creating a repeating pattern.
Radial Gradient
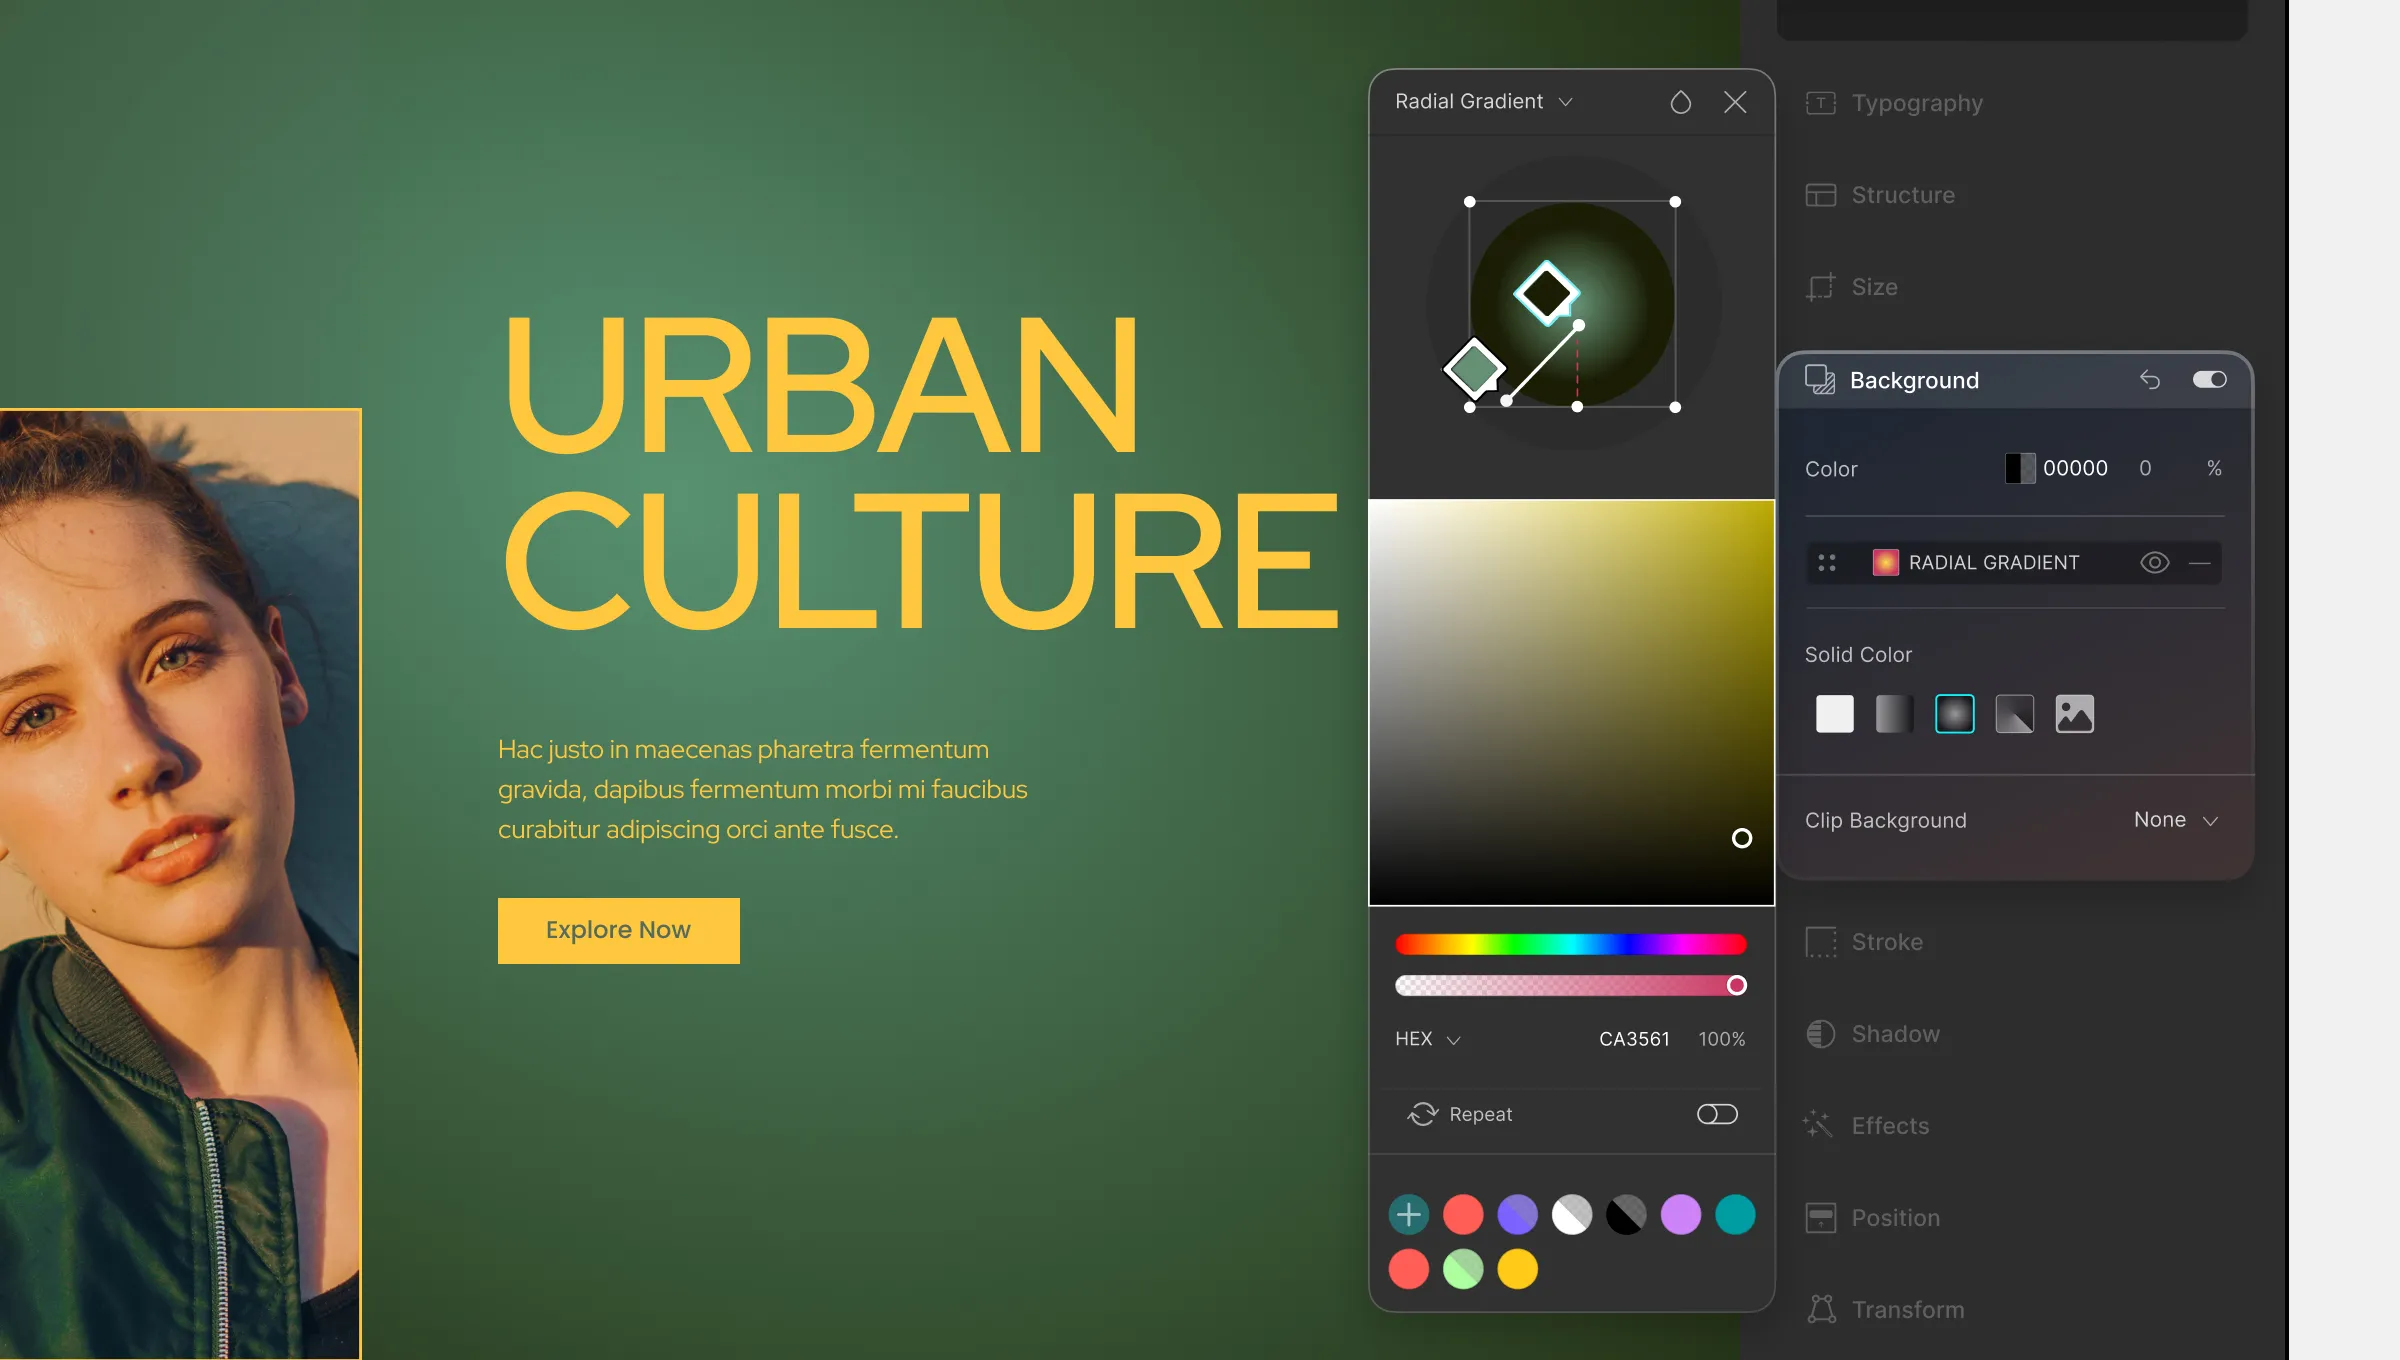
Next, we have Radial Gradient. Here, you’ll once again see familiar tools as well as the Radial Gradient tool. This tool, while looking very different, works similarly to the Linear Gradient tool.
Picking a Color for a Color Stop:
To pick a color, simply click on any color stop to select it. Then choose your color using the usual methods. Repeat the same process to pick colors for all the other color stops.
Adding a Color Stop:
By default, you should have two color stops (start & end) to work with. To add more, simply click anywhere on the gradient ramp.
And to remove a color stop, just select it and press the delete button.
Adjusting the Centerpoint & Spread:
To change the position of the gradient’s center point (starting point), click on the center handle and drag it as shown above.
And to adjust how much the gradient should spread outwards, click & drag the two end-points. Dragging the vertical handle will adjust the vertical spread and dragging the horizontal handle will adjust the horizontal spread.
Repeat:
Right below the color sliders, you should notice a new toggle called Repeat.
When the “Repeat” option is enabled, the gradient pattern will repeat itself seamlessly, creating a continuous effect.
Similar to Linear Gradient Repeat, for Radial Gradient, enabling “Repeat” will cause the same set of color stops to repeat in a seamless manner as it progresses beyond the endpoint, creating a repeating pattern but radiating from the center instead.
Conic Gradient
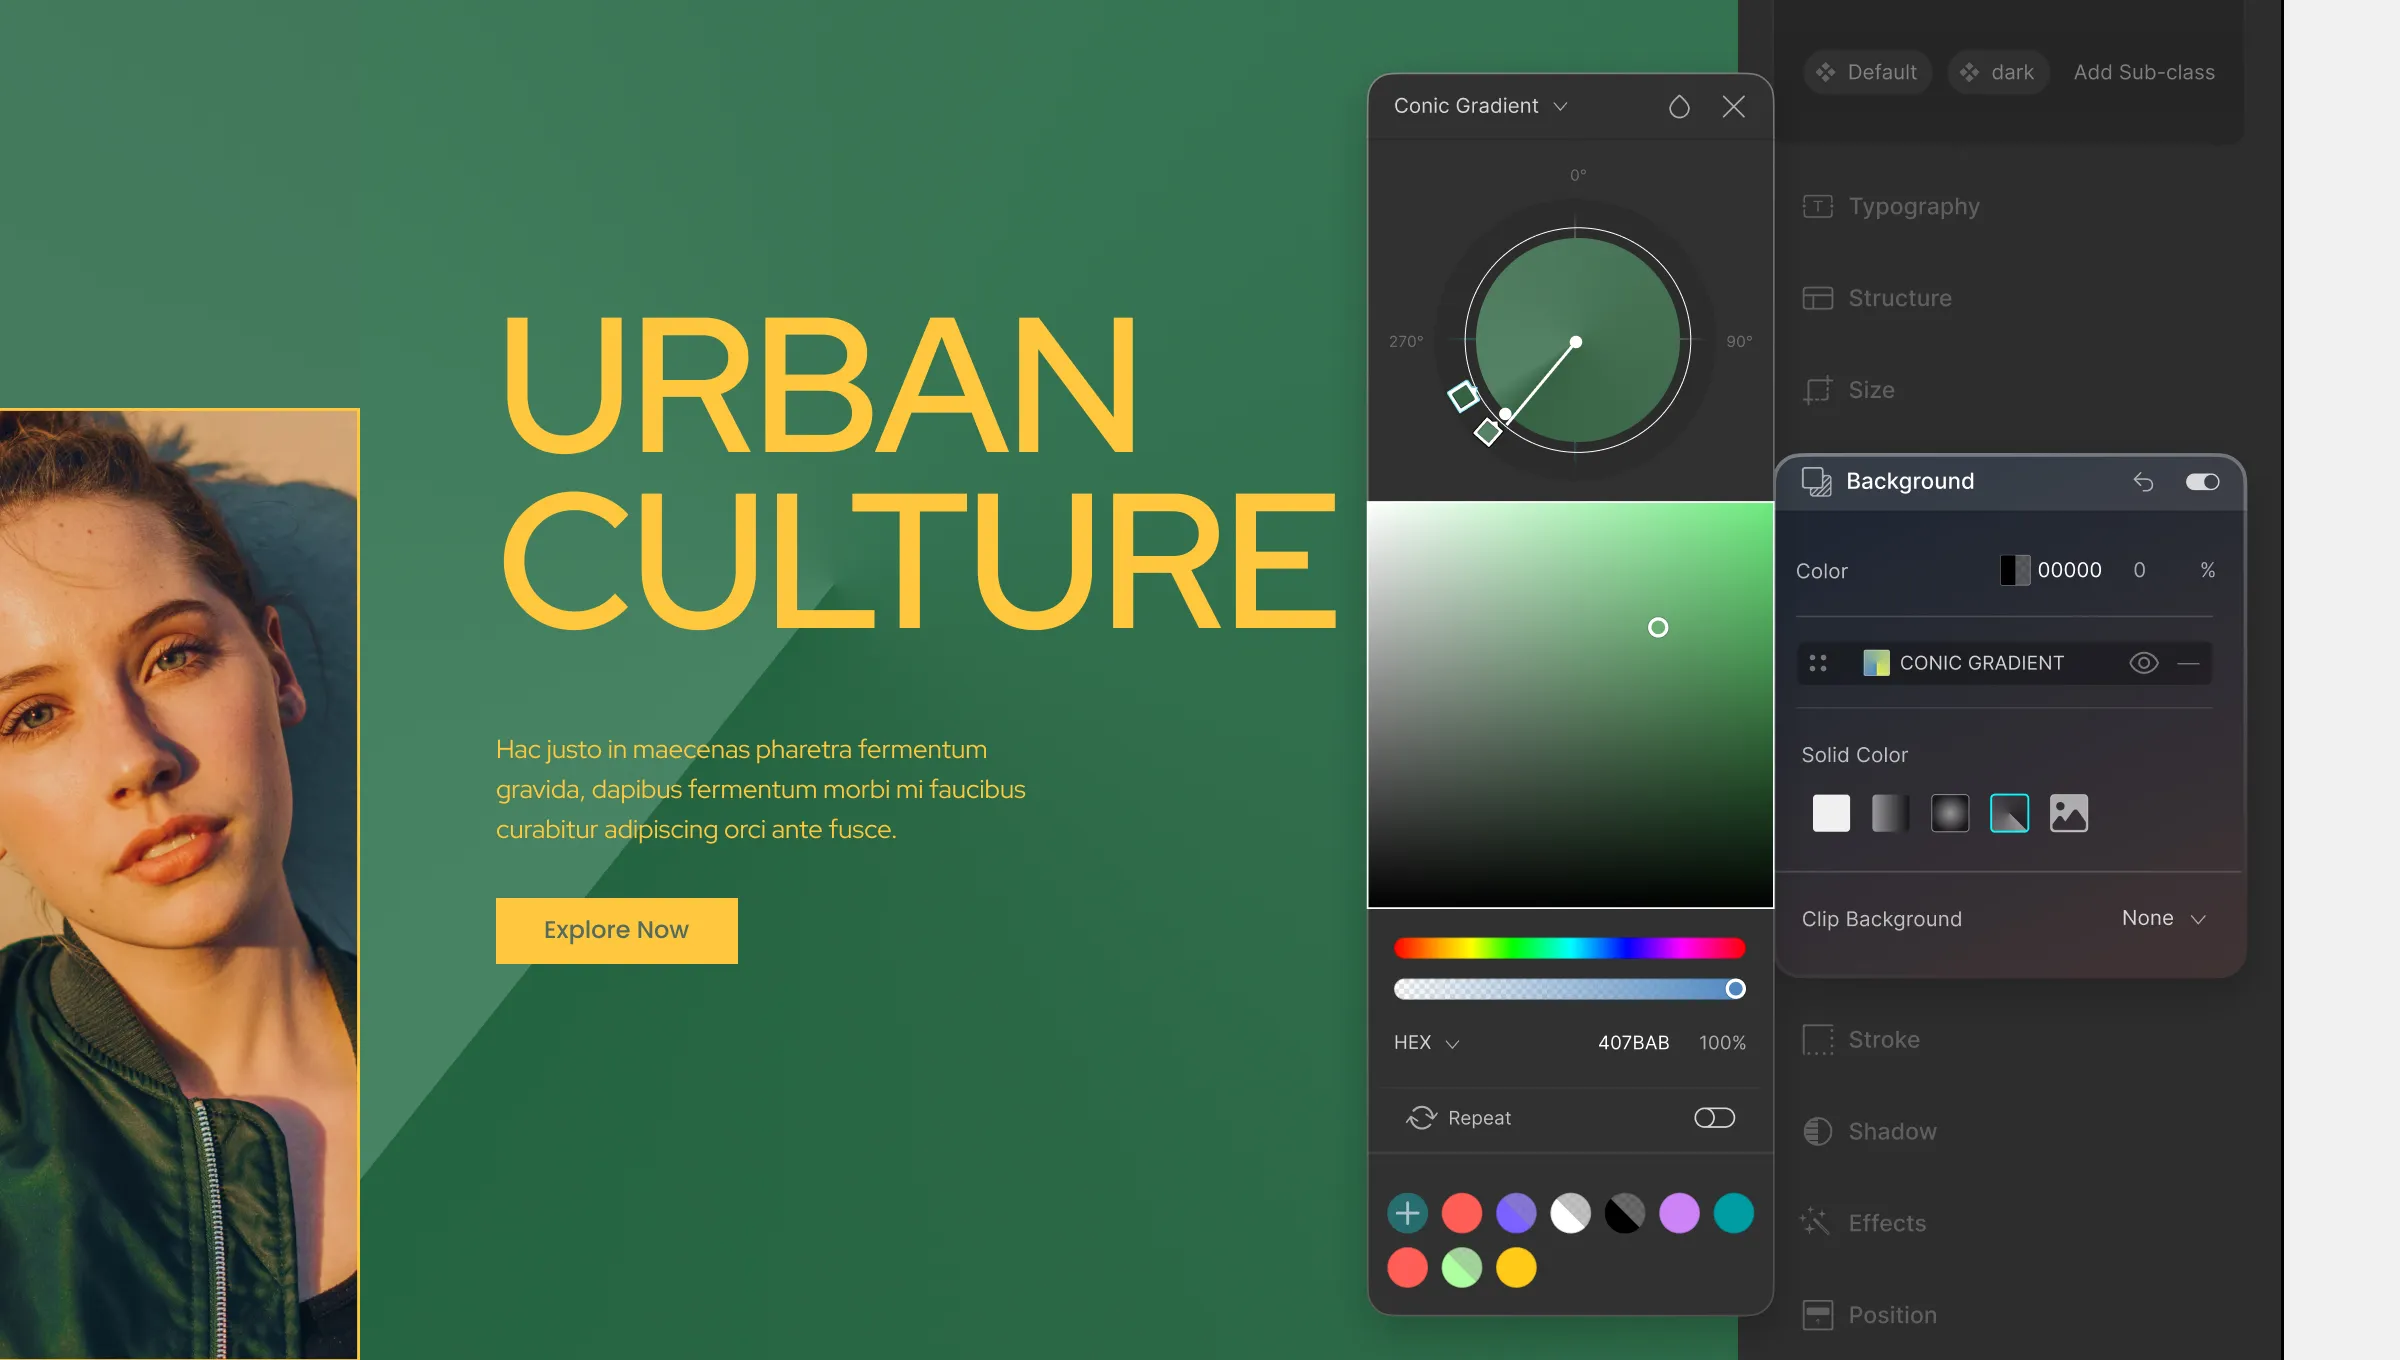
Finally, we have the Conic Gradient and this time the gradient ramp is circular with the preview modal at its center instead of along the gradient bar.
Picking a Color for the Color Stop:
Select any one of the color stops and then pick a color of your choice using any of the methods discussed here. Do the same to pick colors for the other color stops.
Adding a Color Stop:
By default, you should have two color stops (start & end) to work with. So to add more color stops, simply click anywhere on the gradient ramp circumference.
📝 Note: For Conic Gradient, the ending color stop may not be visible at first as the starting color stop usually overlaps it. To adjust the ending color stop’s position, click and drag over the starting color stop to separate the two and place it at an angle of your choice.
Adjusting Color Stop Position:
To adjust the color stop position, simply click and drag the color stop in question and place it at an angle of your choice around the gradient ramp’s circumference.
Off-Centered Conic Gradient:
To make your conic gradient off-centered, click and drag the center point handle to reposition it where you want it.
Reposition All Color Sops:
To reposition the angle of all of the color stops, simply click and drag the end-point of the gradient bar around the gradient ramp’s circumference.
Repeat:
Right below the color sliders, you should notice a new toggle called Repeat.
When the “Repeat” option is enabled, the gradient pattern will repeat itself seamlessly, creating a continuous effect.
Unlike Radial Gradient, enabling “Repeat” for Conic Gradient will cause the gradient to repeat with the color transitions rotated around a center point.
Was this page helpful?