
Visibility Conditions in Droip is a handy feature that lets you control which elements are visible on your website based on specific user criteria.
For instance:
- You can display a menu item in the navbar only for users with admin access.
- Or show an exclusive deal for users who signed up during a special promotional campaign.
These are just a few of the many ways Visibility Conditions can help you create personalized, user-focused experiences.
Why Use Visibility Conditions
Not all users should see the same content, and Visibility Conditions in Droip help you manage this effortlessly.
Whether you’re restricting content based on user roles for added security, showing specific content to users who registered during a certain time, or personalizing content based on any other user-specific criteria, Visibility Conditions help you control exactly who sees what on your website.
This makes for a personalized, more relevant experience for users and a more secure website on your end.
Applying Visibility Conditions to Elements
From the Droip editor, head to the Style Panel to access Visibility Conditions.
Adding a Visibility Condition
To add a Visibility Condtion, follow these steps:
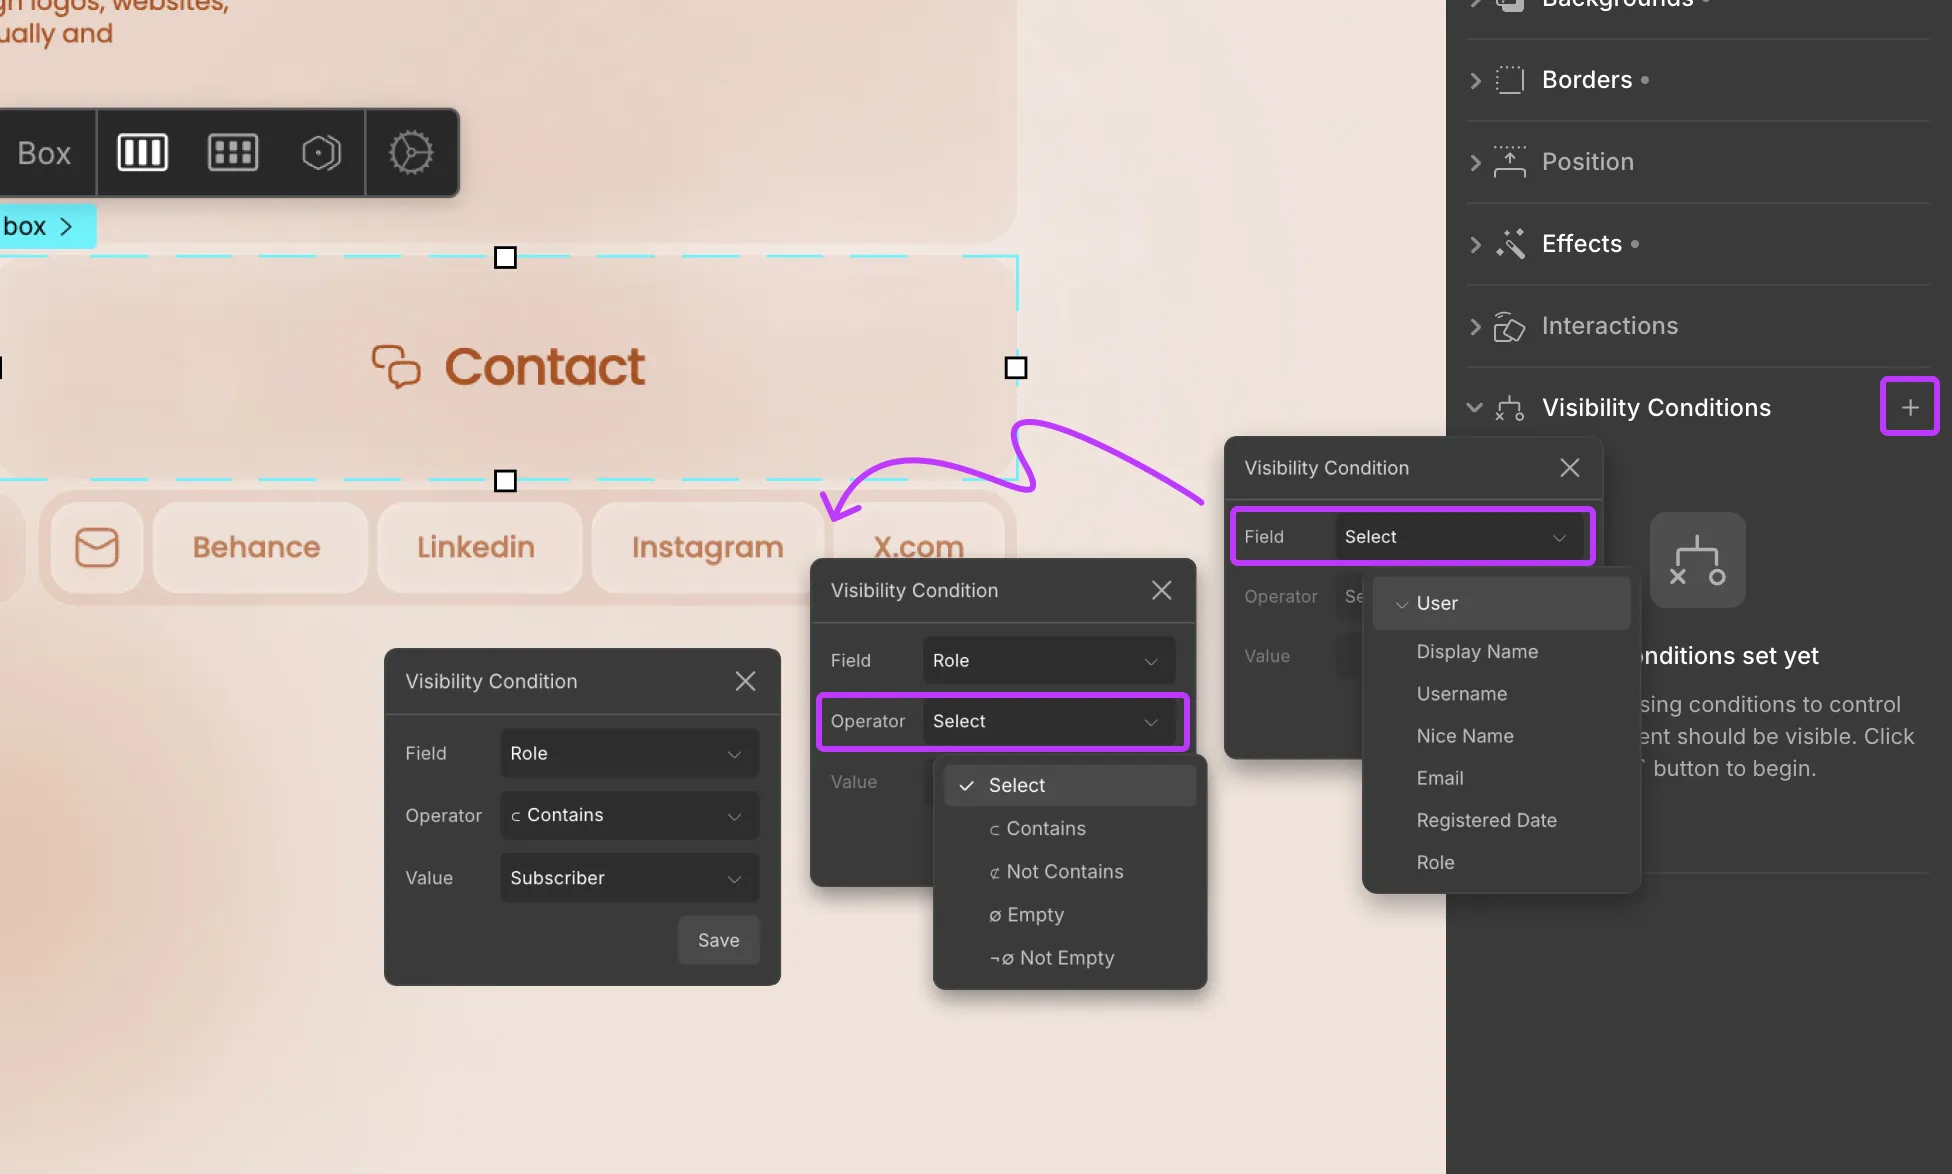
Step 1: Click on the + icon to add a new condition.
Step 2: From the Field dropdown, select User, then choose the data field you want to base your condition on.
Step 3: Then, from the Operator dropdown choose the comparison type and from the Value dropdown select the value to compare against.
Step 4: Click Save to apply the condition.
Adding Multiple Conditions
You can also stack multiple conditions using AND (where all conditions must be true) or OR (where any condition can be true) to further fine-tune when elements should be shown.
Adding ‘AND’ Conditions
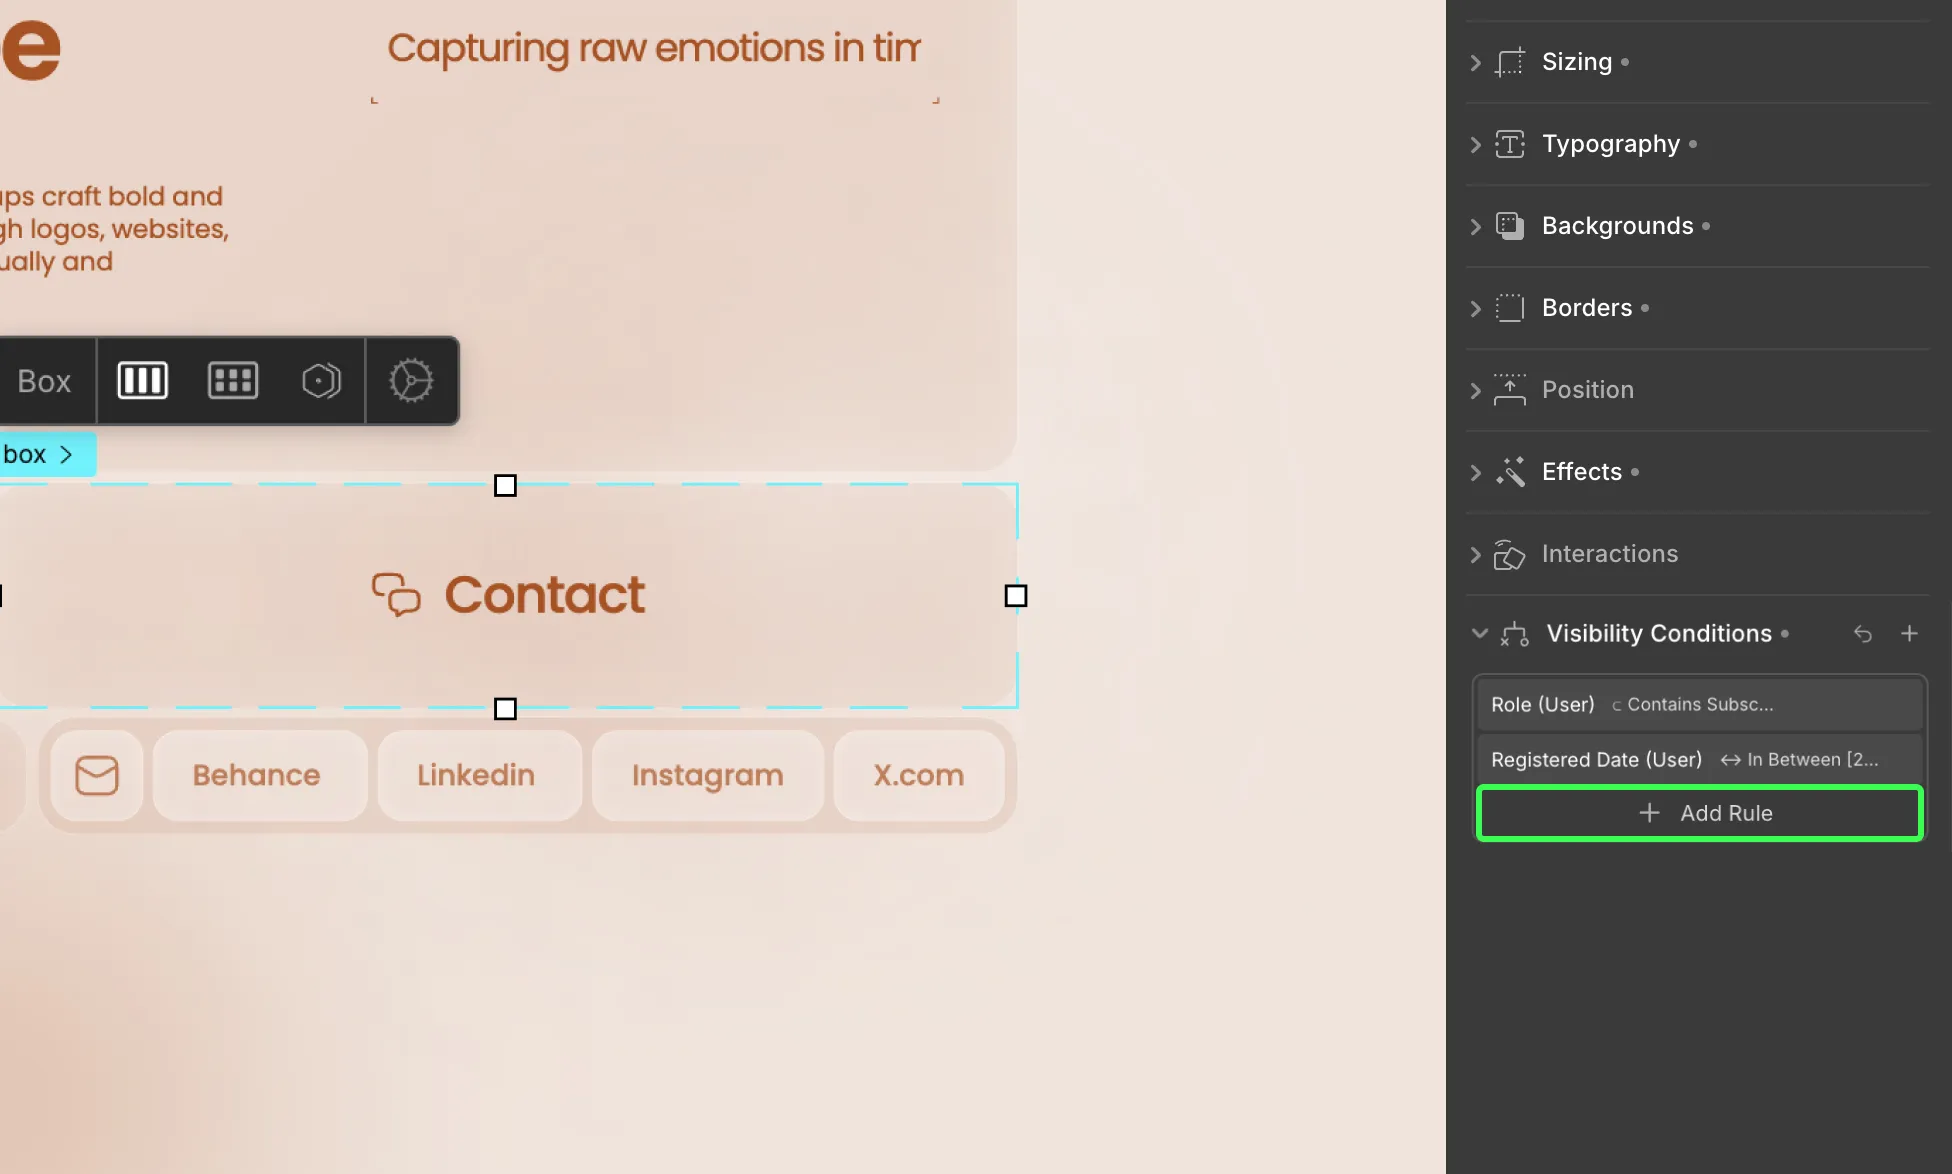
To stack multiple AND conditions, do the following:
Step 1: After adding your first condition, click on the + Add Rule option.
Step 2: Set the next condition as usual and hit save.
Repeat these steps to add more AND conditions.
Adding ‘OR’ Conditions
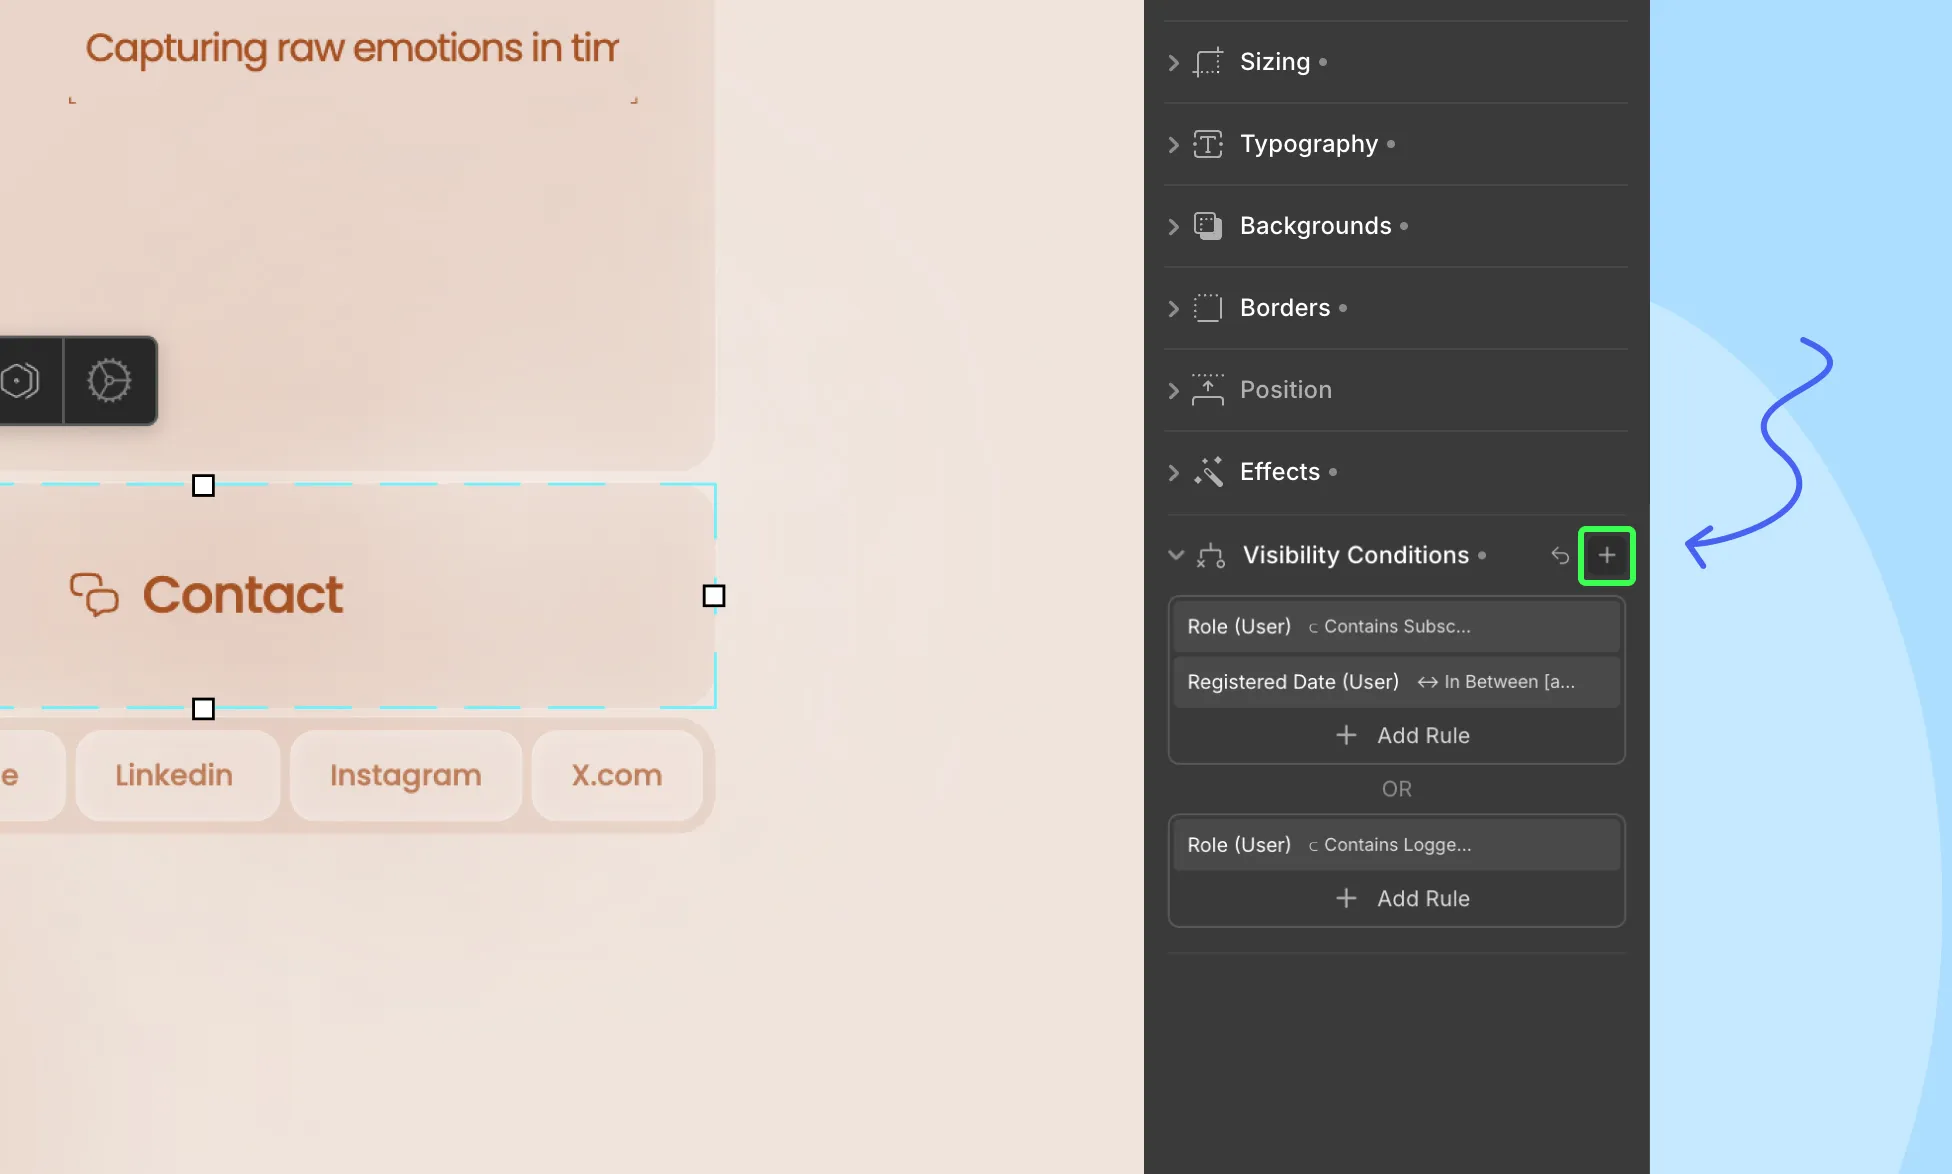
To stack multiple OR conditions, do the following:
Step 1: After adding your first condition, click on the + icon on the top right.
Step 2: Set the next condition as usual and hit save.
Repeat these steps to add more OR conditions.
Editing a Visibility Condition
You can, of course, edit your conditions at any time.
To edit a condition, follow these steps:
Step 1: Click on the condition you want to edit. This will reopen the Visibility Conditions settings.
Step 2: Make your changes and hit save.
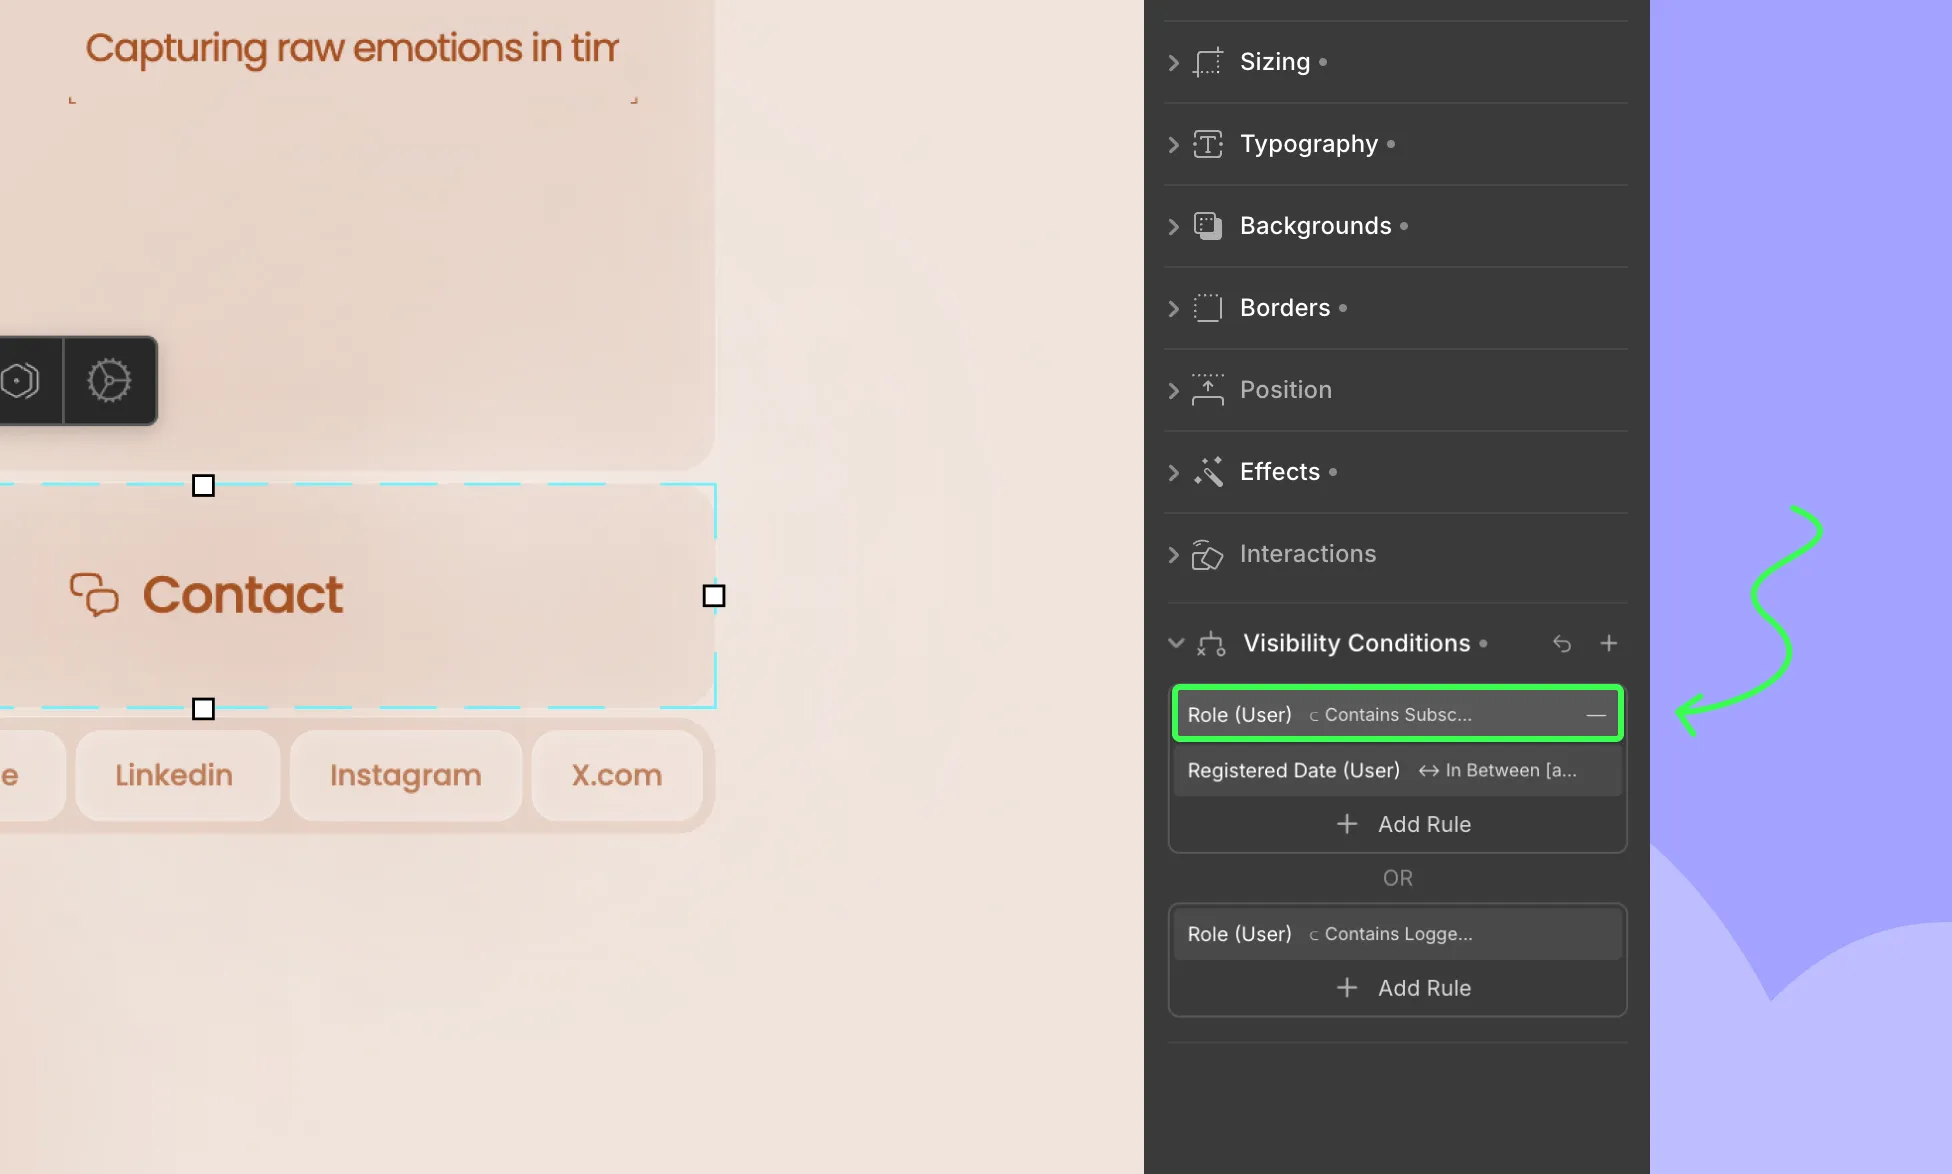
Removing a Visibility Condition
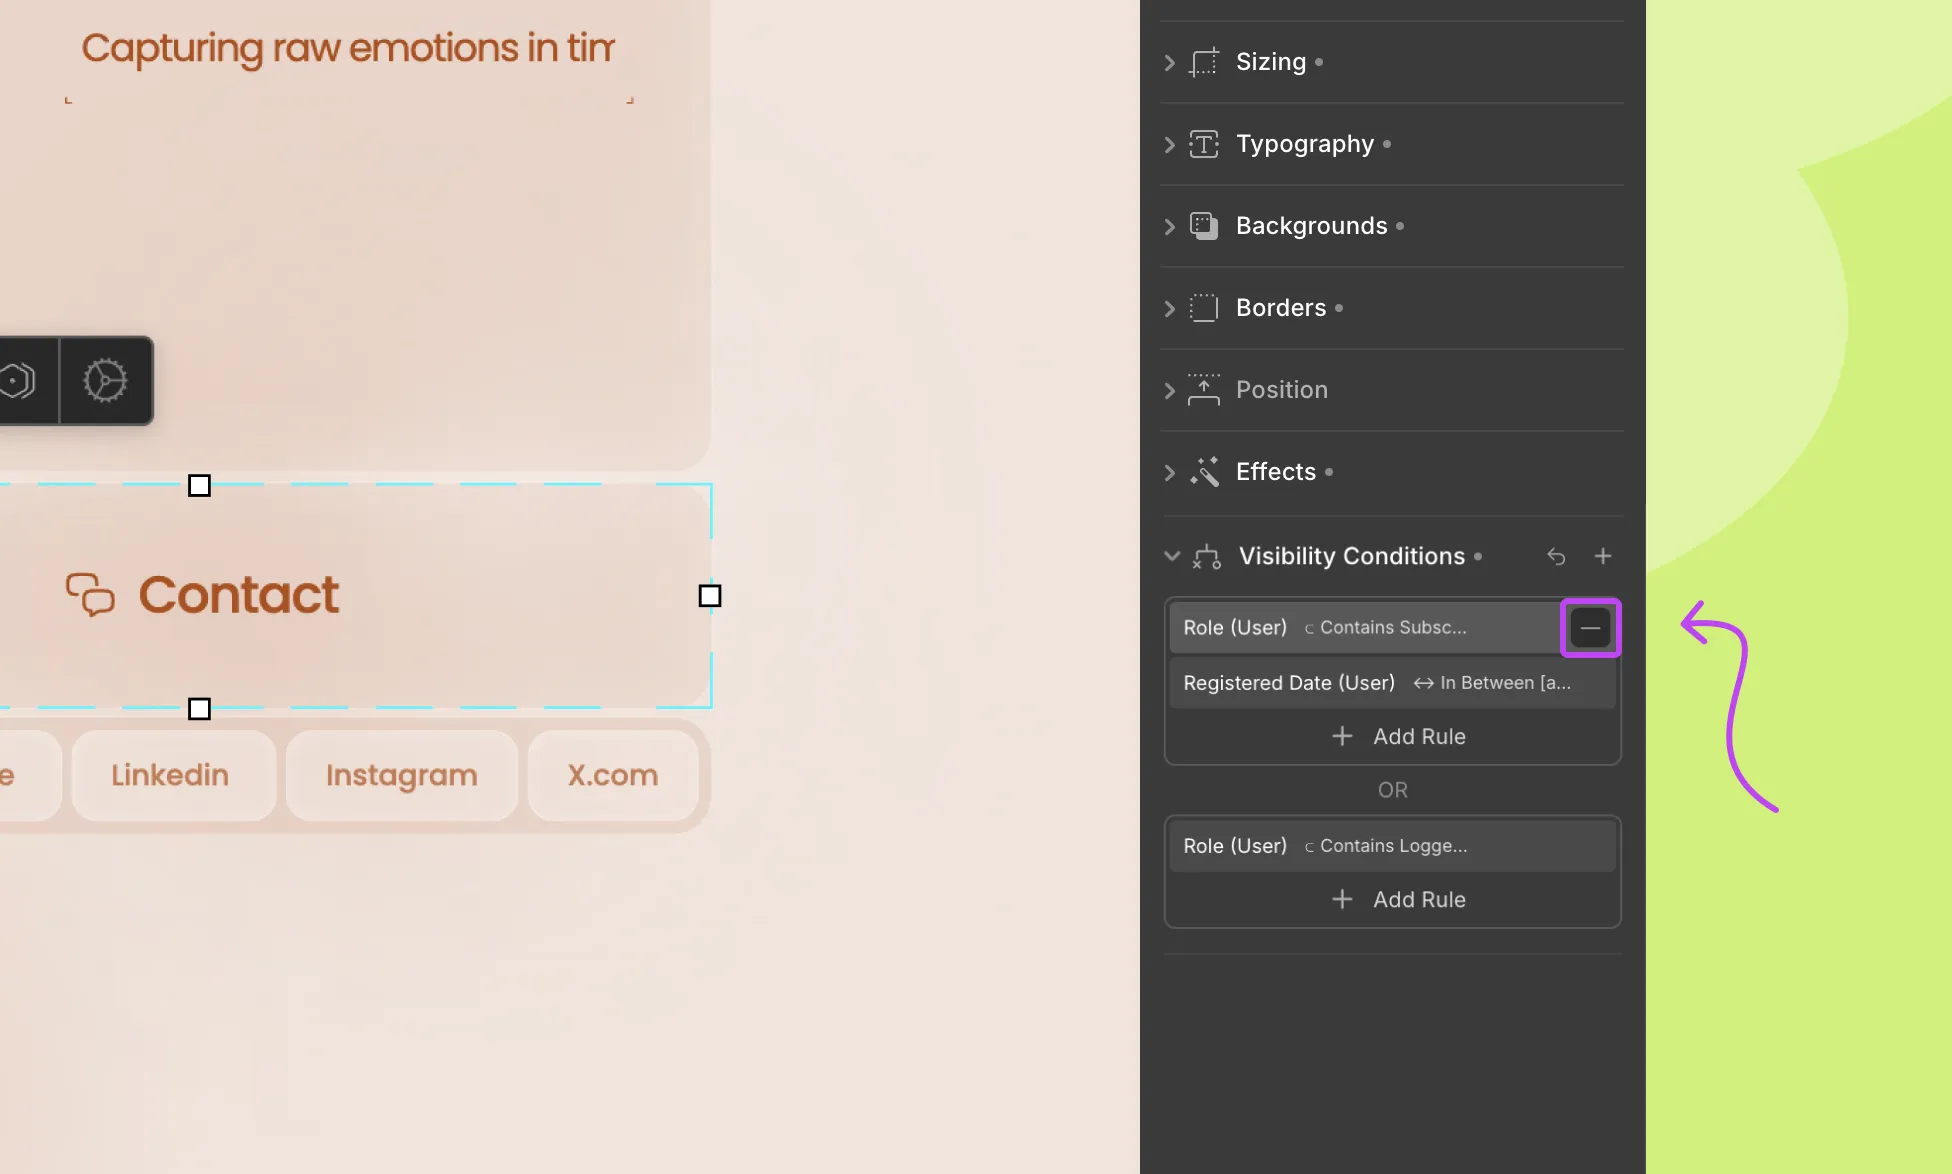
Lastly, to remove a condition, do the following:
Step 1: In the Visibility Conditions panel, find the condition you want to remove and click the – icon next to it.
And you’re good to go!
Applying Visibility Conditions To Dynamic Content
You can also apply visibility conditions to dynamic content, whether it’s part of a collection list or a single-page template based on Post fields.
Here’s what you have to do to implement it:
Step 1: Select the element you want to show or hide.
This could be:
- The entire collection element
- A specific element within the collection
- Or an element within a single-page template
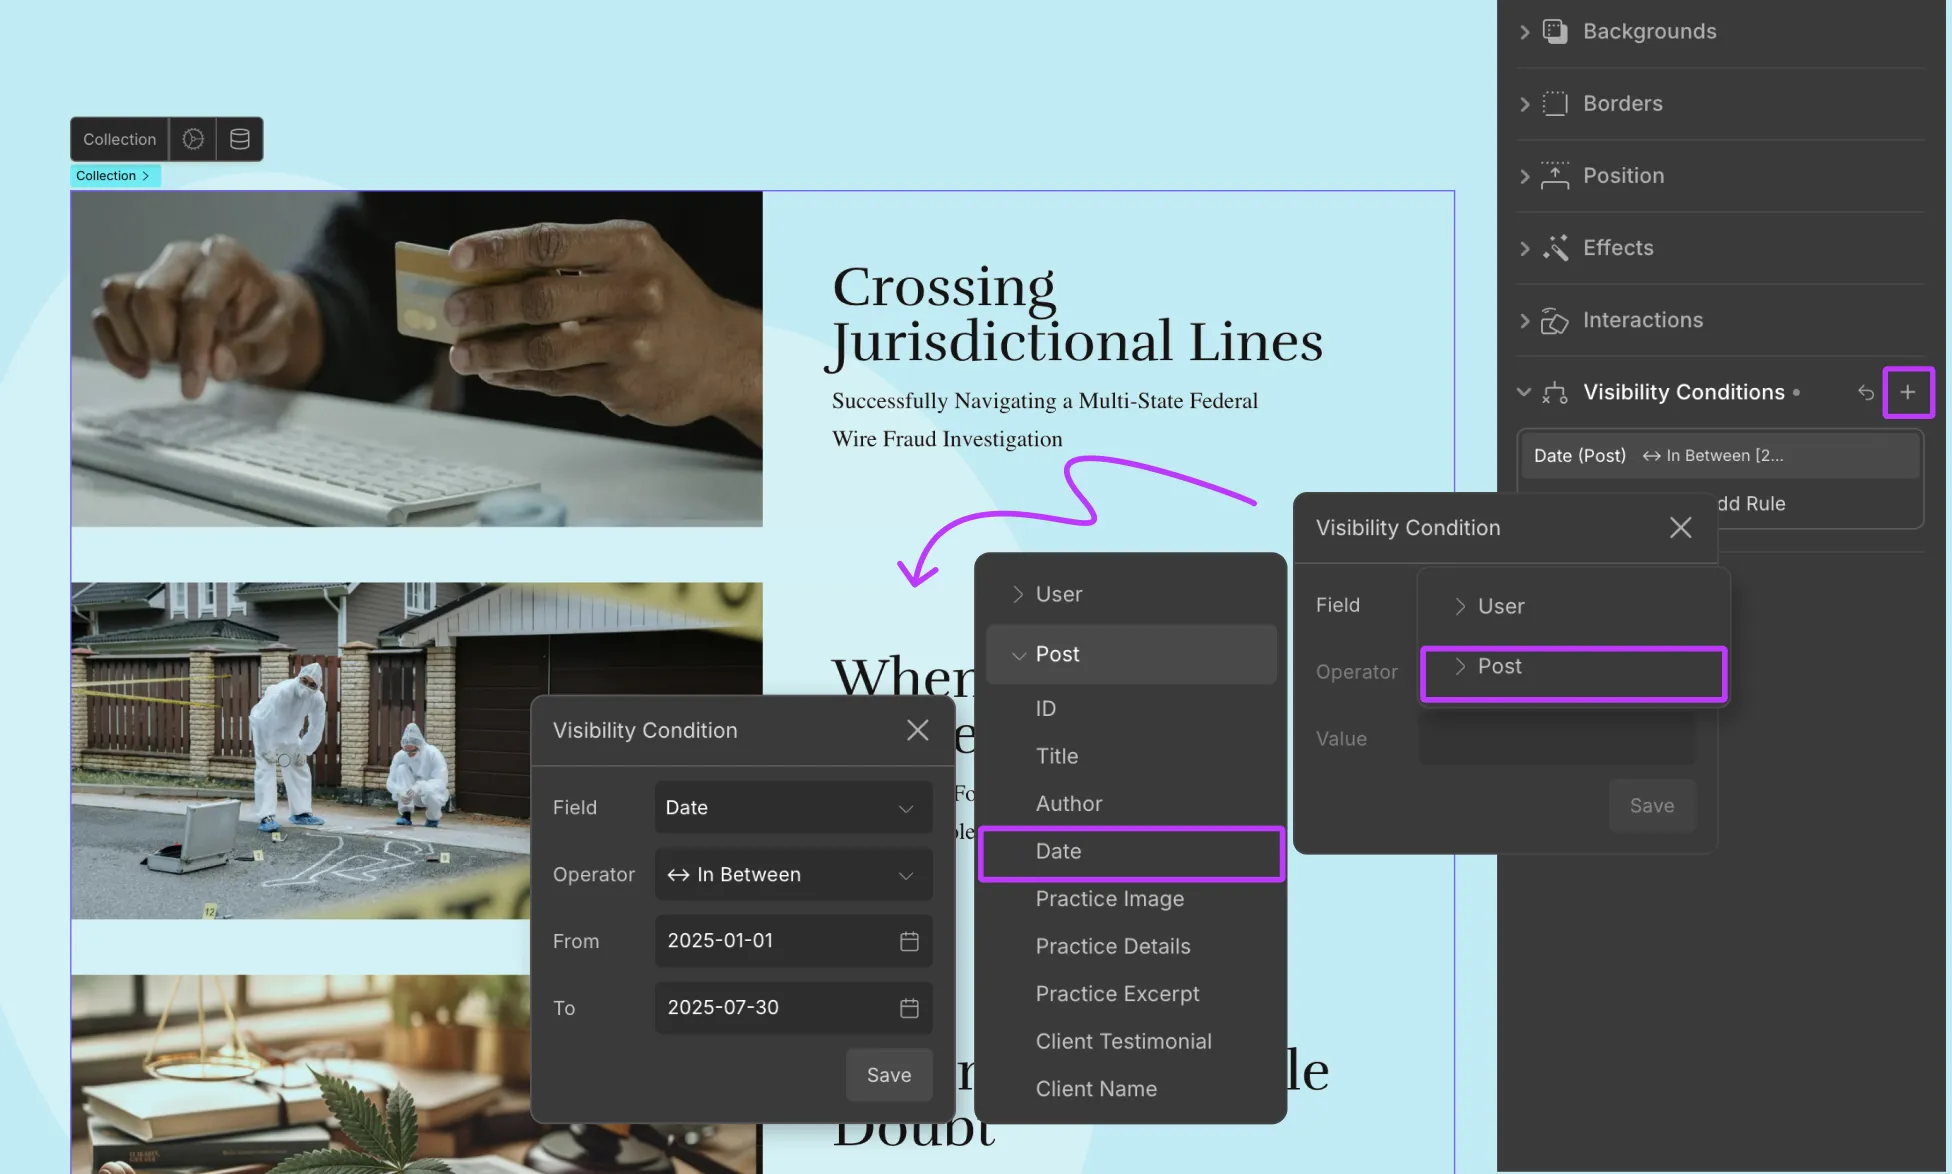
Step 2: Once selected, add a new visibility condition from the style panel.
Step 3: From the Field dropdown, now you’ll see an option called Post. Choose this to access the collection fields you want to base your condition on.
Step 4: Then, as usual, from the Operator dropdown, choose the comparison type, and from the Value dropdown, set the value to compare against.
Step 5: Click Save to apply the condition.
And just like that, you can create visibility conditions based on dynamic post collection fields!
This comes in handy in various ways, such as to show a “Featured” ribbon if the post item’s featured field is toggled “On”, hide limited-time offers based on the date once it expires, and so on.
Was this page helpful?