Videos are a great way to capture visitors’ attention and keep them engaged with your website.
By using the Video element in Droip, you can quickly and easily add videos to your website and customize how they are displayed.
Adding Videos
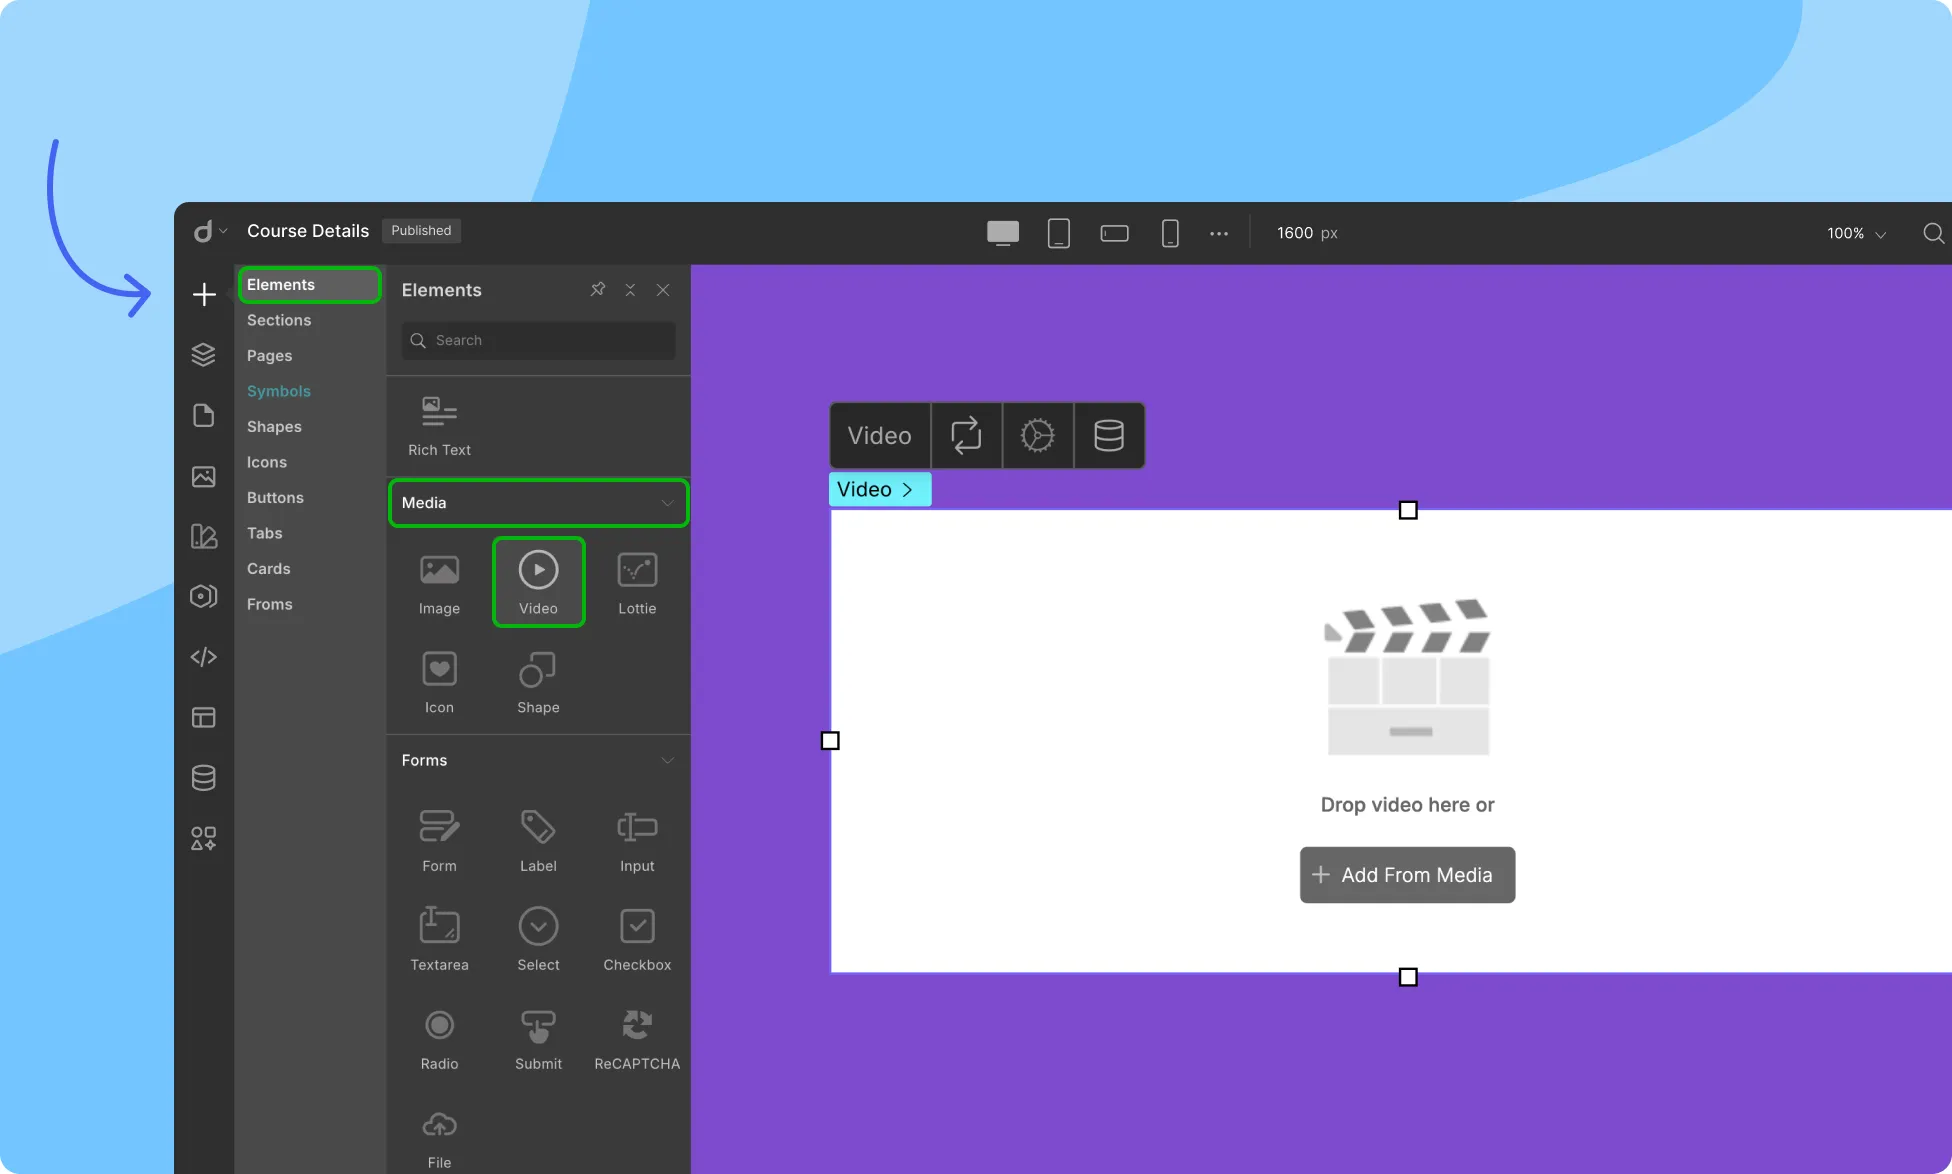
To add a Video element to your page, follow these steps:
- Access the Insert > Elements panel.
- Drag and drop the Video element on the canvas.
Next, effortlessly insert your video file:
- Drag and drop the video file into the specified area.
- Alternatively, use the + Add From Media button to upload an existing video from your media library.
Embedding Videos
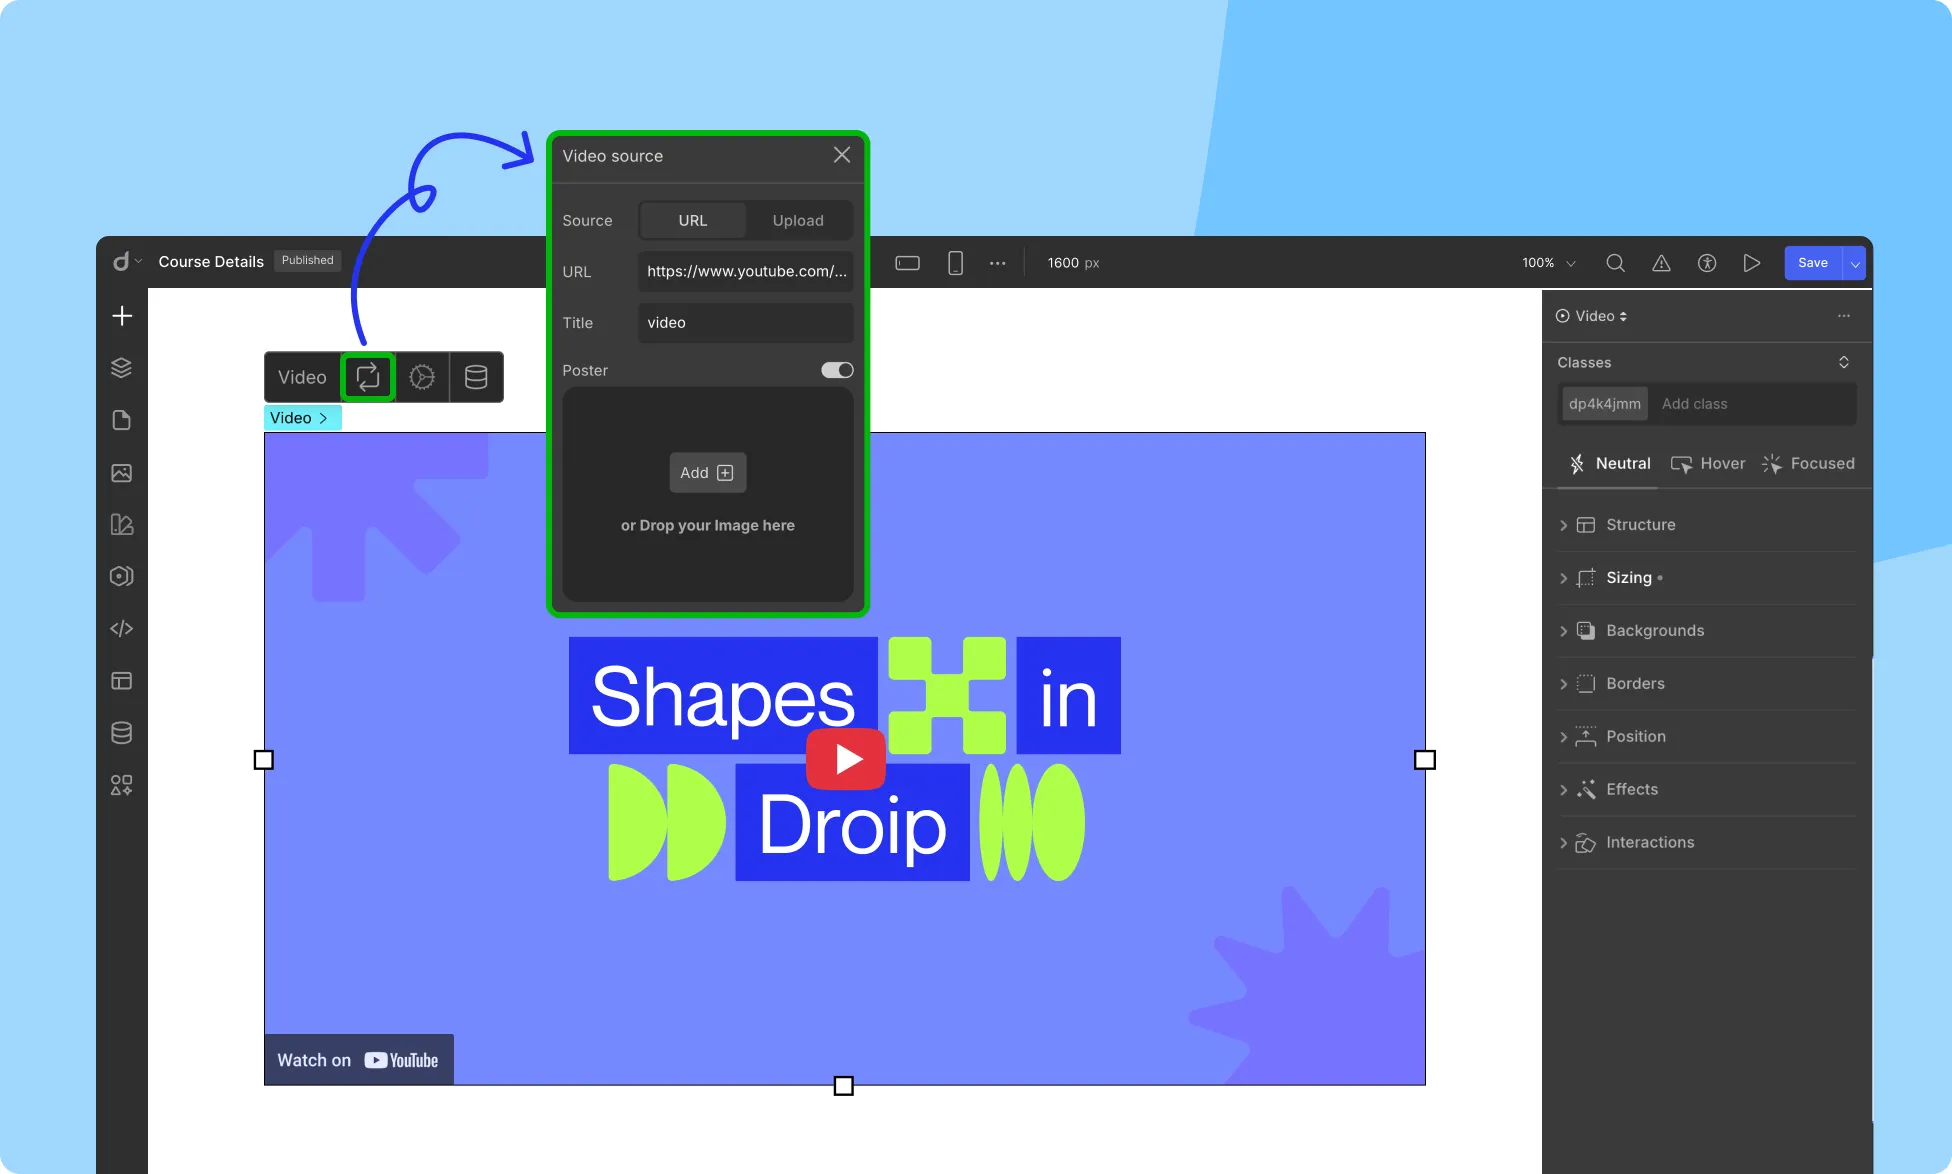
Embed Video is a quick and convenient way to add video content to your website, allowing you to host the video on a third-party platform while seamlessly integrating it into your site.
To embed a video, simply paste the video’s share link into the URL field.
After embedding a video in Droip, you can fine-tune its behavior and appearance.
Click the gear icon on the video element toolbar to open the Video Options panel. Here’s what each setting allows you to control:
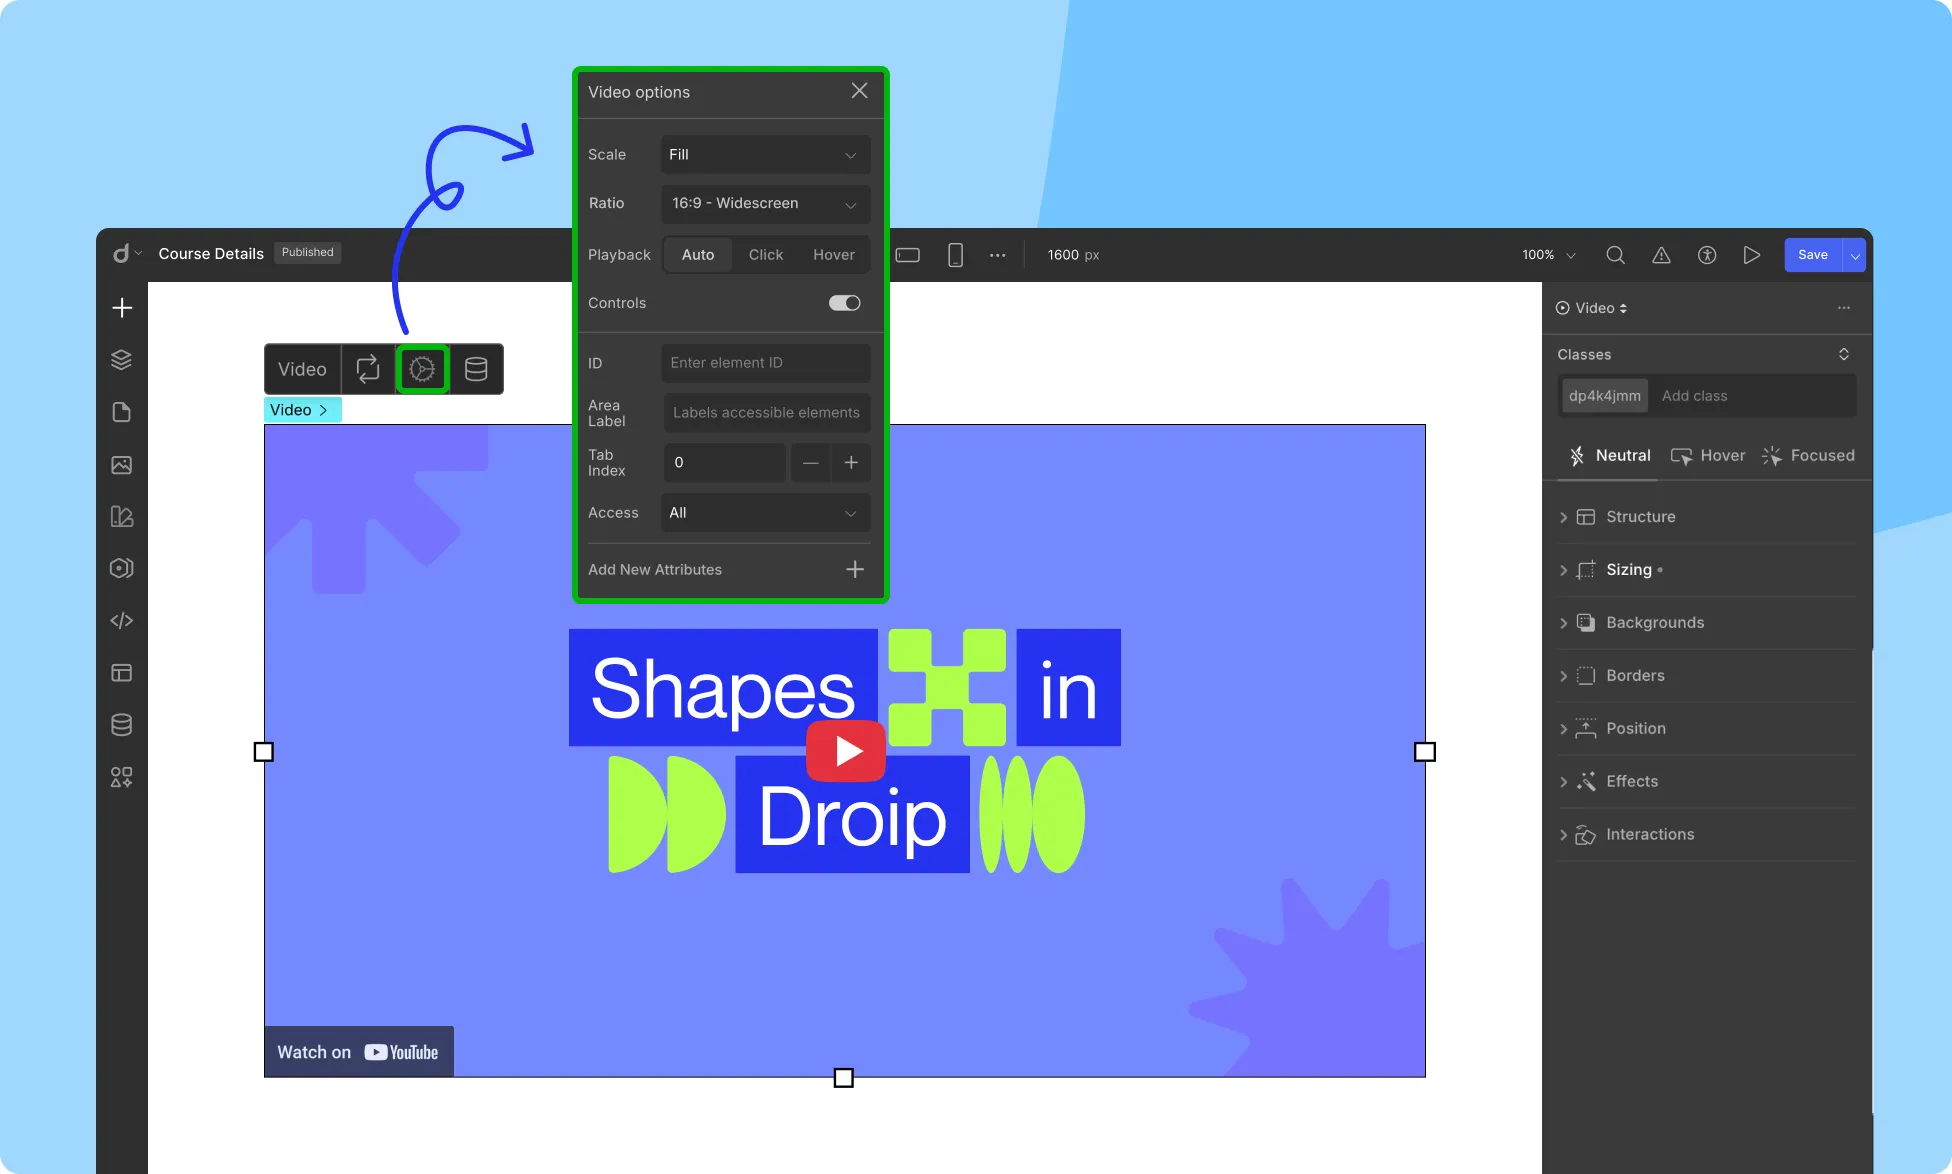
Scale: Determines how the video scales within its container.
- Fill: Stretches the video to fill the entire space.
- Contain: Ensures the entire video is visible without cropping.
- Cover: Fills the container by cropping the video, maintaining the aspect ratio.
Ratio: Sets the aspect ratio of the video frame. Ideal for maintaining visual consistency.
Playback: Defines how and when the video starts playing:
- Auto: Plays automatically when visible.
- Click: Plays when clicked.
- Hover: Plays when hovered.
Controls: Show or hide native video player controls like play/pause, volume, and scrub bar.
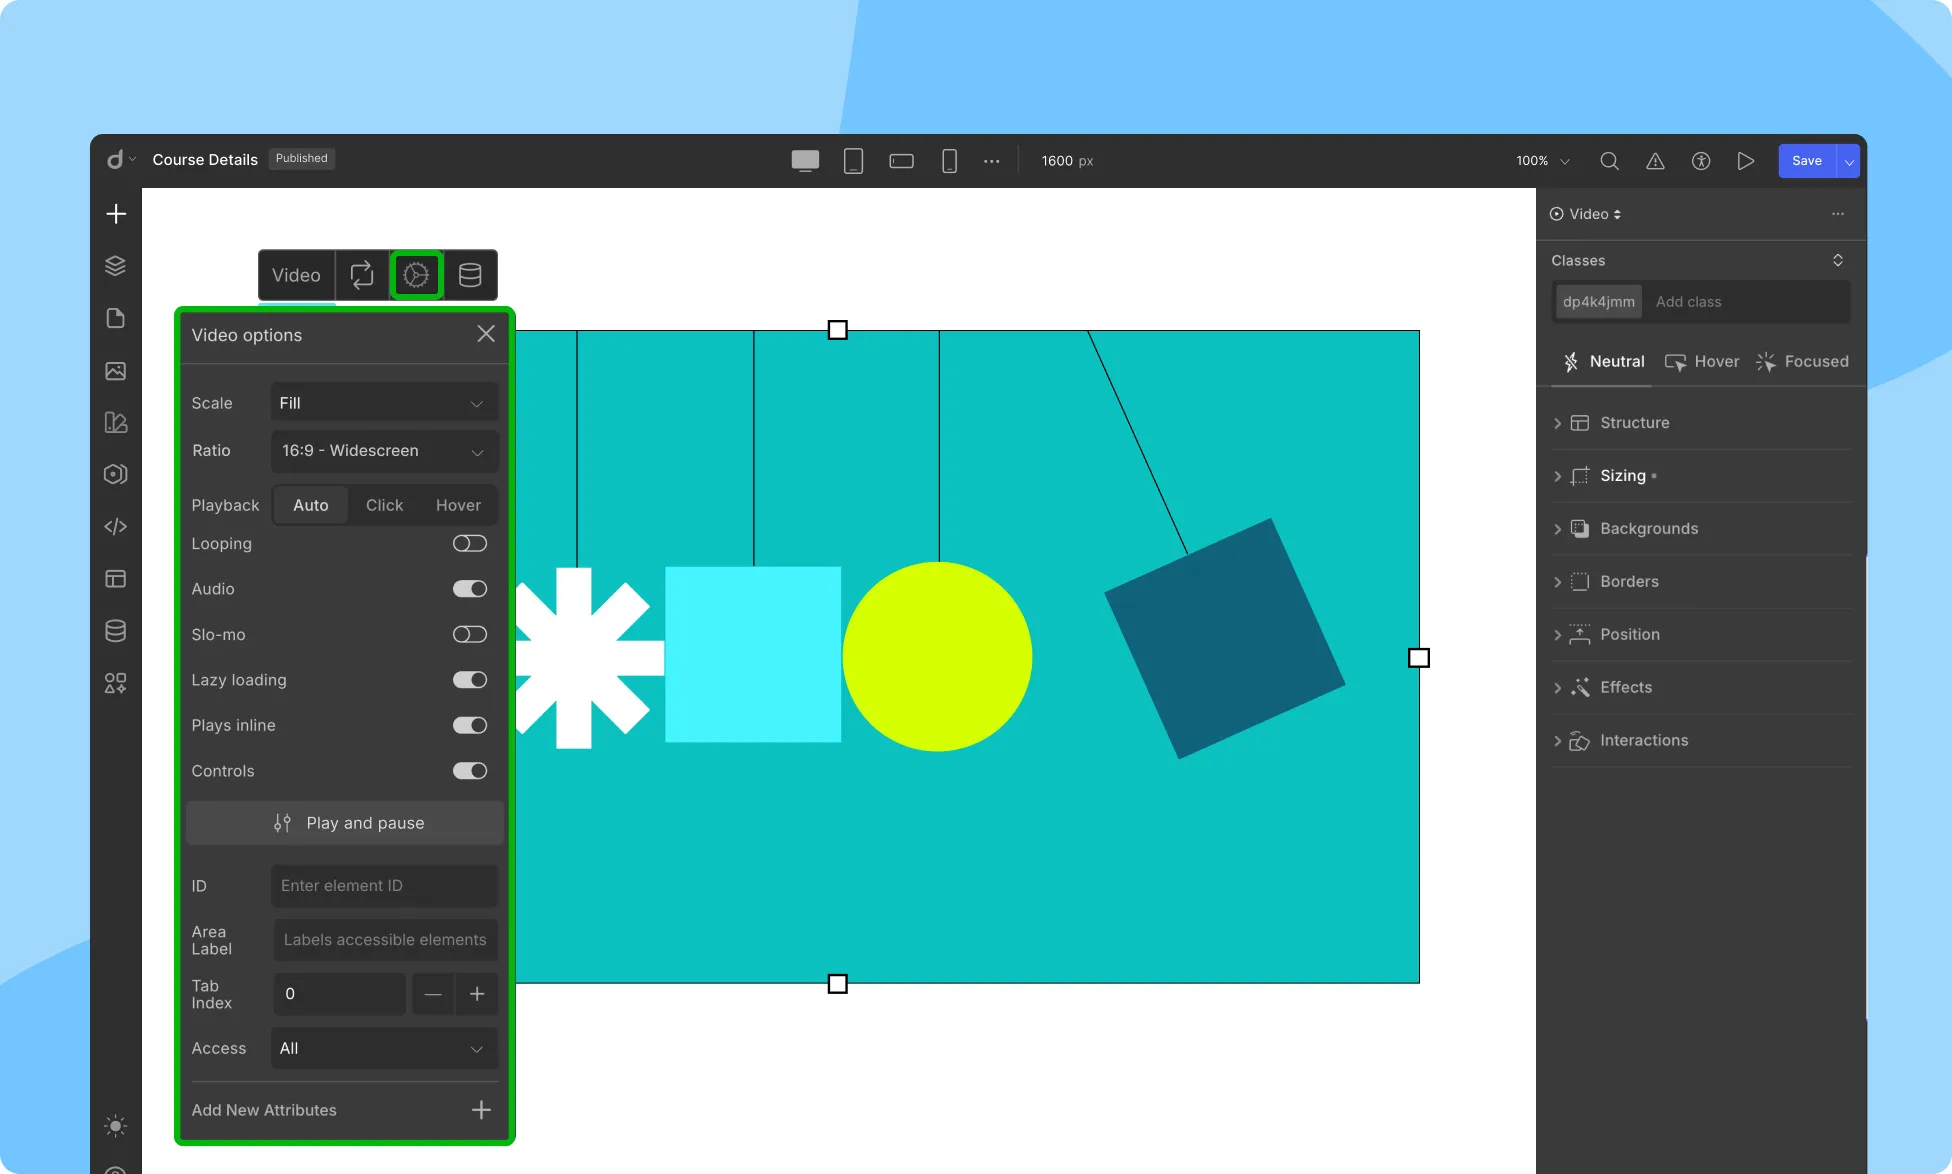
Video Settings
You get a slightly different set of options that give you more control over how the video is rendered and played when you upload a video:
Replace Video
To replace the existing video with a new one:
- Click on the Replace Video option.
- Select the new video file from your computer or from the media library.
Video Display Controls
Tailor how your video is presented on your website using the Video Display Controls. These options adjust the size and position of the video within the designated space:
- Fill: Resizes the video to fill the available space while maintaining the aspect ratio of the original video.
- Contain: Resizes the video to fit within the available space without cropping, ensuring the entire video is visible.
- Cover: Resizes the video to completely cover the available space, even if it means stretching or distorting the video.
- Initial: Displays the video at its original size, unaffected by available space.
Rotate Video
The rotate option allows you to rotate the video by 15 degrees per rotation.
Attachment
The attachment option determines the video’s position relative to the content as the user scrolls the page:
- Scroll: The video scrolls along with the content as the user navigates the page.
- Fixed: The video remains fixed in its position on the page, regardless of user scrolling.
Looping
Enable looping to have the video play continuously, or disable it for the video to play only once.
Audio
Enabling audio allows the video to play with sound while disabling it mutes the video.
Slo-Mo
Enable Slo-Mo for the video to play at a slower speed, or disable it to play at its original speed.
Controls
Enable Controls to display video player controls (play/pause, volume, full-screen), or disable it to hide these controls.
Set Custom Thumbnail
Use this option to add an image as a custom thumbnail for your video.
Play and Pause
The Play & Pause option in video settings allows you to control how the video starts and stops playing.
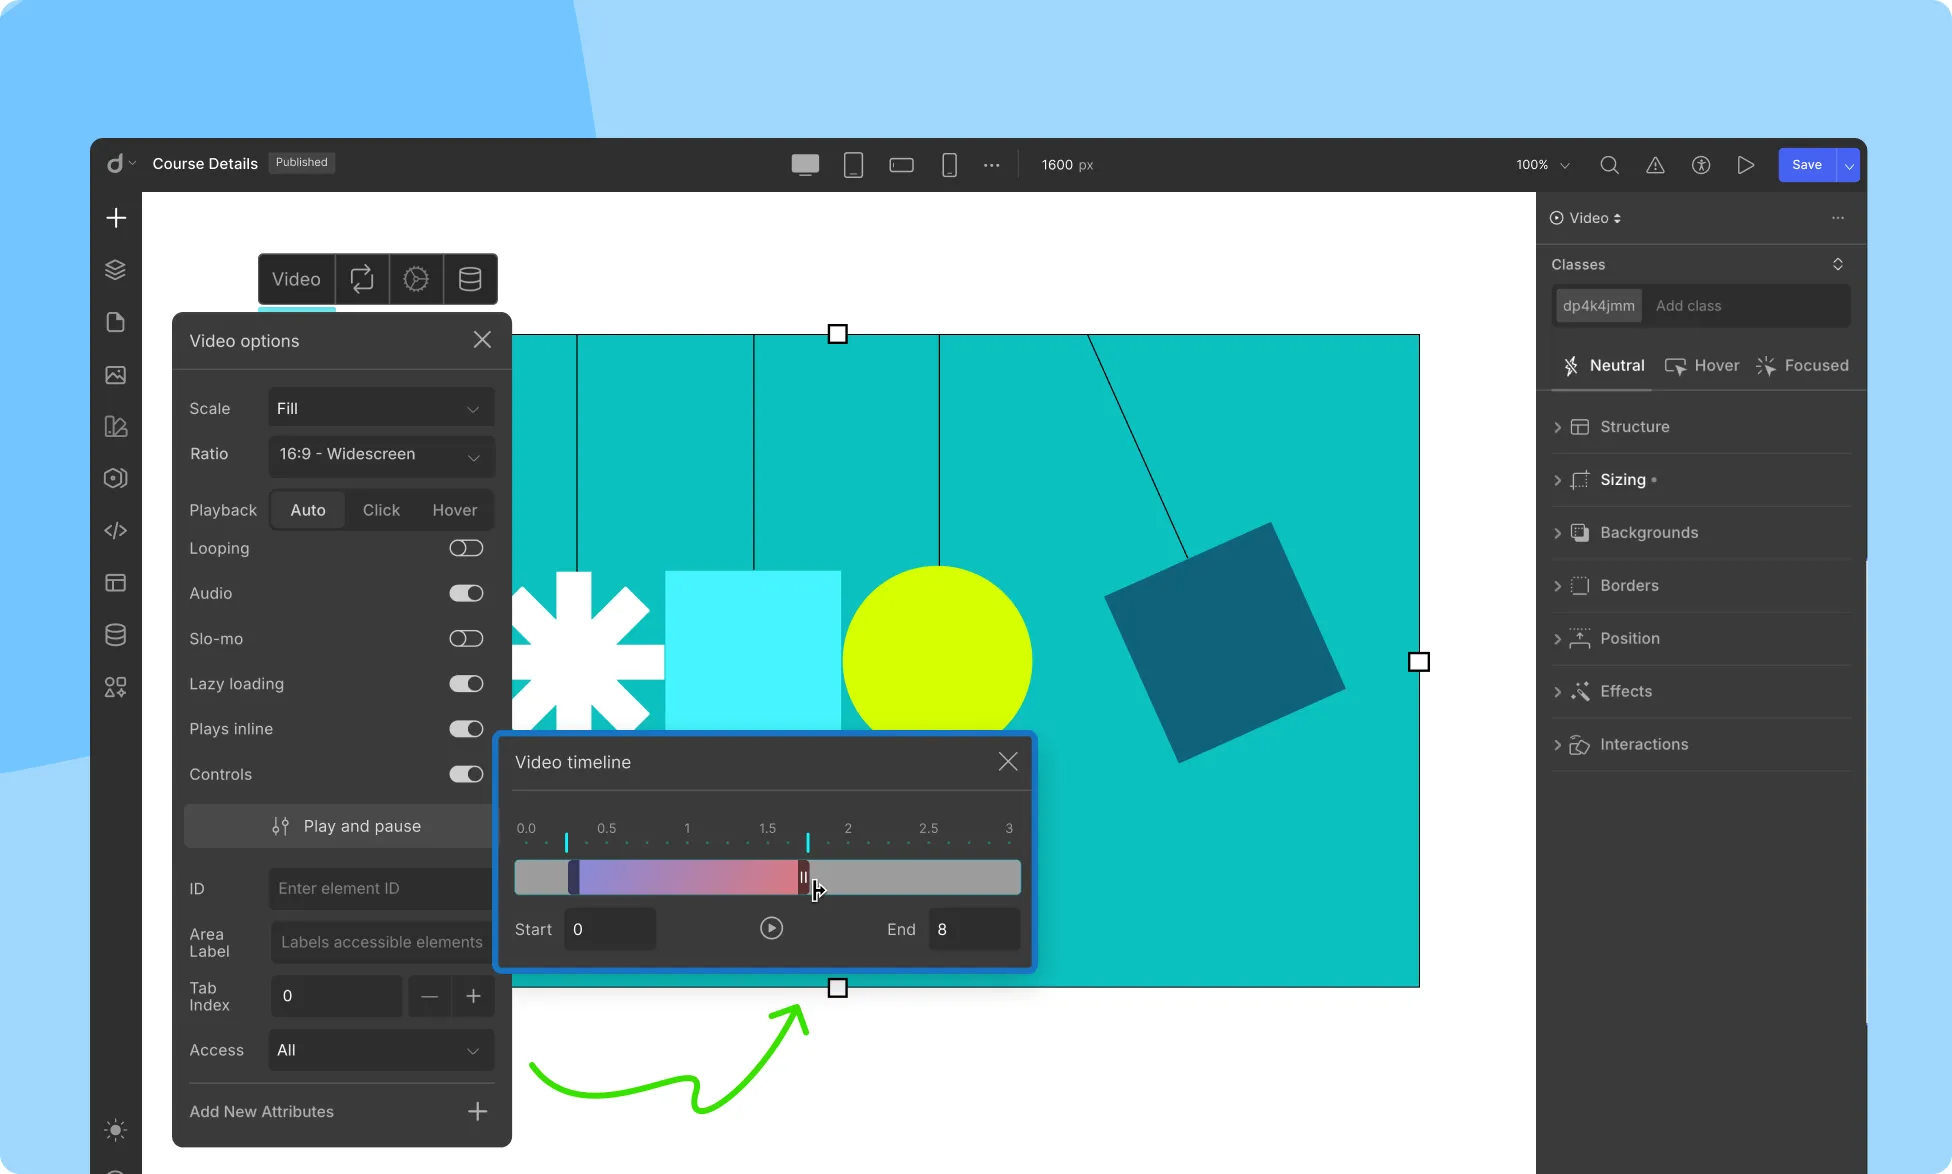
Start and End Time
Set specific start and end times to show only the desired portion of the video on your webpage.
Play Options
Customize how the video is triggered to play:
- Auto: The video automatically starts playing as soon as the webpage loads.
- Click: Requires the user to click on the video player to initiate playback.
- Hover: Starts playing the video when the user hovers their mouse over the video player.
By using these play options, you can curate the video experience for your users, providing a better user experience on your webpage.
Was this page helpful?