In Droip, Form Actions let you control exactly how submissions are handled, whether you want to notify your team, confirm submissions to users, or send data to other apps in real-time.
This guide will walk you through:
- Configuring SMTP to ensure reliable email delivery
- Setting up Email Actions to send notifications and automated responses
- Using Webhooks to integrate your forms with CRMs or automation tools
Email Actions in Droip Forms
In Droip, Email Actions let you define how form submissions are sent and handled. You can:
- Send Admin Notifications — receive a copy of every form submission.
- Send Automated User Emails — confirm to users that their submission has been received.
Before setting up, it’s important to understand the basics:
- SMTP (Simple Mail Transfer Protocol) ensures emails are sent through a proper mail server instead of PHP mail, reducing the chances of messages being marked as spam.
- Email Action in Droip determines where submissions go, how they appear, and who receives replies.
Setting Up SMTP for Gmail
If you plan to use Gmail to send emails from your form:
Step 1: Enable 2-Step Verification
- Go to your Google Account Security page.
- Find 2-Step Verification and turn it on.
Step 2: Create an App Password
- After enabling 2-Step Verification, go to App passwords.
- Name your app like “WordPress” or “Droip.”
- Copy the 16-character password generated. Please note this is your SMTP password (not your normal Gmail password).
Step 3: Enter SMTP Settings in Droip
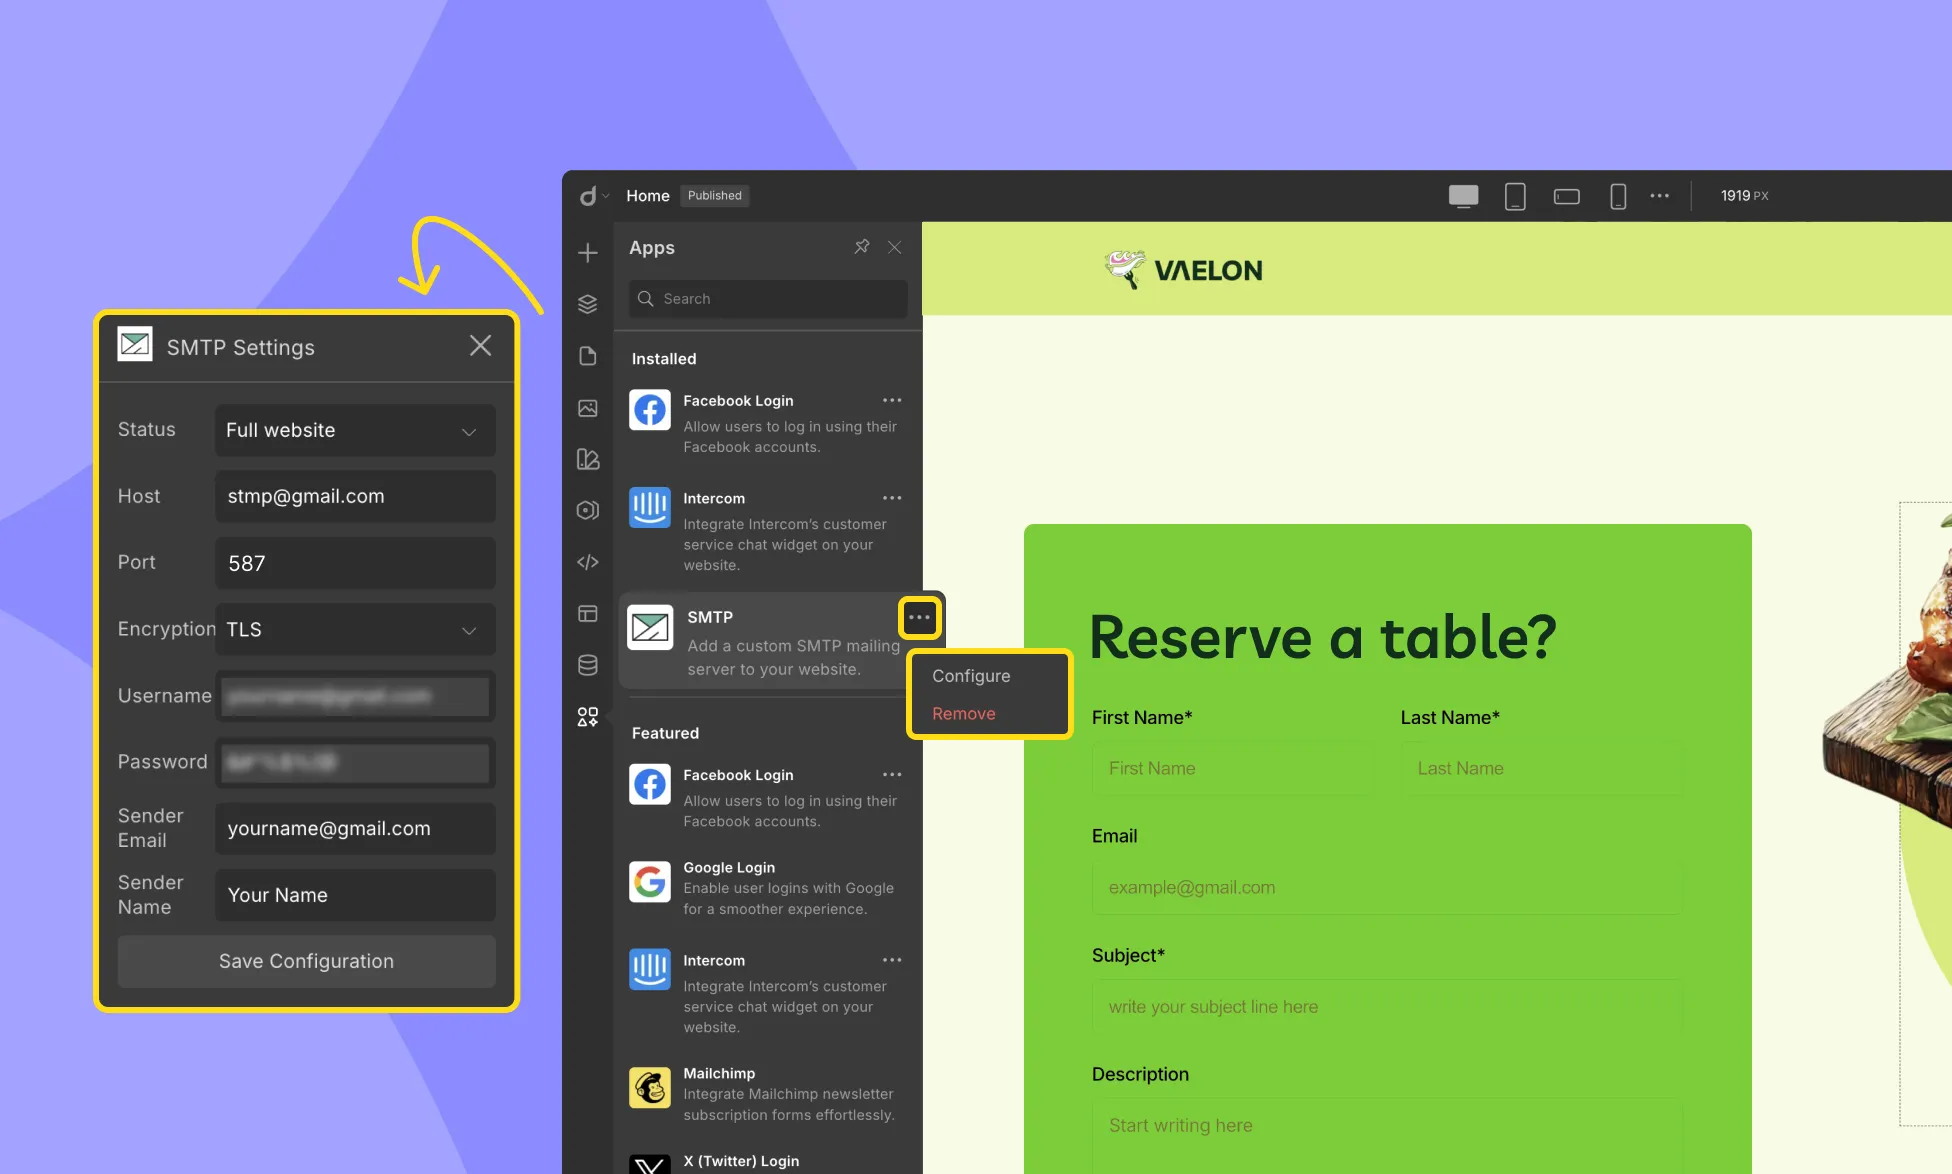
Navigate to Droip Editor > Apps > SMTP and configure:
- Host: Use smtp.gmail.com for Gmail’s SMTP server.
- Port: You can either use 587 (for TLS) or 465 (for SSL). These connection points are used to securely communicate with the SMTP server.
- Encryption: TLS for 587 / SSL for 465.
- Username: Enter your email address, e.g., [email protected]
- Password: Enter the 16-character App Password from Google
- Sender Email: Enter your email address, e.g., [email protected]
- Sender Name: Enter your name or company name. This is the name that will appear as the sender in the email.
Configuring Droip Form Email Action
Once SMTP is set up, you need to configure your form to send emails properly.
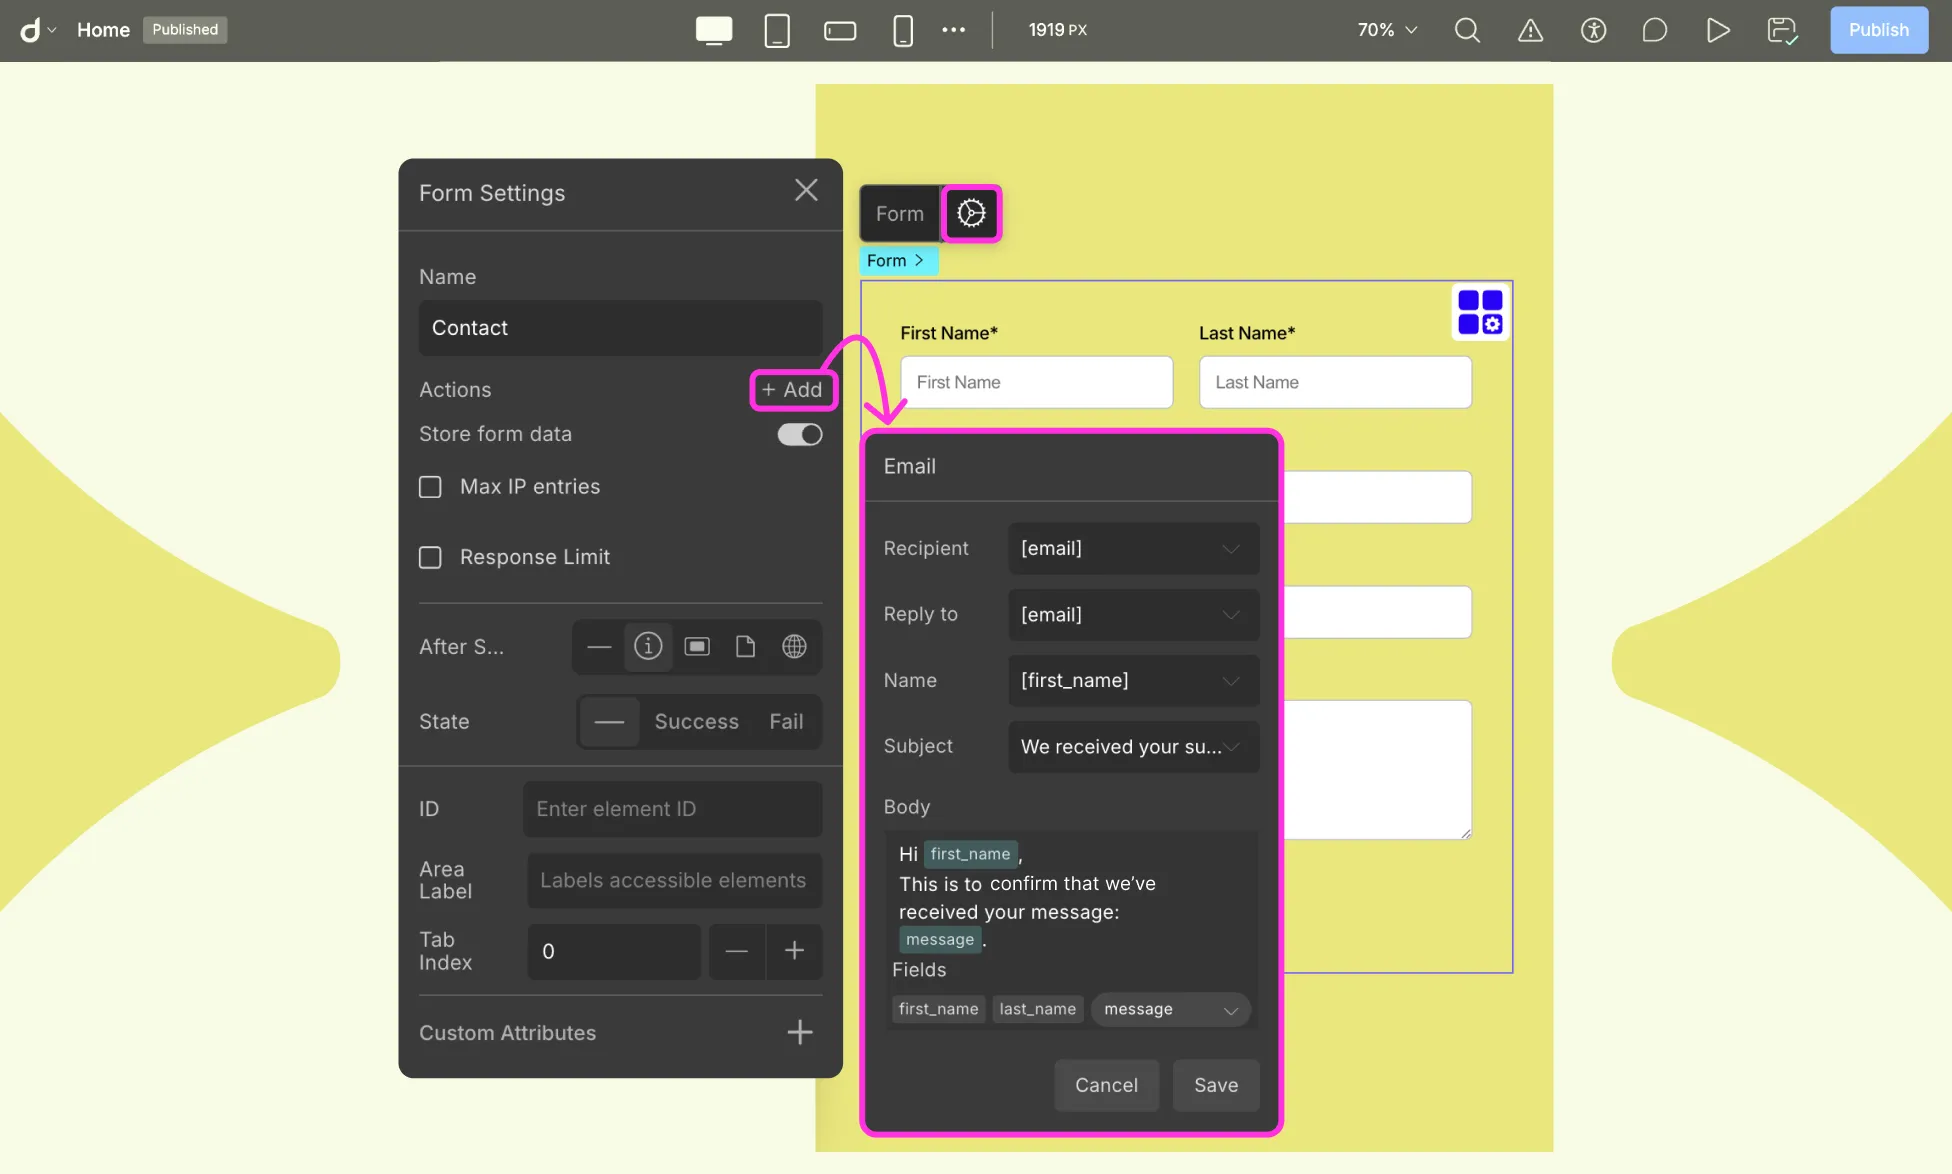
Step 1: Open Form Email Action Settings
- Select your form on the canvas.
- Open Form Settings > Actions > + Add > Email
Step 2: Setup Email Action
- Recipient: Set Recipient to [admin_email] for admin notifications, or [email] if your form includes a user email field. Do not leave it as [email] unless your form has an email field.
- Reply To: [email]. This ensures that when you click “Reply” in your inbox, the response goes directly to the user who submitted the form.
- Name: [first_name] (optional).
- Subject: Enter a subject for your email, e.g, New Contact Form Submission.
- Email body: You can include field names to write your email body.
Example:
Hi [first_name],
Thank you for reaching out! We have received your message:
[message]
Our team will get back to you shortly.
Testing Your Setup
- Fill out your form on the website.
- Confirm that the email arrives at the recipient address.
- Click “Reply” to verify it goes to the user’s email.
- If emails do not appear, check your Spam/Junk folder.
Webhooks in Droip Forms
A Webhook is a way for your form to send data to an external URL in real-time whenever a submission occurs. Unlike email, which simply delivers a message, webhooks allow you to integrate your form with other apps or services, such as:
- CRM systems (e.g., HubSpot)
- Automation tools (e.g., Zapier)
- Analytics or database platforms
- Custom server endpoints for processing submissions
How to Set Up a Webhook in Droip
- Open Form Settings > Actions > + Add > Webhook
- Enter the URL of the service or endpoint you want to send data to.
- Select the HTTP Method:
- GET: Sends data as query parameters in the URL.
- POST: Sends data in the request body (recommended for most integrations).
- GET: Sends data as query parameters in the URL.
- Save the webhook.
Was this page helpful?