The Content Manager is a powerful feature in Droip designed to streamline the creation, organization, and management of dynamic content on your website.
It serves as a central hub where you can define content structures, input data, and seamlessly integrate this data into your site’s design dynamically.
Whether you’re managing a blog, portfolio, client database, or any other type of content, the Content Manager provides a user-friendly interface to handle it all efficiently.
Key Features and Benefits
- Centralized Content Management: Manage all your content in one place, making updates and organization simple and efficient.
- Dynamic Content Integration: Easily integrate your content with your website’s design, ensuring that updates are reflected across all relevant pages automatically.
- Custom Fields: Utilize a variety of field types (text, images, videos, dates, etc.) to capture exactly the information you need.
- Collection Presets: Start quickly with predefined collections for common content types like portfolios, projects, and team members.
- Scalability: Effortlessly handle a growing amount of content without compromising on performance or usability.
- Efficiency: Save time with bulk actions, conditional visibility rules, and other features designed to enhance your workflow.
Accessing the Content Manager
To access the Content Manager in Droip:
- Access the Droip editor: Start by logging into the backend of your Droip website and open the Droip editor.
- Navigate to the Content Manager: From the editor, find and click on the “Content Manager” option on the Topbar.
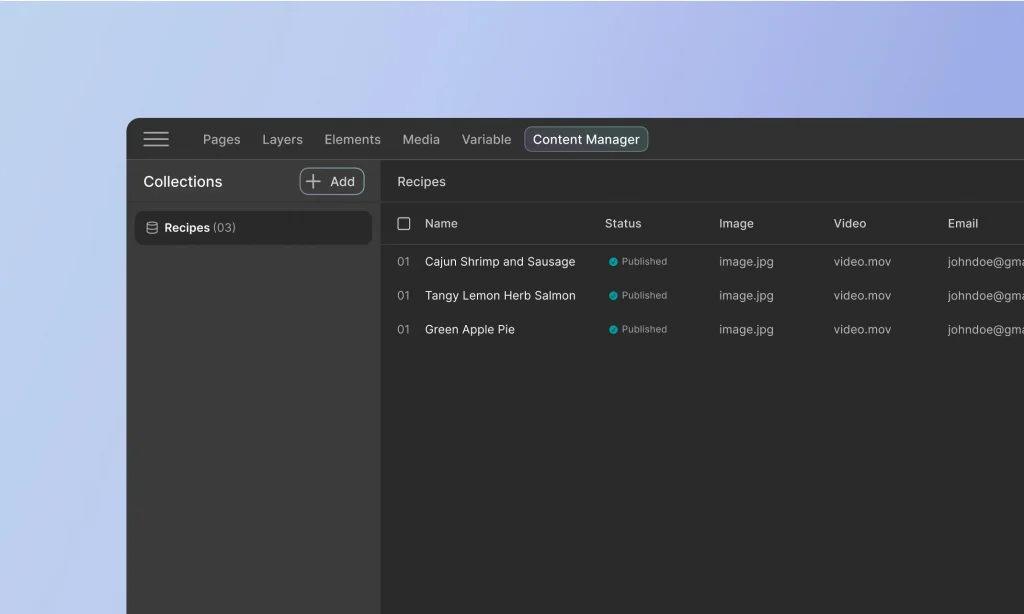
Content Manager Overview
Static content describes content that must be manually updated. Whereas when you use dynamic content, your design is linked to Content Manager data so you can update multiple content instances all at once.
Step 1: Create Collections
To start, navigate to the Content Manager and click on Add New. Name your collection based on the type of content it will hold (e.g., “Blog Posts,” “Products,” “Team Members”).
If you prefer, you can start with a predefined collection template that matches your content type. This can save time and provide a ready-made structure for your content.
Step 2: Define Collection Fields
Collection Fields define the structure of your Collection, dictating the type of information each item will hold. For instance, a “Blog Post” Collection might include fields for the title, author, publish date, and content.
- Add Fields: When creating or editing a Collection, you can add various fields such as text, image, date, number, URL, etc. Each field type is designed to capture specific kinds of data, allowing for precise content management.
- Customize Fields: Customize each field to suit your needs. For example, you can set a text field as mandatory, limit the number of characters, or allow rich text formatting.
Step 3: Add Collection Items
Once your Collection is set up, you can start adding individual items. Each item in the Collection will have the fields you defined where you can input data for each field.
Step 4: Display Dynamic Content
With your Collection items ready, you can now integrate them into your website using Droip’s elements:
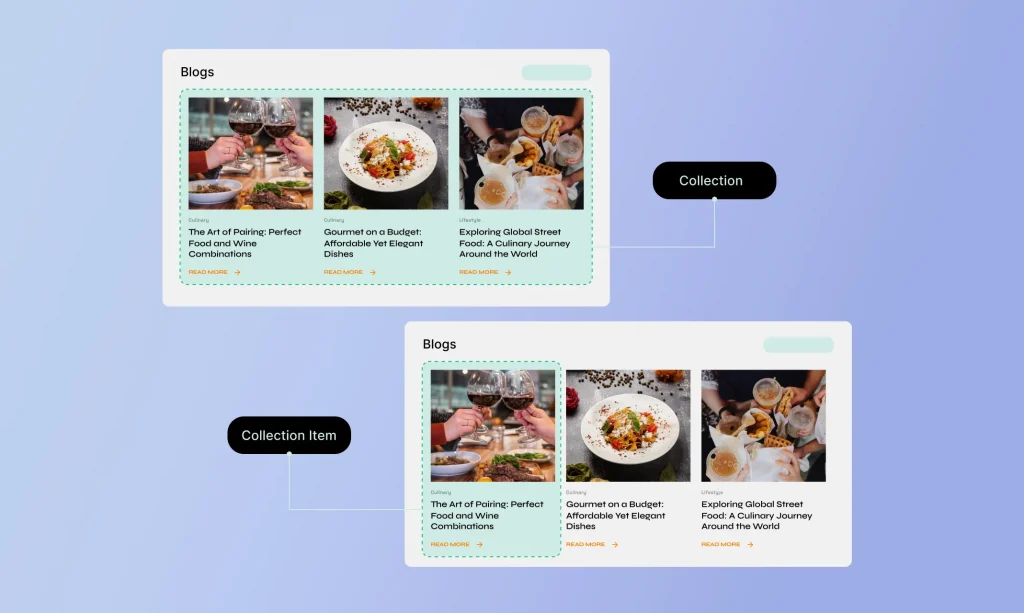
- Collection Lists: The Collection element allows you to display lists of your Collection items on any page. For instance, you can create a dynamic blog feed on your homepage or showcase team members on an “About Us” page. Map the fields from your collection to the corresponding elements in your design (e.g., map the “Name” field to a text element, and the “Profile Picture” field to an image element).
- Collection Pages: Collection Pages enable you to design a single layout that applies to all items in a Collection. For example, if you have a “Team Members” Collection, you can design a page layout with placeholders for the team member’s name, picture, bio, and contact information. The data for each team member will automatically populate these placeholders when the page is viewed.
Was this page helpful?