In Droip, a collection is a structured set of related content items that you can manage centrally and display dynamically on your website.
Collections allow you to group similar types of content, such as blog posts, projects, or team members, and manage them efficiently within the Content Manager.
Each collection is composed of individual entries, each entry being a unique instance of the content type defined by the collection.
Creating a New Collection
Step-by-Step Guide to Creating a Collection:
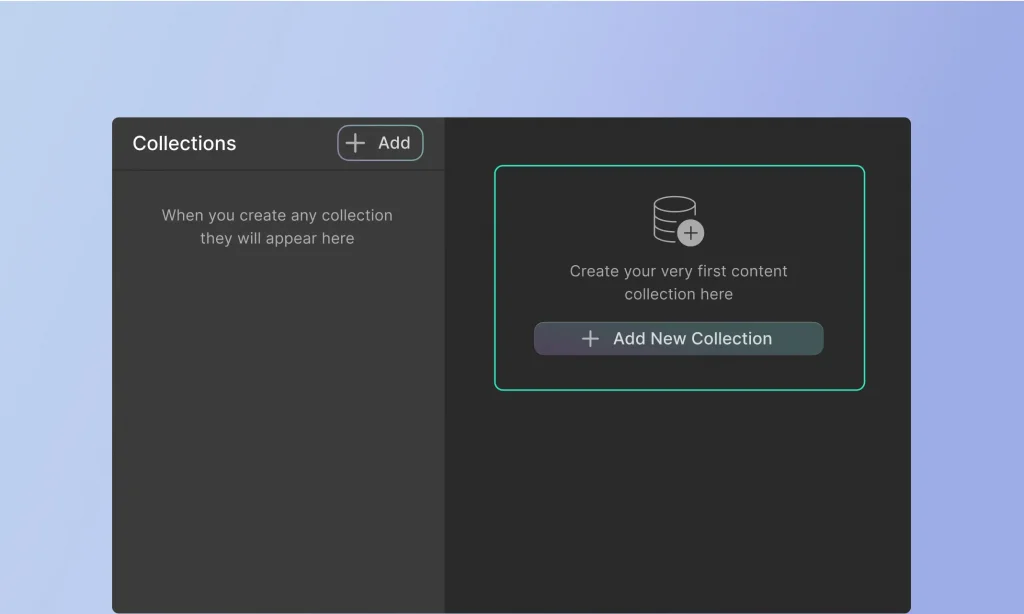
- Access the Content Manager: Open the Droip editor, then navigate to the “Content Manager” option on the top bar.
- Add New Collection: Click on the “+ Add New” button to start creating a new collection.
- Choose a Preset or Start from Scratch: You can either select a collection preset (like Team Members or Recipes) to get started quickly or choose to create a custom collection from scratch.
- Name Your Collection: Enter a name for your collection that clearly describes its content, such as “Blog Posts” or “Portfolio Projects.”
- Define the Collection URL: Specify the URL for your collection, which will be used in your website’s address bar.
- Add Fields: Define the fields for your collection. Click on the “+ Add” button under “Custom Fields” to add new fields. You can add text fields, images, videos, dates, and more, depending on what data you need to capture.
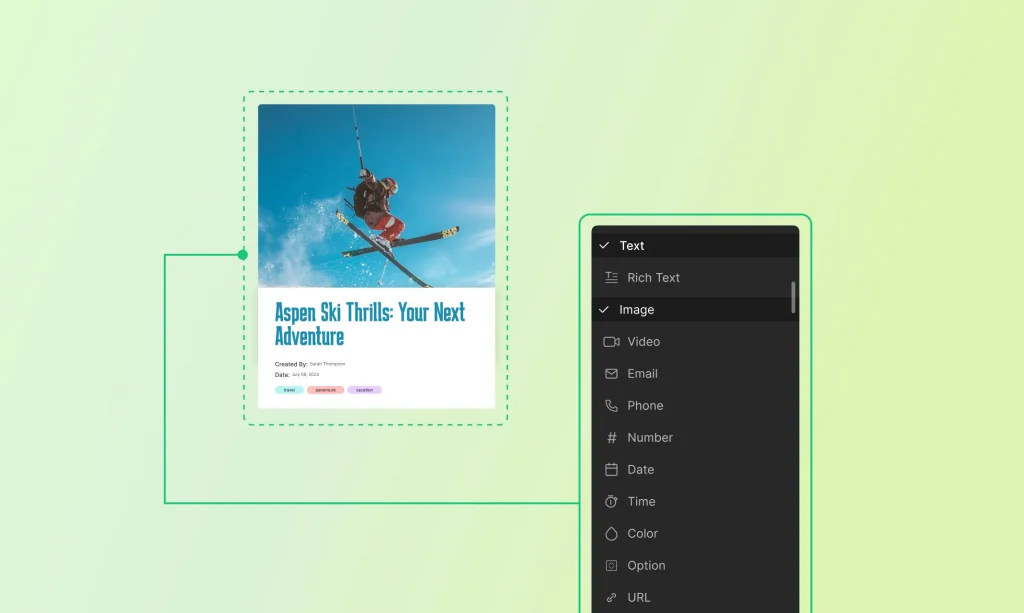
- Configure Field Settings: For each field, configure its settings such as label, required status, and any validation rules.
- Save Your Collection: Once you’ve added all the necessary fields and configured them, click the “Create” button to save your new collection.
Collection Presets
Droip provides several collection presets to help you get started quickly with commonly used content types. These presets come with predefined fields tailored to their specific use cases, making it easy to set up and start adding content.
- Team Members: Includes fields for name, position, bio, profile picture, and contact information.
- Portfolio: Designed for showcasing projects, with fields for project name, descriptions, images, and links.
- Projects: Similar to the portfolio preset, focused on detailed project descriptions and related media.
- Clients: Includes fields for client names, testimonials, project history, and contact details.
- Listings: Ideal for real estate, job postings, or product catalogs, with fields for title, description, price, and location.
- Recipes: Comes with fields for recipe name, ingredients, steps, cooking time, and images.
Customizing Presets
While the presets provide a solid starting point, you can customize them to better fit your specific needs:
- Select a Preset: When creating a new collection, choose a preset that closely matches your requirements.
- Modify Fields: After creating the collection, you can add, remove, or edit fields to suit your needs. For example, you might add a “video tutorial” field to the Recipes preset or a “client logo” field to the Clients preset.
- Rearrange Fields: Adjust the order of fields by dragging and dropping them in the desired sequence.
- Field Settings: Customize each field’s settings, such as making a field required, changing its label, or adding validation rules.
- Save Changes: After customizing the preset, save your changes to update the collection.
By understanding and utilizing collections, you can effectively manage and display dynamic content on your Droip website.
In the next sections, we’ll delve deeper into managing entries, using dynamic content, and integrating collections into your website design.
Was this page helpful?