Make your Collection pages easier to explore by adding a search bar and filters that update results in real time.
What you can create:
- A search box that looks through items in a selected Collection
- Filters based on fields like category, tags, and more
Before you start, make sure:
- You already have a Collection created in the Content Manager (e.g., Products, Recipes)
- A Collection List is connected to that Collection and displayed on the page
Learn more about Displaying Collections.
Add a Collection Search
Step 1: Insert a Form Input element
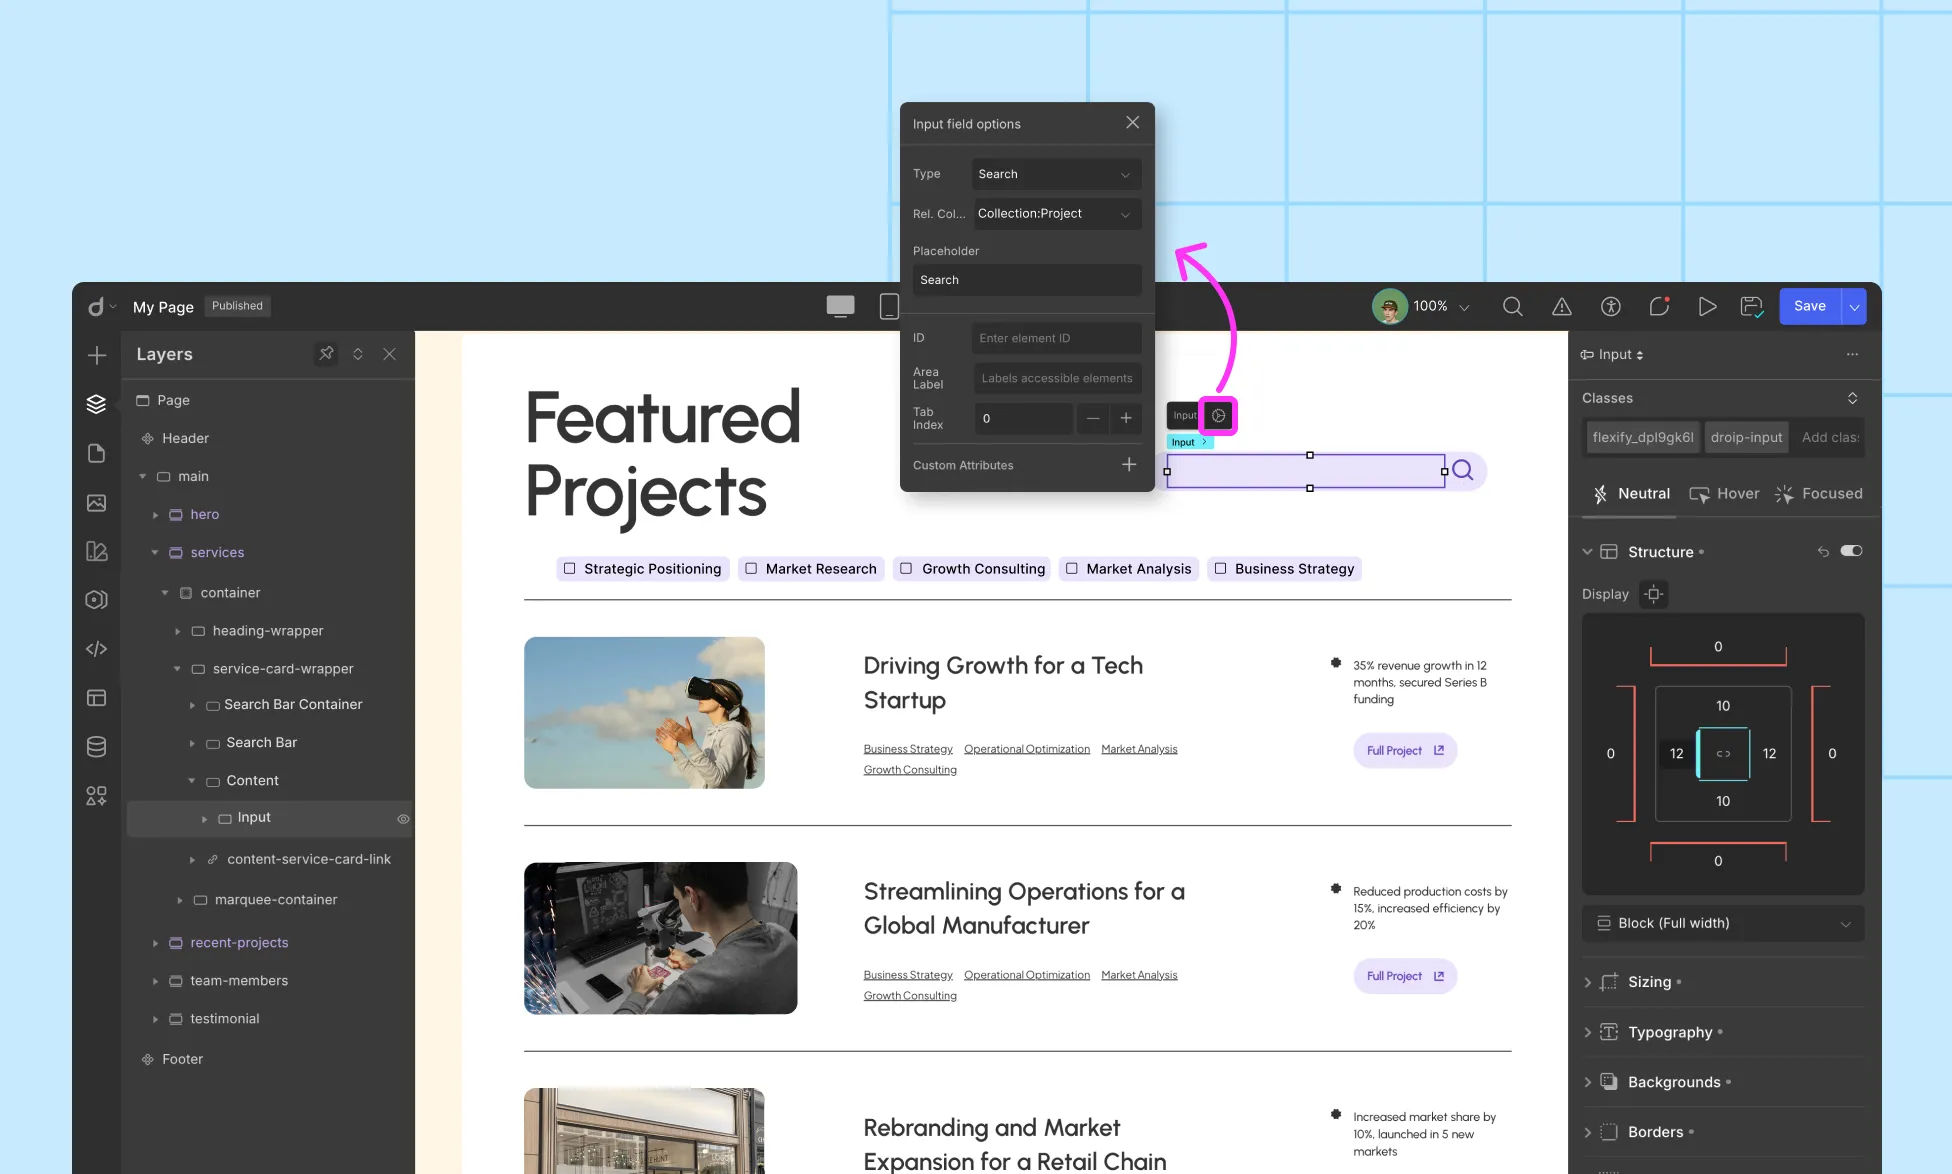
Drag the form Input element onto the canvas.
In Input Settings, set Type = Search.
For ref. Collection: choose the Collection you want to search in.
Set Placeholder (e.g., Search…)
Note: In the dropdown, you’ll only see the Collections already used on that page. The names of the Collections will appear exactly as you’ve named them in the Layers panel. If you didn’t name your Collection element in the Layers panel, it will simply appear as Collection.
Step 2: Style the search bar (optional)
- Use Design controls to customize radius, padding, border, and focus states.
- Add an Icon inside the input (prefix) and a Clear button (suffix) for better UX.
- Ensure the focus outline is visible for accessibility.
Step 3: Test the search

- Type a few queries and verify the Collection List updates.
- If nothing changes, confirm that both the search input and the results list reference the same Collection.
Add a Checkbox Filter to a Collection
A checkbox filter lets users narrow down items in a Collection based on specific fields, like Category, Tags, or any referenced Collection.
For example, you can let visitors filter your Projects Collection by selecting different Project Tags.
Here’s how to set it up step by step:
- Insert a Collection element onto your page.
- Set up the Collection Source:
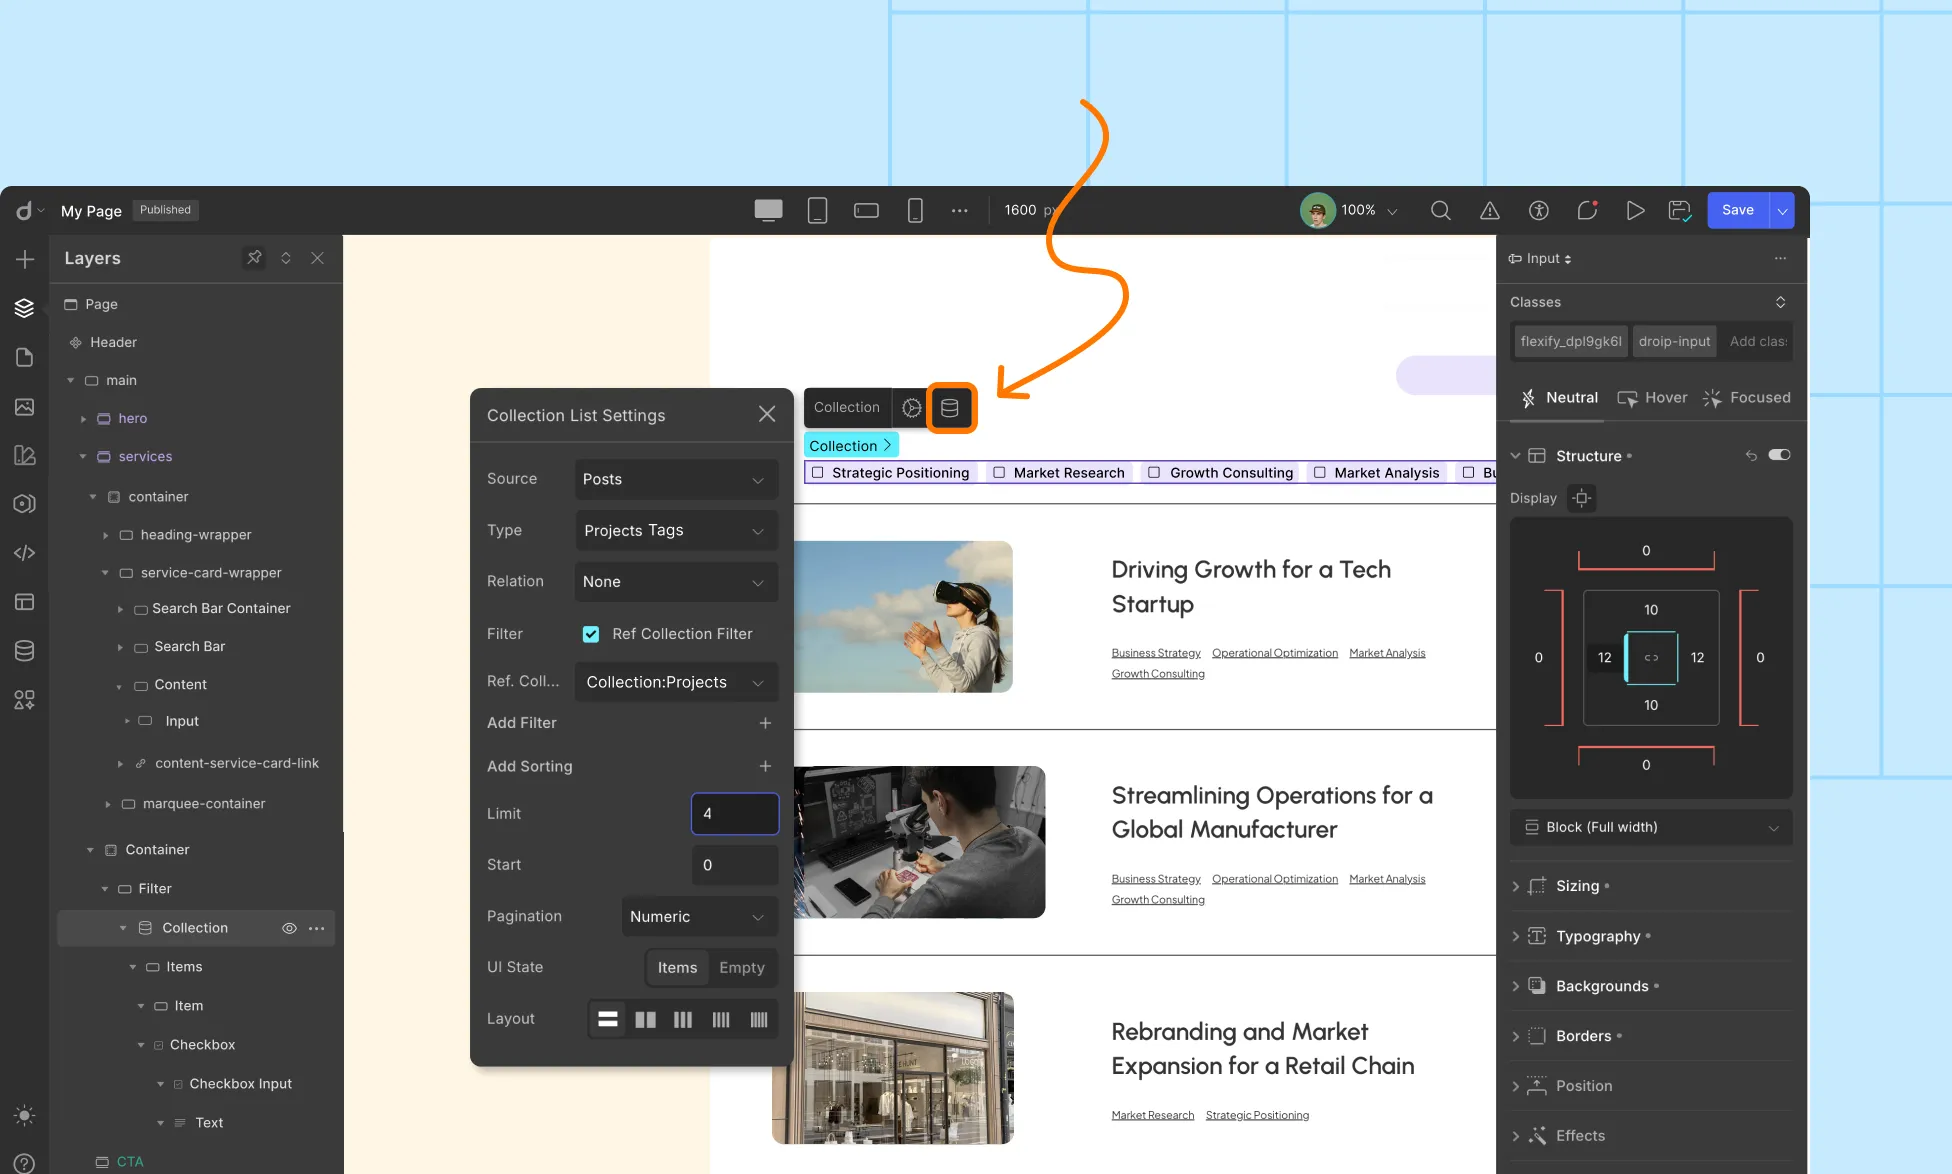
- Source: Posts
- Type: Project Tags
- Relation: None
- Enable Ref Collection Filter, then choose the referenced Collection (in this case, Projects).
Note: In the dropdown, you’ll only see Collections already added to that page. The names match what you’ve called them in the Layers panel (not in the Content Manager). If you didn’t rename a Collection, it will simply appear as Collection.
- Inside the Collection Item, delete the default Heading and Paragraph.
- Drag a Checkbox element inside the Item div. Now, each Project Tag will automatically generate its own Checkbox.

- Select the Text element inside the Checkbox and set its dynamic settings to:
- Type: Project Tags
- Value: Title
- Type: Project Tags
- Preview and test your filter. Selecting a Checkbox should filter the Projects Collection instantly.

Was this page helpful?