Droip’s Content Manager supports scalable, relationship-driven architecture using Reference and Multi-Reference fields. These fields allow you to create relational data models, making content reusable, consistent, and dynamic across your website.
What Is a Reference?
A Reference field creates a one-to-one relationship between two content collections.
Think of it as a “foreign key” where one item points to another, rather than storing duplicated data.
What Is a Multi-Reference?
A Multi-Reference field forms a one-to-many relationship, where one item can link to multiple items in another collection.
This enables advanced relational setups like tags, multi-instructors, etc.
Reference Field
A Reference Field lets you connect a single item from one collection to another. It’s perfect for one-to-one relationships — like assigning a Department to a Course, or a Contributor to a Project.
Why Use It?
- Reuse data instead of typing it again and again.
- Keep your content consistent across the site.
- Update once, and it changes everywhere it’s used!
Example: Instead of typing the department’s name for every course manually, you can connect each course to a department from the Departments collection.
How to Add a Reference Field
Let’s say you already have a Courses collection, and you want to reference a Department from another collection called Departments.
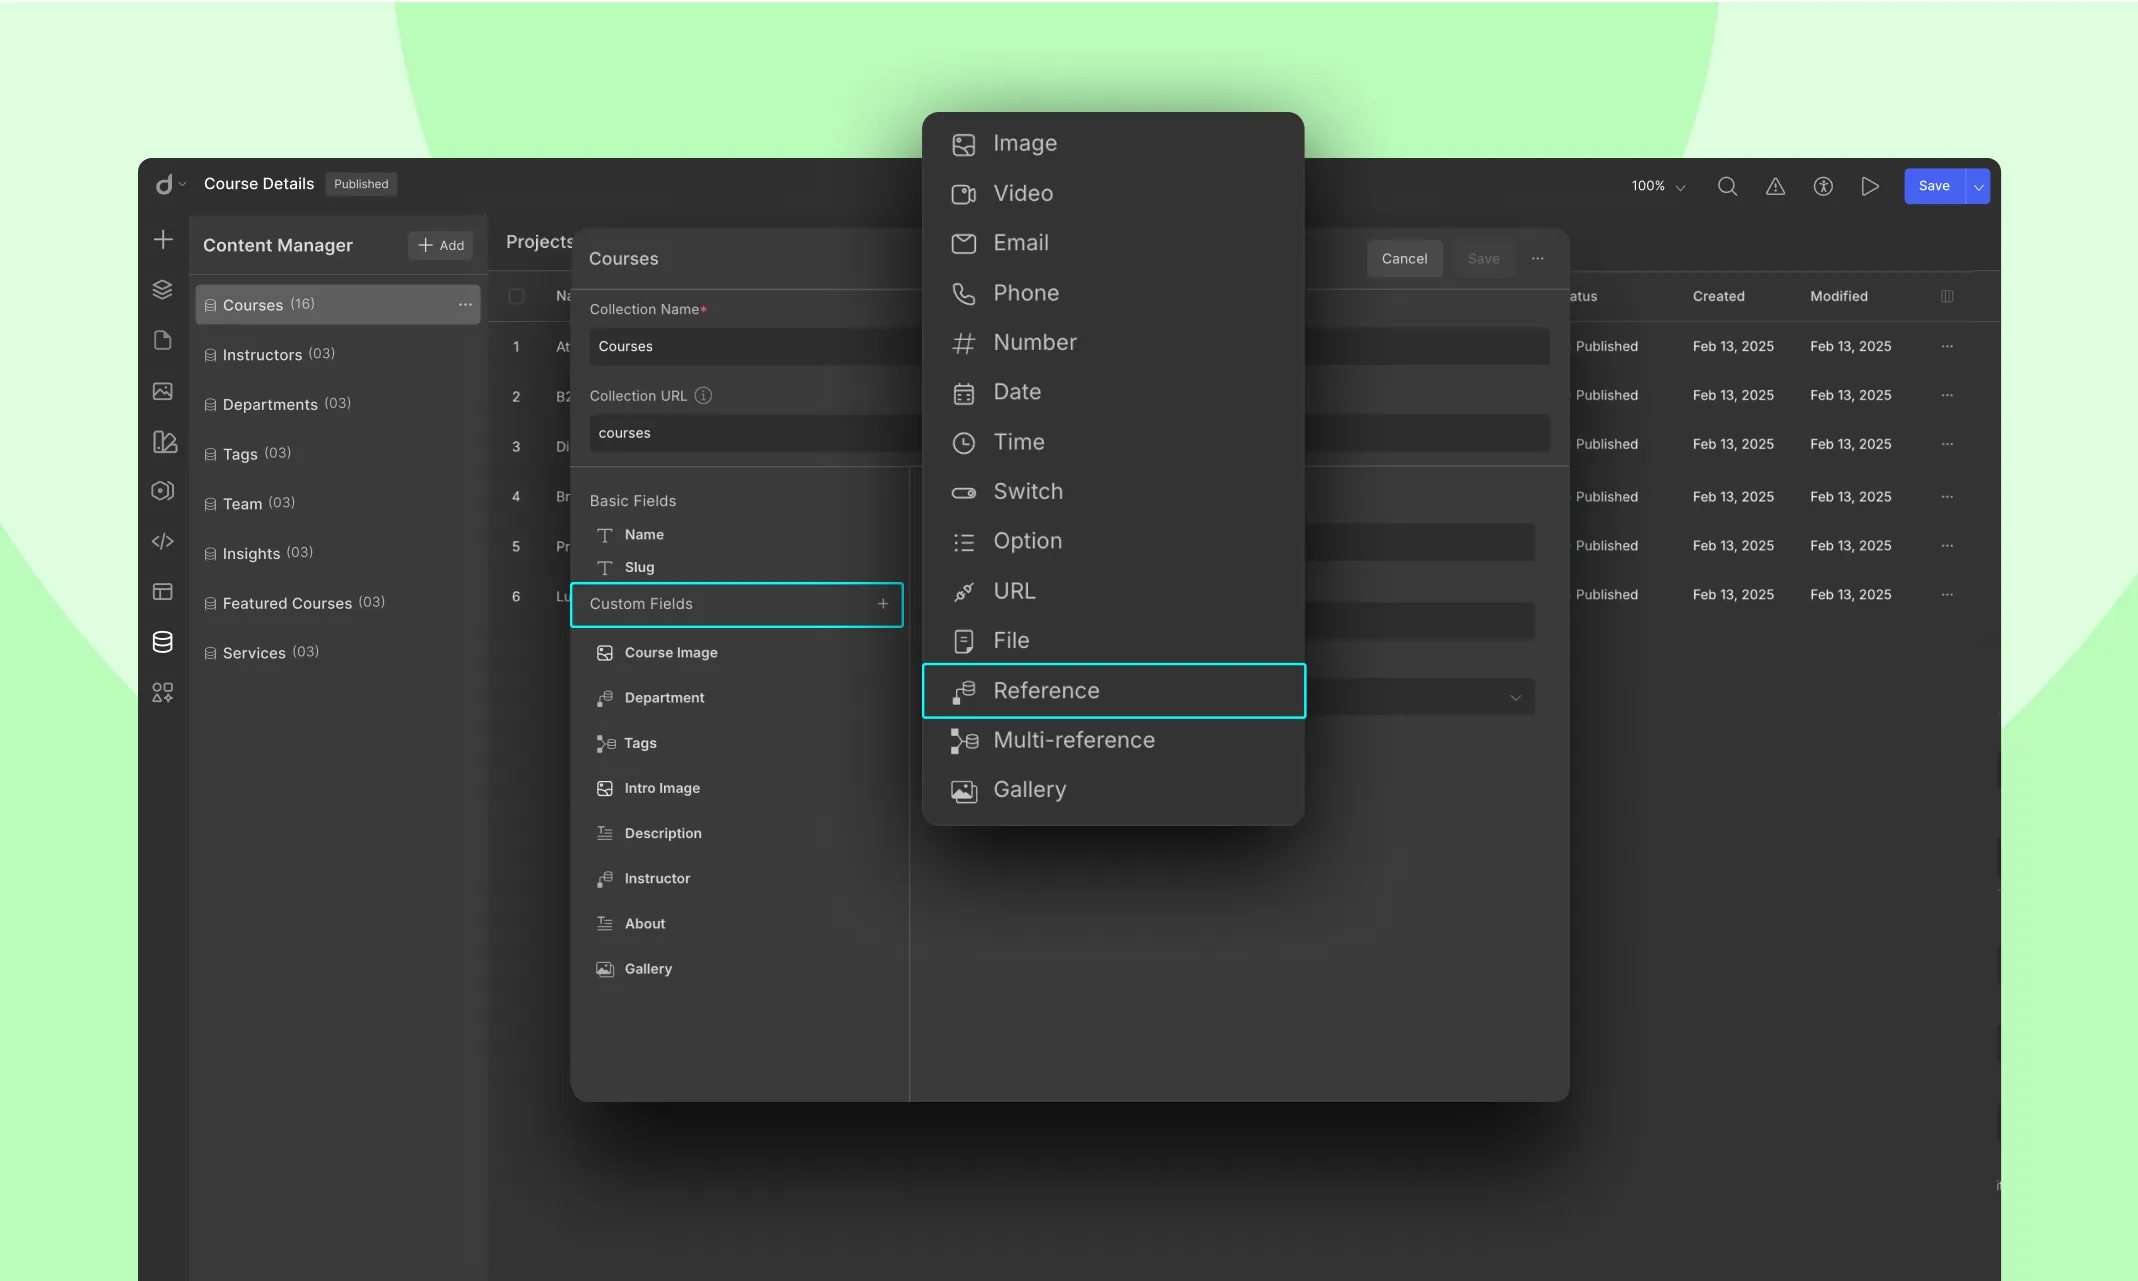
- Go to the collection where you want to add the reference (e.g., Courses).
- Click + Custom Fields, then choose Reference.
- Set the Target Collection: Pick the target collection you want to reference (e.g., Departments)
- Name the Field: Give the field a name (e.g., Department)
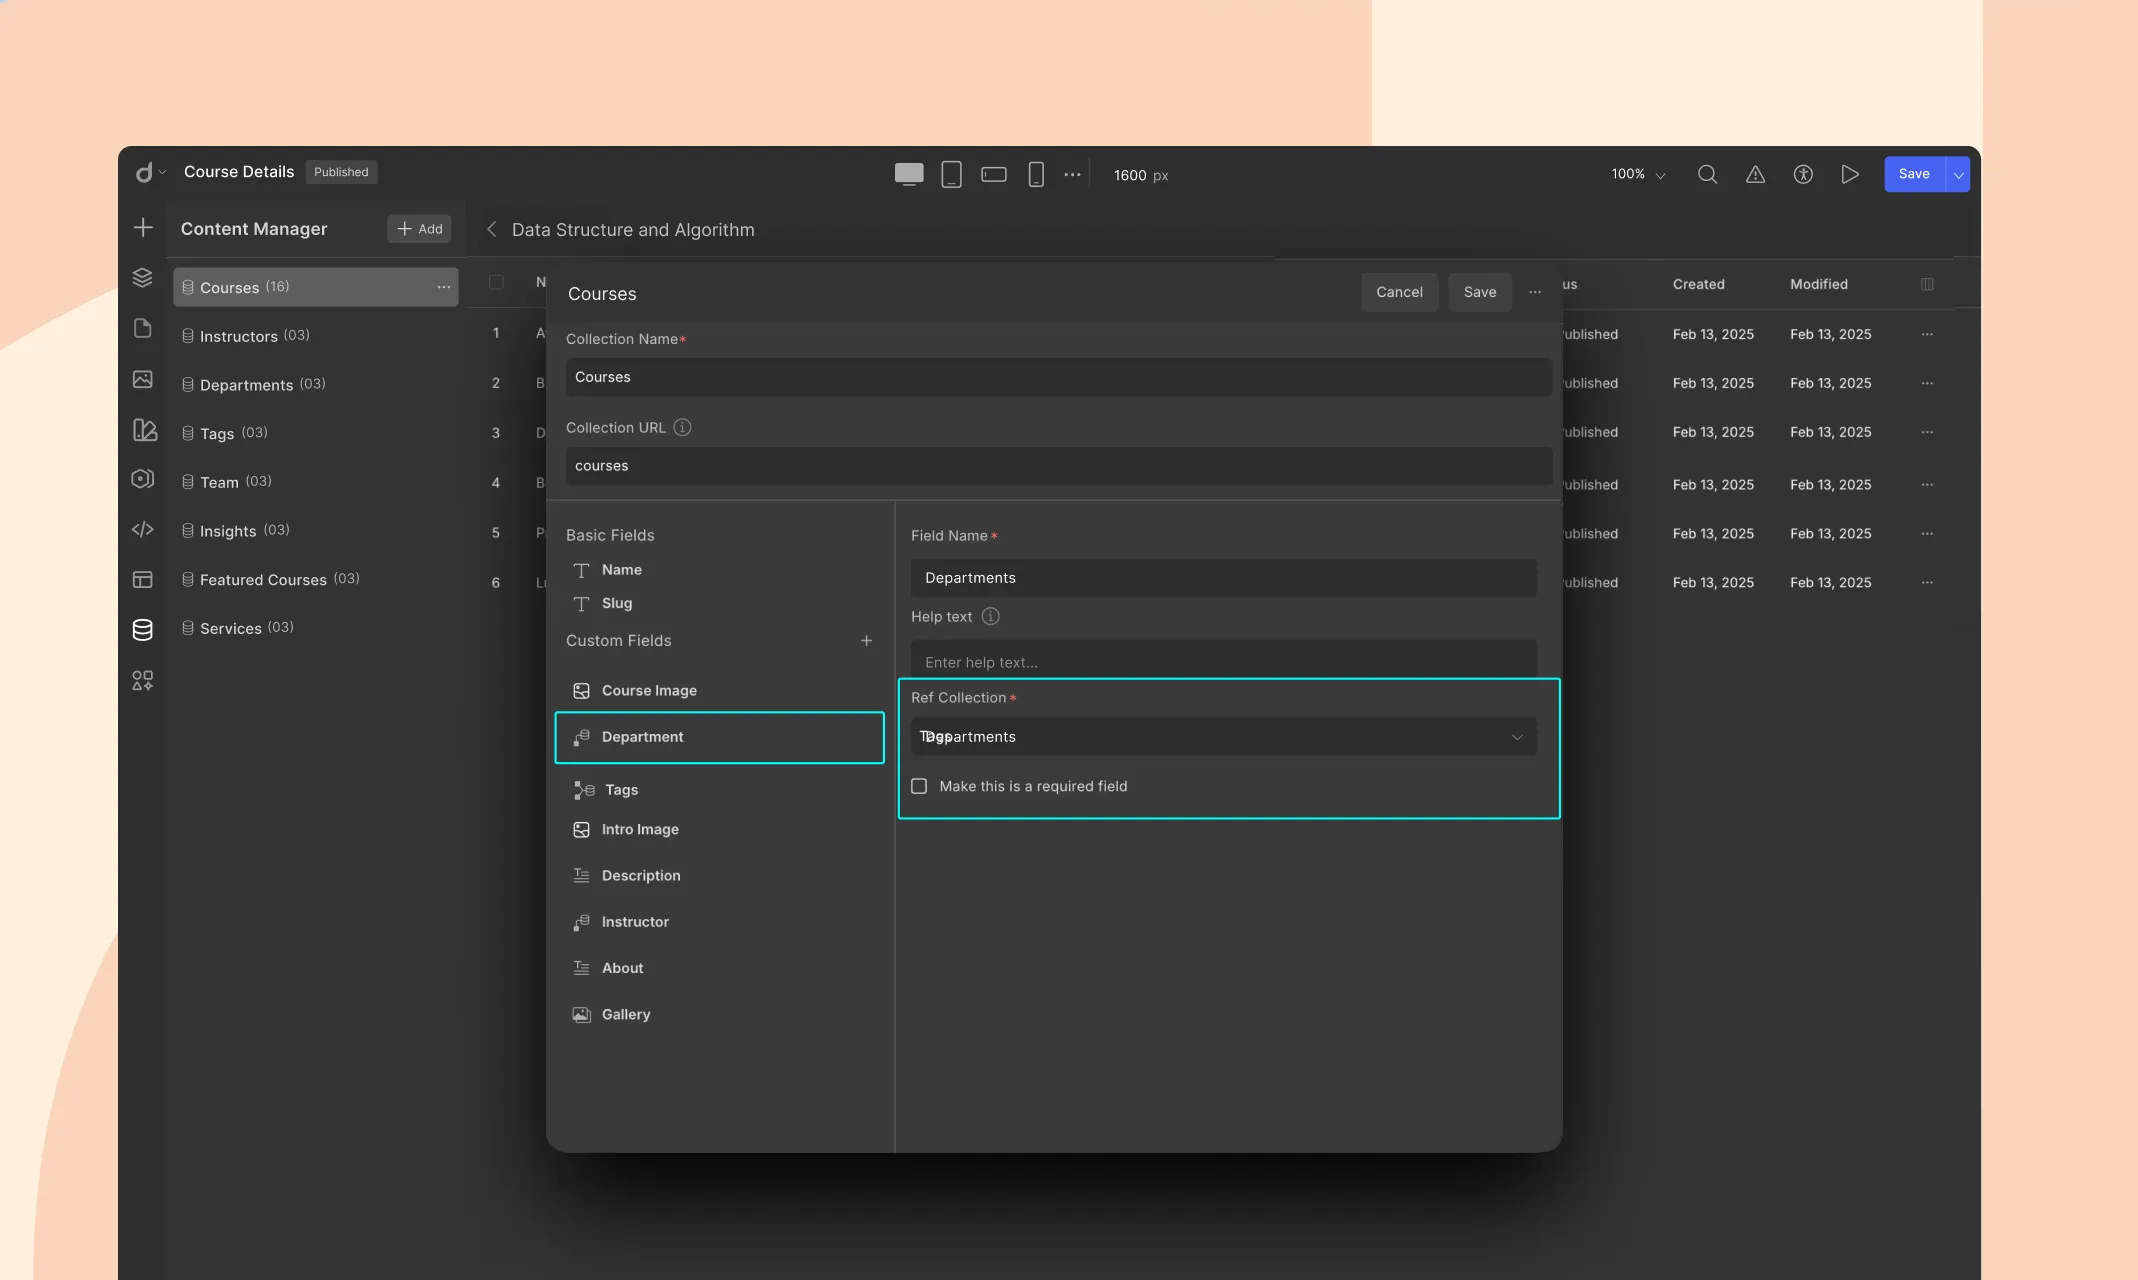
- Hit Save to apply the changes.
Add Data to the Field
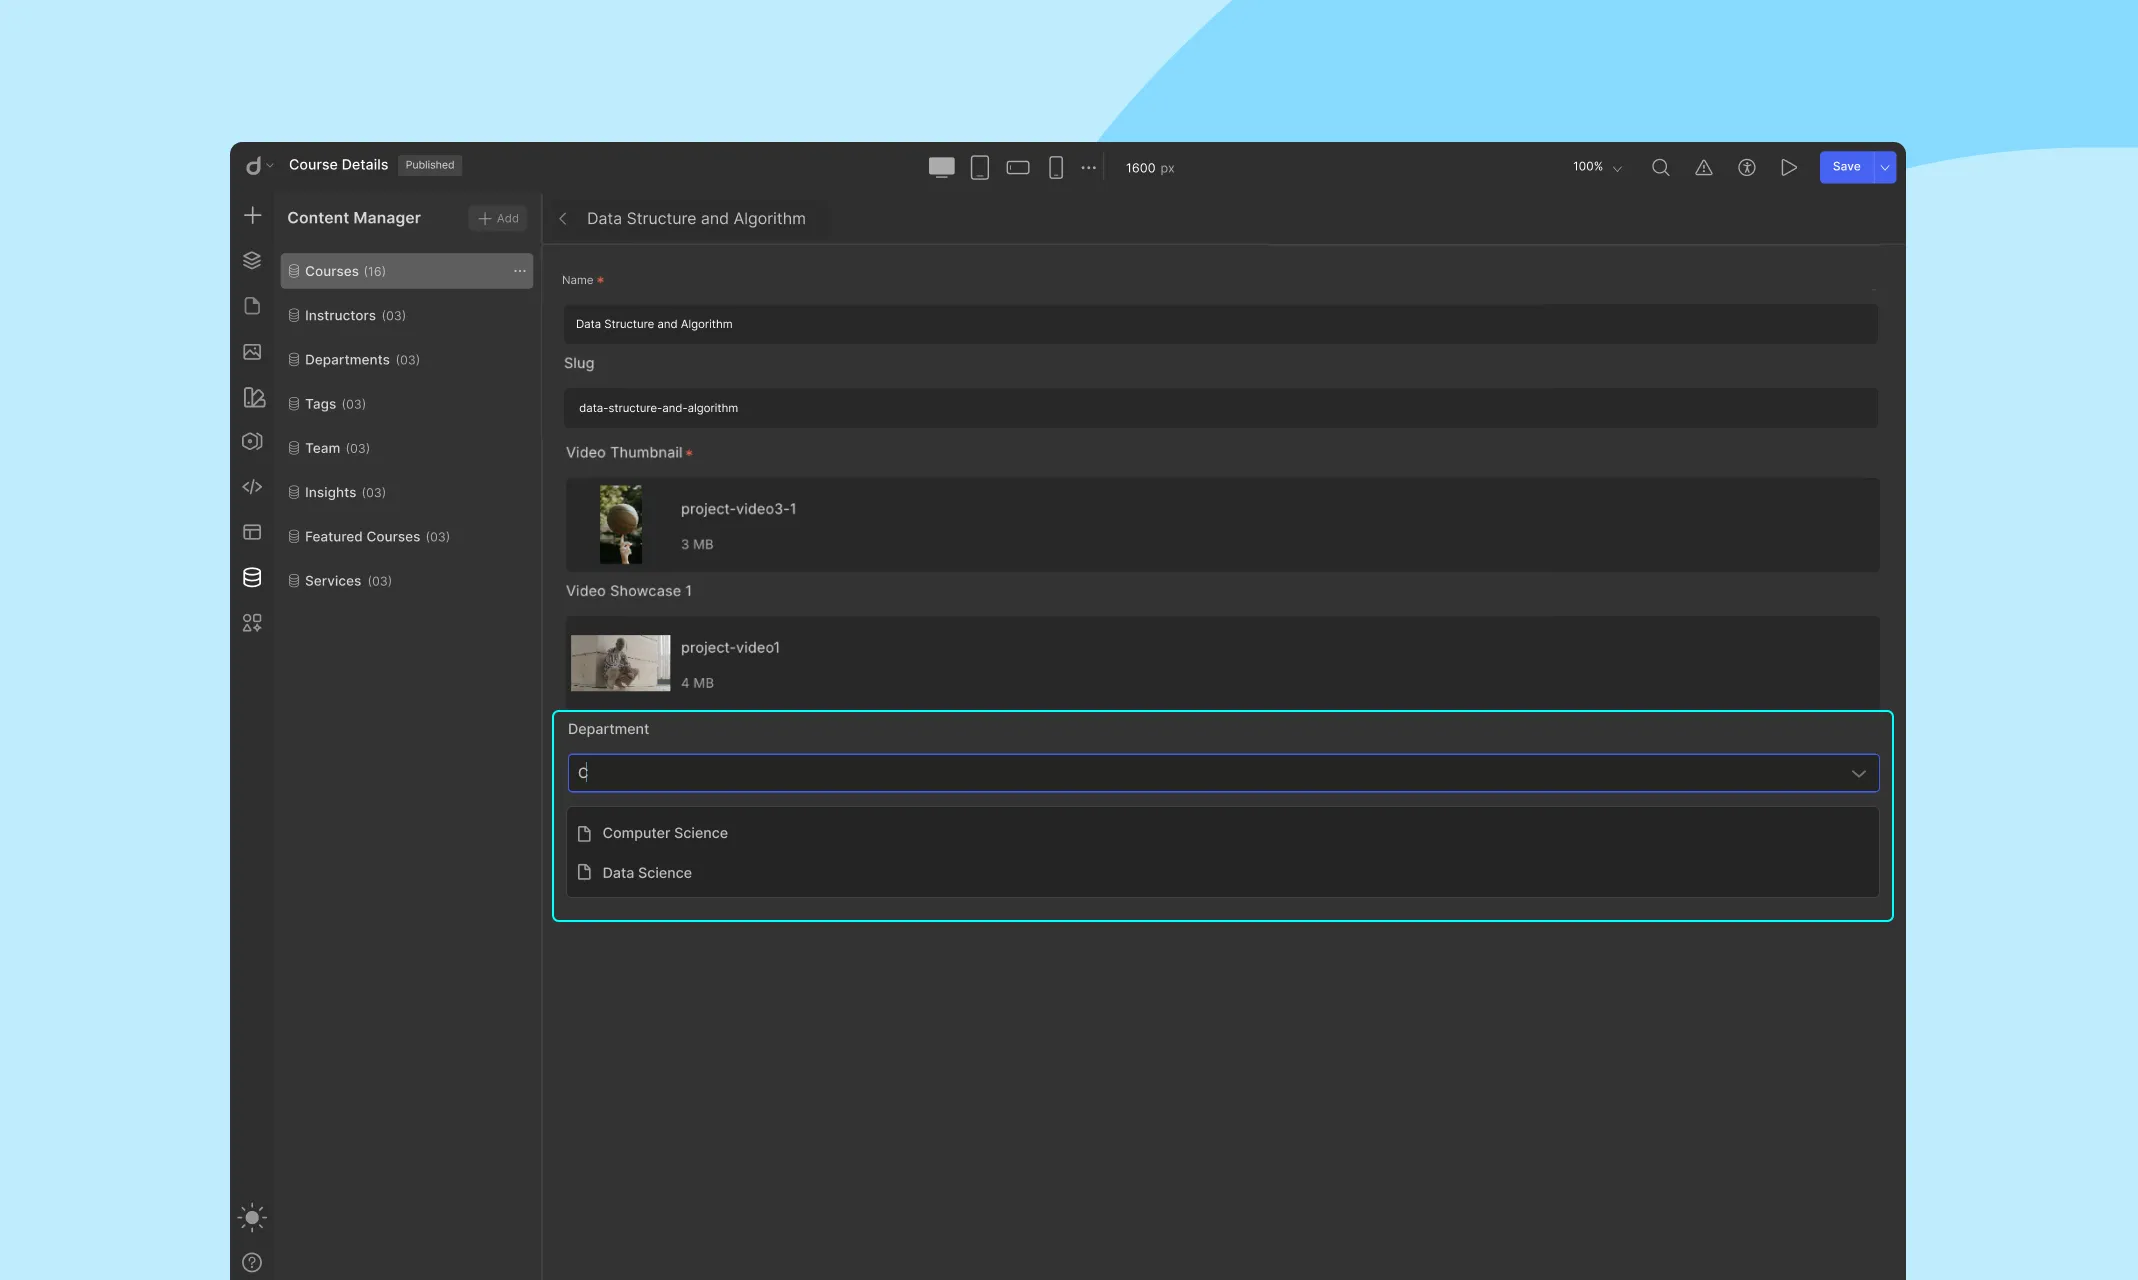
When you’re adding or editing a Course in your Courses collection:
- You’ll now see a dropdown for the reference field (e.g., Department)
- Choose one of the items from the Departments collection — that’s it!
Displaying Reference Field on Your Website
Once you’ve connected data, you can display it on your page.
On a List Page (e.g., all Courses)
- Add a Collection Element to the page.
- Set the Source to Courses
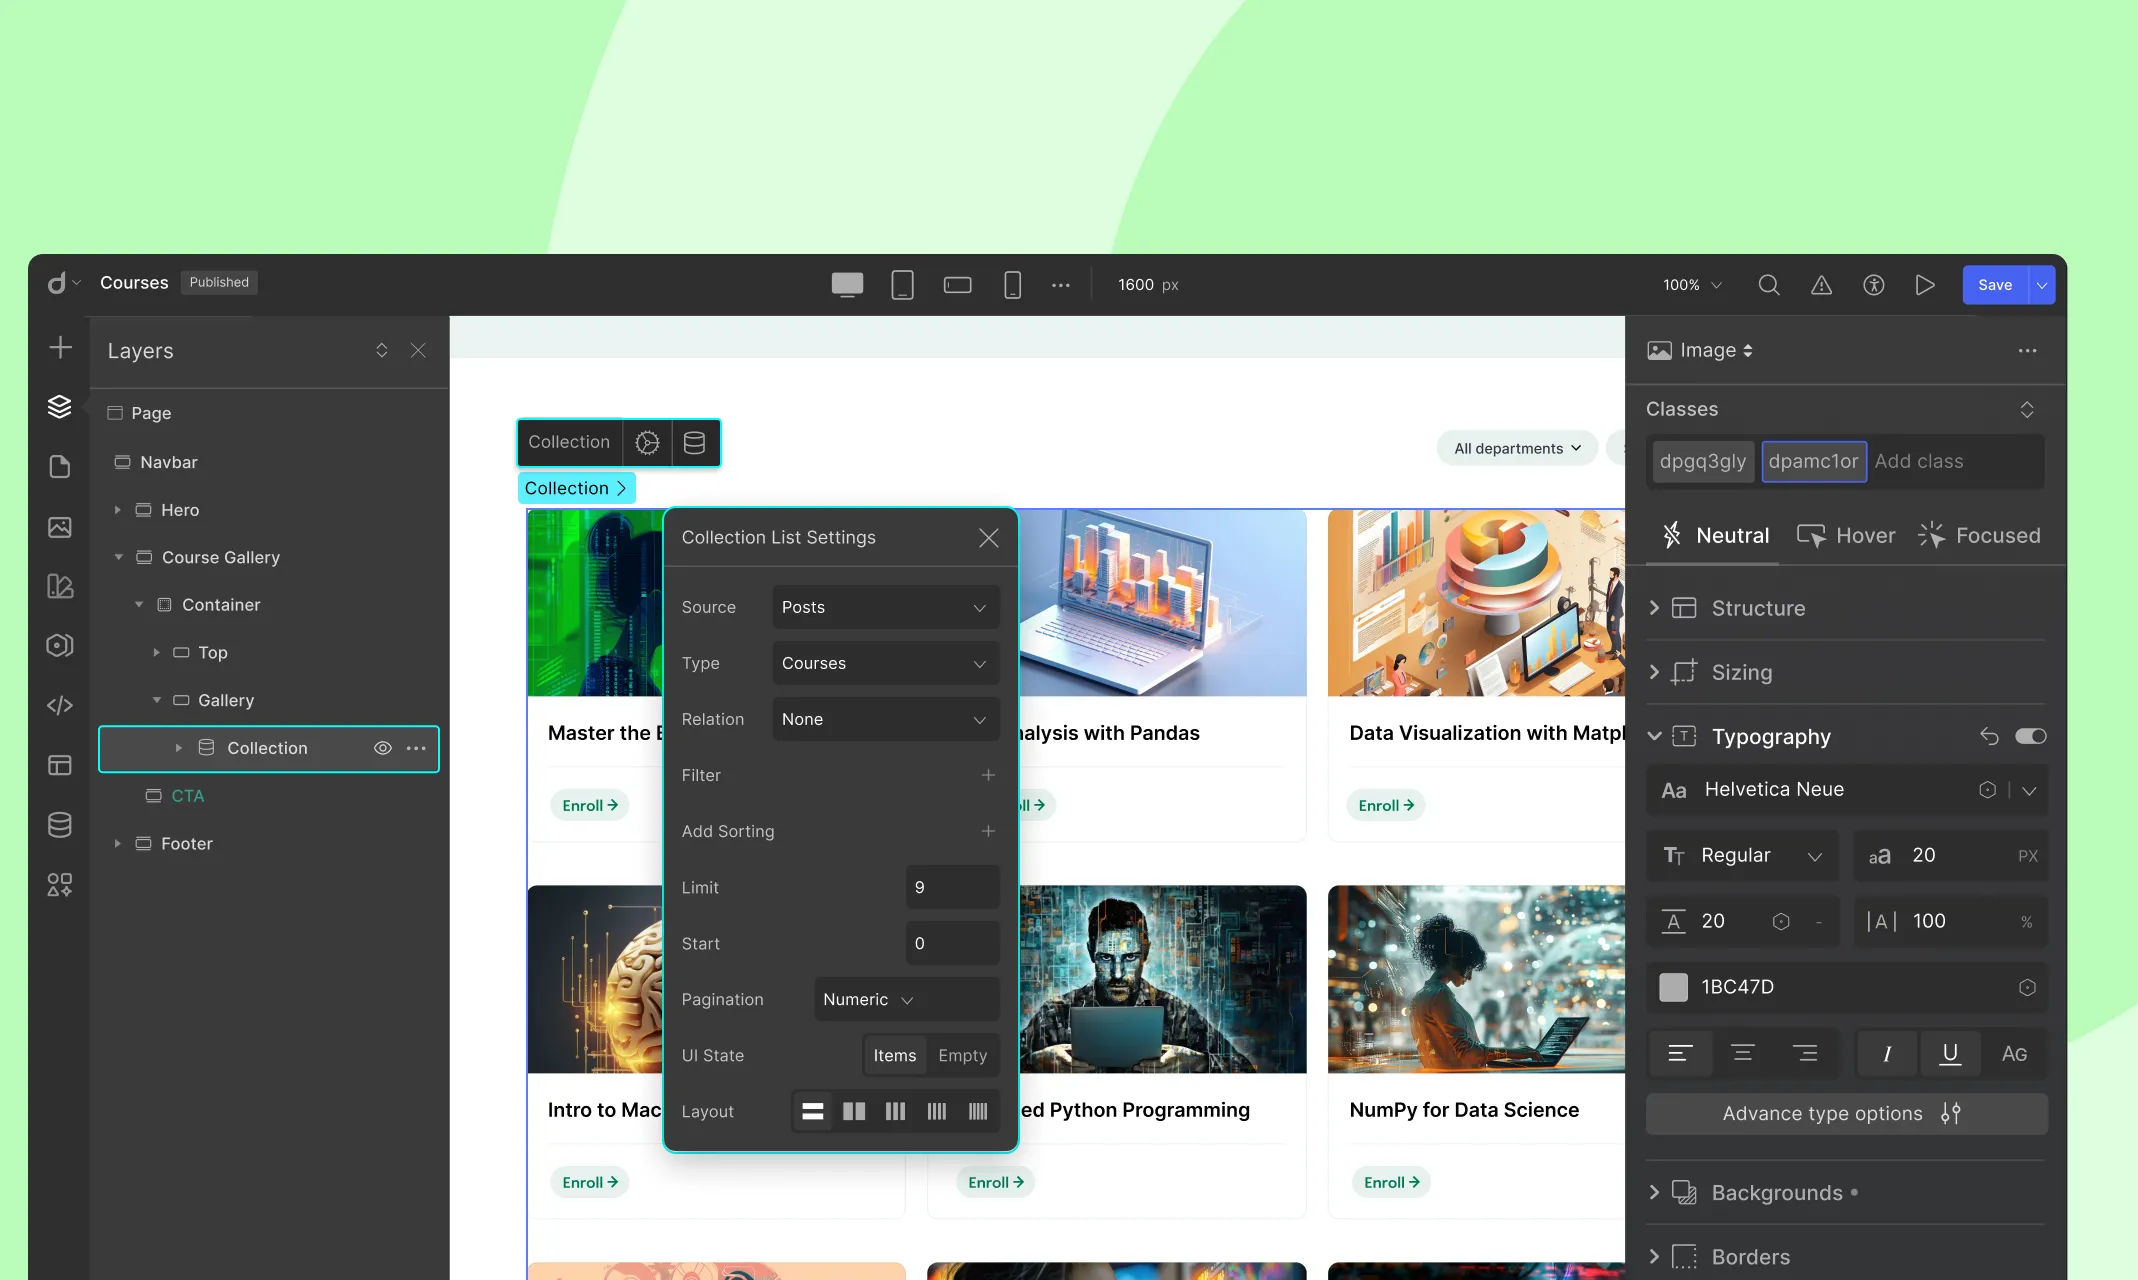
- Inside the Collection Element, add design elements (e.g., text).
- For each element, click the Dynamic Content icon and set:
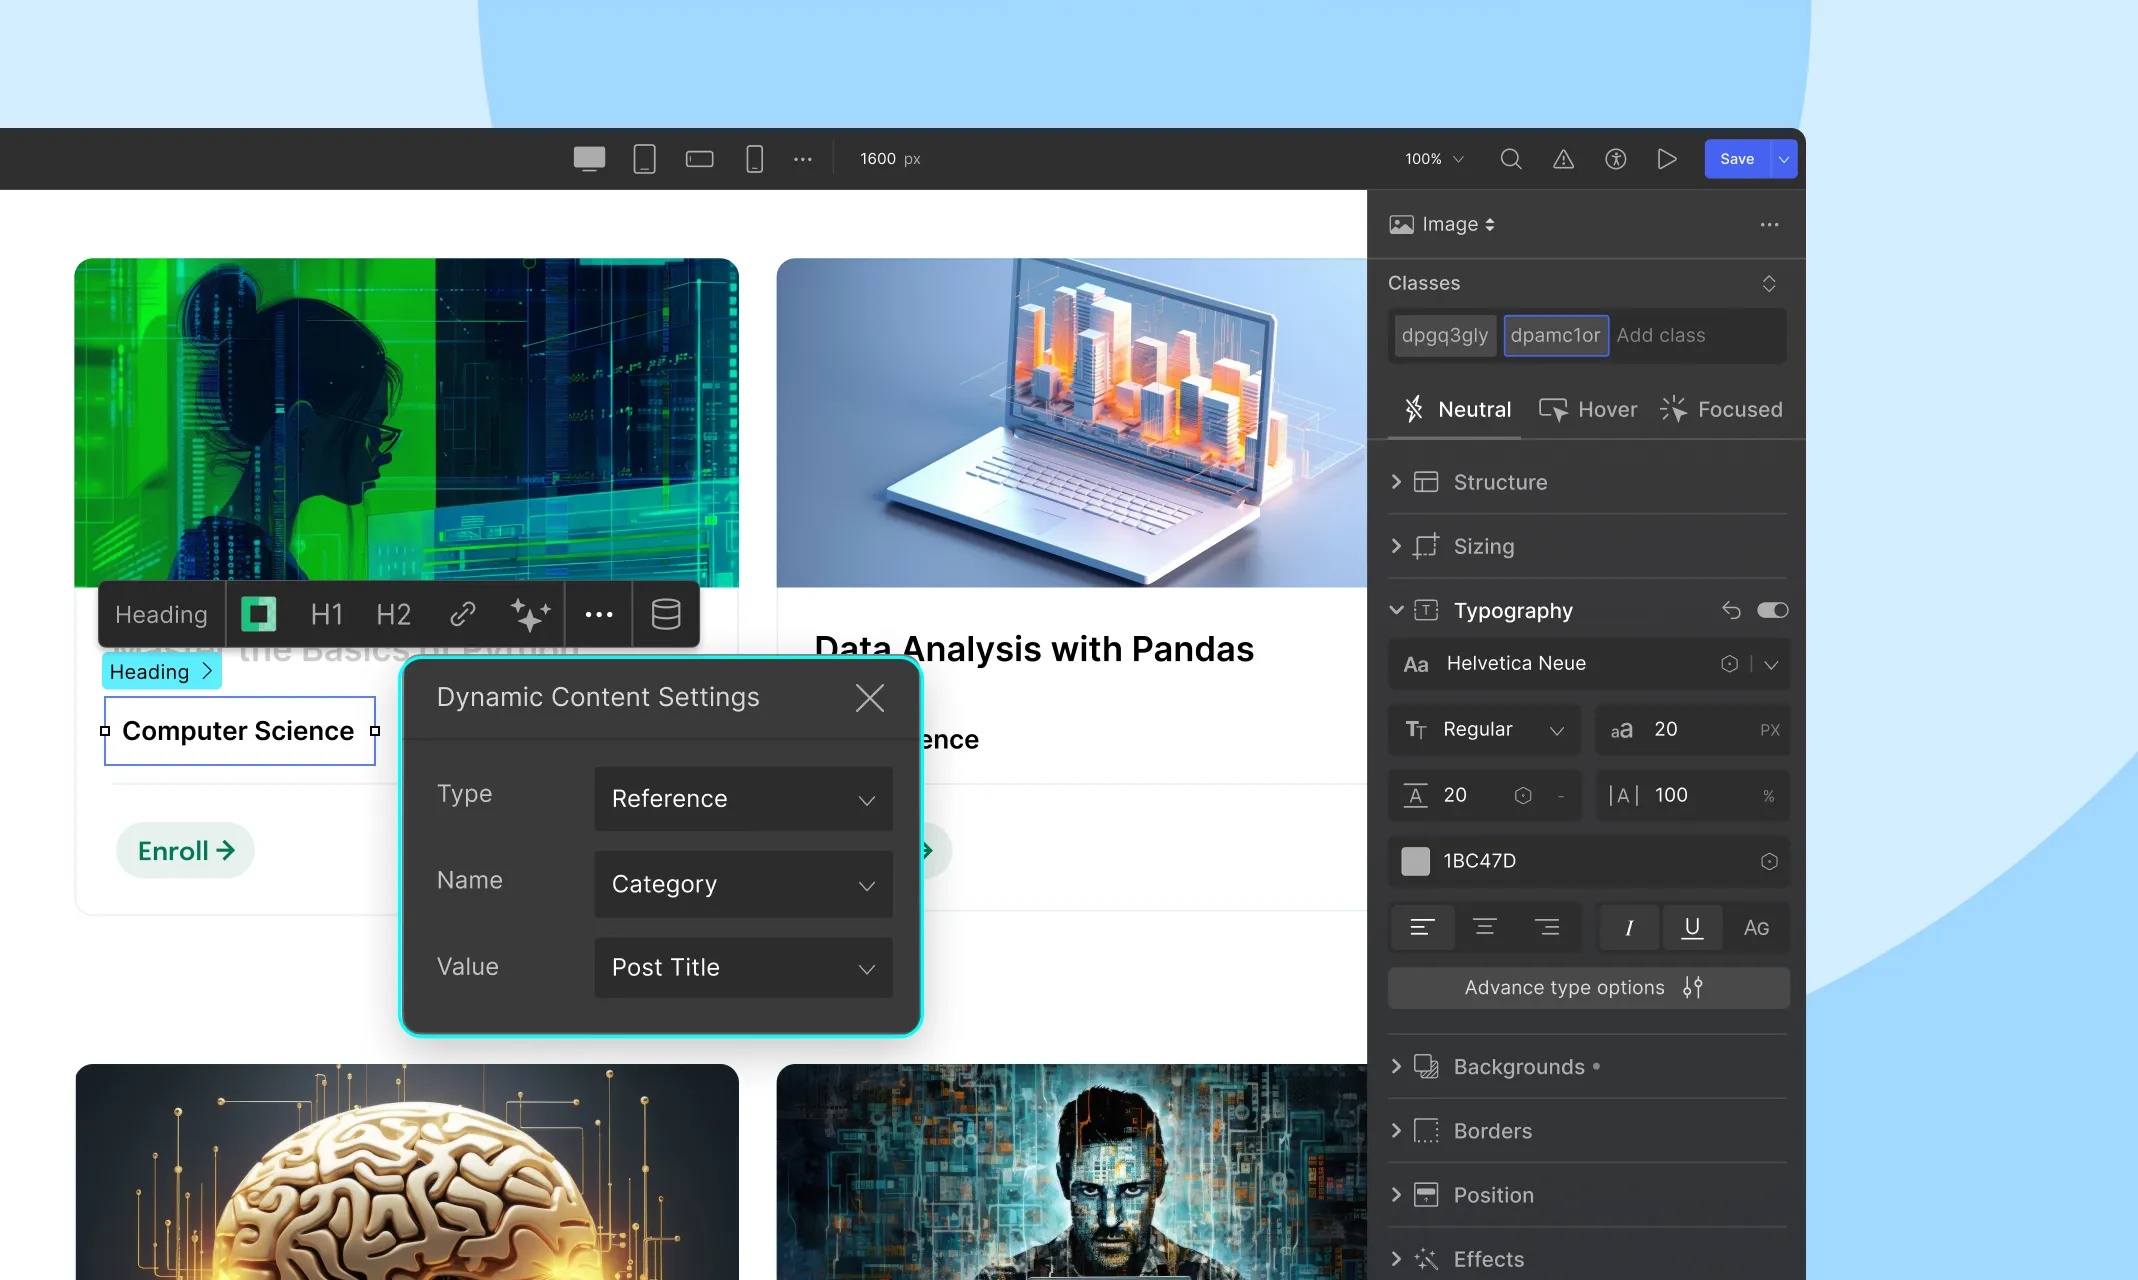
- Type: Reference
- Name: Department
- Value: What you want to display — like Post Title, etc.
On a Template Page (e.g., single Course page)
On a template page (e.g., dynamic page for each Course), the context of the current item is already known — so you don’t need a Collection Element for Reference Fields.
- Drag a text/image or any design element anywhere on the page.
- Click the Dynamic Content icon and set:
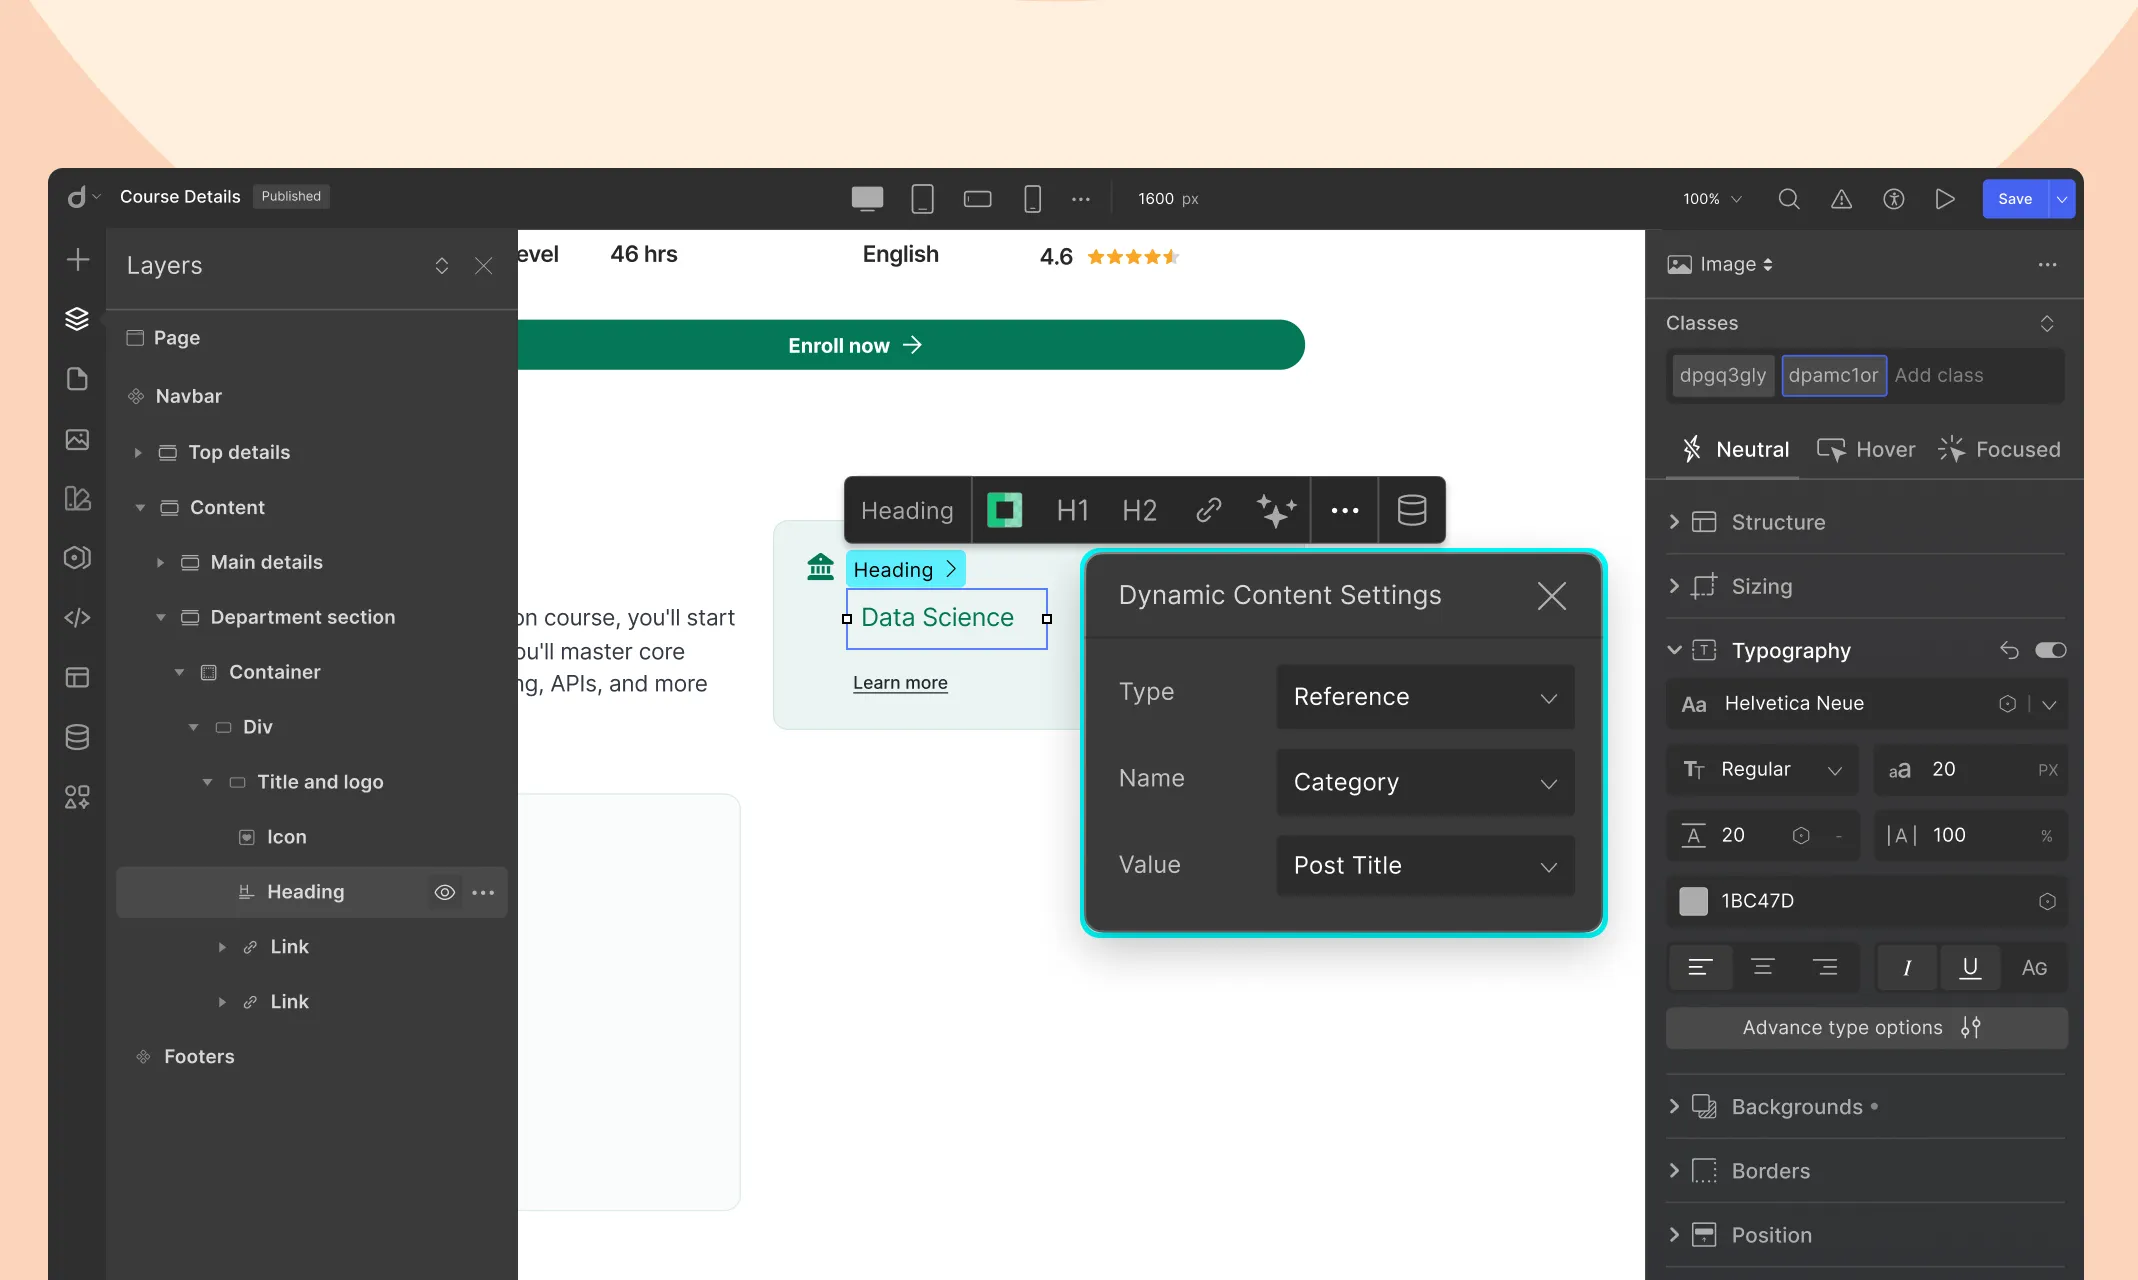
- Type: Reference
- Name: Department
- Value: Choose what to show — like Name, Description,etc
Multi-Reference Field
A Multi-Reference Field lets you link multiple items from another collection. This is ideal for one-to-many relationships — like assigning multiple Tags to a Course, or multiple Awards to a Project.
Why Use It?
- Connects multiple items to a single entry.
- Easily manage grouped content (like tags, features, etc.)
- Keep related content dynamic and consistent
- Save time by reusing data across different items
Example: If you want to assign multiple tags to a course, instead of typing them all in manually, connect them from a Tags collection.
How to Add a Multi-Reference Field
Let’s say you want to add multiple Tags to your a Course.
- Go to the collection where you want to add the multi-reference (e.g., Courses).
- Click + Custom Fields, then choose Multi-Reference.
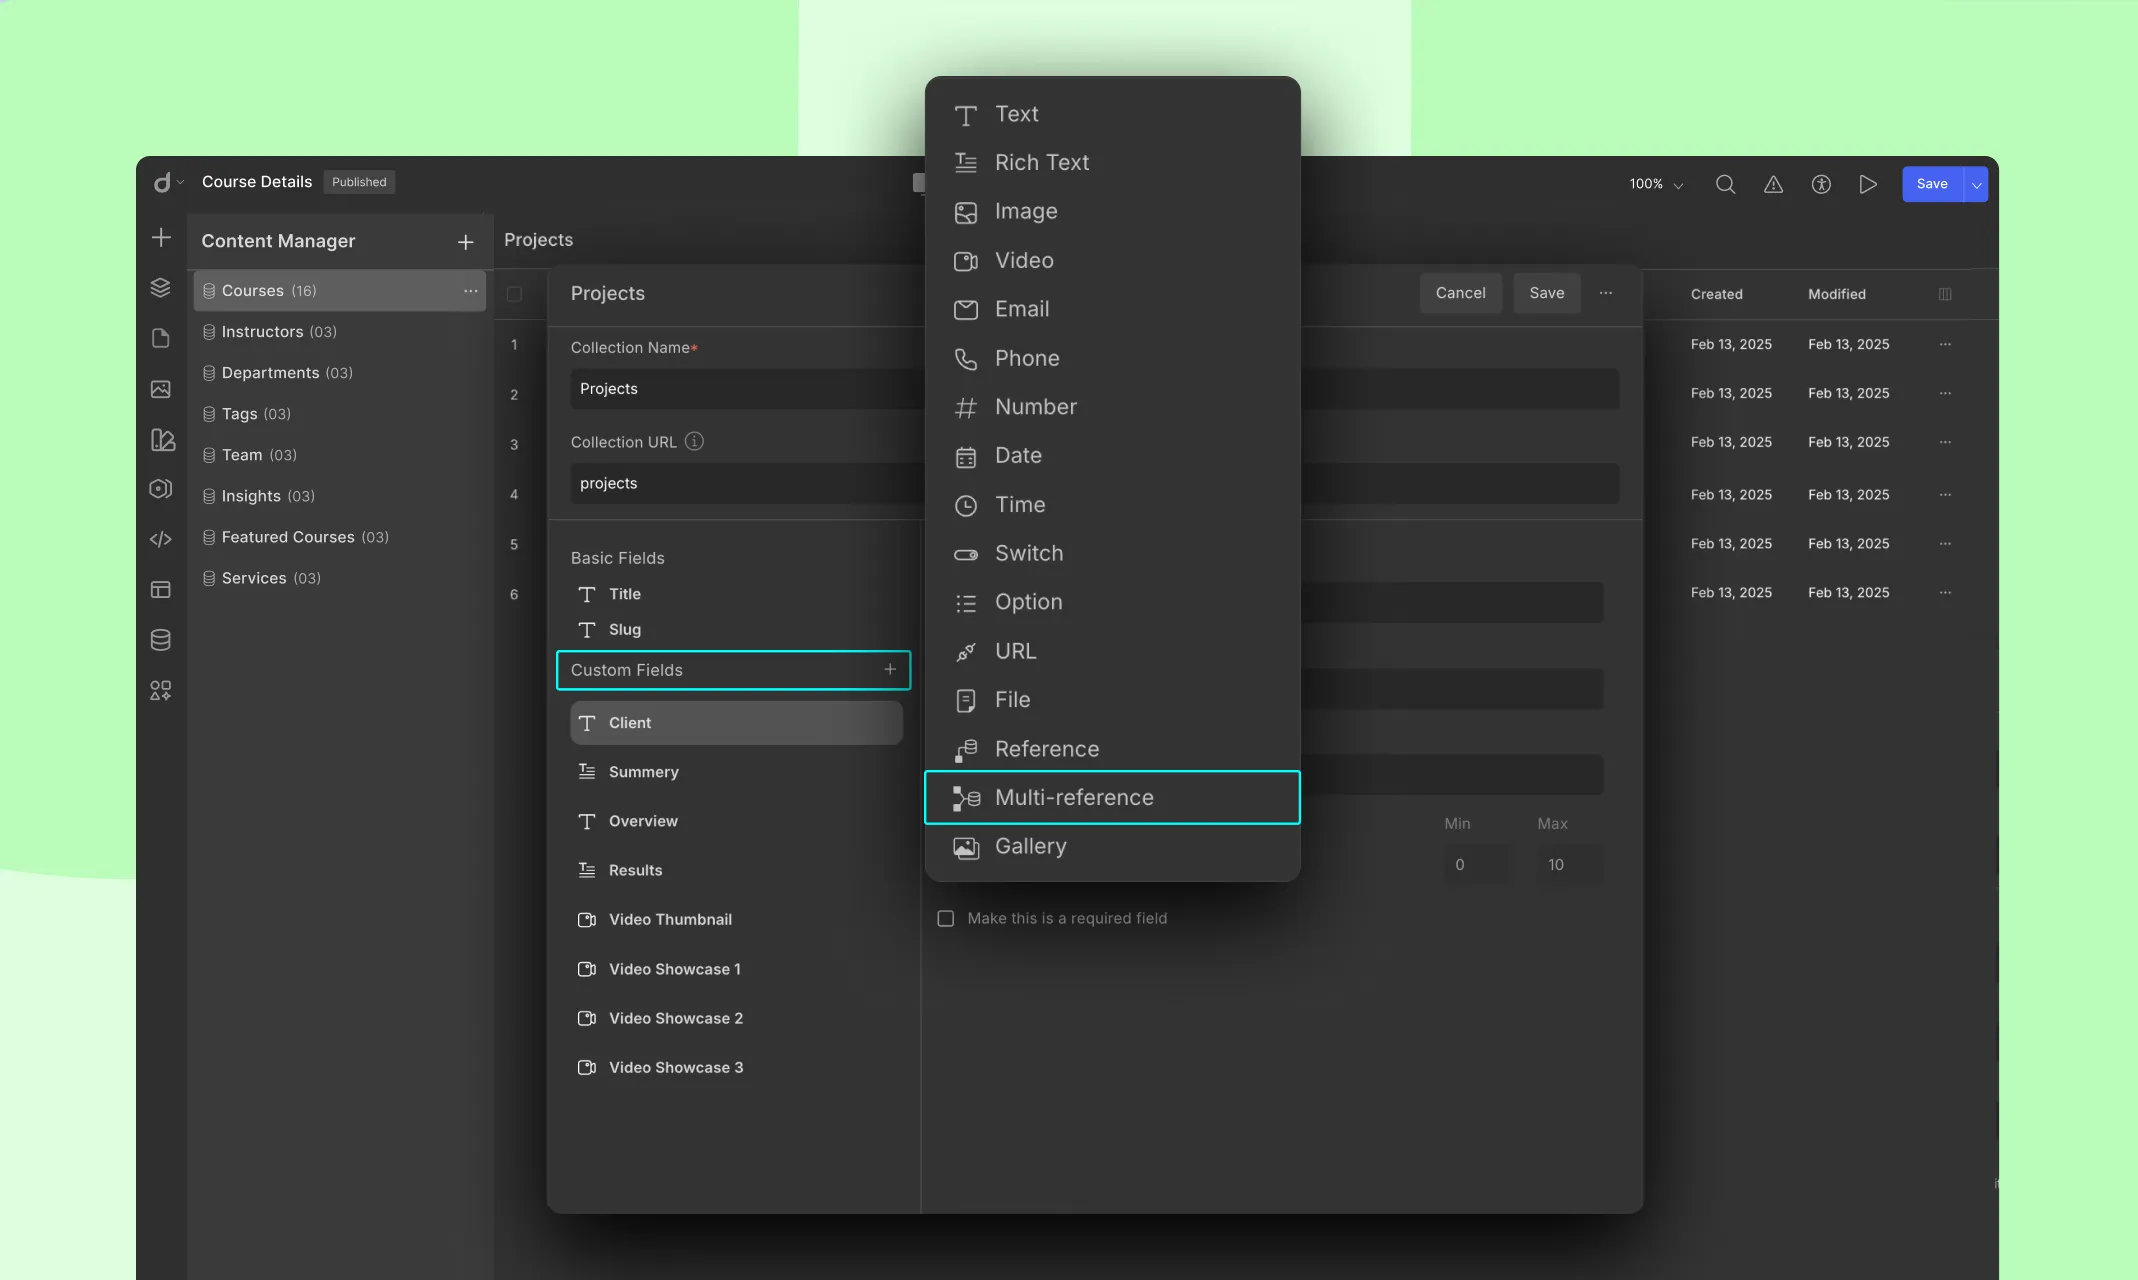
- Choose the Target Collection: Pick the target collection you want to link. (e.g., Tags)
- Name the Field: Give the field a name. (e.g., Tags)

- Click Save to finish.
Add Data to the Field
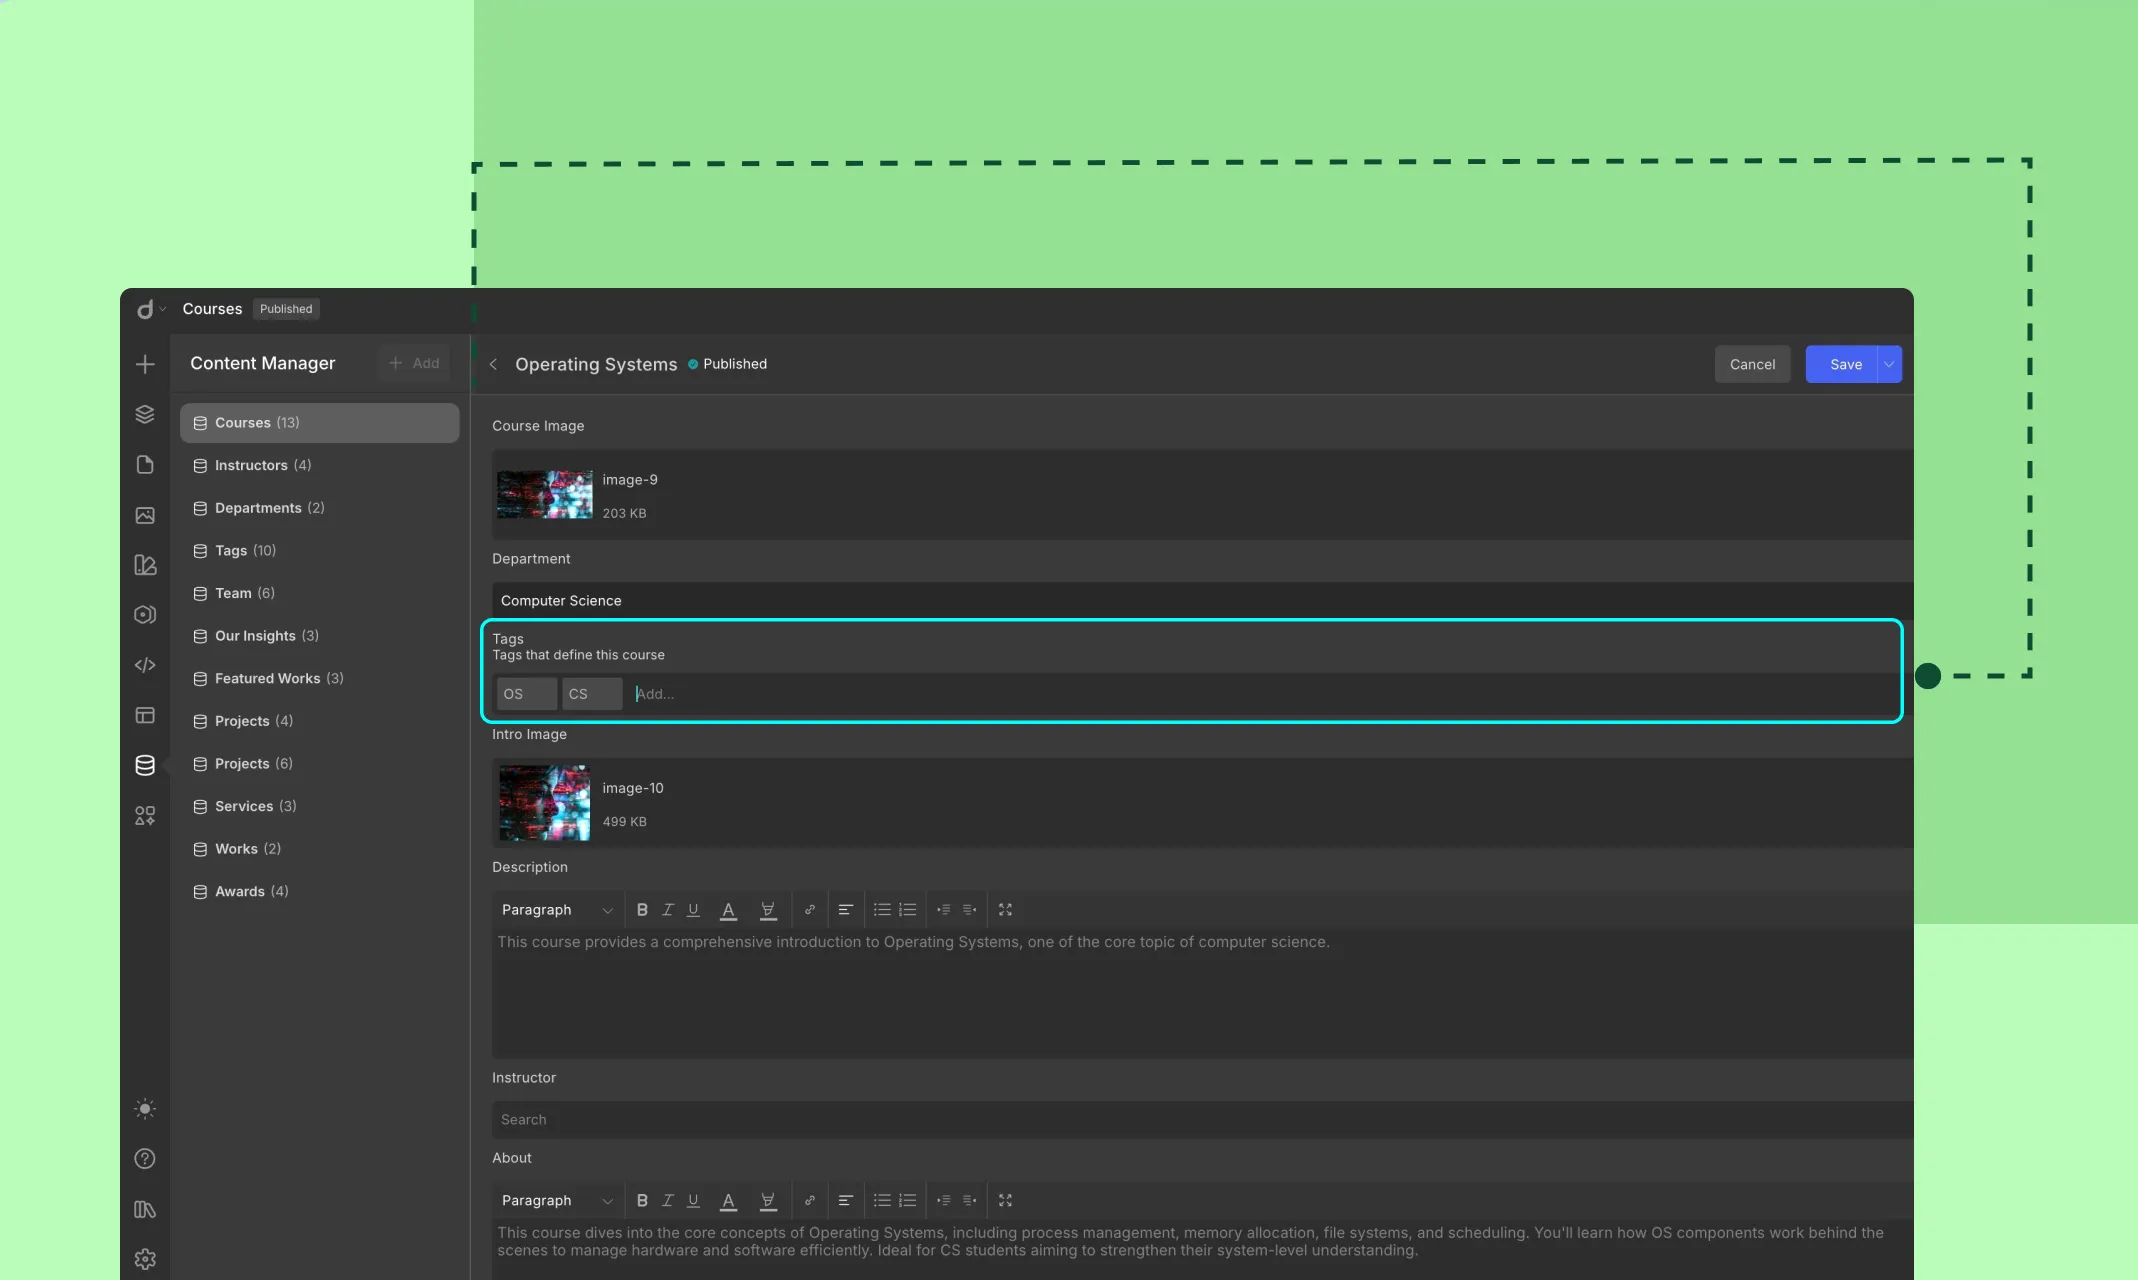
When editing a Course:
- You can add multiple items from the Tags collection.
Displaying Multi-Reference Data on Your Website
Since you’re referencing multiple items, this part is a little different from single references. You’ll need a collection element to display your multi-reference items.
On a List Page (e.g., all Courses)
- Add a Collection Element and set the Source as Courses
- Inside this element, add another Collection Element. This nested one will display the multi-referenced items.
- Set the nested Collection Element:
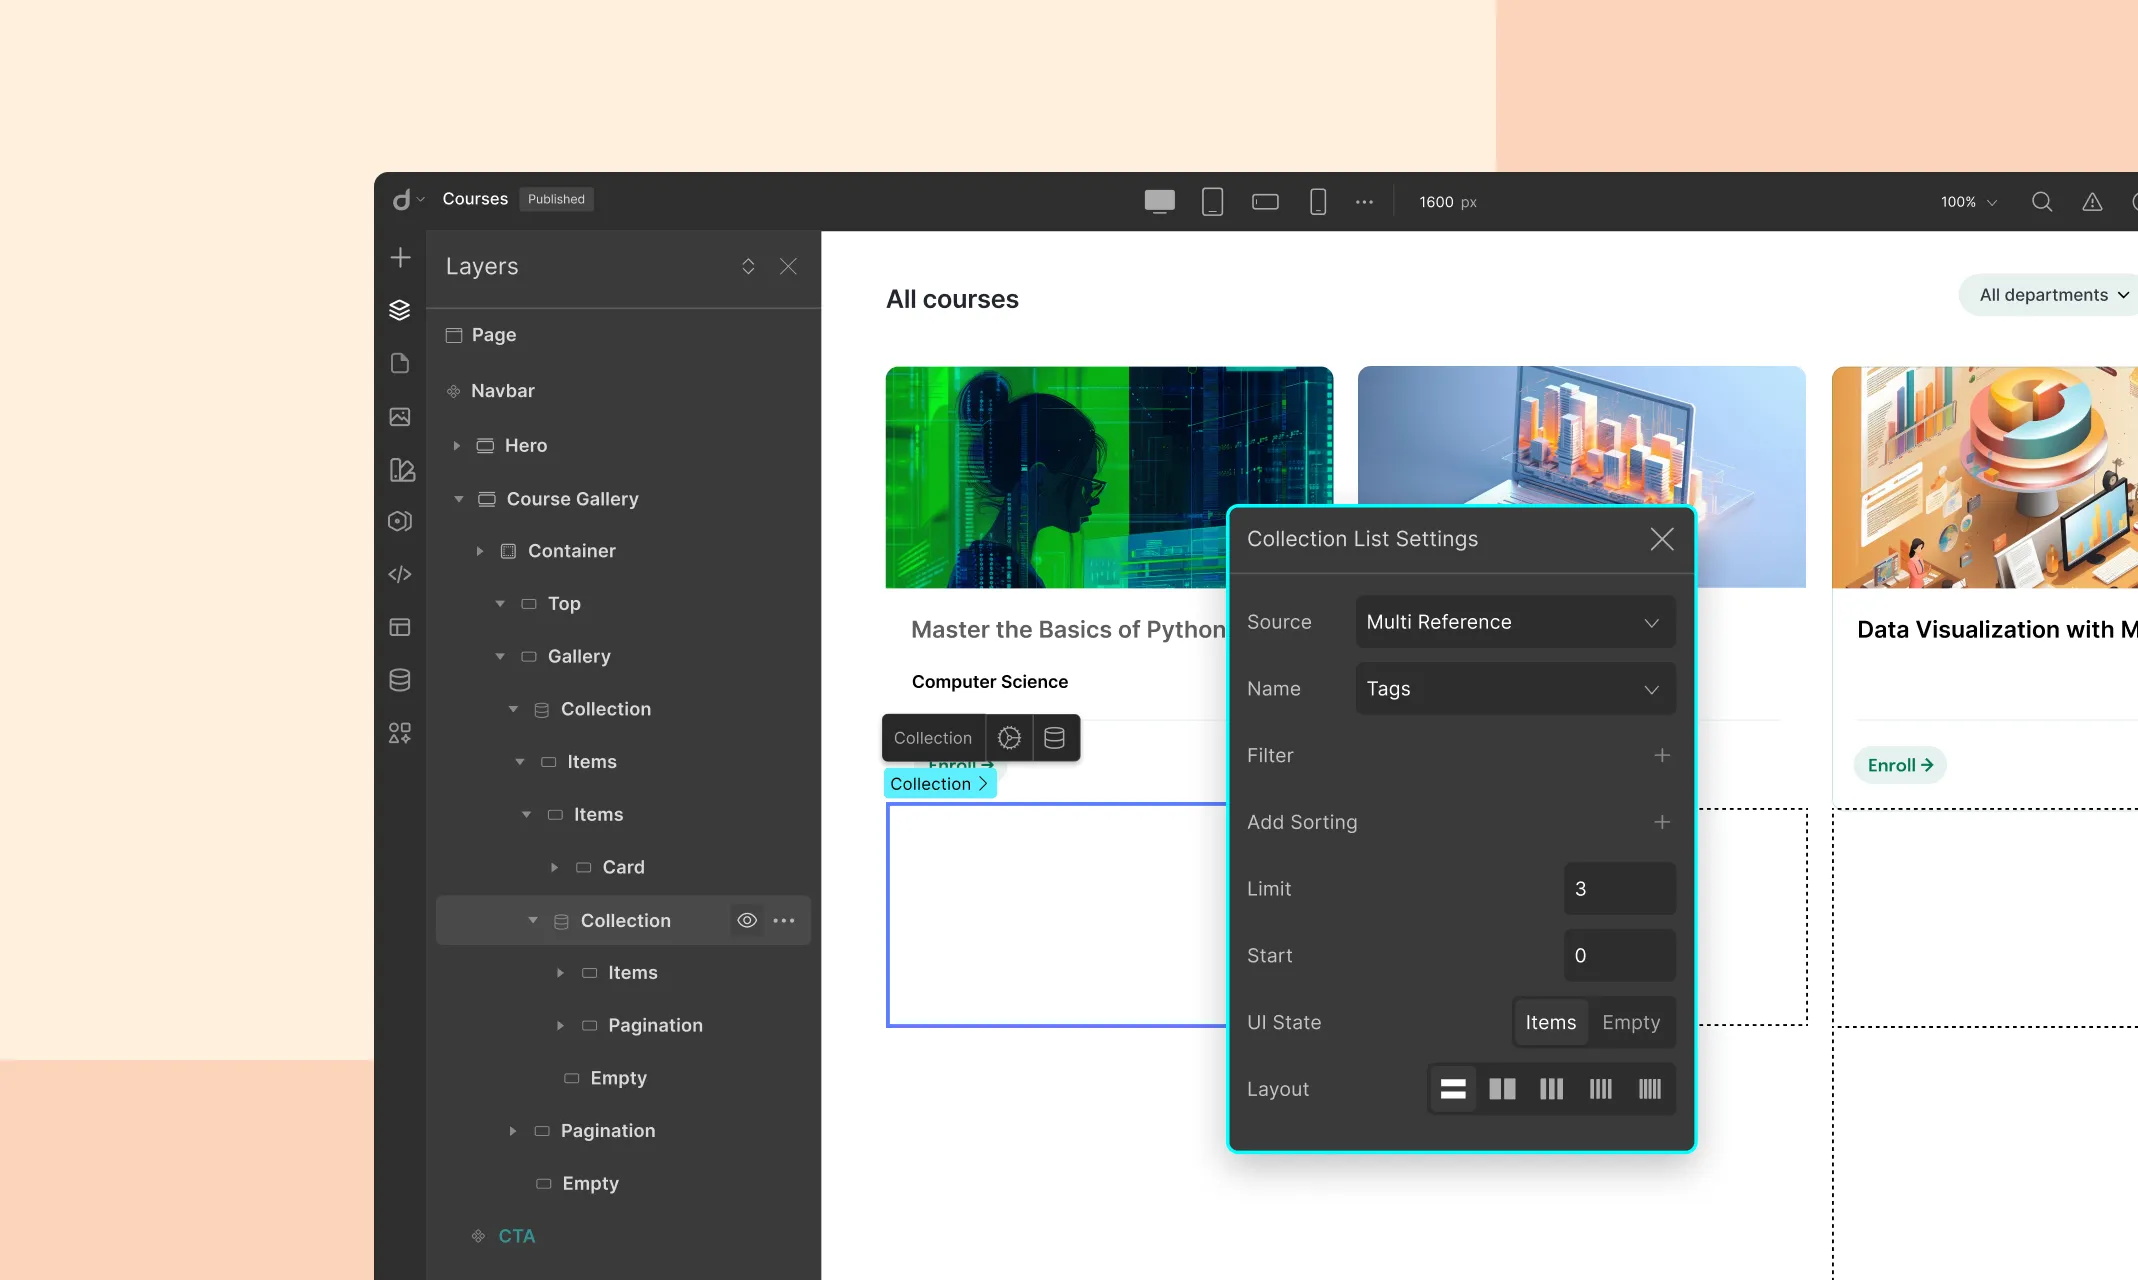
- Type: Multi-Reference
- Name: Tags (or whatever your referenced collection is called)
- Inside this nested collection element, add a text, image, or any design element. Click the Dynamic Content icon and set:
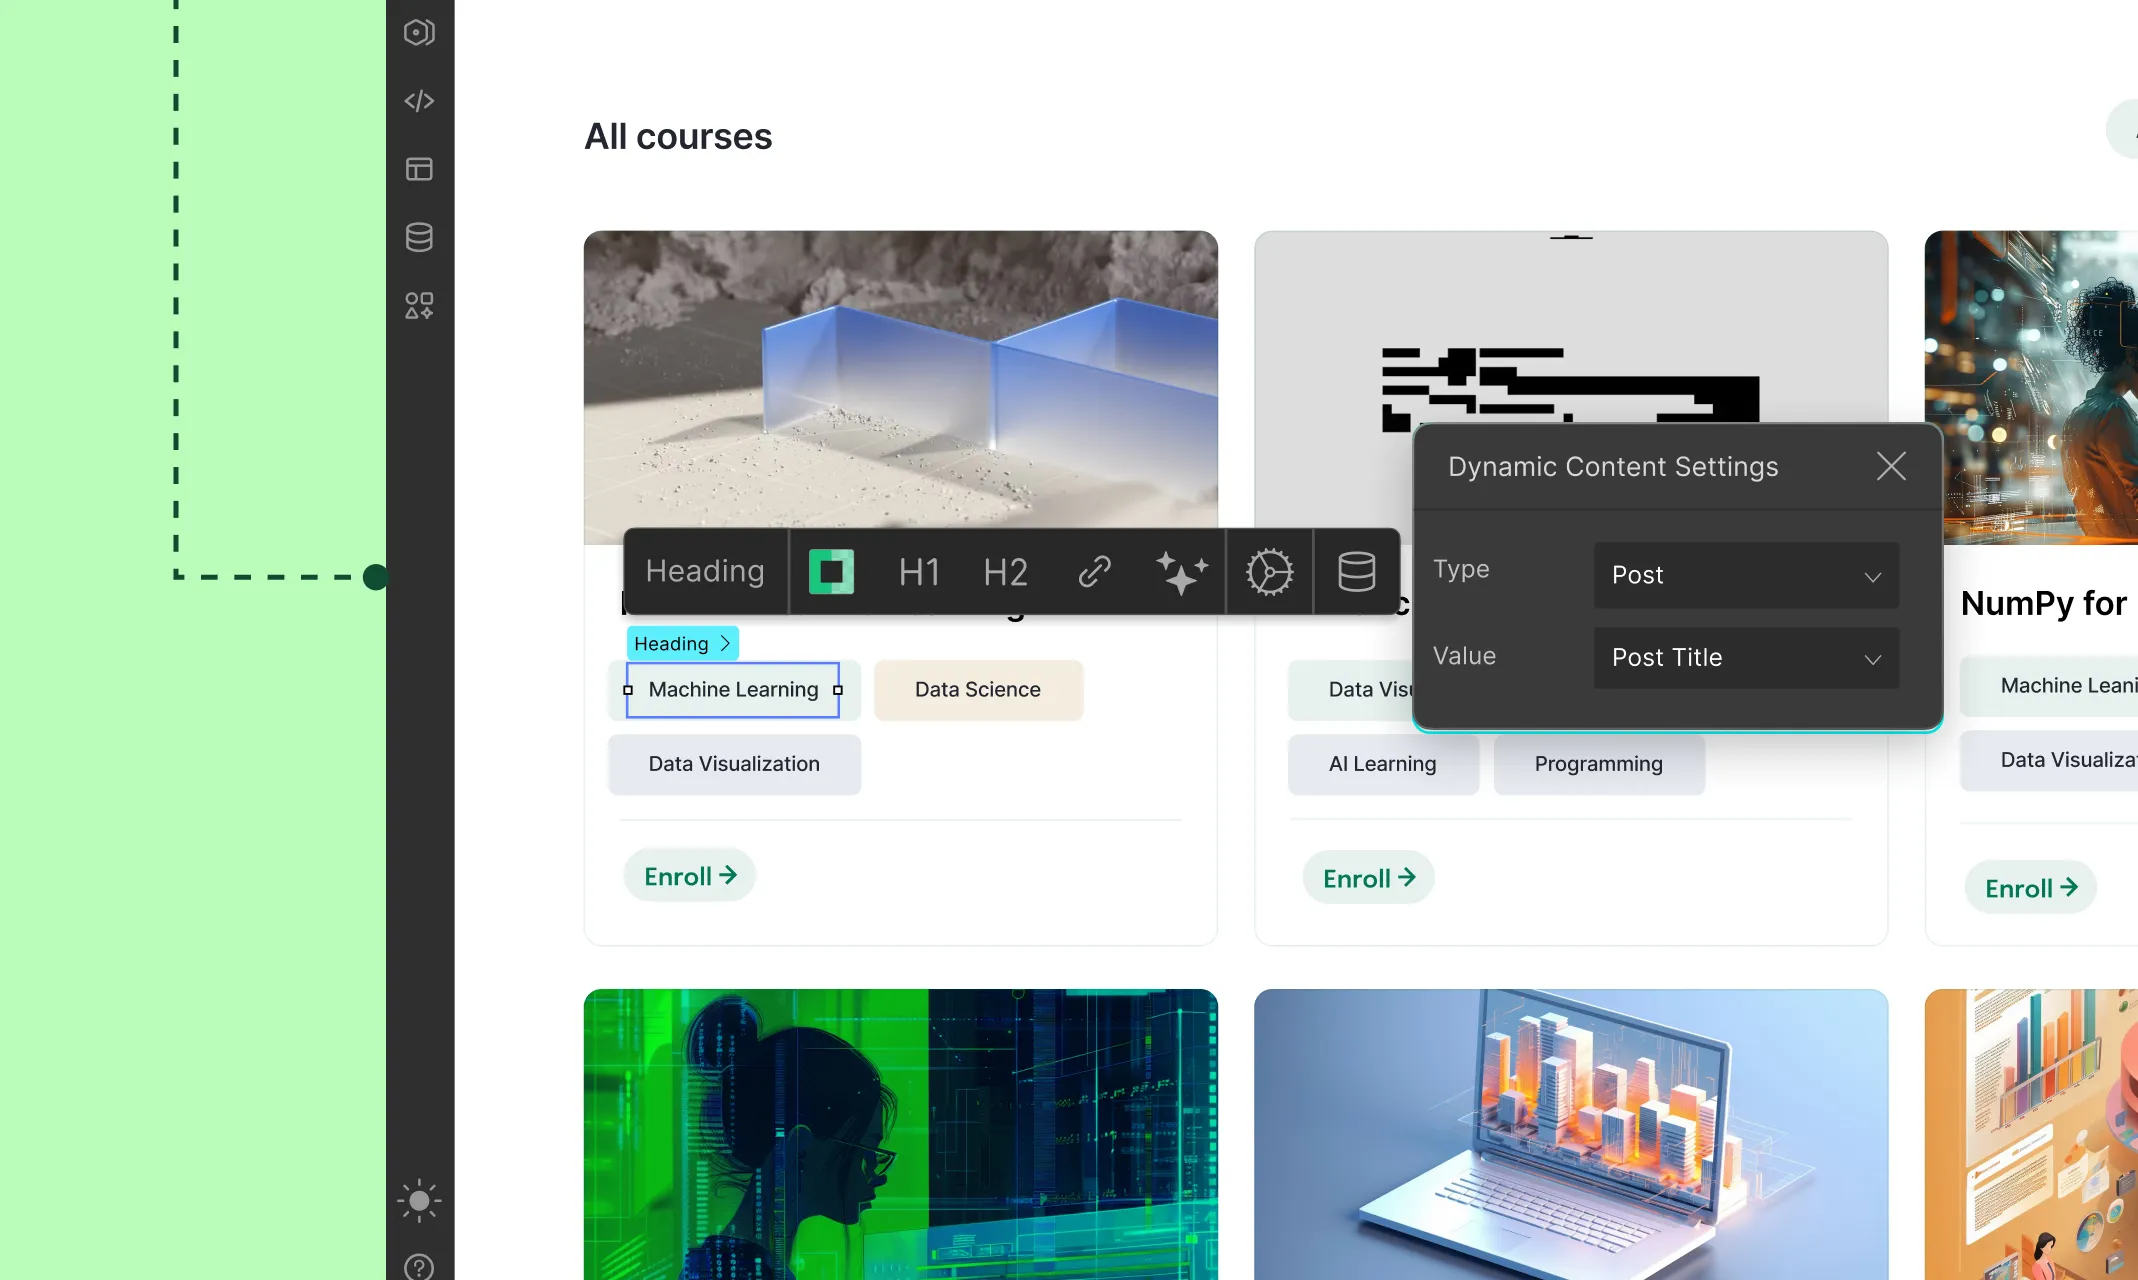
- Type: Post
- Value: The field to display (e.g., Post Title)
On a Template Page (e.g., a single Course page)
- Drag a Collection Element onto the page and set it as:
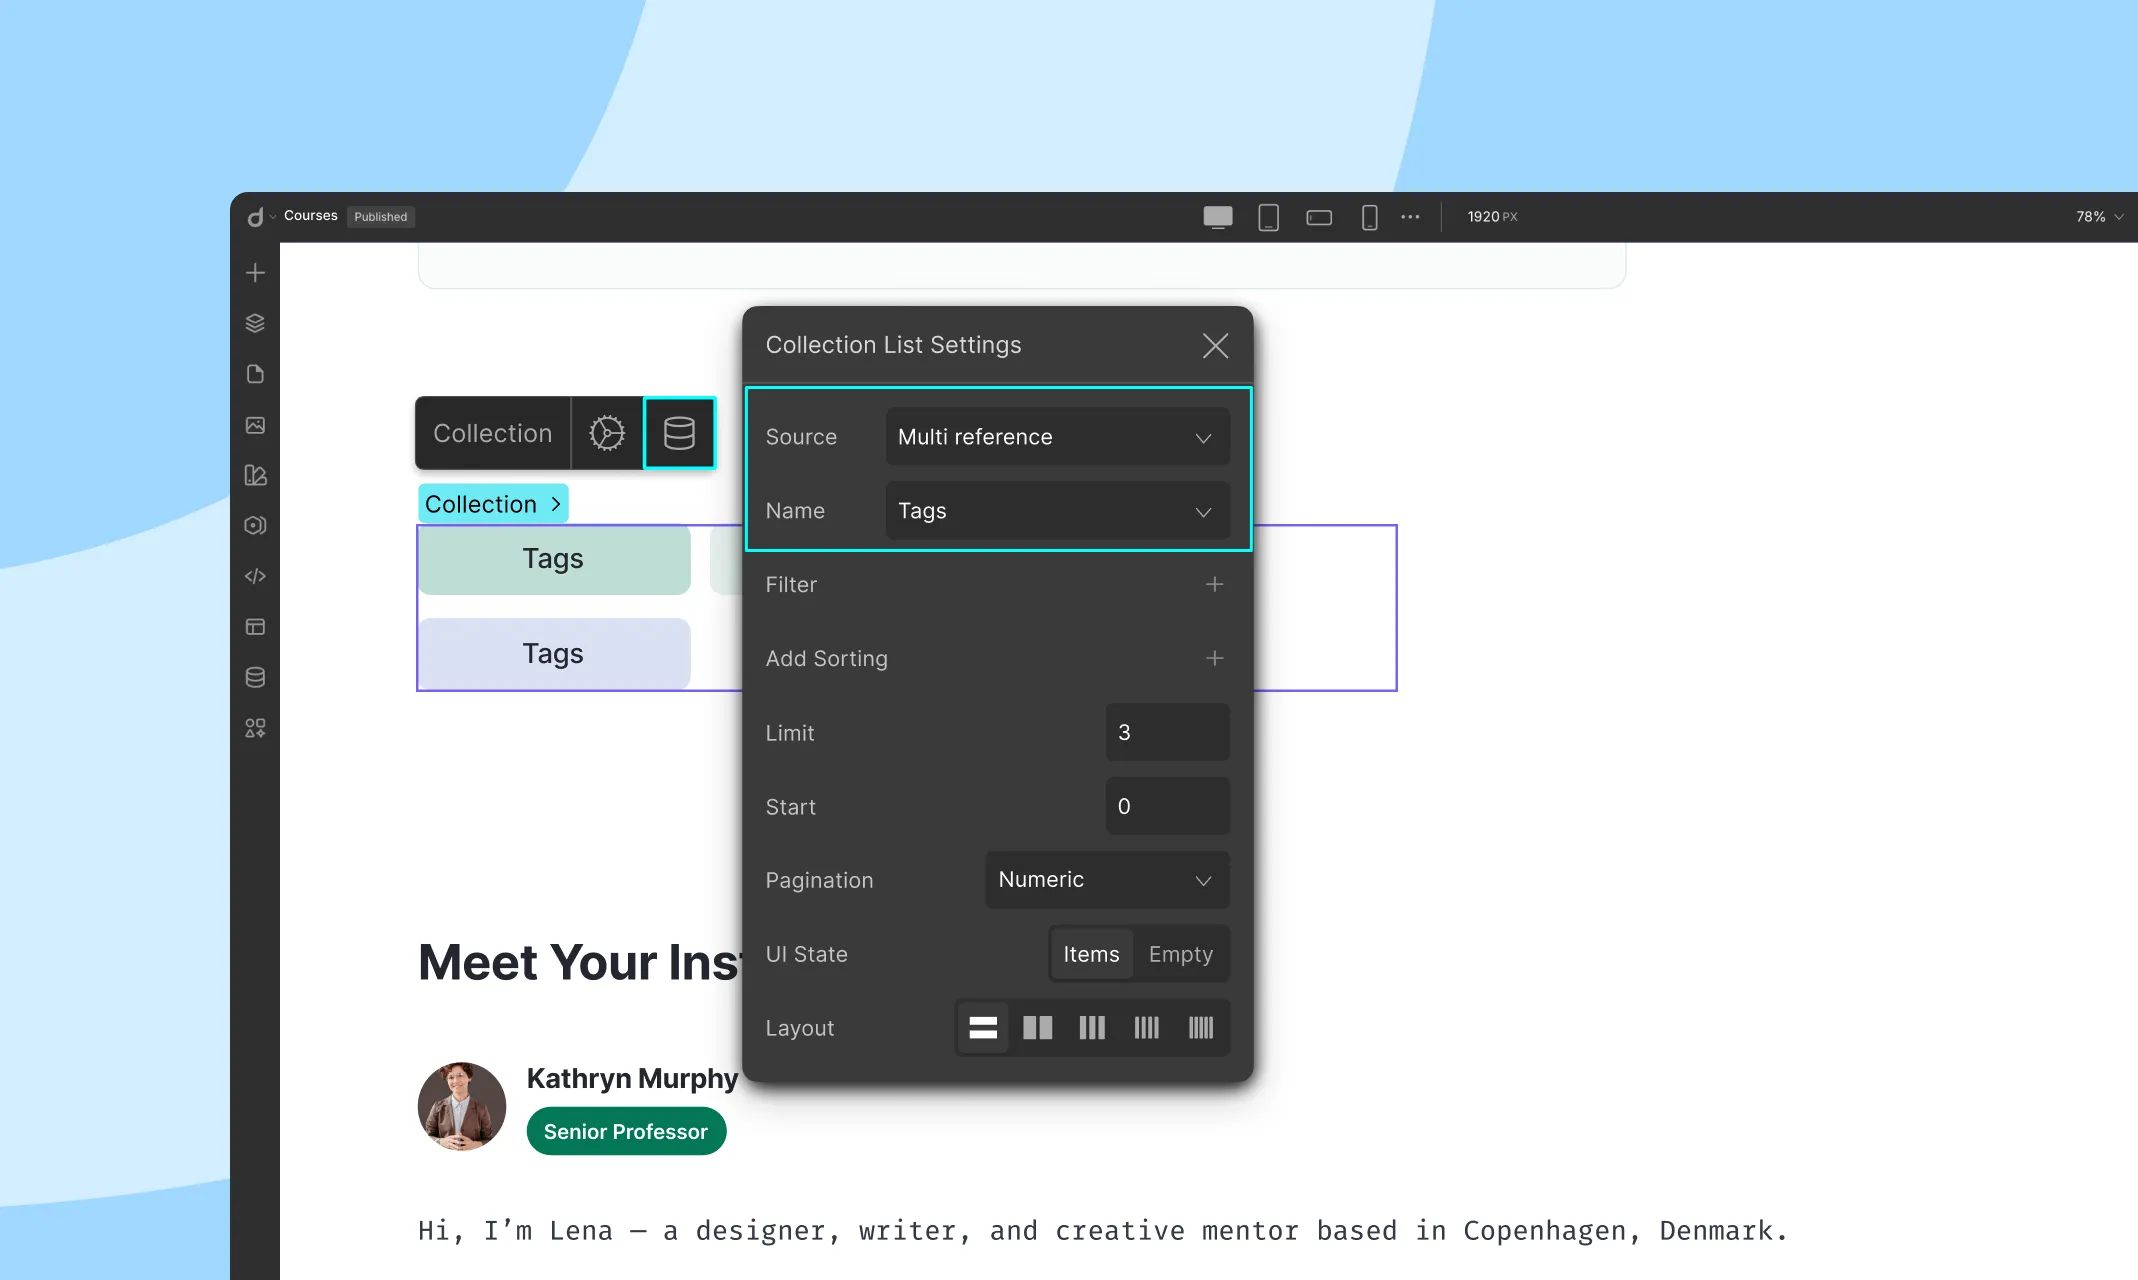
- Type: Multi-Reference
- Name: Tags (or whatever your referenced collection is called)
- Inside it, add elements to show each Tag.
- Use the Dynamic Content icon and set:
- Type: Post
- Value: The field you want to show (e.g., Tag Name)
Updating Reference Content
Any changes you make in a referenced collection automatically reflect wherever that reference is used:
Example: Change a department’s info in Departments→ it updates across all courses referencing them.
This is especially powerful when managing large portfolios, product specs, or vendor info, etc.
Best Practices
✅ DO:
- Reference instead of duplicate — especially for categories, tags, sponsors, clients, etc.
- Name your fields clearly (e.g., Primary Author, Related Tags)
- Populate referenced collections first to avoid null dropdowns
- Use Multi-Reference when multiple associations are guaranteed or expected
🚫 AVOID:
- Over-nesting references (e.g., Contributor → Company → Country) unless necessary, it may complicate display
- Using Multi-Reference when a single reference is enough.
Was this page helpful?