To make the most of your design and layout options in Droip, ensure you enable the following controls in the Droip WordPress dashboard:
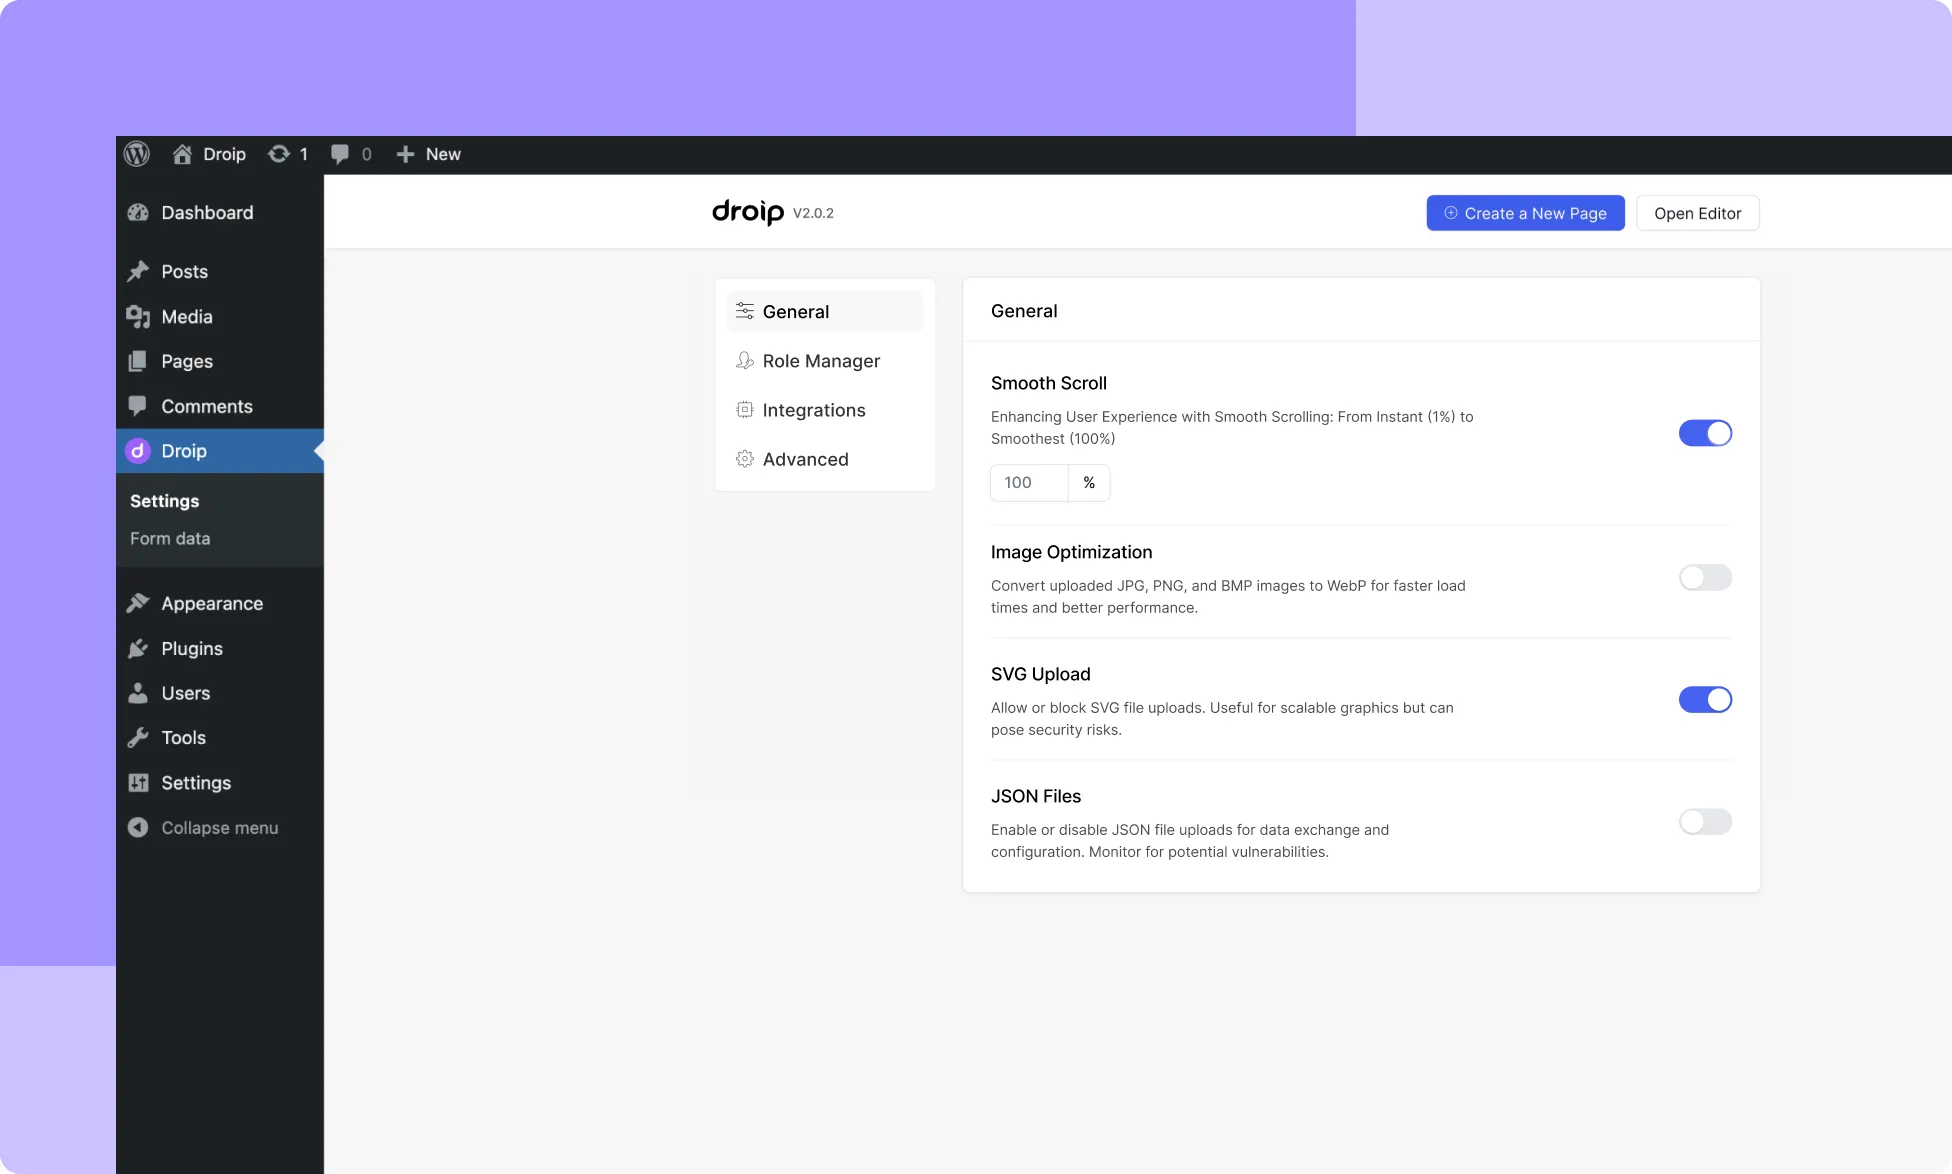
Smooth Scroll
The Smooth Scroll feature enhances scrolling by adding a gradual transition effect. Users can toggle it on or off and adjust the smoothness level.
- Go to Droip WordPress Backend > Settings > General.
- Find Smooth Scroll.
- Use the toggle switch:
- Enabled: The page scrolls with a smooth transition effect.
- Disabled: The page scrolls instantly without any easing.
Adjusting Smoothness Level
When enabled, smoothness can be set between 1% (Instant) and 100% (Smoothest):
- 1%: No transition, abrupt movement.
- 50%: Moderate smooth effect.
- 100%: Most fluid scrolling.
To adjust, enter a value between 1% and 100%. Changes apply instantly.
Image Optimization
Optimize uploaded images by converting JPG, PNG, and BMP files to WebP format for faster load times and improved performance.
Once enabled, uploaded images will be optimized without additional action.
SVG Upload
By enabling the SVG Upload option, you can effortlessly upload SVG files and incorporate them into your designs.
JSON Files
To leverage .json files in your projects, activate the JSON Files option. This allows uploading and management of .json files from your Media Manager.
Share View-Only Link
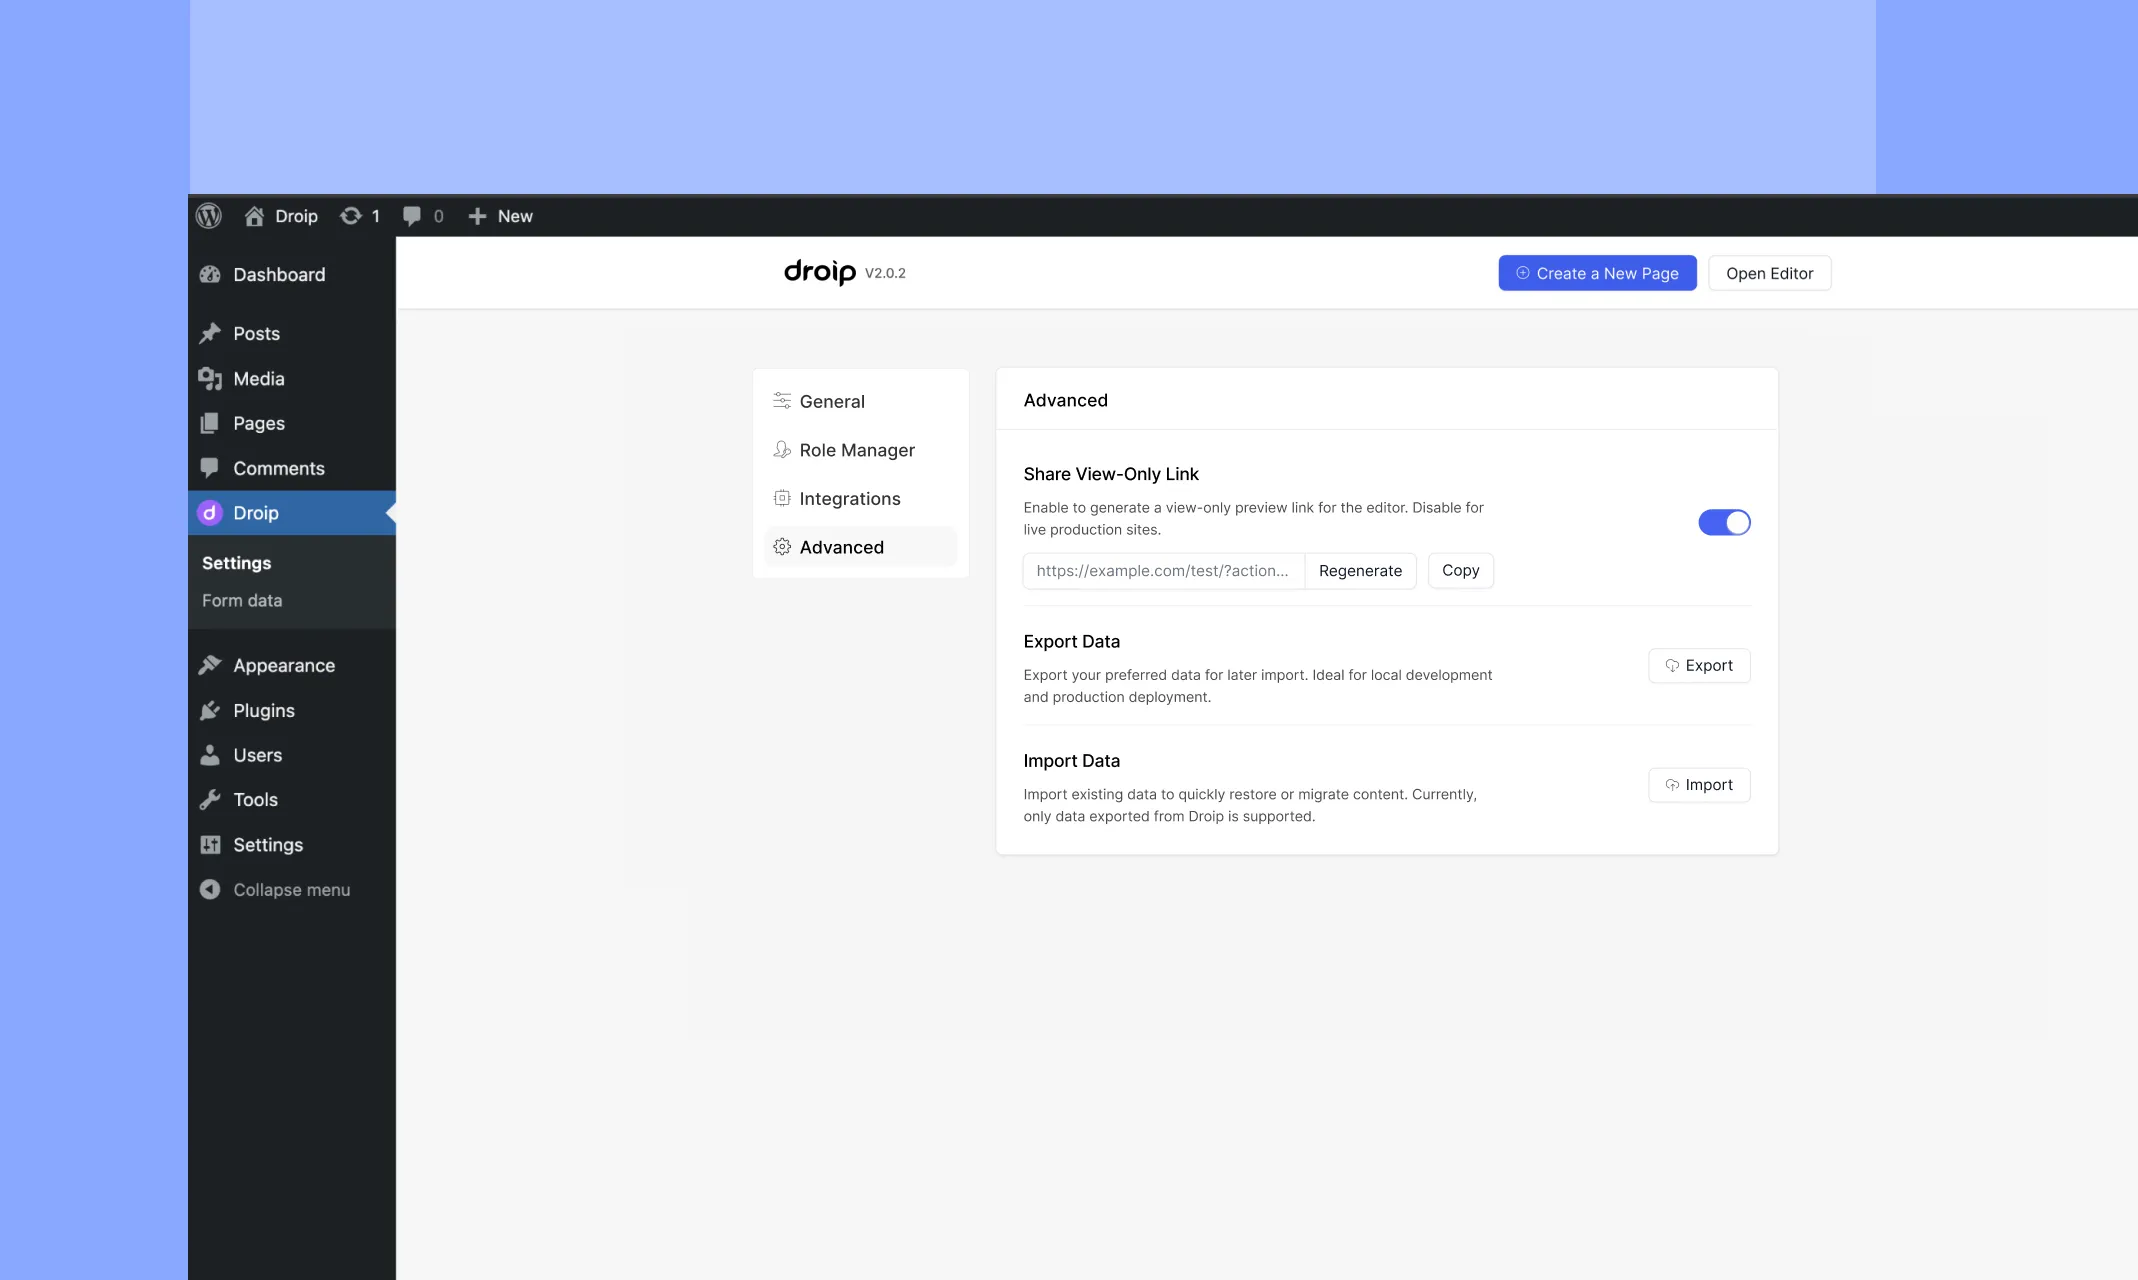
This feature allows you to generate a shareable, view-only link for the editor. It’s useful for sharing progress or drafts with clients without granting them editing access.
Use the Share View-Only Link to get feedback without risking changes to your project.
How to Use:
- Navigate to Settings > Advanced in the Droip interface.
- Locate the Share View-Only Link section.
- Toggle the switch to enable this feature.
- Click Regenerate to create a new preview link.
- Use the Copy button to share the link with collaborators.
📝 Note: This feature is disabled for live production sites to maintain security and control over your project.
Export Data
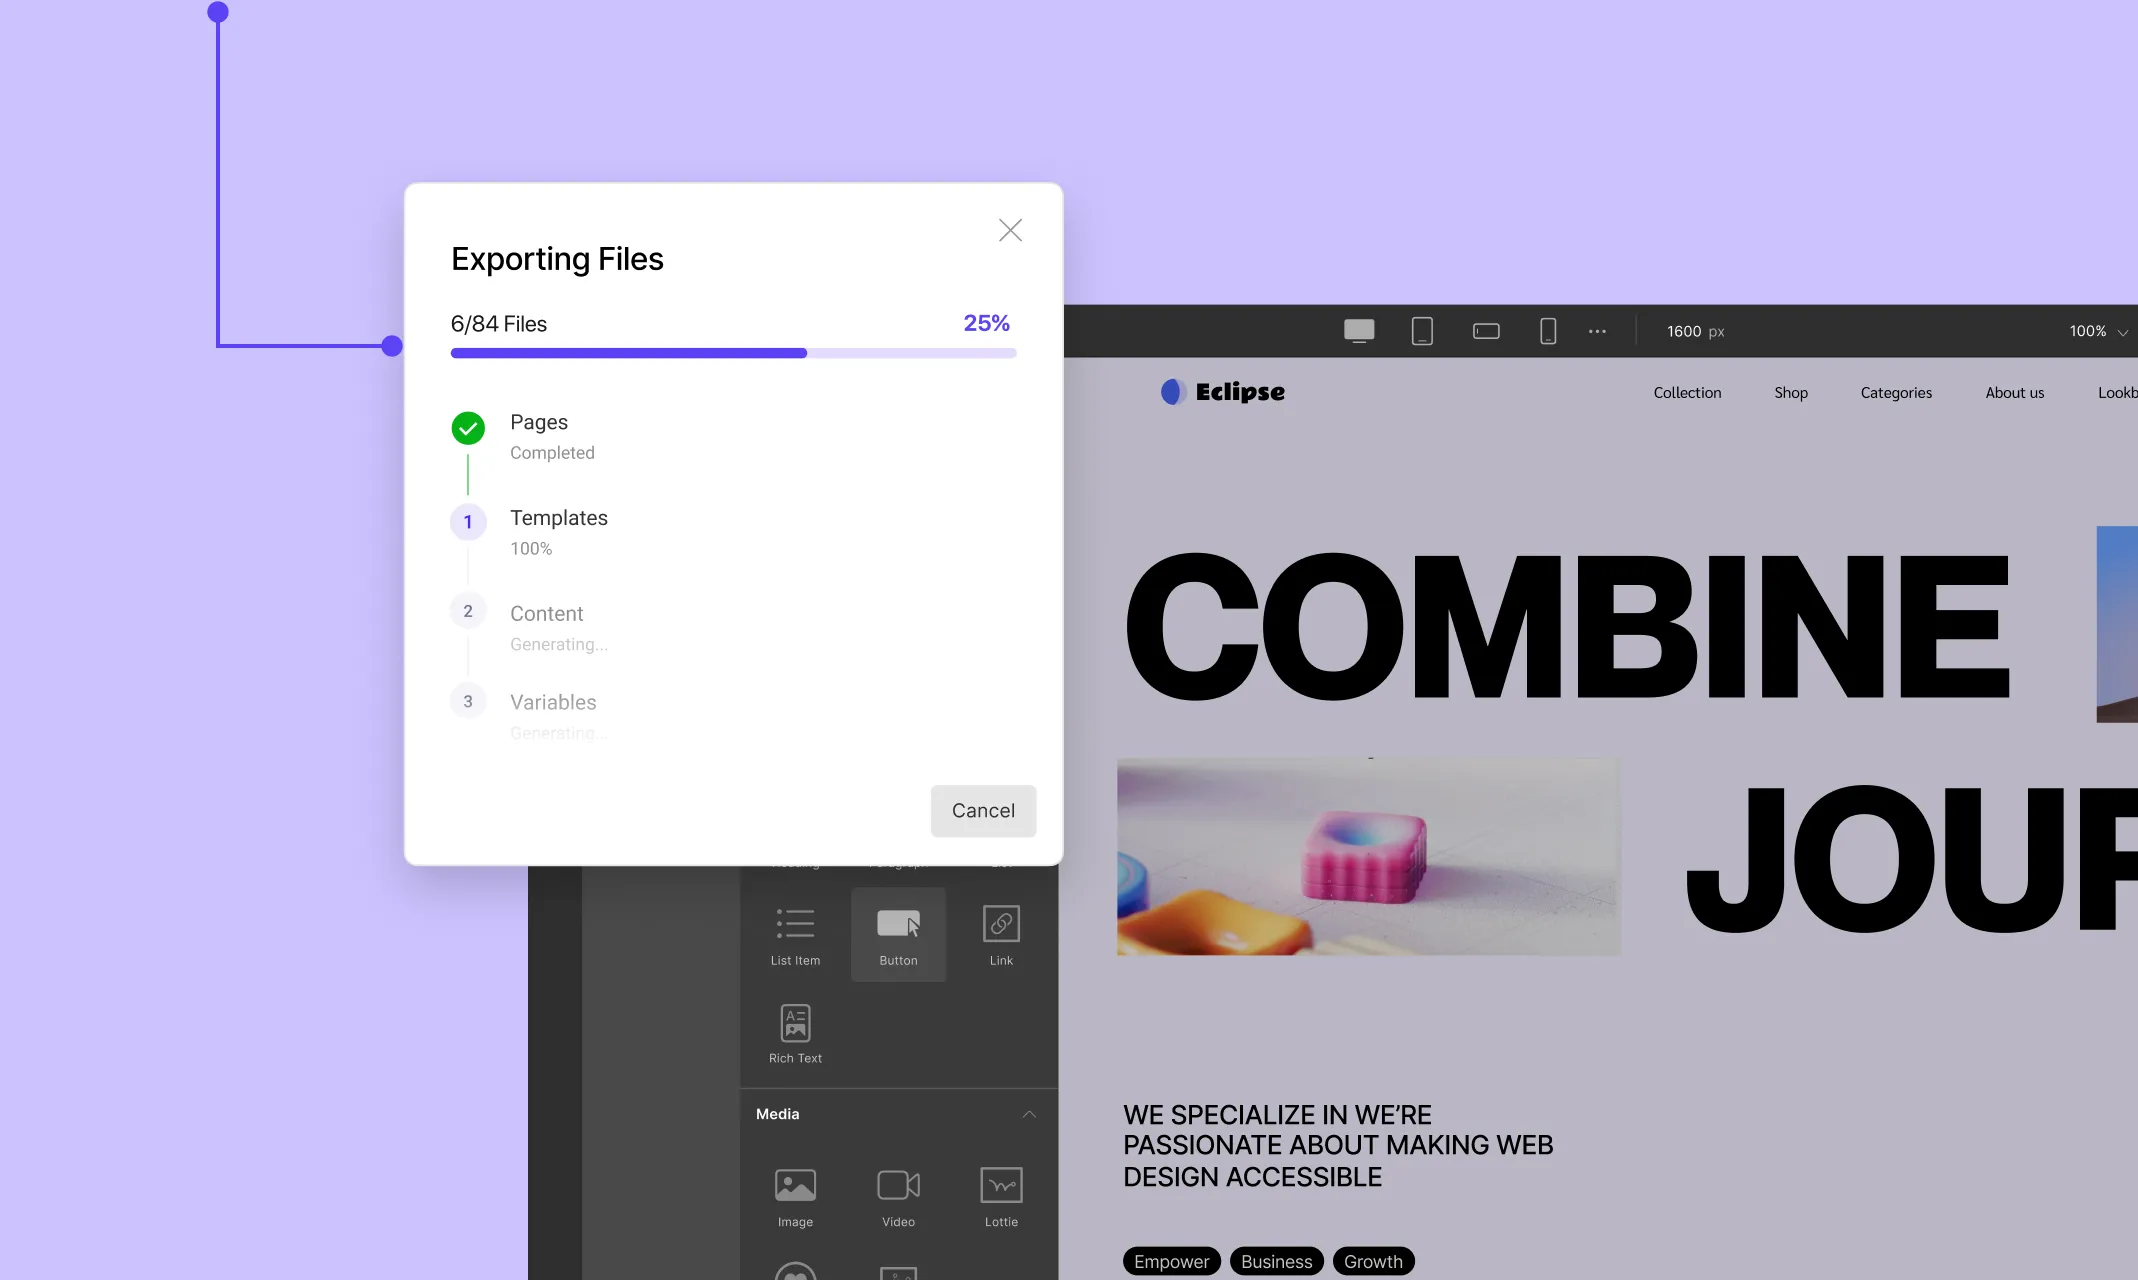
The Export Data feature enables you to save your current project setup, including pages, templates, styles, and other site information, for local backups or production deployment.
What’s Included in the Export:
- Pages and Templates: All the pages and templates used in your project.
- View Ports and Fonts: Settings related to responsive design and typography.
- Styles and Variables: Global CSS variables and design settings.
- Content Manager: Data related to dynamic content.
- Assets and Site Info: Uploaded assets and site metadata.
How to Export:
- Navigate to Settings > Advanced.
- Click the Export button under the Export Data section.
- A progress modal will appear, showing the status of the export process.
- Once completed, click Download to save the exported file to your device.
💡 Tip: Exported data is ideal for migrating your content between environments, such as from a staging server to production.
Import Data
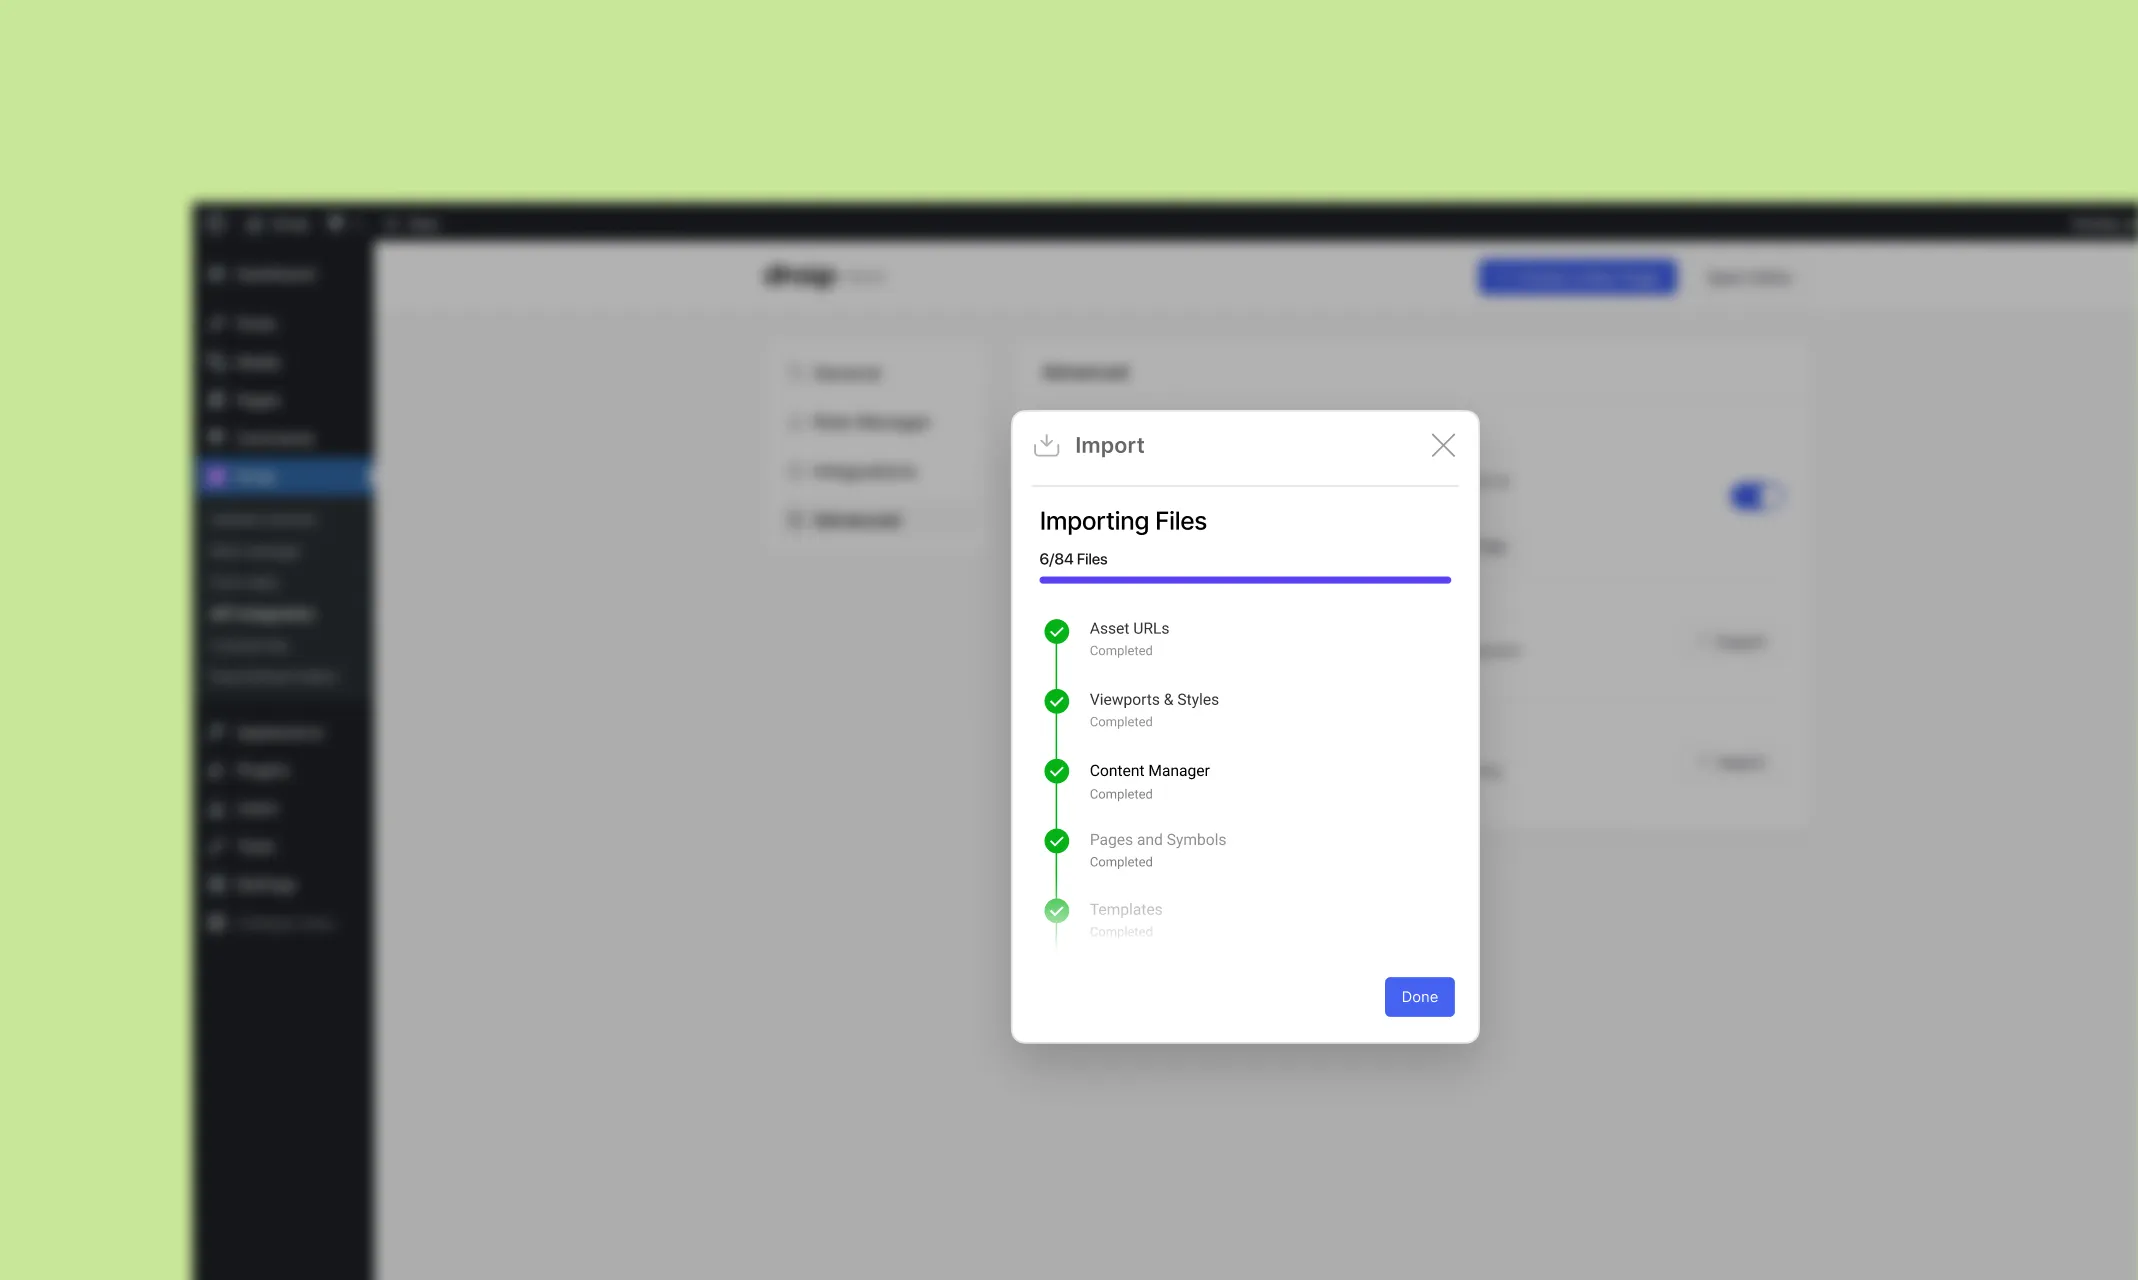
The Import Data feature lets you restore or migrate content by uploading previously exported Droip data files.
How to Import:
- Navigate to Settings > Advanced.
- Click the Import button under the Import Data section.
- Select the exported file from your device.
- The system will process the import, restoring the content and settings.
📝 Note: Only data exported from Droip is supported for import. Ensure the exported file is from a compatible Droip version.
Was this page helpful?