In Droip, you can create a dynamic filtering functionality for WordPress posts using the Collection element.
This feature allows users to filter WordPress posts based on categories, tags, and any custom taxonomy you have on your WordPress Site
Step 1: Create a Collection for WordPress Posts
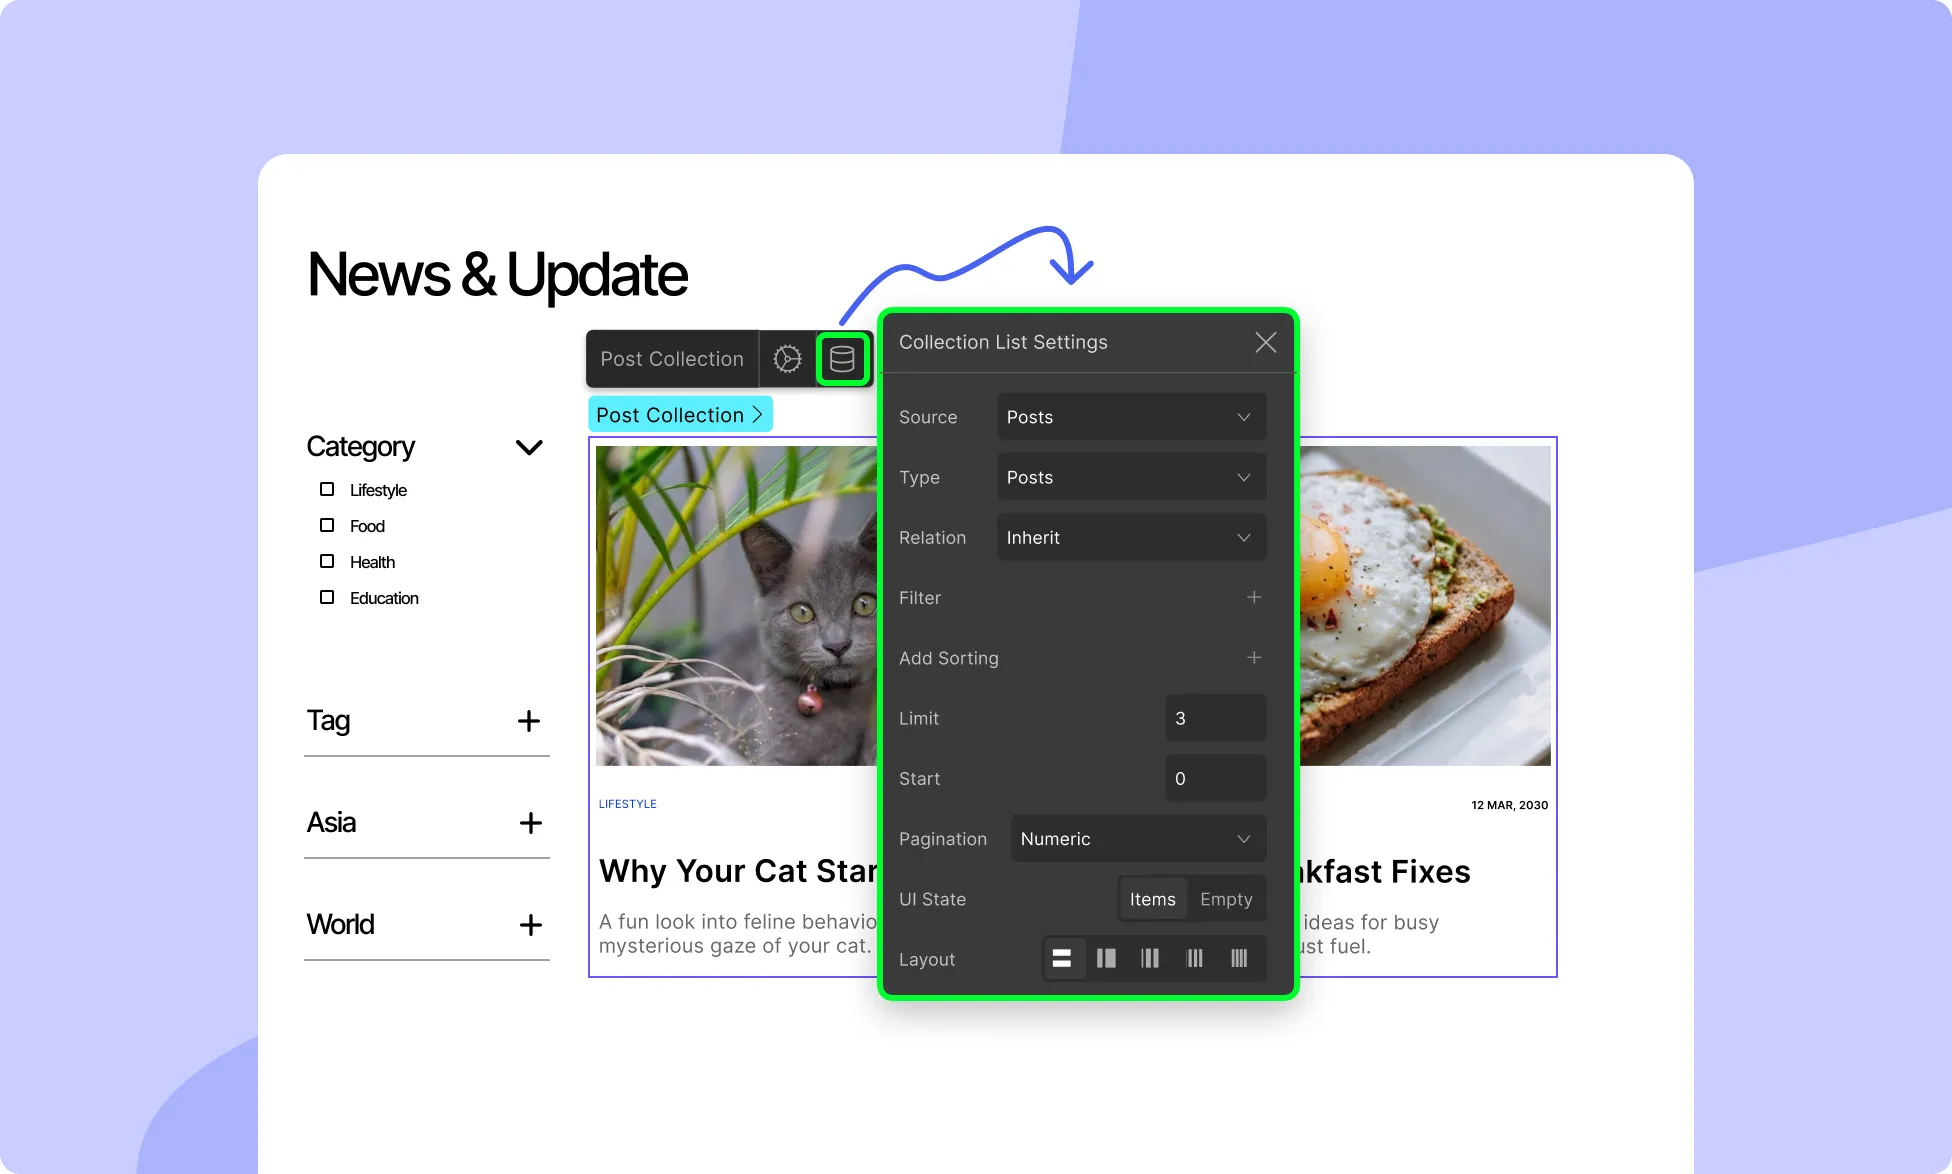
- Add a Collection Element: Begin by adding a Collection Element to your Droip page. Connect this Collection Element to your WordPress posts. This is where your WordPress post data will be displayed dynamically.
- Set Collection Type: In the Collection settings, set the Collection Type to Post. For the Post field, select Posts. This will ensure that your Collection is pulling data from your WordPress posts.
- Configure the Collection Settings: Name your collection appropriately in the Layers, i.e Post Collection.
- Design the Collection List: Use Droip’s element and styling tools to customize the appearance of the posts as per your design needs. You can use dynamic elements like post title, featured image, excerpt, and metadata (date, author, etc.).
Step 2: Create a Collection for Filter Functionality
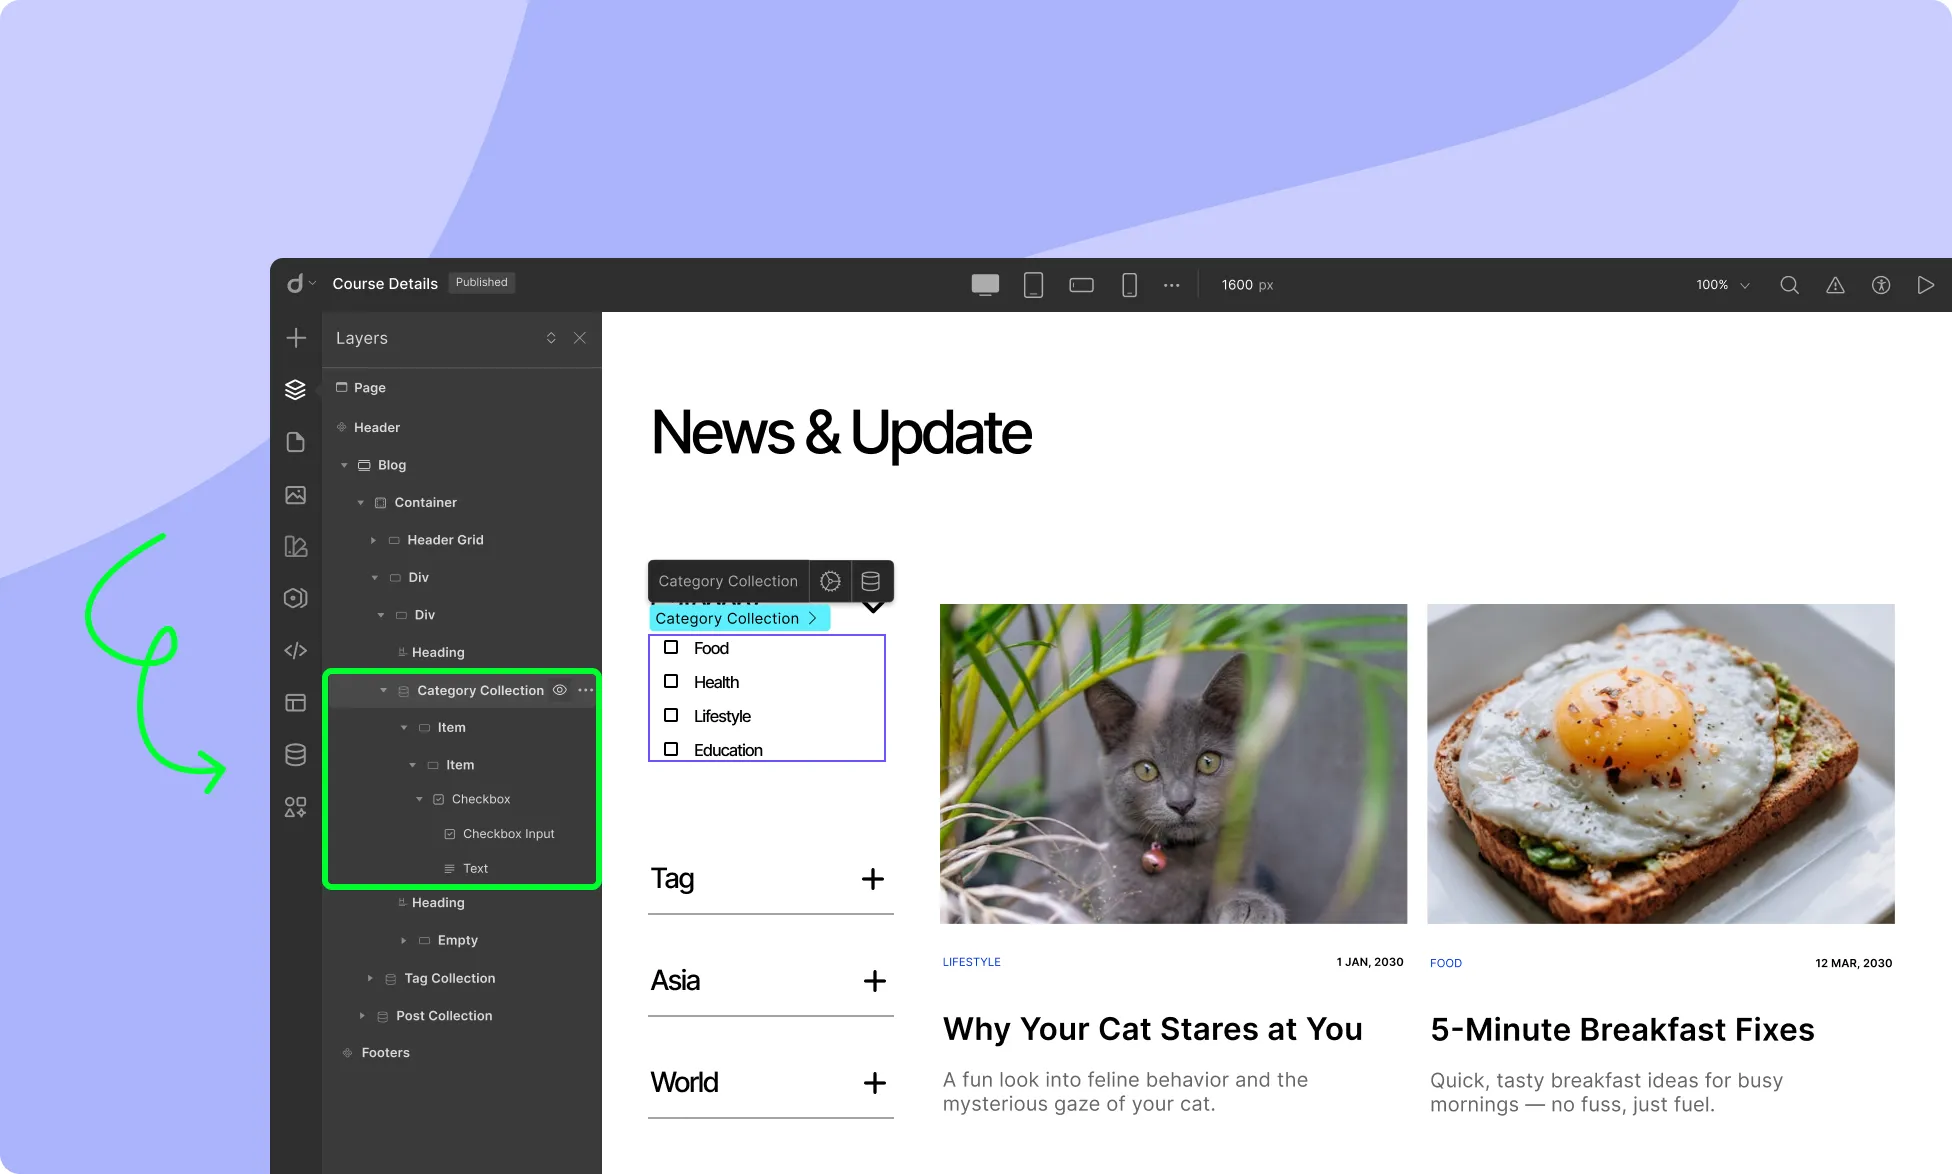
Next, we will create another Collection that will act as the filter for our posts.
- Add a New Collection Element: This collection will be responsible for creating the filter functionality. The key to this Collection Element is that it should only contain the checkbox element as collection items.
- Add Checkbox: Insert the Checkbox Element into this Collection to dynamically display the categories, tags, or custom taxonomies as checkboxes that your posts fall under.
Step 3: Configure Collection Settings for the Filter
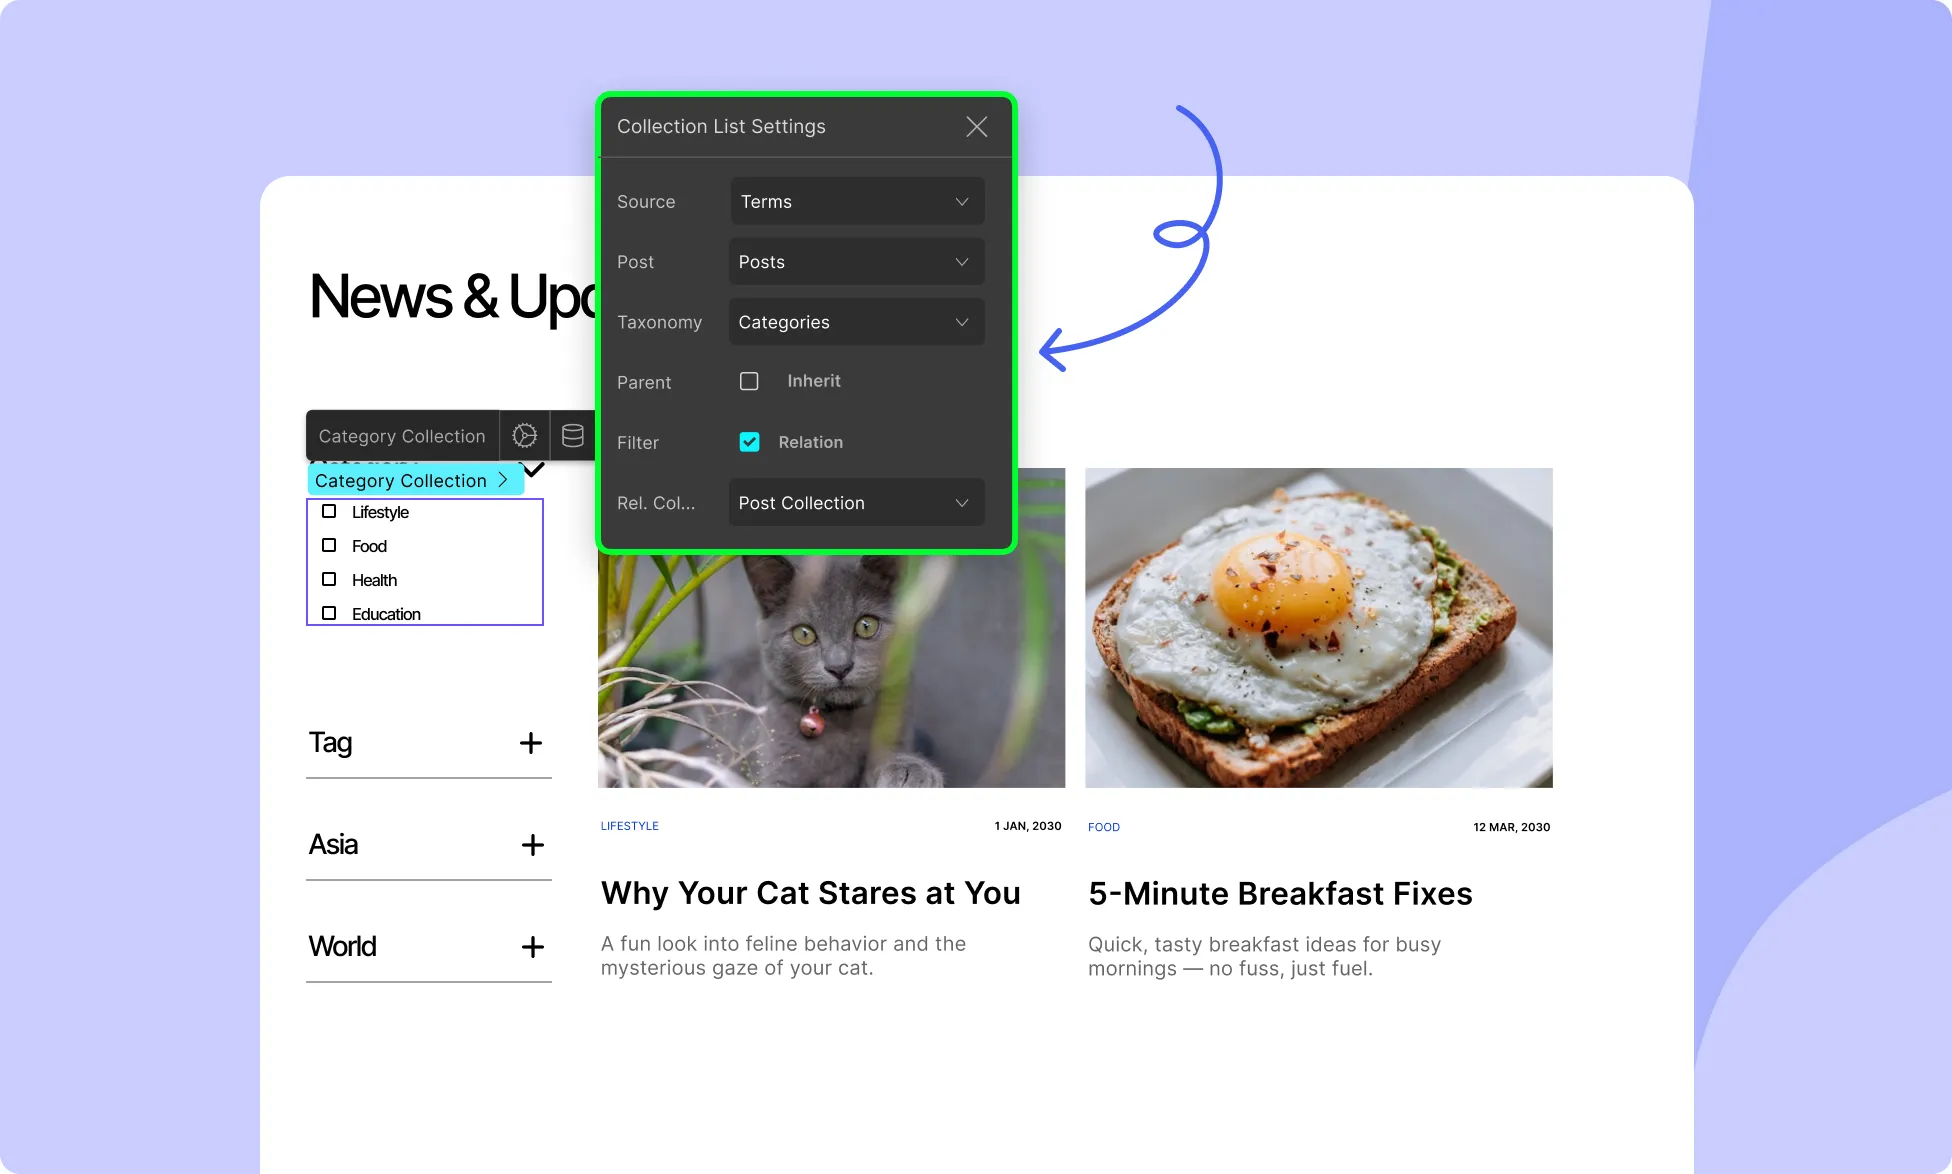
Now, configure the Collection settings for the filter functionality to connect it with your post collection.
- Set Collection Type: In the Collection settings, set the Collection Type to Terms. For the Post field, select Posts.
- Select the Appropriate Taxonomy: In the Taxonomy field, select the relevant taxonomy you want to filter by. This could be Categories, Tags, or any custom taxonomy you have on your WordPress site.
- Set Relation as Filter: Under the Relation option, tick the checkbox to enable Filter. This will link the checkbox collection with the filtering functionality.
- Link the Filter Collection with the Post Collection: In the Collection field, select the Collection you want to apply the filter functionality on. This step connects the checkboxes to your list of posts, allowing them to filter the posts based on the selected criteria (categories, tags, etc.).
Step 4: Preview the Filter Functionality
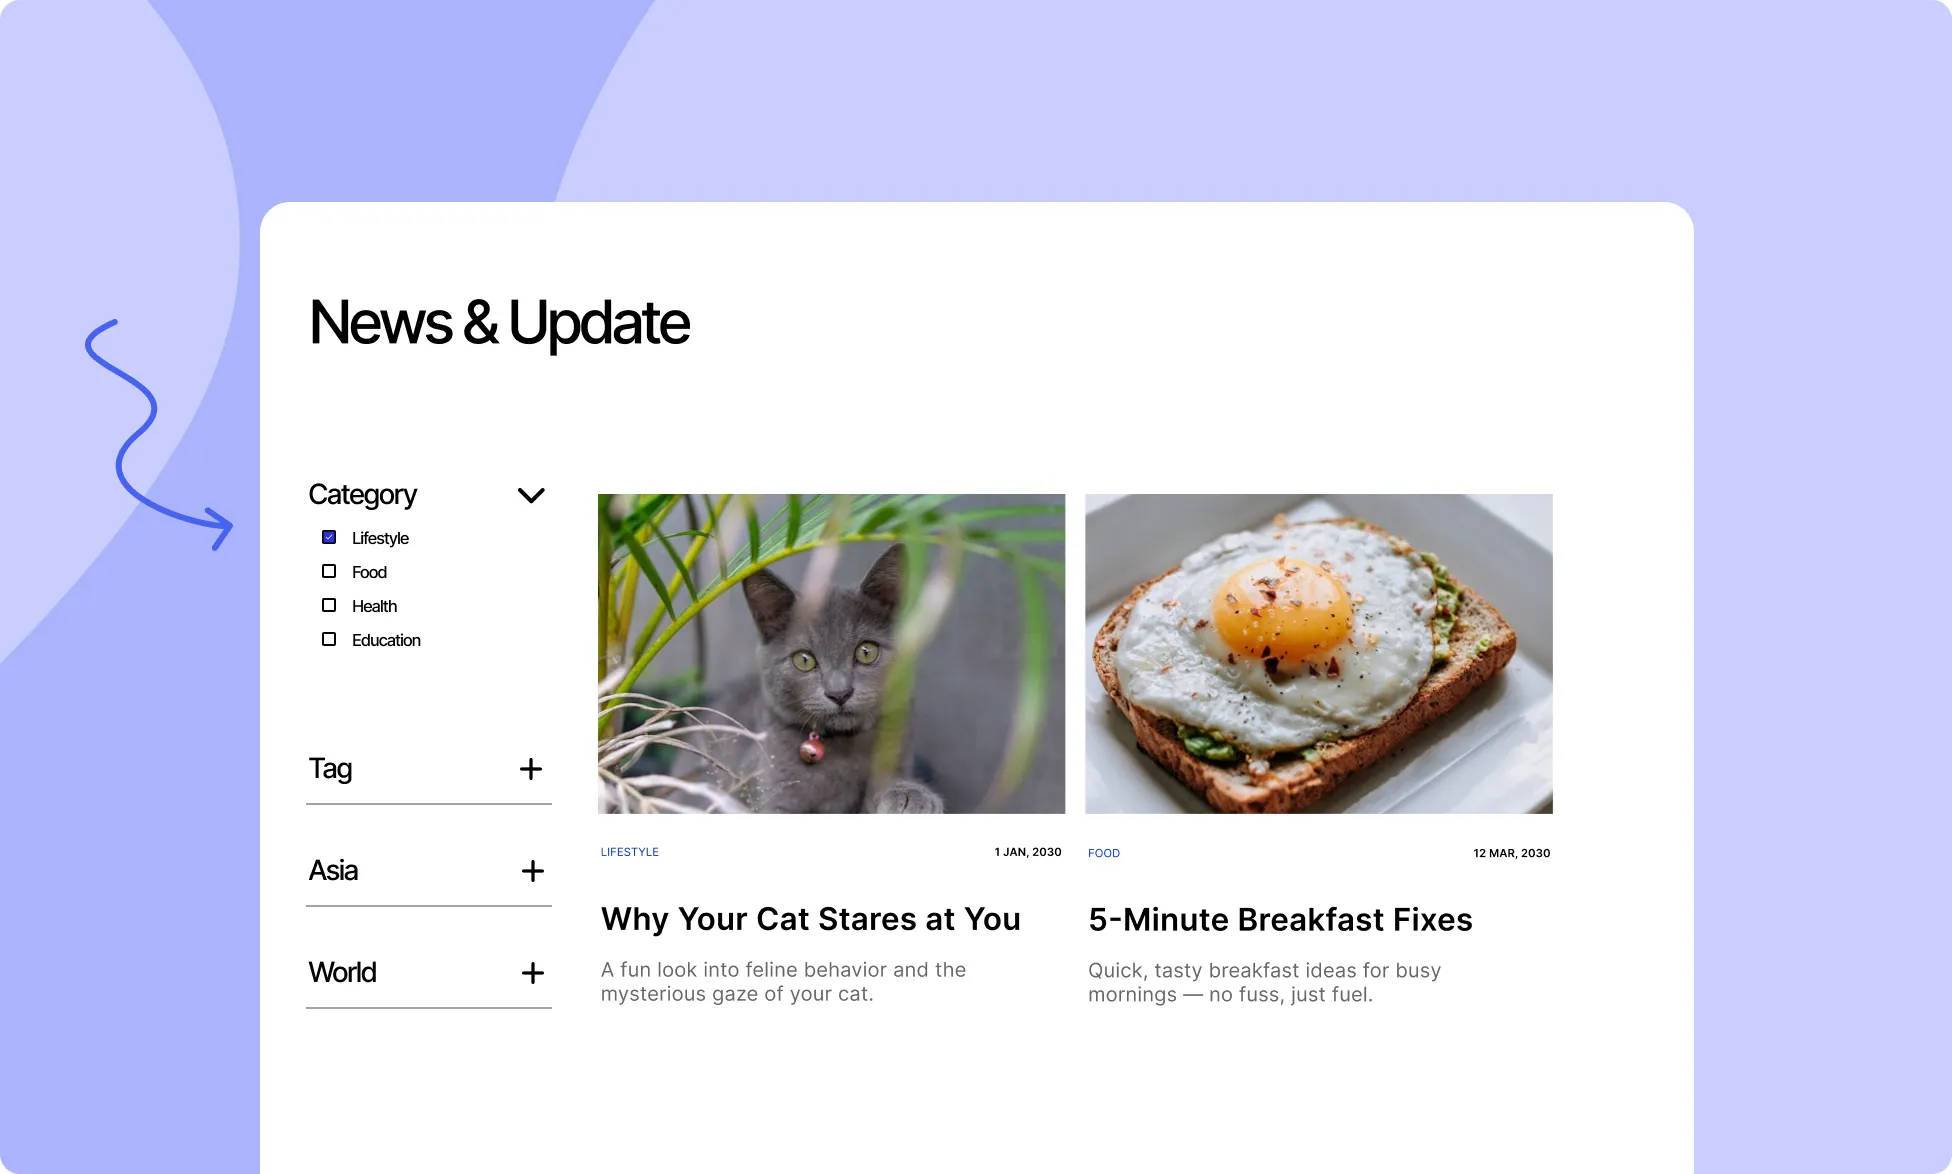
Once the settings are configured, preview your page to see the filter in action.
Users should now be able to check and uncheck the checkboxes, and the WordPress posts will dynamically update based on the selected filters.
With Droip’s Collection Element, creating a filter functionality for WordPress posts is a simple yet powerful feature. By using dynamic data, and advanced collection settings, you can offer a seamless and interactive user experience, allowing visitors to filter posts by categories, tags, or other taxonomies.
Was this page helpful?