Great artists deserve the best stage — and for photographers, that stage is a stunning website that puts their work in the spotlight.
That’s why in this guide, we’ll show you how to create a photography website in WordPress with no code, hassle-free, and ready in no time.
So let’s dive right in!
Step 1: Find the Right Platform & Website Builder
To build a photography WordPress website without code, the first step is finding the right platform and website builder.
There’s no shortage of options, from WordPress builders to SaaS solutions and more. But SaaS platforms can often lock you into their ecosystem, offer limited flexibility & customization, and have high or recurring costs.
That’s why, if you’re looking for flexibility at an affordable price point, WordPress is your best bet.
However, with numerous website builders on the platform to choose from, it can get overwhelming.
To make things easier, here’s a breakdown of what an ideal WordPress website builder should let you do:
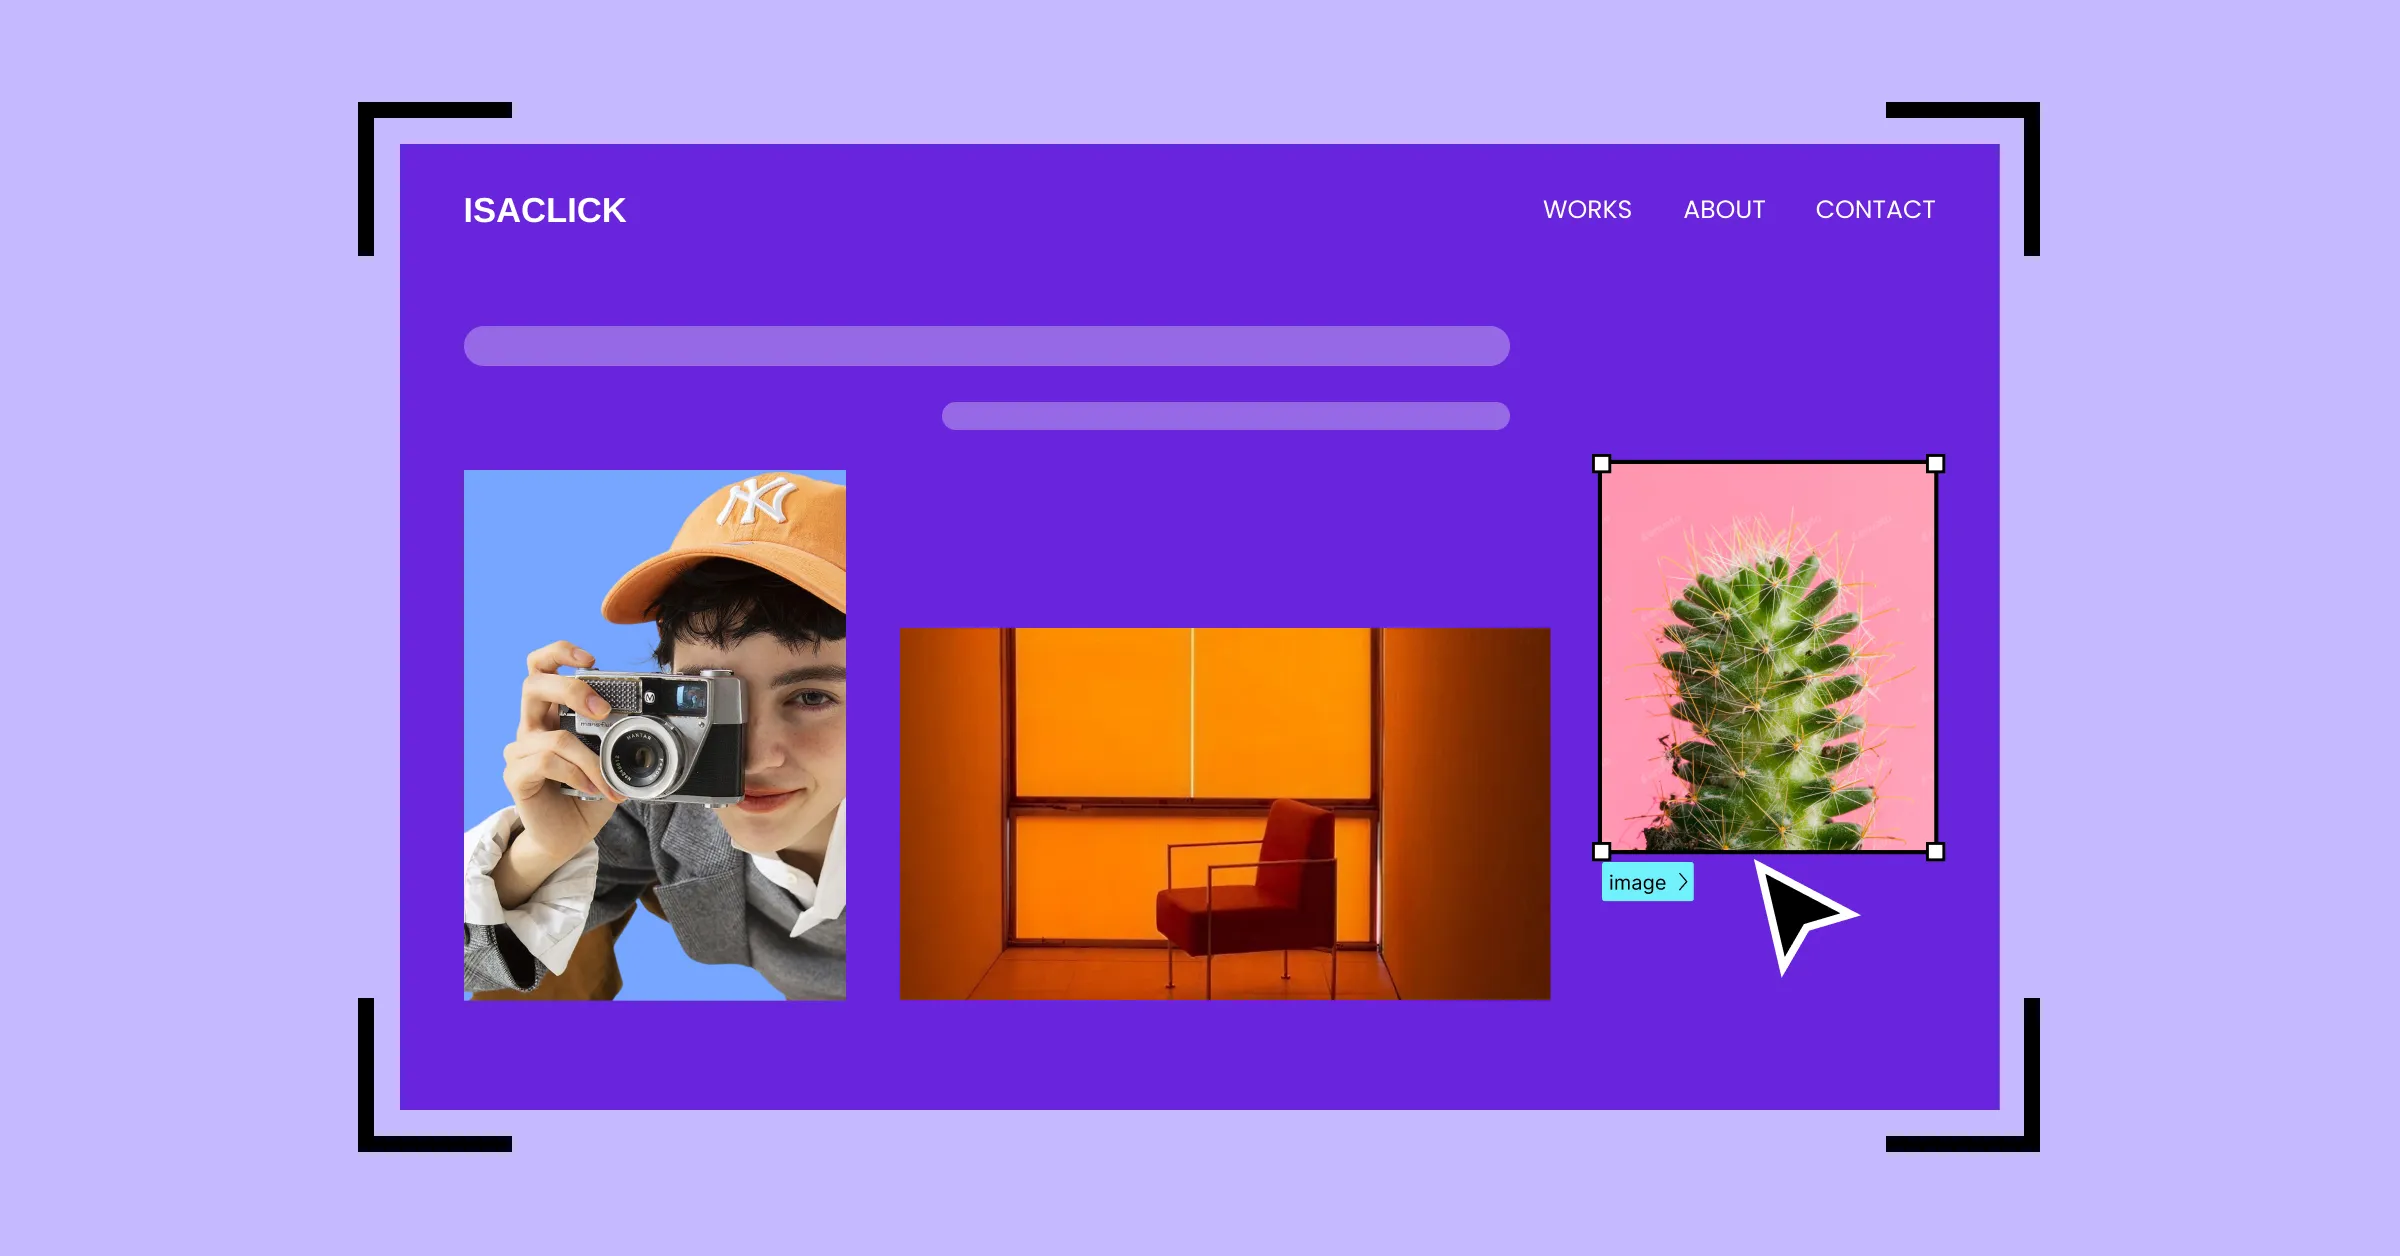
Work easily with images: It’s a photography portfolio website, so handling images should be a breeze! This means easily adding, viewing, and managing images. Bonus points if the editor lets you tweak images directly within the editor.
Freely customize your design: Photography websites rely on visuals. Find a tool with a real-time visual editor and granular control, which gives you the freedom needed to create a website that reflects you perfectly.
Make it responsive across any device: Stunning visuals lose their impact if they break on a different device. Avoid this by choosing a responsive website builder to adapt your design with ease.
Organize and display content dynamically: Another must-have for future-proofing your website is dynamic content! Then, you can update and add content from one place — making alterations and expansion hassle-free.
Optimize for speed and performance: A photography portfolio with all its high-quality images can slow down your site. Look for a website builder that generates fast and smooth pages with clean-code output and optimized media.
Avoid extra plugins and expenses: Don’t fall into the extra plugin black hole as it’ll slow down your site and break the bank. Instead, choose a one-stop website builder that offers everything built in.
Now, not all website builders on WordPress are truly no-code, nor do most offer a real-time visual editor and other necessary capabilities.
But one notable exception to this is the Droip WordPress website builder.
The all-in-one super-solution ticks all of the right boxes, giving you everything you need to build a professional photography portfolio website with no code required.
Like for starters, it comes with a growing library of WordPress themes, many of which are perfect for professional online photography portfolios. Best of all, you can use any of them without extra costs and get complete freedom to customize everything to fit your style and needs!
Beyond its real-time editor and free WordPress themes, Droip is genuinely a one-stop solution with powerful built-in features such as:
- Figma to WordPress Handoff
- Dynamic Content Manager
- Synchronous Global Styling Using Variables
- Real-time Collaboration & Co-editing
- Interaction and Animation
- And more!
Plus, Droip’s clean code output, lack of reliance on third-party JavaScript libraries, and automatic CSS and JS compression ensure flawless performance — making it the best choice for photography portfolio websites with heavy media.
Step 2: Install and Set Up Your WordPress Website
After choosing your website platform and builder, it’s time to go ahead and set it up.
For WordPress, this is super easy to do:
Step 1: Go to the WordPress website and download its latest version.
Step 2: Next, create a database for your site.
Step 3: Upload the WordPress files to your hosting server or local device if it’s a staging site.
Step 4: Navigate to your domain on a browser to run the WordPress installation.
Once your WordPress website is all set up, you can then install the website builder, which in our case is Droip:
Step 1: Create an account on the Droip website and choose a Droip plan that best fits your needs.
Step 2: Make your purchase and from your Account > Subscriptions > Downloads, save the latest version.
Step 3: Upload this file by going to your WordPress website > WP Admin > Plugins > Add New > Upload Plugin.
Step 4: Hit Install and Activate. Then activate your license to finish.
Step 3: Design Your Website With Droip
Finally, it’s time to get started on designing your website. Droip makes this really simple with four different ways to kick things off:
- Import from Figma to WordPress: Already designing on Figma? Instantly bring your work into WordPress for development with the help of Droip.
- Install any one of Droip’s free WordPress themes: Perfect if you’re a beginner, running short on time, or just want the simplicity of a pre-designed website that’s fully customizable.
- Use Pre-built Wireframes, Sections, Pages, and Components: Alternatively, if you want more creative freedom or feel overwhelmed by complete templates, Droip’s pre-built options work great to give you that flexibility while still keeping the process fast and simple.
- Start from scratch on a blank canvas: For ultimate creative freedom, you can start from scratch on a blank canvas using Droip’s built-in elements and create a completely unique website.
Method 1: Import From Figma to WordPress
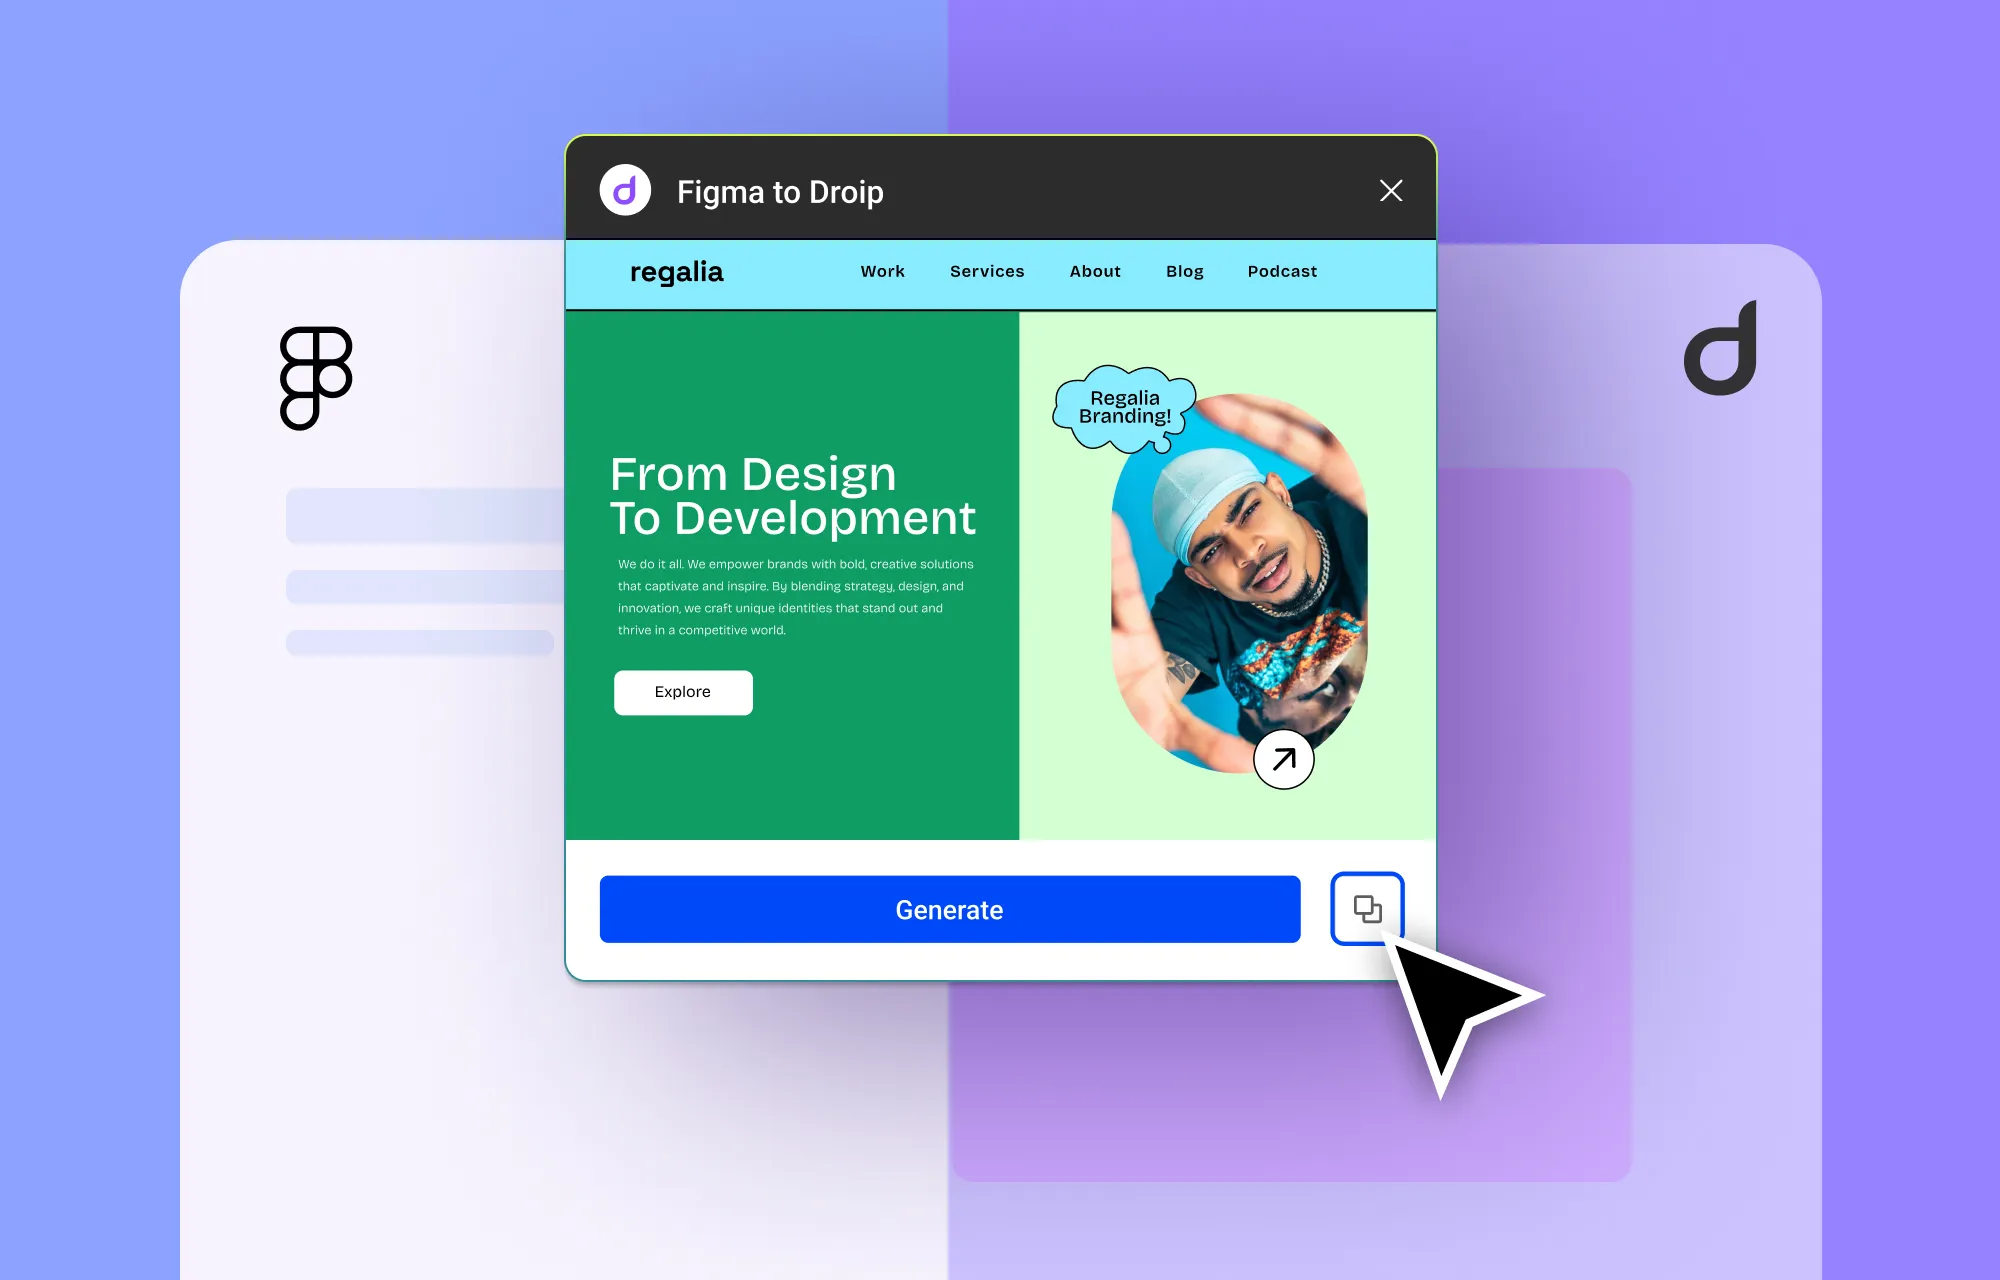
If you have a design ready on Figma or prefer it, no need to fret. With Droip, you can import your designs from Figma to WordPress instantly.
No more waiting weeks or even months for developers to recreate your design. Instead, with just a few steps, you can have a fully-functional, pixel-perfect, and responsive website ready to go.
Check out our Figma to WordPress guide to learn all about it.
Method 2: Use a Droip WordPress Theme
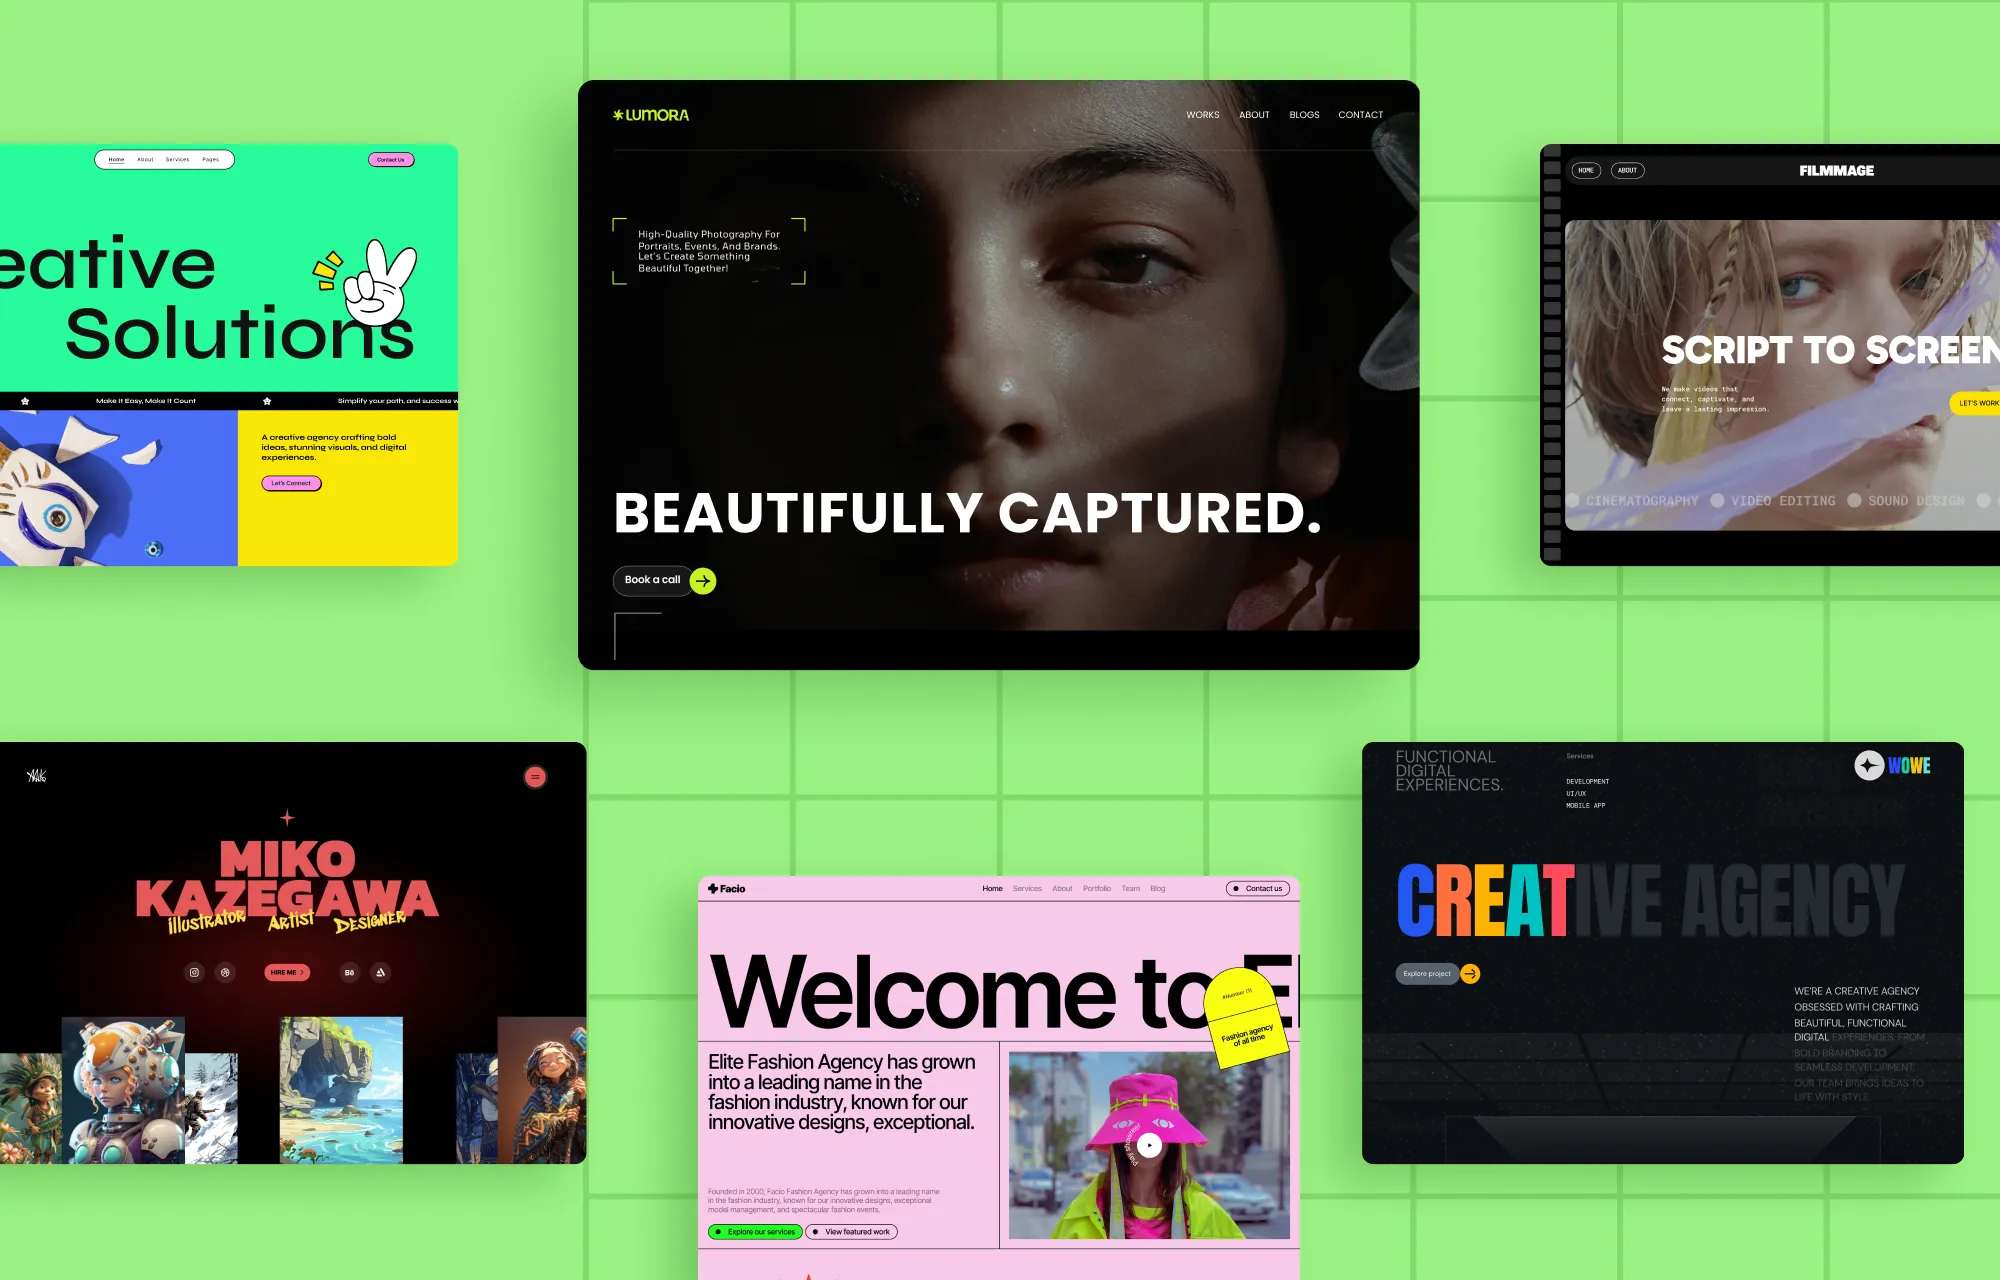
Droip also offers tons of ready-made, free WordPress themes with all the essential pages, making them the easiest and fastest way to get your website up and running!
Here are some creative portfolio WordPress themes that you can try at no extra cost, like:
- Lumora – Creative Portfolio & Photography WordPress Theme
- Artixan — Creative Portfolio WordPress Theme
- Filmmage — Video Production Agency WordPress Theme
- Facio — Fashion Agency & Portfolio WordPress Theme
- Forges – Creative Studio & Agency WordPress Theme
- Wowe — Creative Agency WordPress Theme
Visit the Droip WordPress theme library to explore all the available options.
To install a Droip WordPress theme, do the following:
Step 1: In the Droip editor, click on the Templates icon on the left sidebar.
Step 2: Browse the Template Library to find an option that fits your photography website.
Step 3: Click the template’s Details button to view more information, hit Import to install, and click Proceed to confirm.
That’s it! Your portfolio WordPress theme is now installed — complete with pages, site settings, and more.
💡 Note: For best results, use the Droip Base Theme with these templates. Download it from your Droip Account > Downloads, then upload, install, and activate it via WP Admin > Appearance > Themes.
Once your free WordPress theme is imported, you need to:
- Replace placeholder content with your own
- Swap images and other media
- Tweak layouts and design to match your brand
- Update navigation and links
- Optimize for performance and SEO
Method 3: Use Pre-Built Wireframes, Sections, Pages, and Components
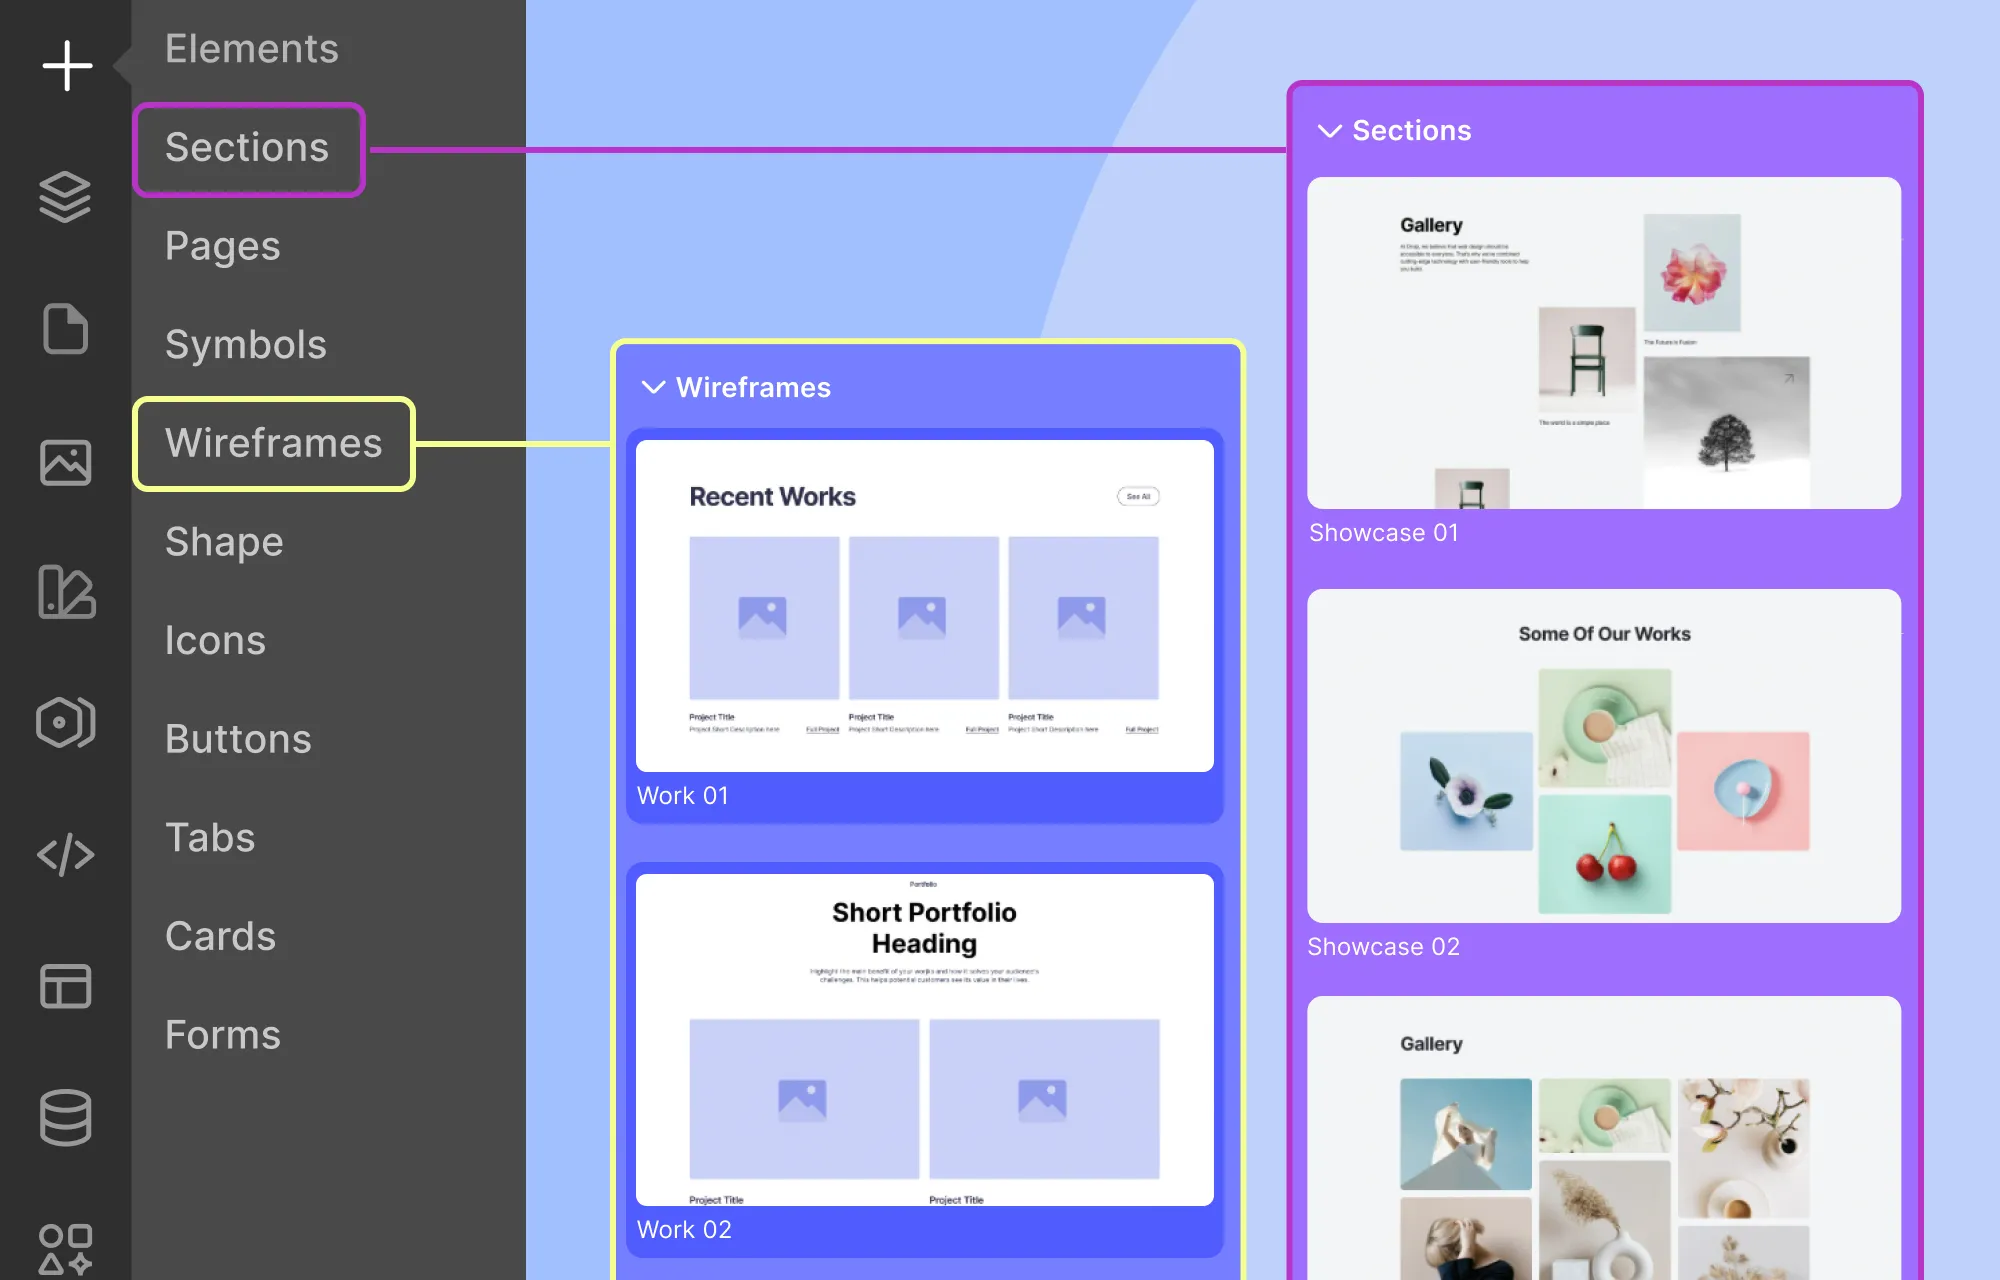
Droip also offers a library of Wireframes, Pre-built Sections, Pages, and Components that you can mix and match to quickly build your portfolio.
Wireframes: Think of these as web design blueprints — unstyled structures with content placeholders that give you a head start while leaving plenty of room for your creativity. There are options for every need, including Portfolio and Image Gallery Wireframes.
Pre-built Sections: Fully styled blocks that you use by simply swapping the demo content with your own. Showcase sections are perfect for presenting your photography in a unique, eye-catching way.
Pre-made Pages: Ready-to-use pages for landing, portfolio, pricing, and more — ideal for quickly creating companion pages for your website.
Pre-designed Components: Choose from a range of fully designed buttons, cards, etc that you drop anywhere on your site to boost both functionality and style without extra setup.
Method 4: Start From Scratch on a Blank Canvas
Last but not least, you can start entirely from scratch on a blank canvas by using Droip’s built-in elements:
Step 1: In the Droip editor, click on the plus icon on the left sidebar and go to Elements.
Step 2: Drag and drop elements to add layout, content, etc.
Step 3: Use the Style Panel to customize these elements.
With this approach, you get complete freedom to design every part of your website exactly the way you envisioned it.
Speaking of elements, here are some key media options in Droip that can take the way you showcase images to the next level:
The Image Element
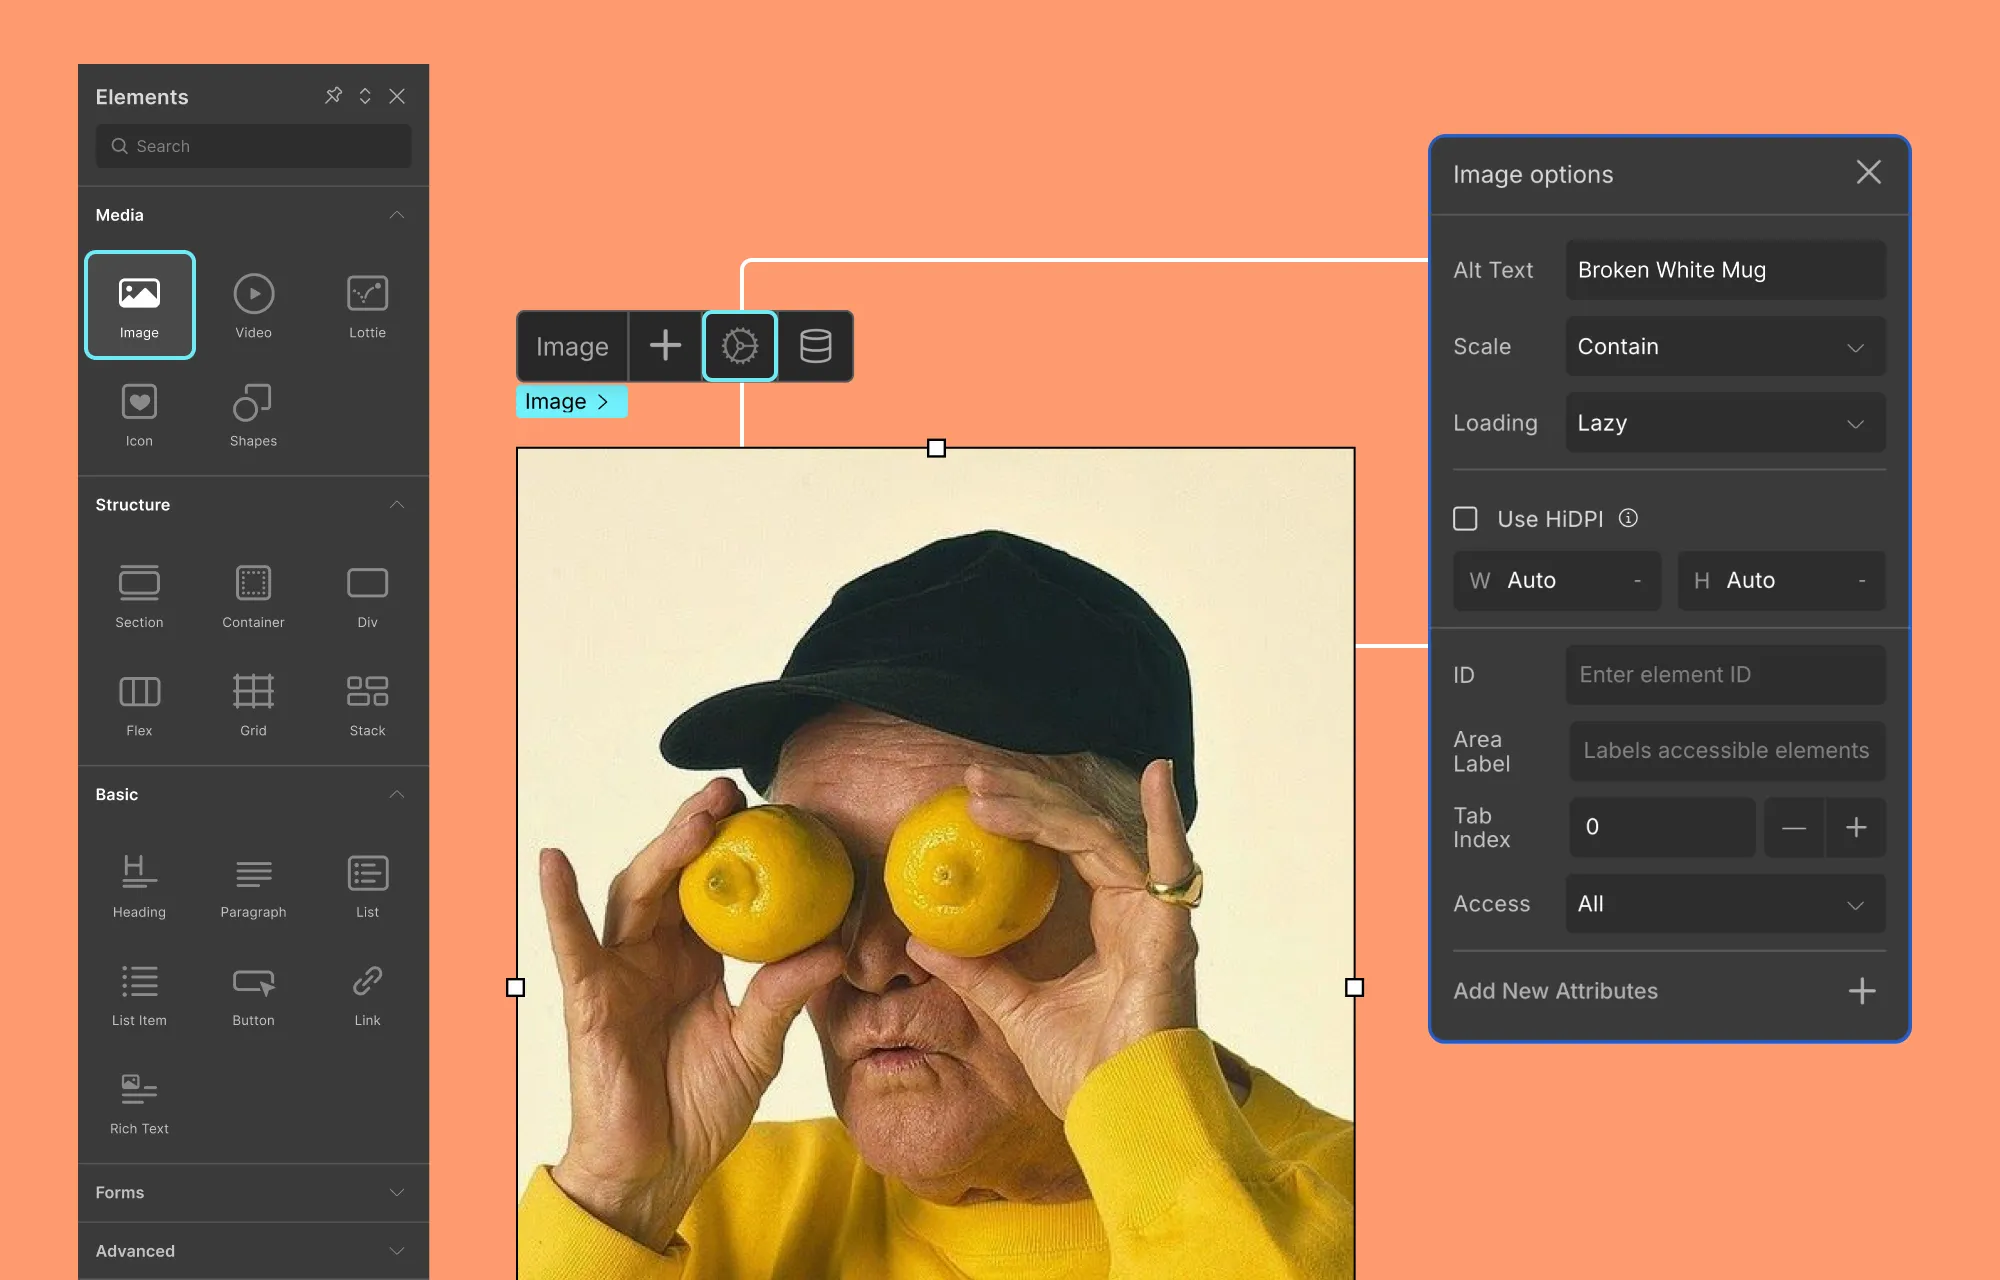
Droip’s basic Image element is quite powerful on its own. It lets you add images from the Media Manager, upload new ones, and even pull directly from third-party image libraries like Unsplash & Pexels after integrating.
Then, from the Image element’s settings, you can set things like:
- Image Alt Text
- Loading Style (Auto, Eager, or Lazy)
- HiDPI
- And more
Grid, Flex & Stack Structures
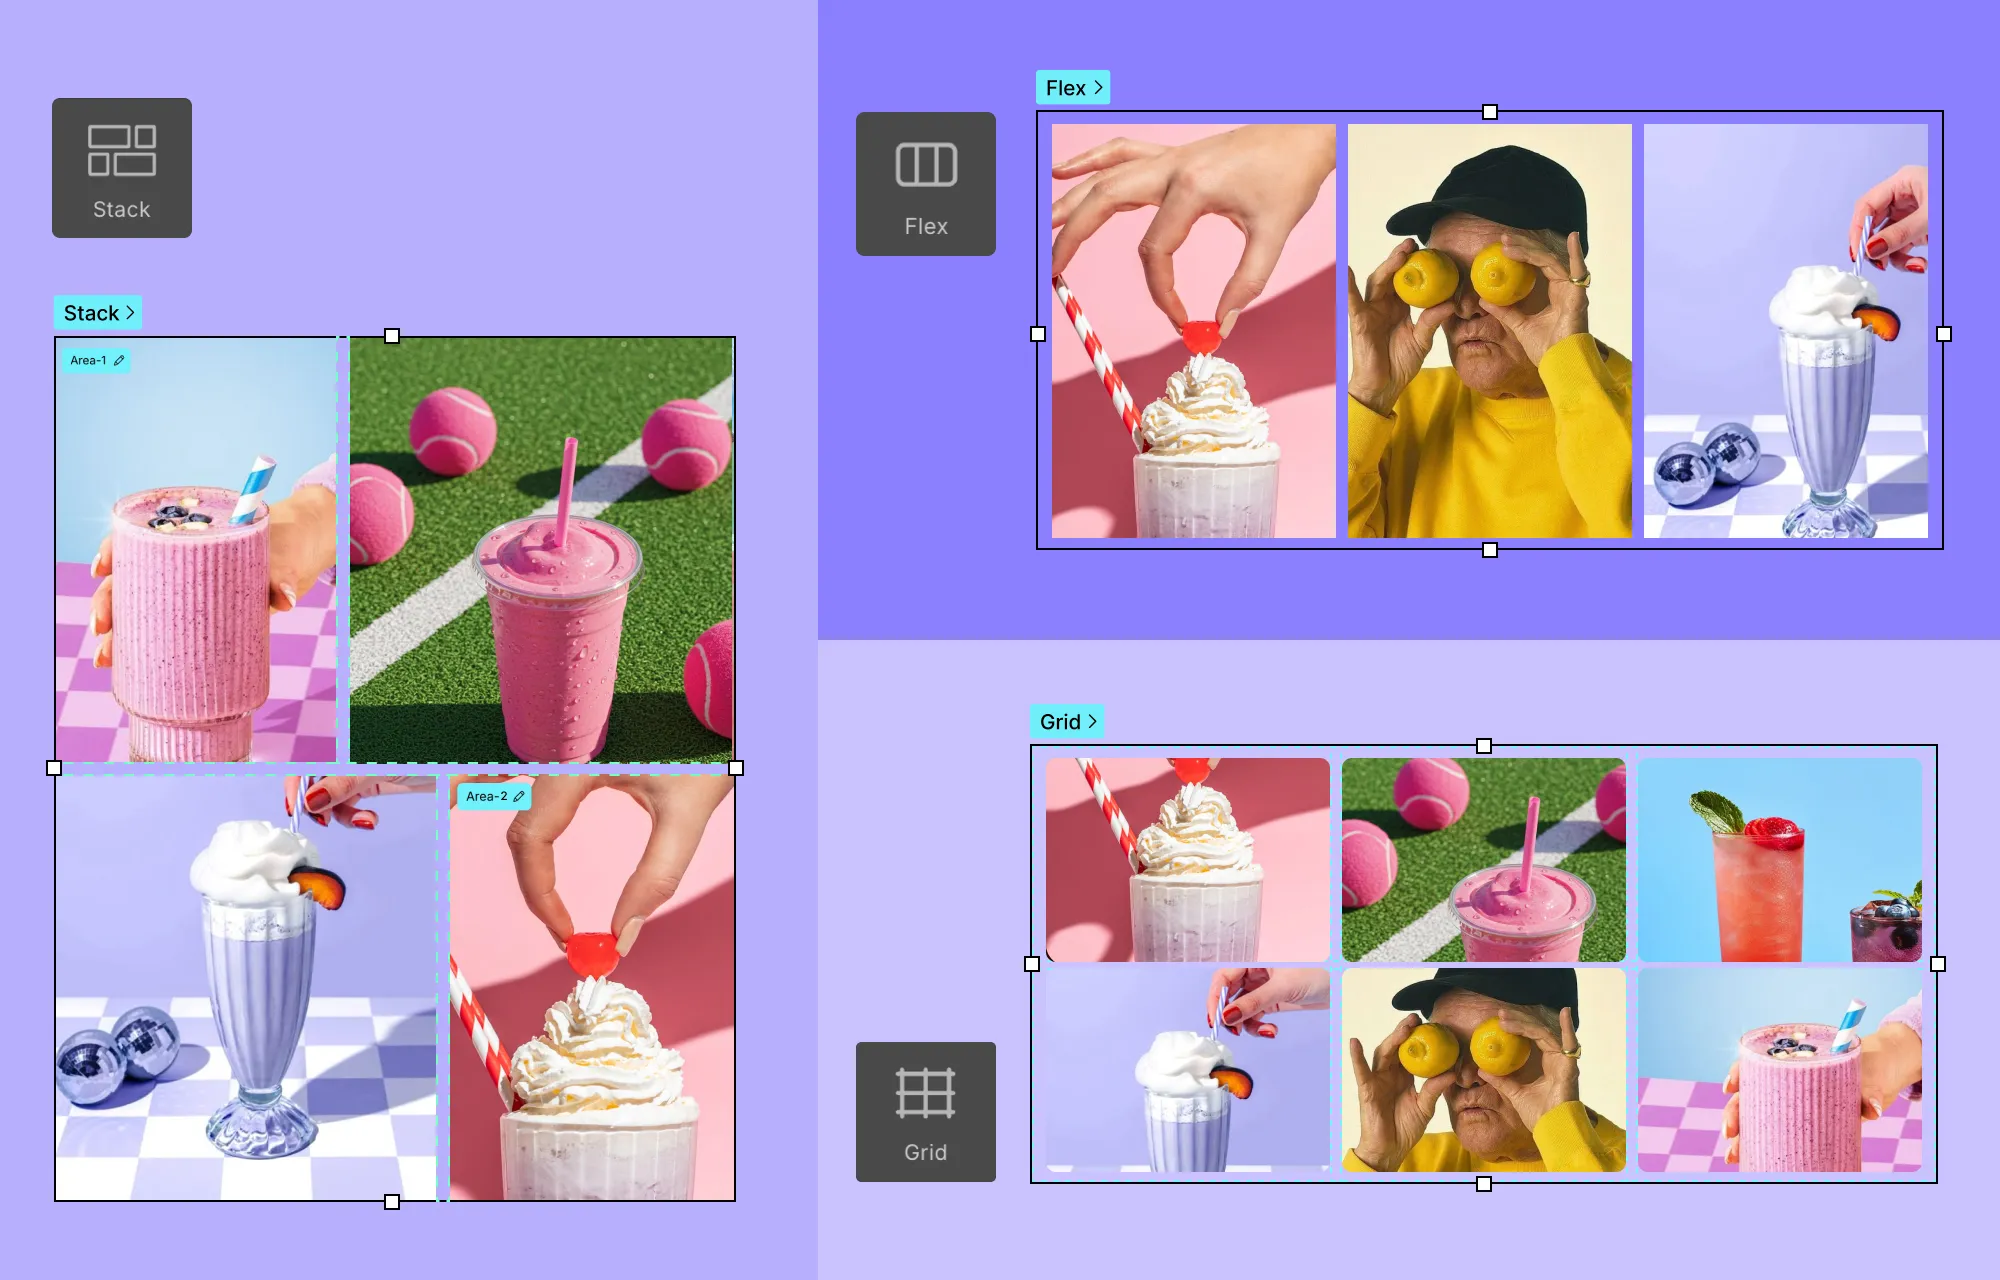
Droip also includes several layout elements to showcase your photography portfolio images easily and effectively:
Grid & Flex: Showcase your images in a clean, structured layout using Grid or Flex. Grids are two-dimensional with rows and columns, while flex is one-dimensional, either horizontal or vertical.
Stack: Easily craft striking image masonry layouts, adding visual uniqueness to your design.
Slider, Carousel, & Lightbox
If you want your portfolio to feel more immersive, then Droip’s more advanced elements are the way to go.
Instead of just displaying the photos, they encourage viewers to engage with your work and experience it more fully. From Sliders and Carousels to Lightbox, you have plenty of options to showcase your photography in style.
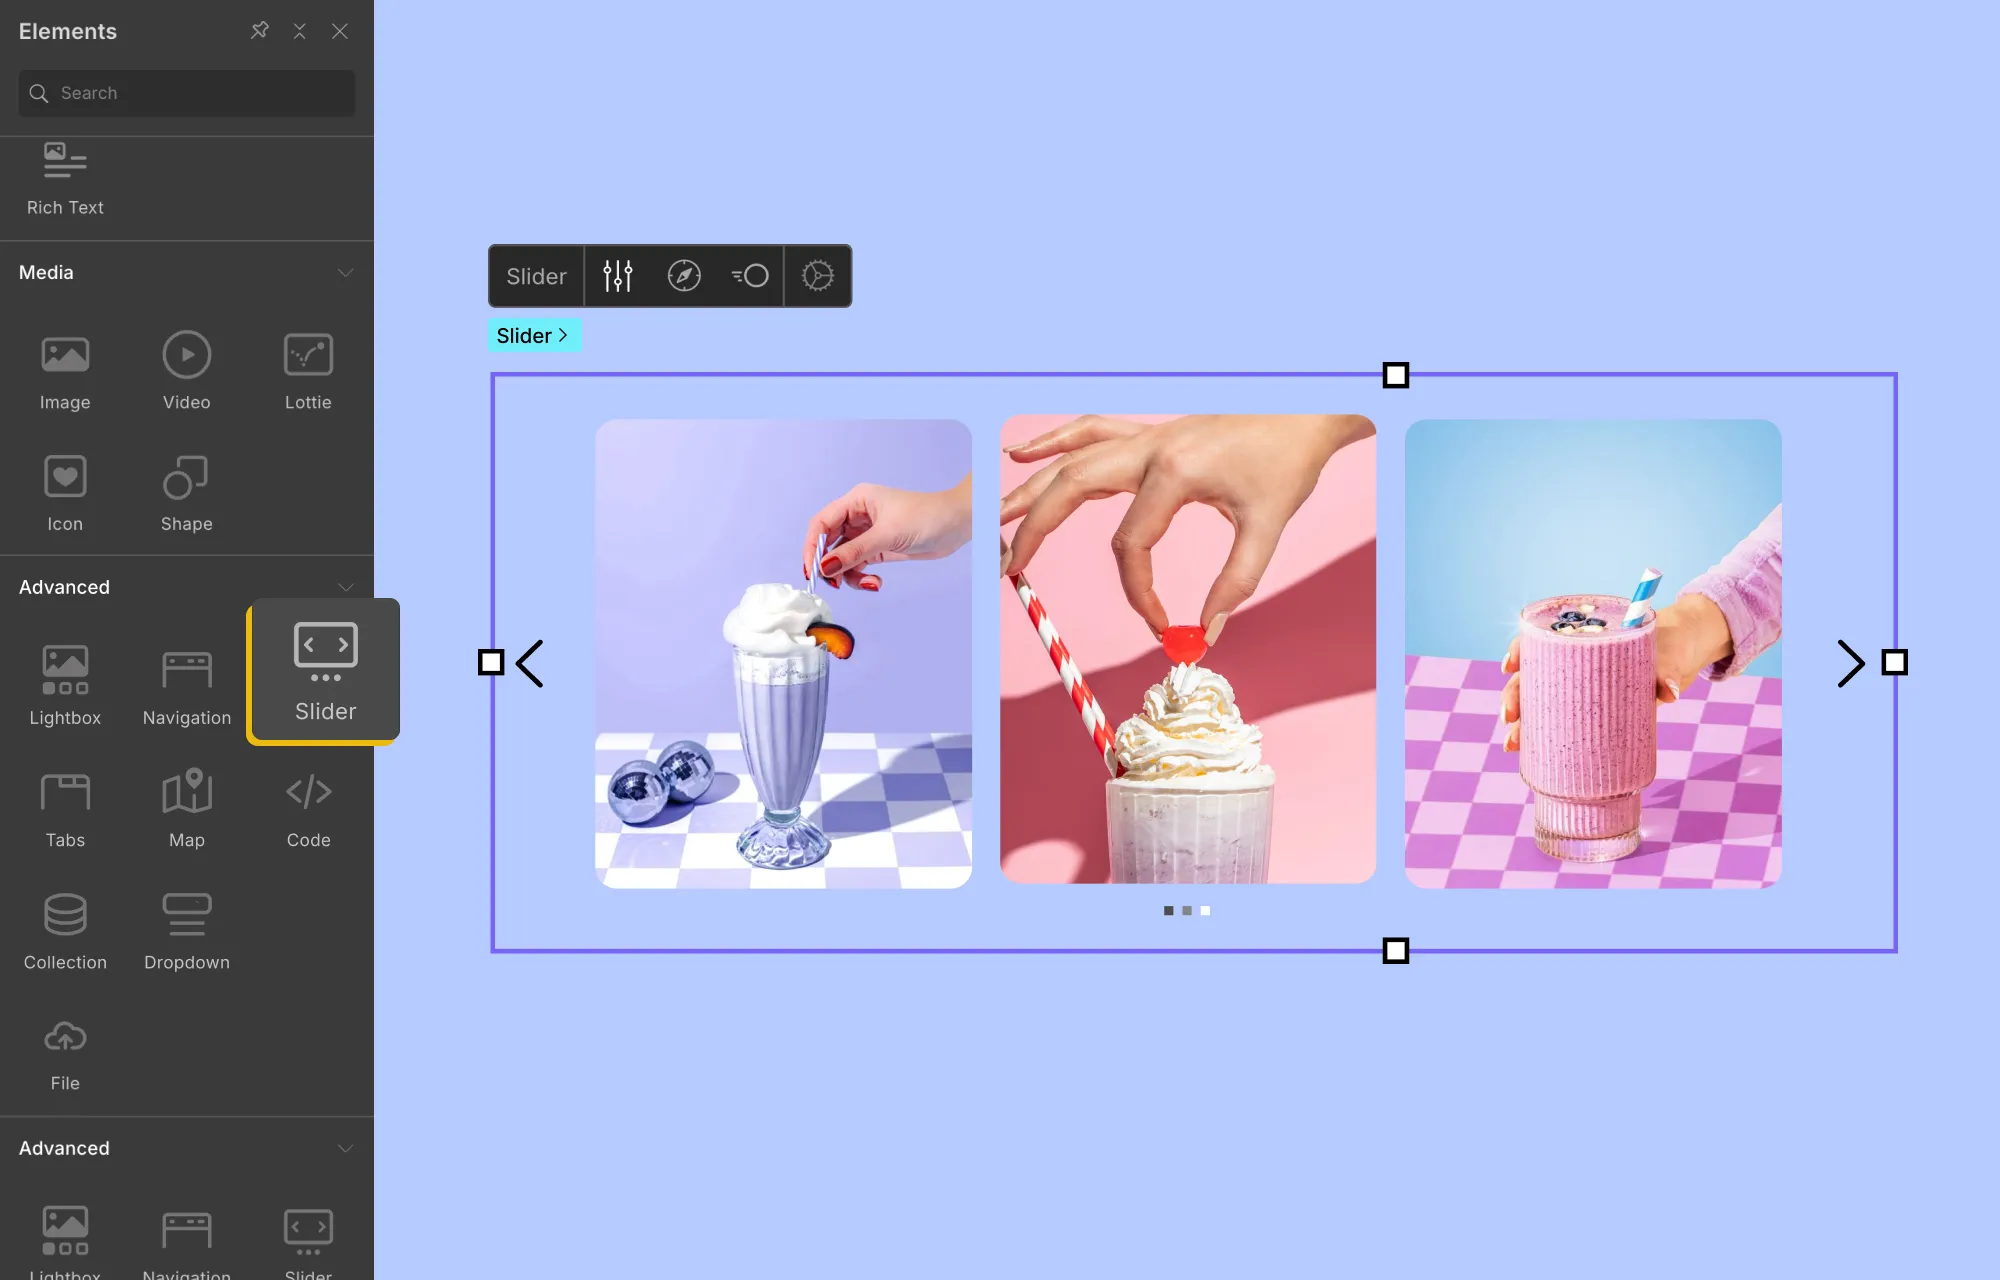
Slider: Basically an interactive slideshow, a Slider is perfect for putting your best shots front and center, one at a time.
Carousel: Another type of interactive slideshow, but where Sliders show single items at a time, Carousels display multiple. This makes them ideal for showcasing your creative range or the variety of projects you can deliver.
You can convert your Slider into a Carousel like this:
Step 1: In the Droip editor, click on the plus icon on the left sidebar, go to Elements, and drag the Slider element onto your page.
Step 2: Set the width of each slider item from the size panel. For example, use 50% to display two images at once, 33% for three, and so on. (You can also play around with uneven widths to give a sneak peek of the next item in the carousel.)
Step 3: Finally, add an image element to every slider item, wrapped in its own div, and add your photos.
Just like that, you’ve got your Image Carousel!
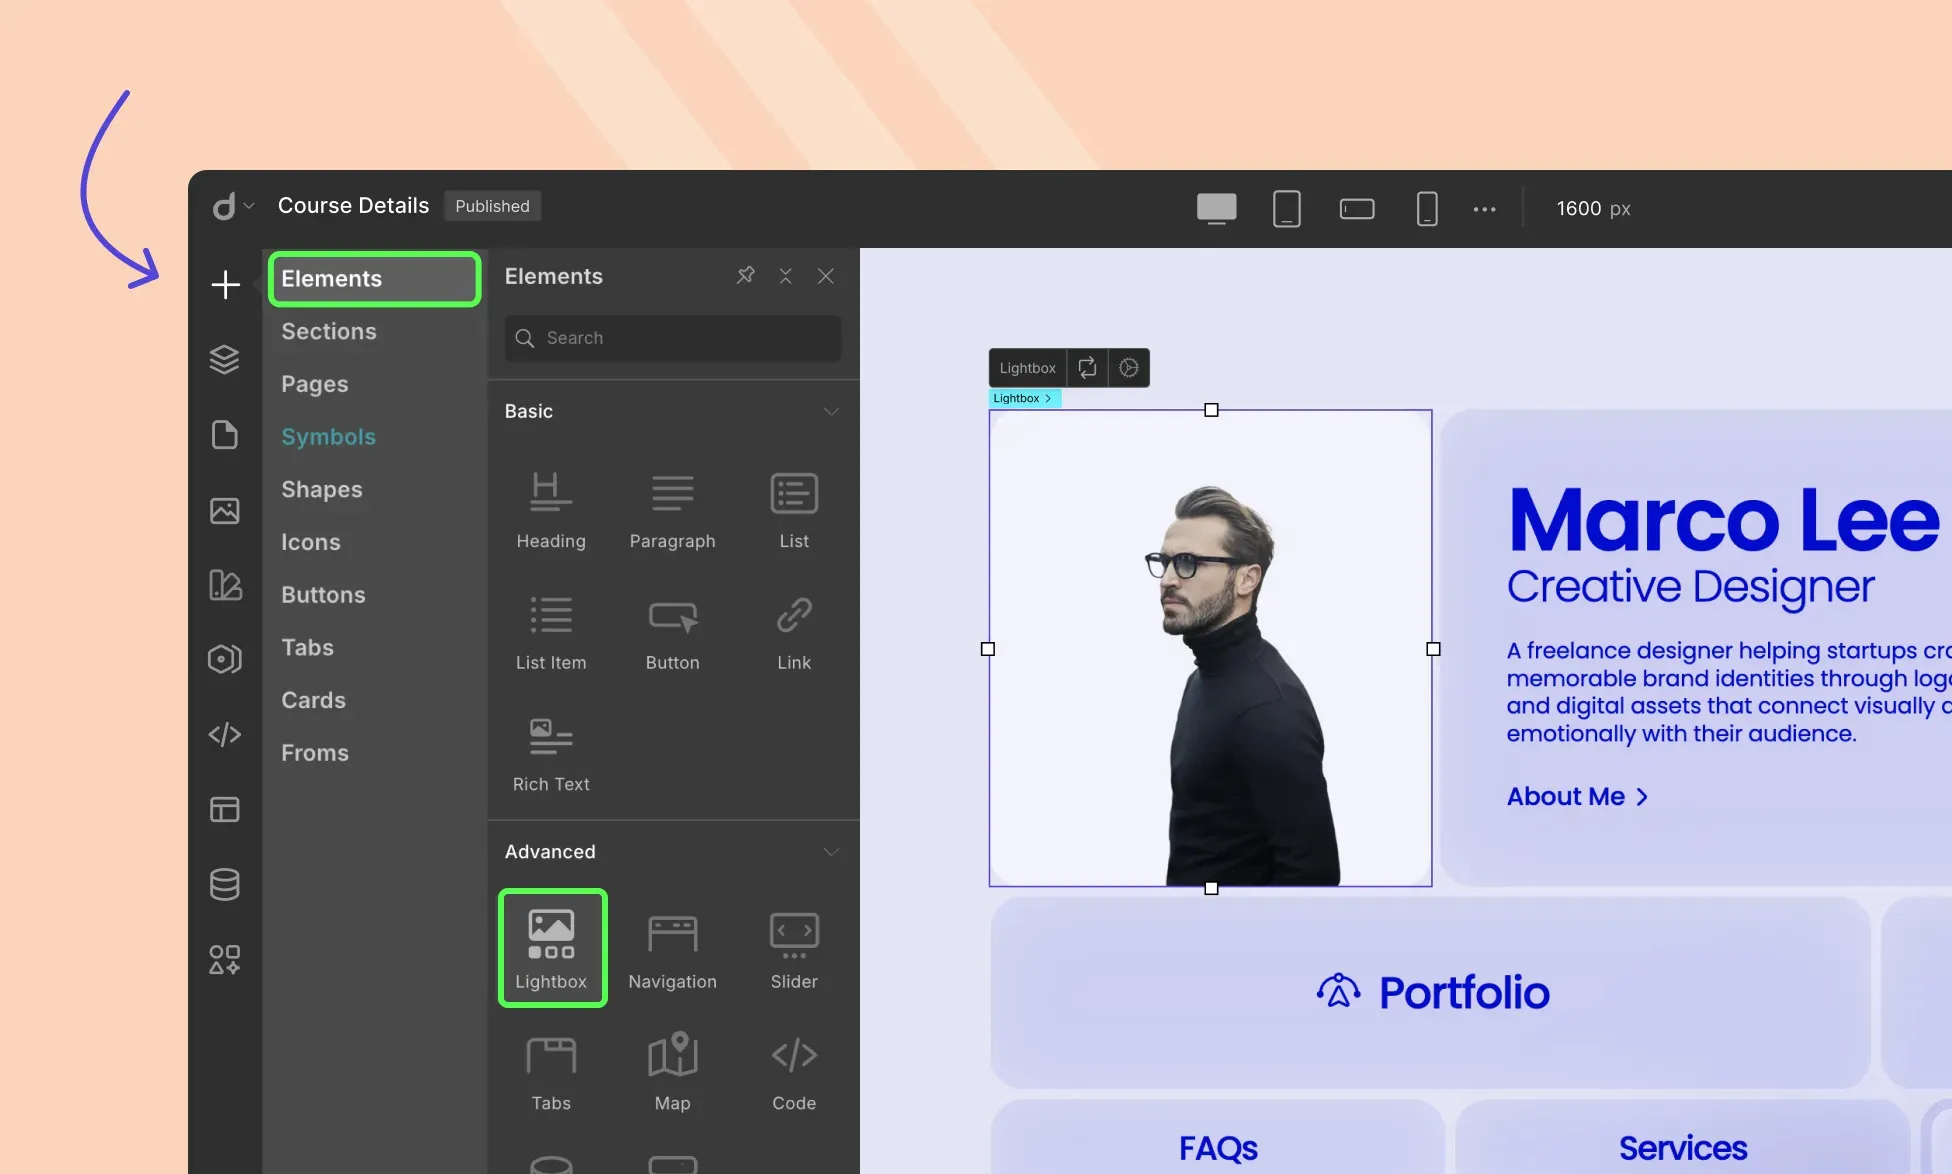
Lightbox: A combination of a modal and a slider, the Lightbox element takes the immersive viewing experience to another level. Works great if you want your audience’s focus to be solely on your featured projects with no distractions.
Step 4: Go Beyond Design and Add Functionality
Whatever method you start with, once your design takes shape, it’s time to refine the finer details and then add functionality. With Droip, you can edit images to better fit your website, display dynamic content, capture leads with forms, add interactive effects, and more.
Edit Images Using Built-in Image Editor
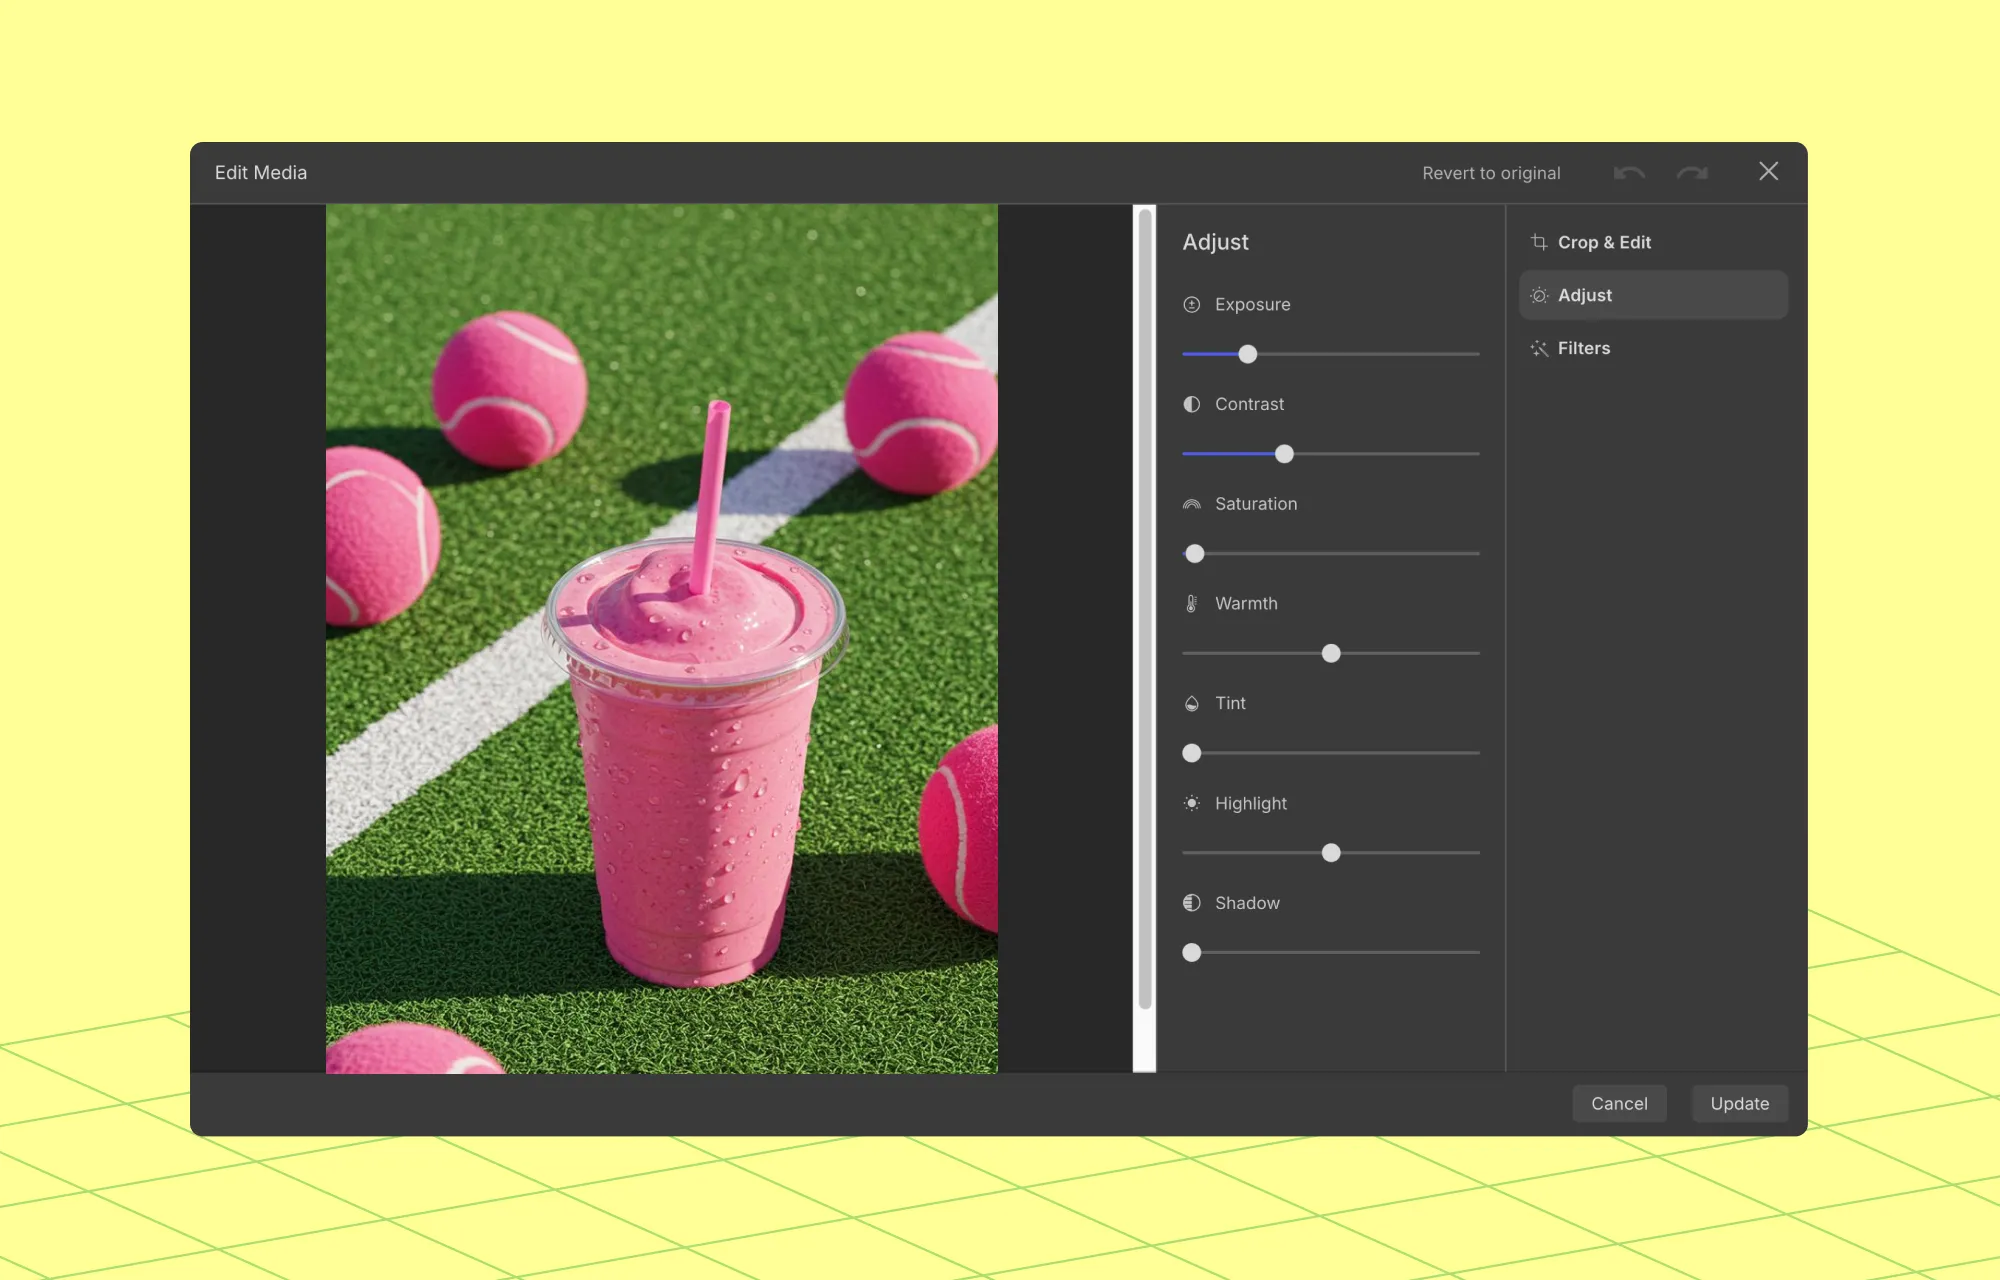
You’ll also find that Droip comes with a built-in Image Editor. This is great if you have some last-minute adjustments to make or want your images to match your design better.
To access it, select the image on the canvas you want to edit and click on Adjust.
You’ll then find the image adjustment toggles here as well as the tabs for Crop & Edit and Filters.
Alternatively, you can go to the Media Manager directly, select your image, and access the Image Editor options from there.
Display Dynamic Content
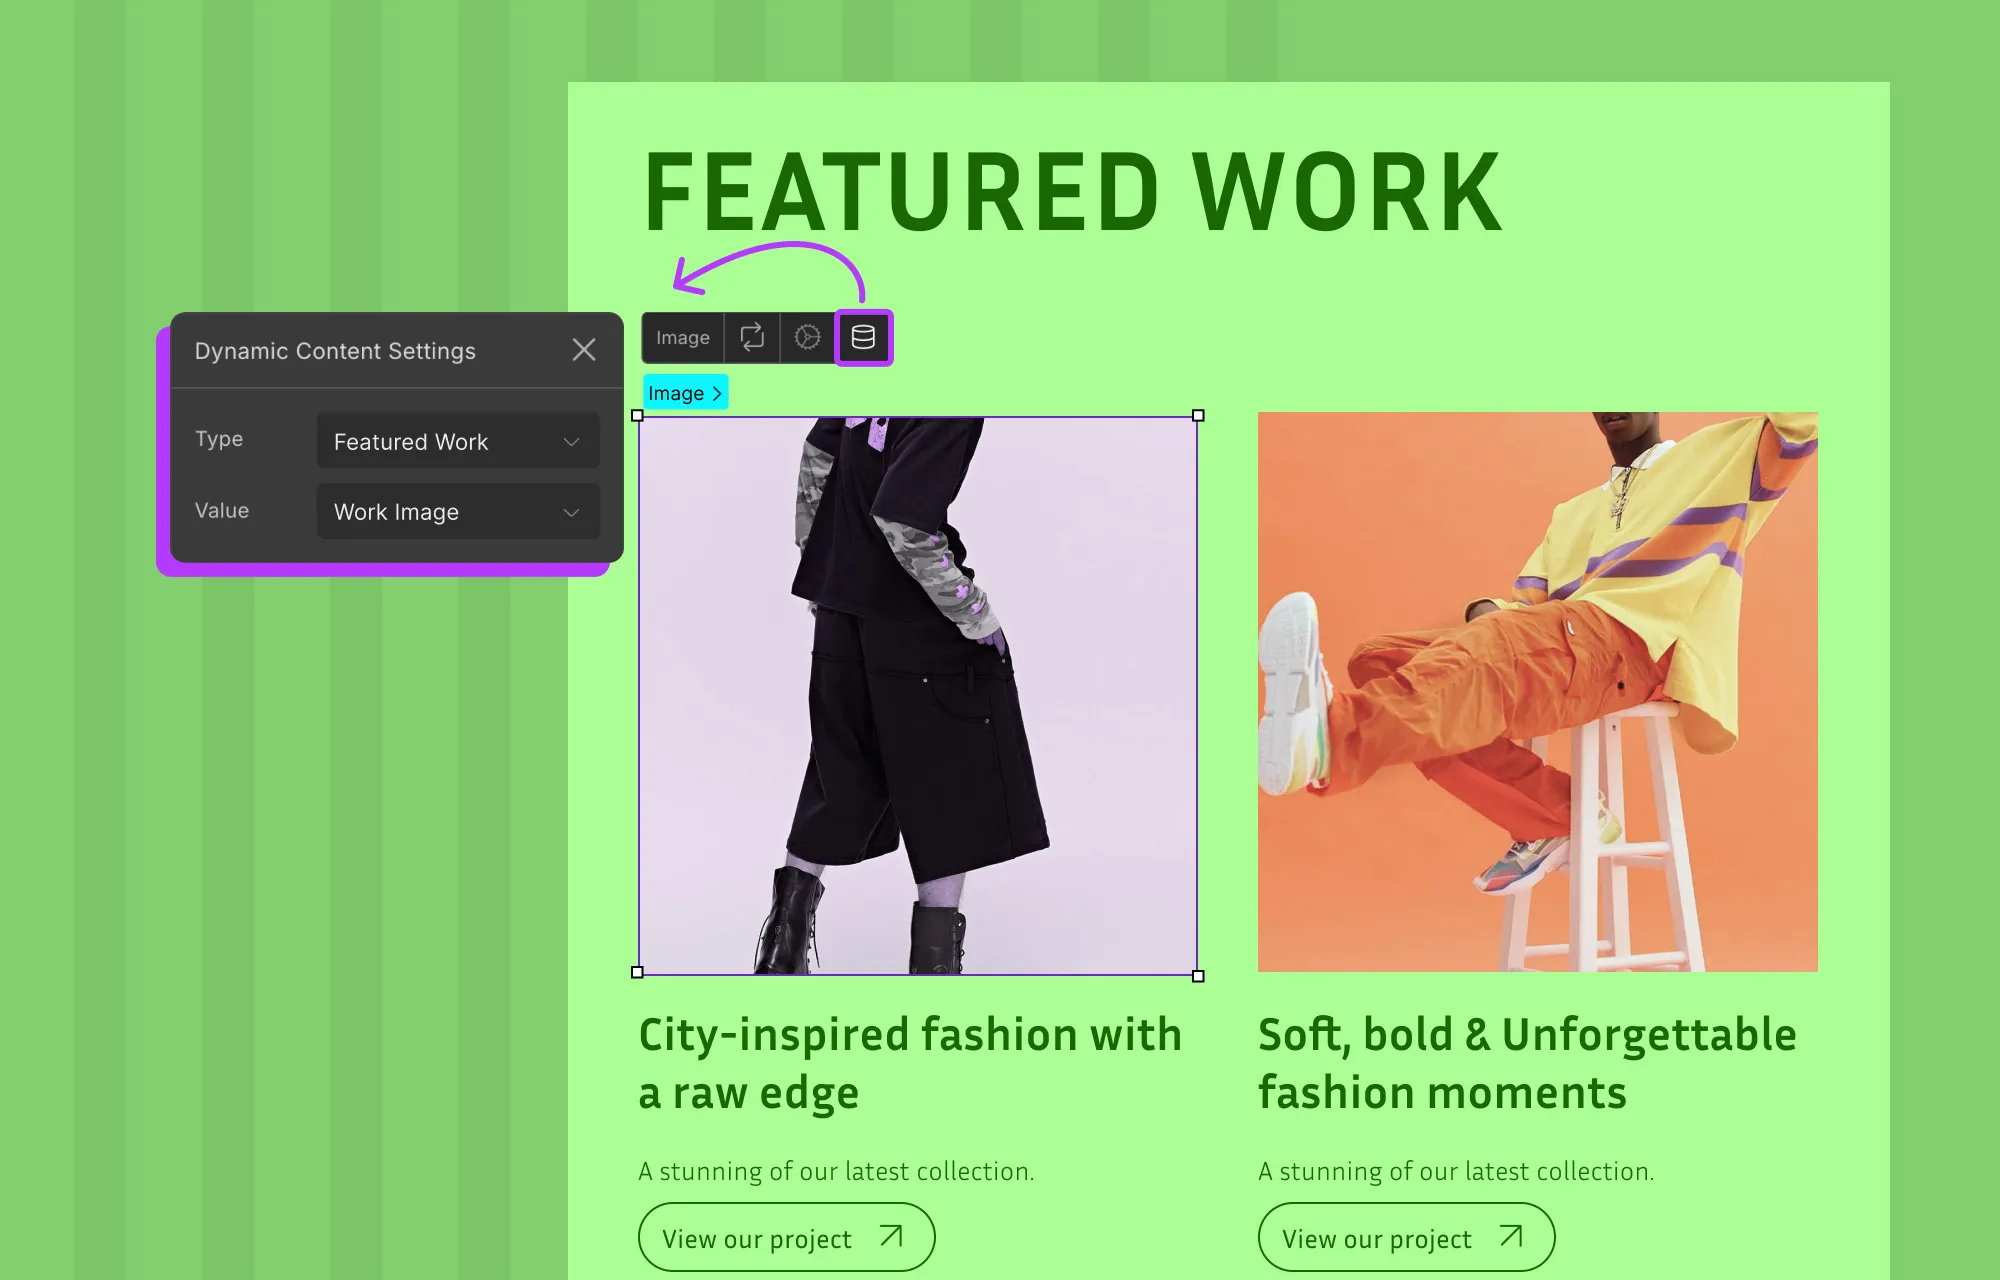
Static placeholder content is easy to swap with what’s relevant, but listings like Portfolio, Services, etc, are constantly evolving alongside your website. So manually adding and managing these to a page can quickly get messy and tough to scale — especially as your brand expands.
This is where Droip’s Dynamic Content Manager comes in.
While replacing template content, use the Content Manager to create custom content types for Portfolio, Services, and more. Then, you can add your data just once and display it dynamically anywhere on your website through lists and single-page templates.
This approach makes updating your content effortless and allows your portfolio website to scale seamlessly as your brand expands.
Check out the Dynamic Content Manager playlist on YouTube to learn more.
Use Forms & Form Data Manager to Capture Leads
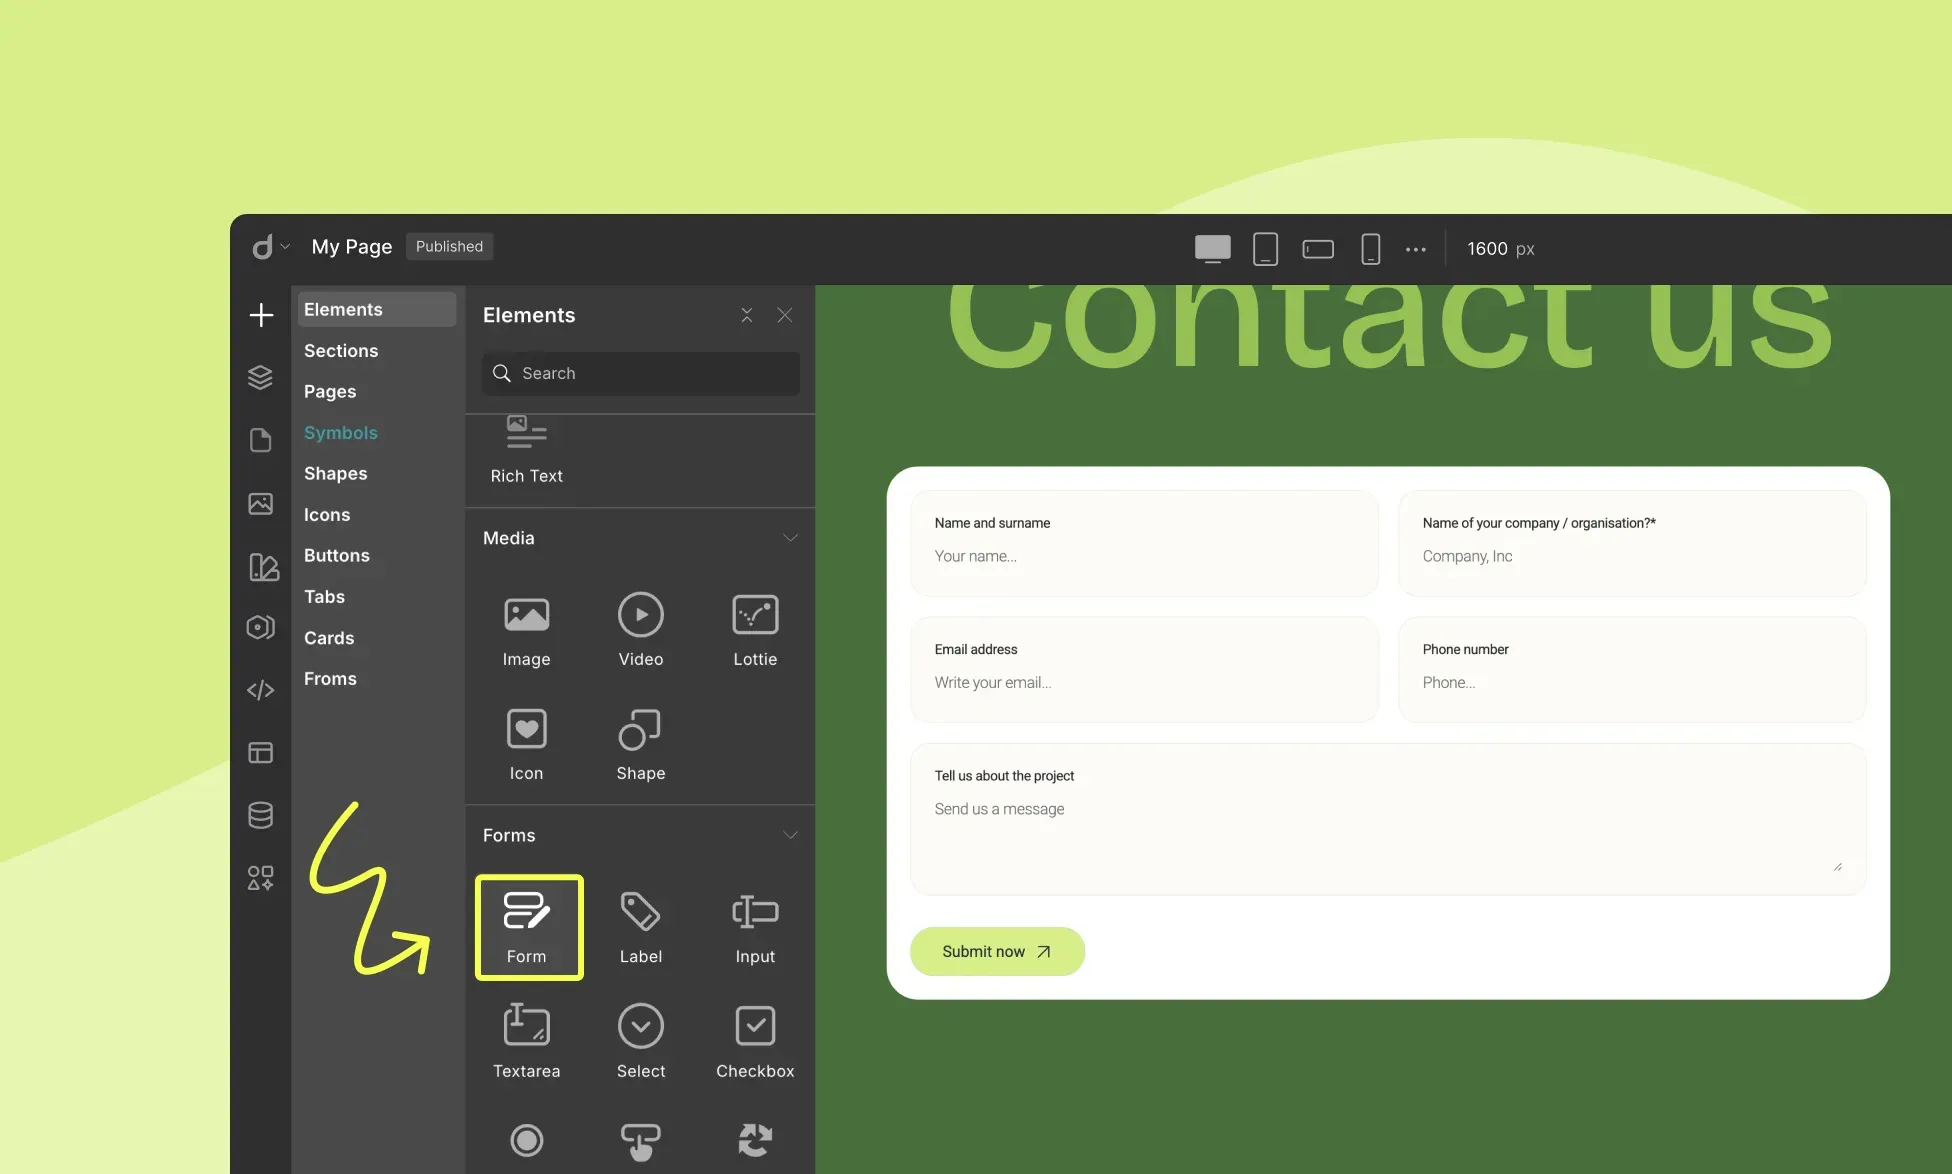
Forms are a vital part of any website as they let you capture leads, collect important data, and connect with your audience directly from your website.
For instance, most photography portfolio websites use contact forms so potential clients can easily get in touch.
With Droip’s built-in Form builder, you can create forms for any purpose from simple contact and inquiry forms to newsletter sign-ups and more.
You can also strengthen form security by connecting with reCAPTCHA and automate email marketing campaigns by integrating with the MailChimp API.
Plus, with a native Form Data Manager, you can access, organize, and manage your responses with ease.
To learn more, check out the Form Builder documentation.
Add Interaction & Animation
Finally, bring your website to life by adding engaging interactions and animations. In Droip, this is easily done through the:
Animation Library: Use the preset animations for quick effects.
Custom Response Editor: Visually build advanced, layered interactions in WordPress without code.
Text Animation: Instantly animate your text elements.
You can check out our interactions and animations playlist for more guidance and inspiration!
Step 5: Run Final Audit & Publish
We’re almost at the finish line, but before you go live, take a moment to run a final audit.
Here’s where Droip’s built-in Audit tool comes in handy. It can quickly catch missing links, alt text, and other issues for you to fix.
Next, you should also use any reliable online tool to check your website’s performance and find what areas, if any, you need to improve.
Once everything looks good, you’re ready to go live!
If you’ve been working on a staging site, Droip makes it effortless to switch from staging to live in no time. Otherwise, you can publish directly.
Launch Your Photography Website Today
And that’s our guide on how to create a photography website in WordPress with no code, all wrapped up!
Launching an online photography portfolio on WordPress has never been easier or more flexible. With Droip, it can just be a matter of picking a free WordPress theme, swapping in your content, customizing the style, adding functionality, and bam — you’ve got your website.
So why wait? Get Droip and start building your dream website visually today!

