Glass Effect, or Glassmorphism, is a design trend that’s all the rage for users seeking to craft sleek, modern websites. And so, today, we’re here to show you how to create Apple style glass effects on WordPress websites without any extra plugins or complex code!
What is Glass Effect
As the name suggests, the Glass Effect gives elements a translucent, liquid glass-like appearance, including characteristics like light refraction and fluidity.
Using a combination of depth, light, and blur, it creates the most eye-catching visuals and adds interest to your pages.
Apart from being aesthetically pleasing, glass effects are also a great way to visually separate content, enhance focus, and even elevate the user experience.
How to Create Glass Effects in WordPress
Glass Effect isn’t new to web design, but it can be tricky to pull off without the right tools.
And for WordPress websites, many of you might assume you’ll need yet another plugin or add-on to make it happen.
But what if you didn’t?
With an all-in-one solution like the Droip WordPress website builder, you can create glass effects right from the editor, no extra plugins, wasted time, costs, or risks whatsoever.
And that’s not all it’s got. As a powerful no-code website builder, it goes beyond the basics with features like the Dynamic Content Manager, Instant Figma to WordPress handoff, Real-time Collaboration, and more.
With Droip, you’re free to visually design liquid glass effects in multiple ways and effortlessly elevate your website.
Designing Glass Effects in Droip
Now that we’ve covered how easy it is to add glass effects on WordPress websites using the right tools, it’s time to start designing Glass Effects in Droip!
To give you the full picture, we’ll walk you through the different ways glass effects can elevate website design.
Frosted Navigation Menu
Frosted Navbars created with Glass Effect instantly add a sleek, modern touch to your websites! Placed over contrasting static or video backgrounds to make them pop, they’re sure to grab attention.
To create Frosted Navigation Menus in Droip:
Step 1: Set Up Your Hero Section
Take a Section and rename it Hero Section.
Inside it, create your Navigation Menu. (For detailed steps, see this Droip video tutorial.)
Step 2: Apply the Glass Effect
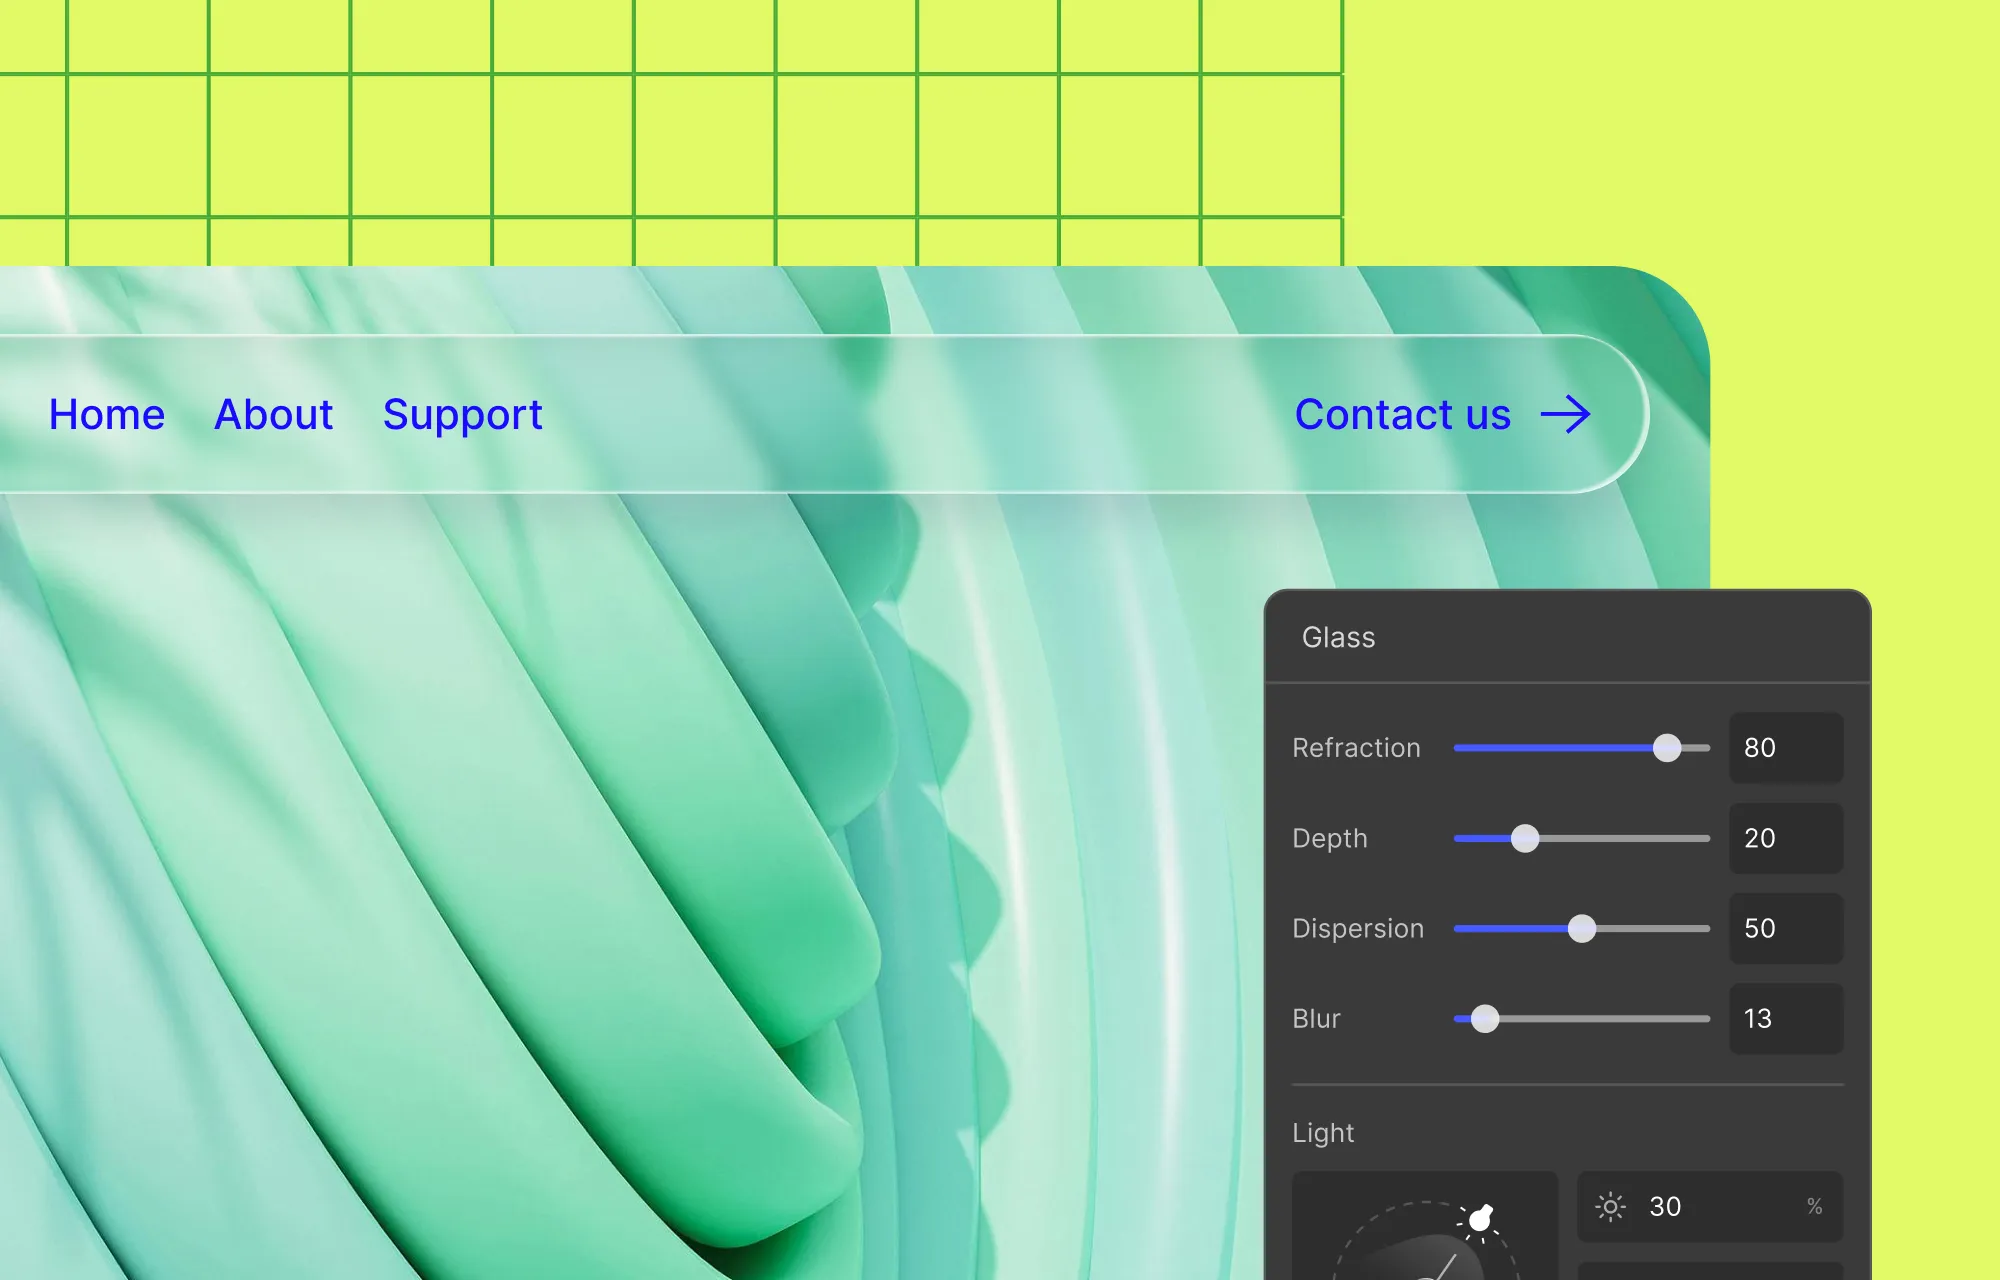
Select your Navigation element, go to Effects > Filters, and choose Glass.
Then, set the following values or adjust them as you see fit:
- Refraction: 80
- Depth: 20
- Dispersion: 50
- Blur: 13
- Light: 30
- Angle: 35
- Depth: 5
And voila — you’ve got your frosted navigation bar! To make it pop, make sure you use a background with high contrast. Or better yet, you can even overlay your glass effect elements on a video background:
Step 1: Add a Video Background
Take a Div and add a Video element inside it. Then add this to the Hero Section, layered before your Navigation wrapper.
Next, rename the Div to Video Wrapper and set its Position to Relative. (Similarly, be sure to also reposition the other elements within the Hero Section so they overlay the video.)
Then, select the Video element and from its Video Options:
- Upload or link your video
- Enable Loop and Plays Inline
- And finally, disable Audio and Controls
It’s optional, but you can also add a tinted overlay so your video matches better with your design:
Step 2: Layer a Tinted Overlay
Add a Div to the Video Wrapper, give it a background color, and lower its opacity.
Lastly, set its Position to Absolute, Left & Top Offset to 0, and from Size, set Width and Height to 100%.
Glass Effect Button
You can even add the Glass Effect to Buttons, giving them that extra impact and modern flair, easily directing focus to important call-to-actions.
To create one, do the following:
Step 1: Adjust Button Style
Select your button and remove its background or lower its opacity.
Step 2: Apply the Glass Effect
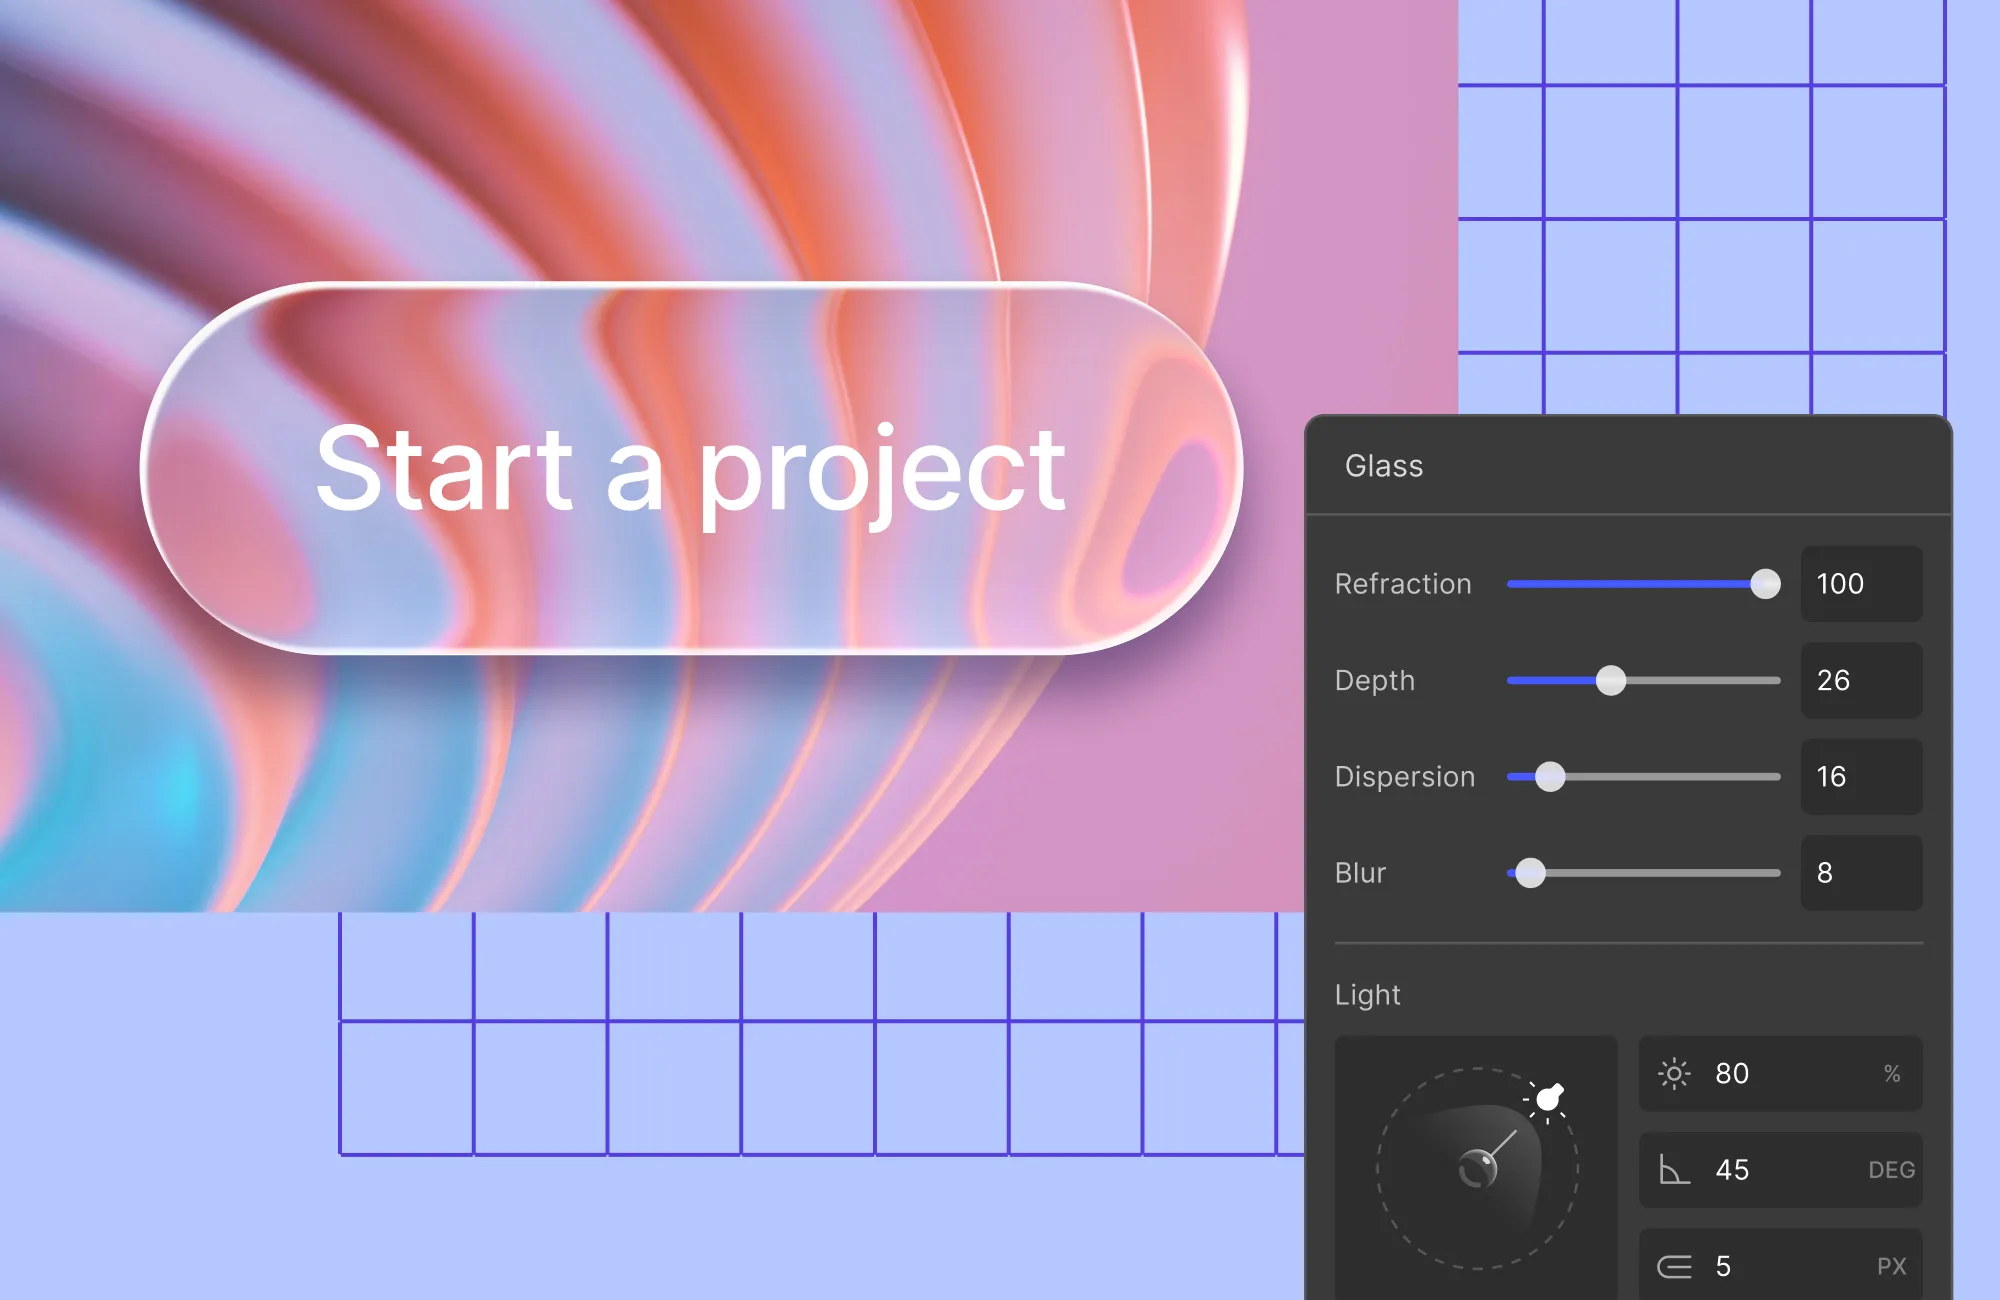
Select your button again, go to Effects > Filters, and choose Glass.
Then, set the following values or adjust them as you see fit:
- Refraction: 100
- Depth: 26
- Dispersion: 16
- Blur: 8
- Light: 80
- Angle: 45
- Depth: 5
And just like that, you have a futuristic-looking button to add interest to your design!
In the same way, you can apply the glass effect to various other elements and adjust their values to create different styles of glass effects.
Frosted Cursor Trail
Next, let’s dive in to create a Frosted Cursor Trail.
This playful effect involves a glass-style element following the direction of the cursor, and works to enhance both the user experience and interactivity.
To pull it off, you actually need to combine two design concepts: Glass Effects and Cursor Trail — both of which you’ll find built-in with Droip.
Follow these steps to implement it:
Step 1: Design Your Trailing Element
Add a Div element to the top of your page and nest another div inside it. Rename the parent div Cursor and the child div Circle.
For the Cursor div, set its Structure to Flex, Align to Center, and Justify to Center.
Then, set its Position to Absolute and give it a high enough Z-index so it layers over all your page elements.
Next, set its Radius to 100 from Borders and define its Width and Height from the Size Panel. Do the same for the Circle Div, but make sure its size is smaller in comparison.
Lastly, give the Circle div a Background.
Step 2: Apply the Glass Effect
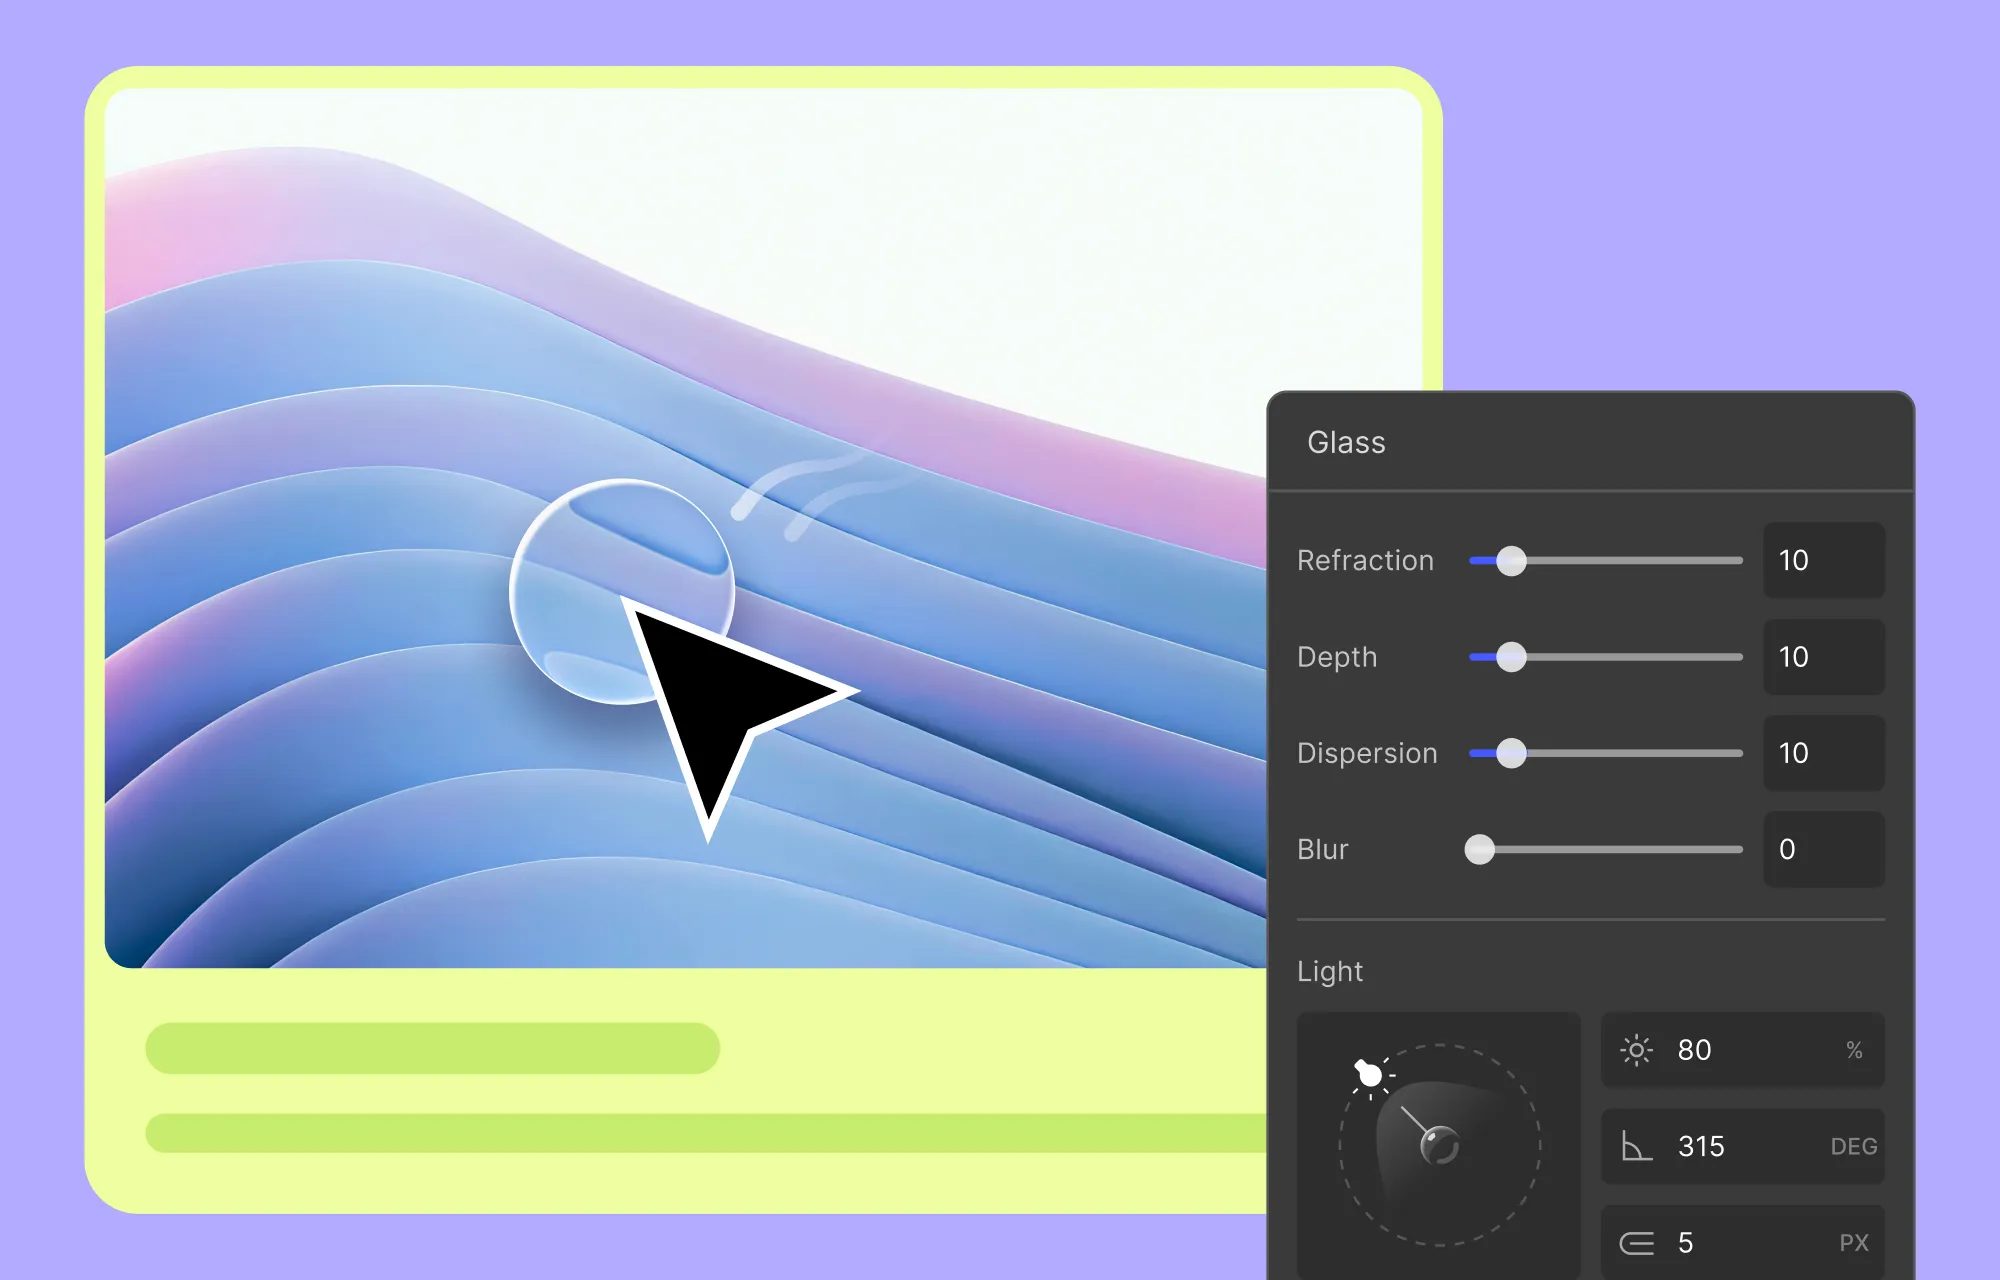
Select the Cursor div, go to Effects > Filters, and choose Glass.
Then, set the values or adjust them as you see fit:
- Refraction: 10
- Depth: 10
- Dispersion: 10
- Blur: 0
- Light: 80
- Angle: 315
- Depth: 5
Step 3: Implement Cursor Trail Animation
While the Cursor div is selected, head to the Interaction panel, and click on the Plus icon.
Then, choose Scroll Into View, click on the Plus icon, and select Cursor Trail.
Set Container to Viewport, adjust the Smoothing as desired, and you’re done!
Build Modern Websites With Droip
So that was how to create Apple style glass effects on WordPress websites, now made effortless with Droip!
Of course, the examples shown here are just a drop in the ocean of what’s possible using Glass Effects.
To explore all the possibilities, get Droip and start creating yourself and build fluid, modern websites in no time!

