Struggling to effectively organize and display your website content with the limited default WordPress post types? You’re not alone because Posts and Pages can only go so far. What you need to do is define Custom Content Types.
The best part is that you won’t require external tools or complex code to achieve it! In this article, we’ll show you how to create custom content types in WordPress without extra plugins.
What is Custom Content Type
Not sure what custom content types are or why you need them?
It all starts with understanding WordPress Post Types, which are a way to organize different kinds of content in WordPress, the most common being Posts and Pages.
The problem is that these default post types don’t work well for various other types of content, such as portfolios, services, projects, events, teams, etc.
This is why you need to define a new custom content type, tailored to your specific needs, to organize and display content properly.
How to Create a Custom Content Type in WordPress
Now that you know what custom content types are and why you need them, let’s finally explore how to create custom content types in WordPress!
Pick a Builder With Built‑in Content Manager
So, how do you create custom content types in WordPress without extra plugins?
Using a WordPress website builder with a built-in Dynamic Content Manager, like Droip, of course!
The Droip WordPress builder is a one-stop tool that lets you visually create, manage, and display custom content types without any extra tools or hassle.
Plus, with other built-in capabilities like premade templates, unlimited breakpoints, Figma to WordPress handoff, visual interaction builder, form builder & manager, and more — you’ve got an all-in-one website building solution at a fraction of the price of other, more limited options and with no extra costs!
Create Custom Content Types Using Droip
Now, let’s come to the meat of the matter, i.e., how to create custom content types using the Droip website builder.
In Droip’s Content Manager, custom content types are defined through Collections. To create one, follow these steps:
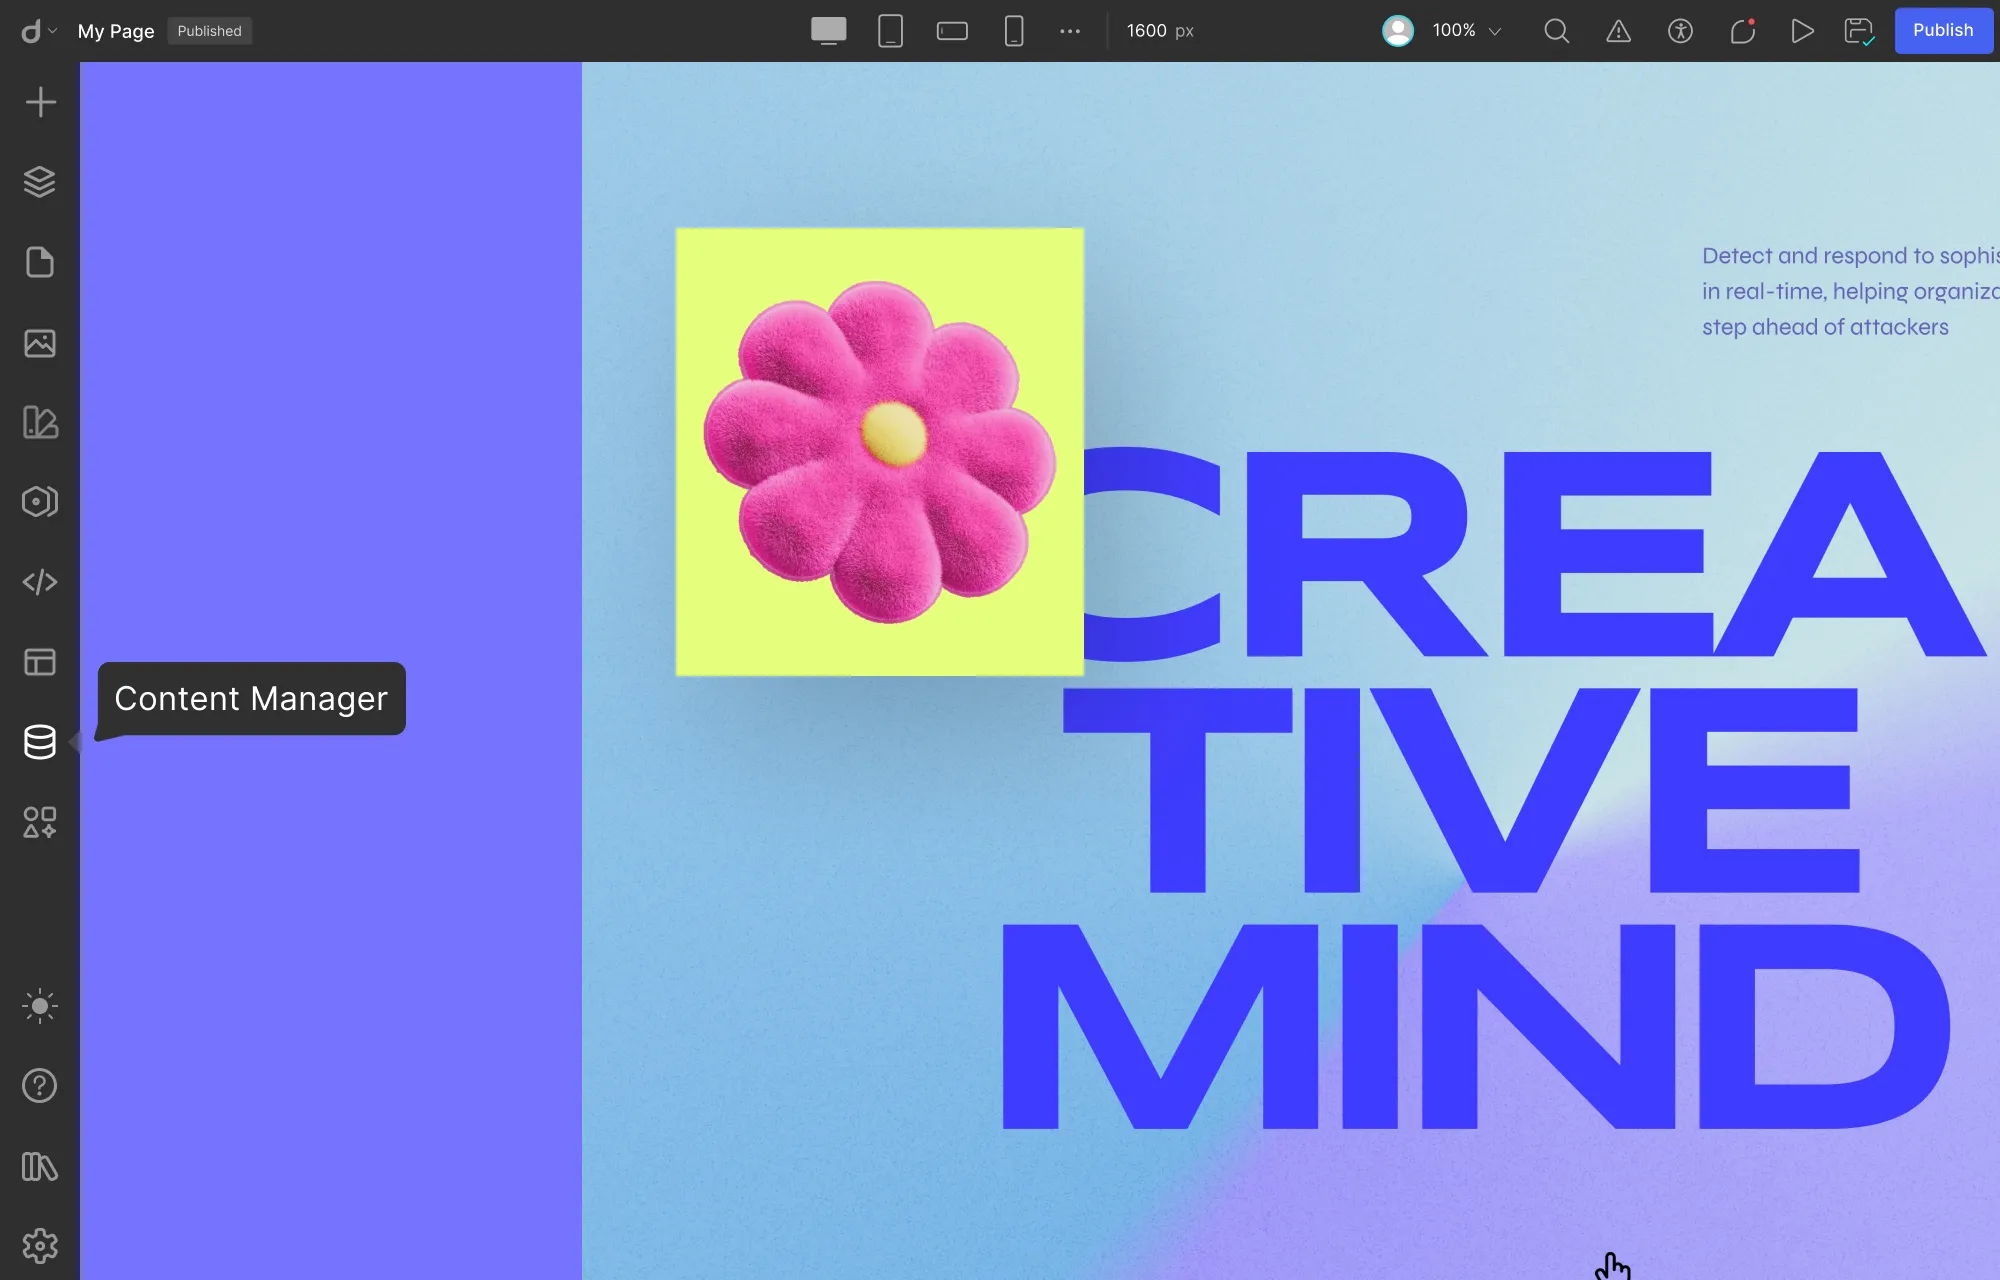
Step 1: Click on the Content Manager icon on the left sidebar.
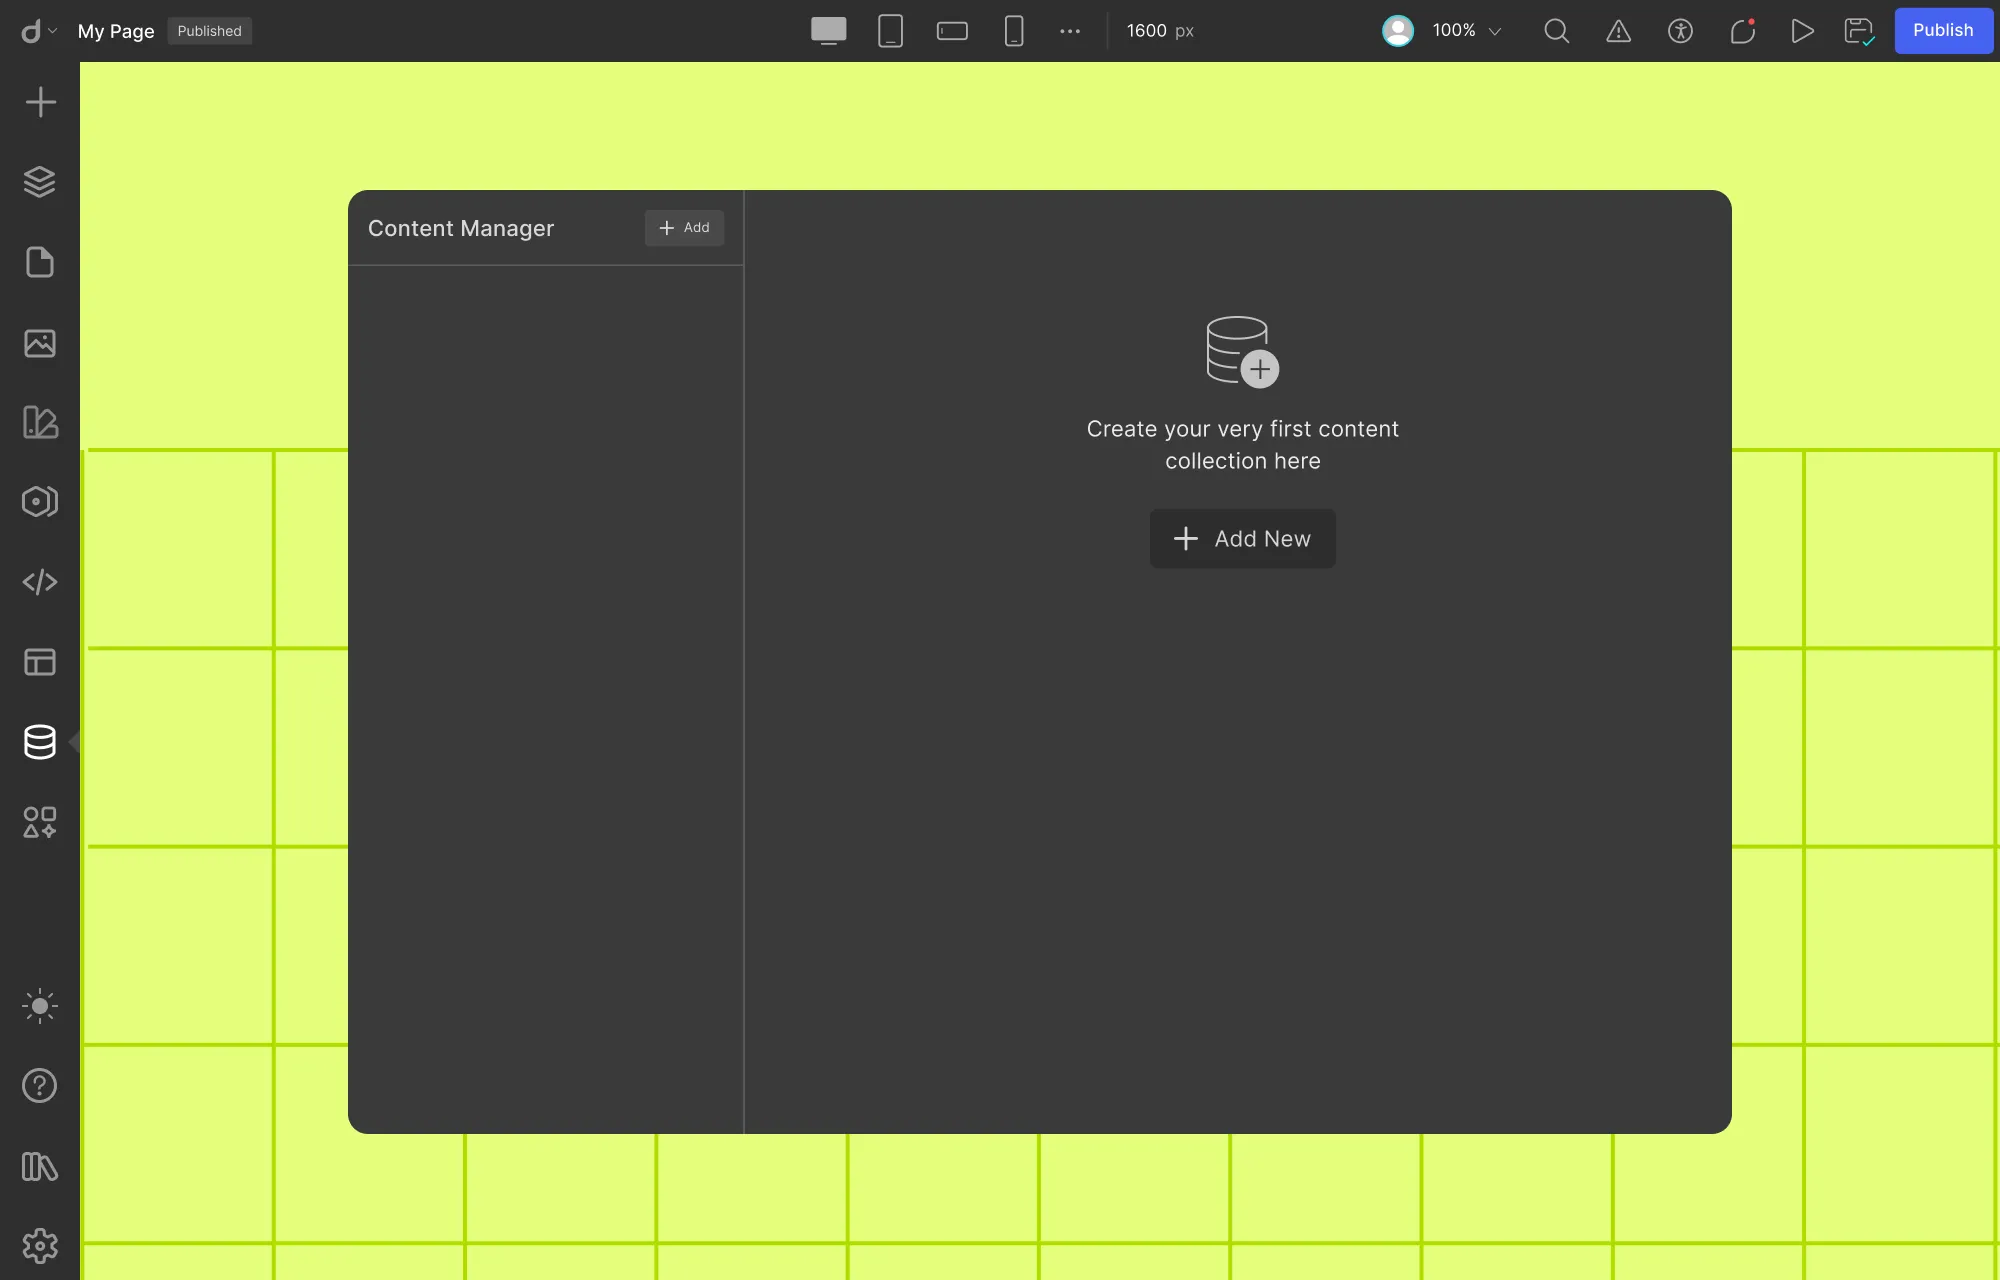
Step 2: On the Content Manager dashboard, click on Add or Add New Collection.
Step 3: Choose one of the preset collections or start from scratch.
Step 4: Name your new collection so it clearly describes its content, e.g., Works, Recipes, Team Members, etc.
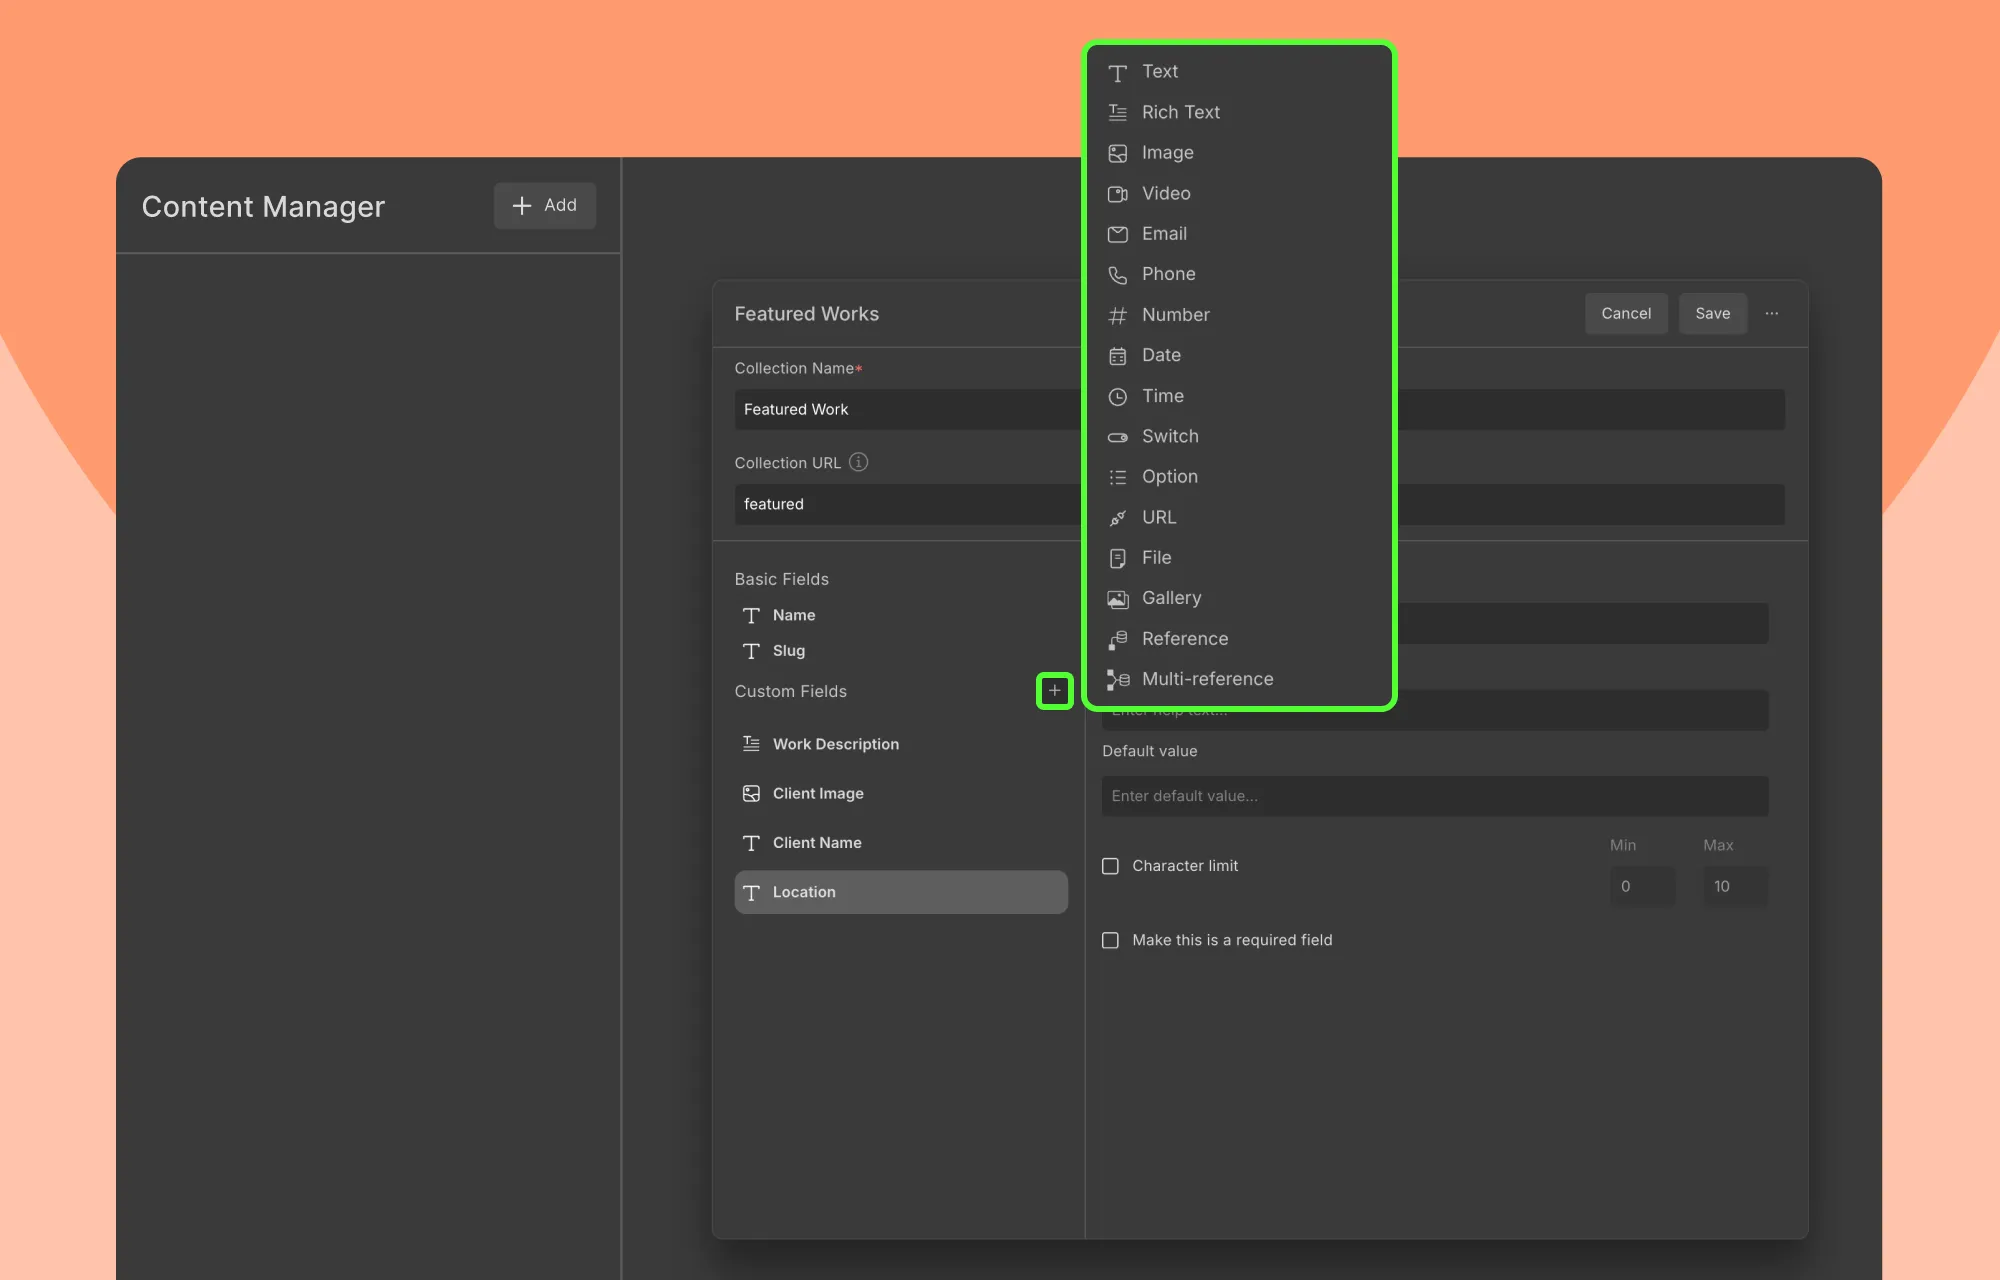
Step 5: Next, add fields to store relevant information. Click on the plus icon and choose your desired field type. The Droip Content Manager offers a variety of field types to suit your needs.
Step 6: Finally, configure field settings and hit Create Collection.
And just like that, your custom content type is defined!
But Droip’s Content Manager doesn’t stop there — it lets you add, manage, and display data dynamically and with ease.
Add Data to Your Custom Content Type
Your collection is ready to store entries and organize your custom content. In Droip, this is easily done in just a few steps:
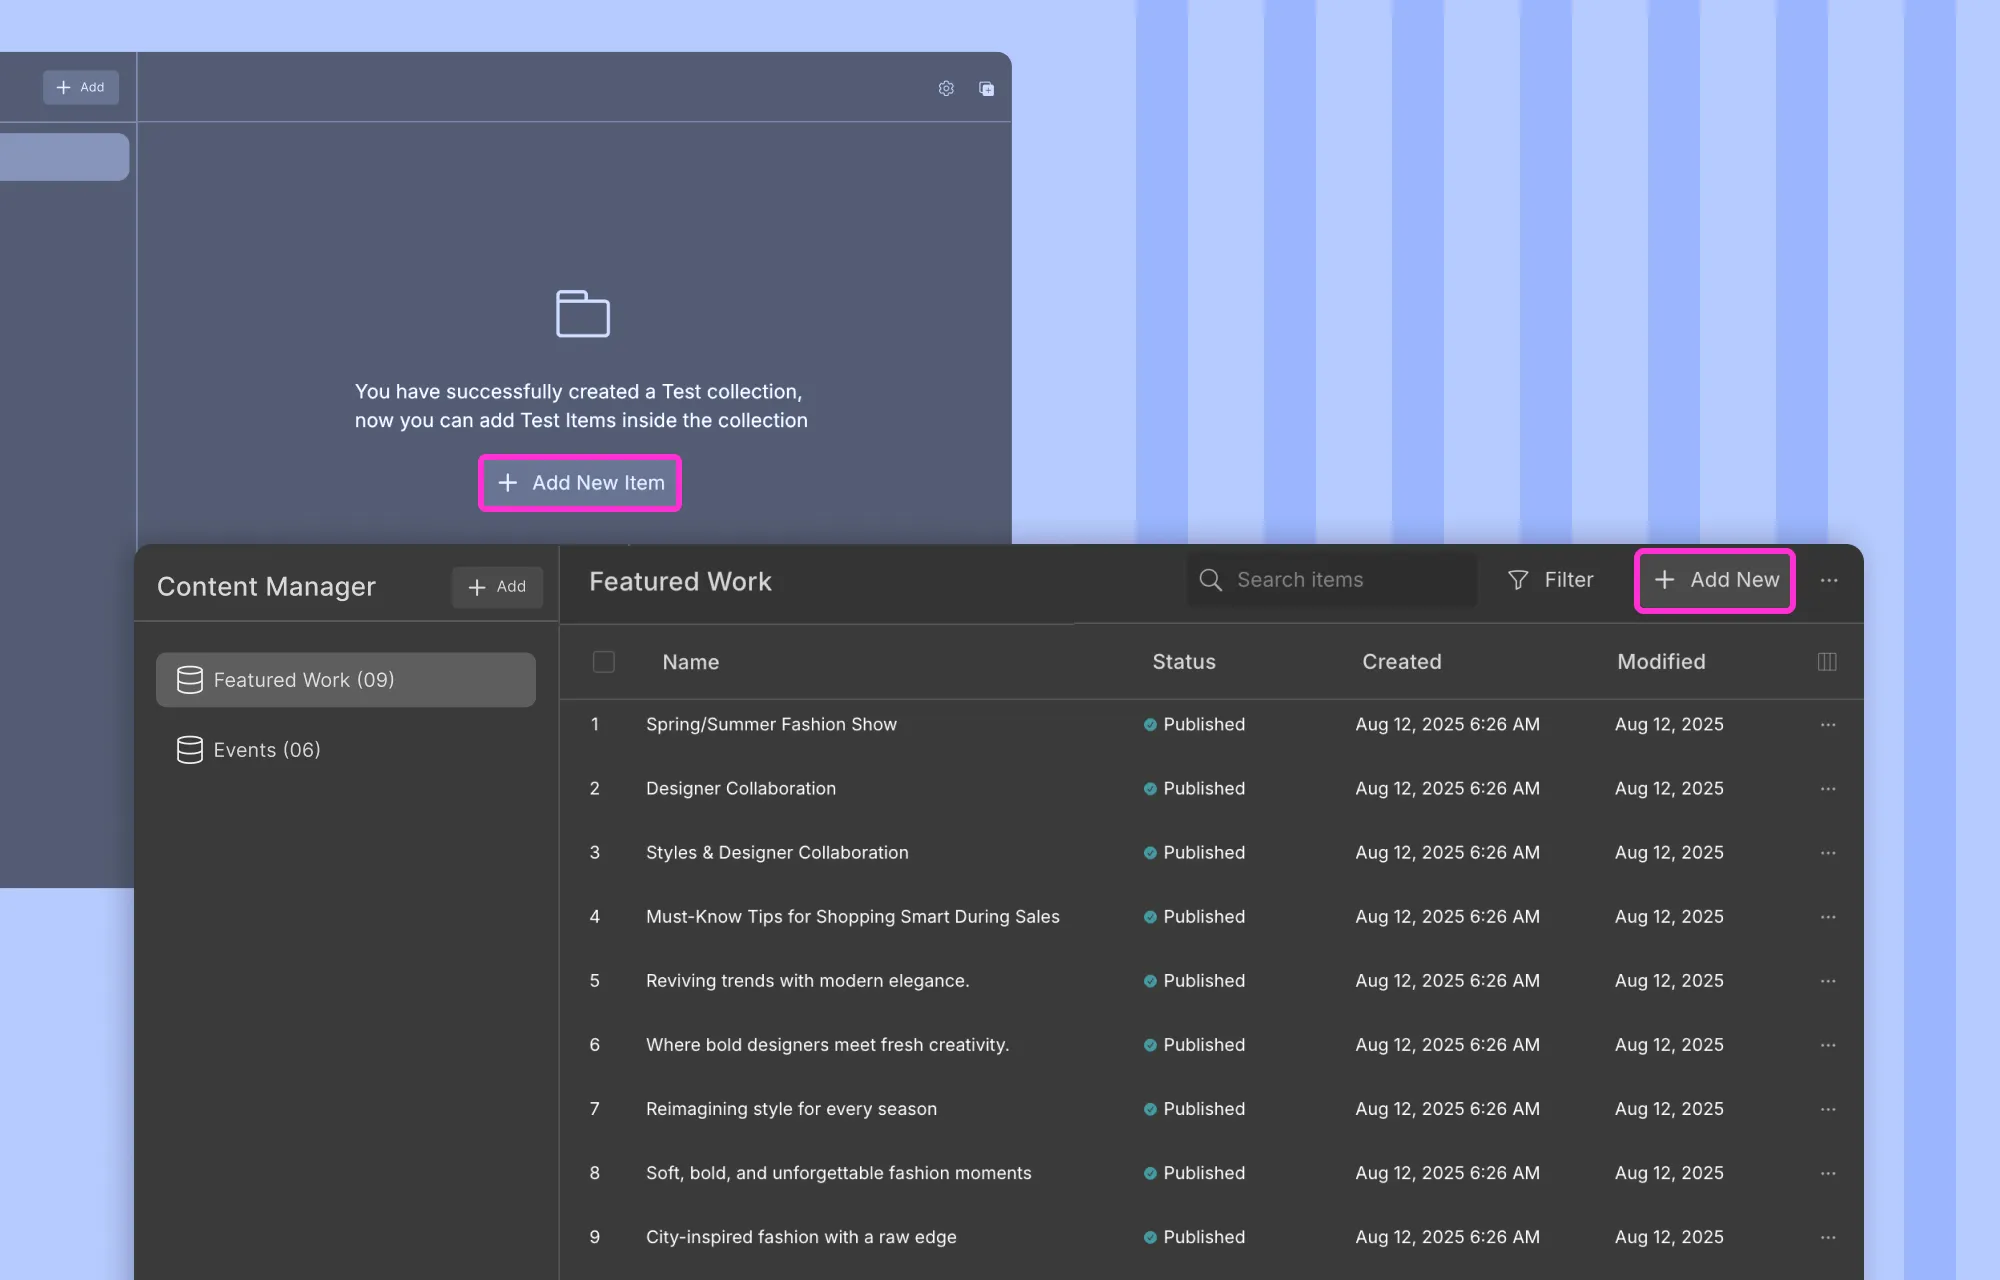
Step 1: Select the collection you just created, then click on +Add New Item if it’s empty or +Add New in the top right corner.
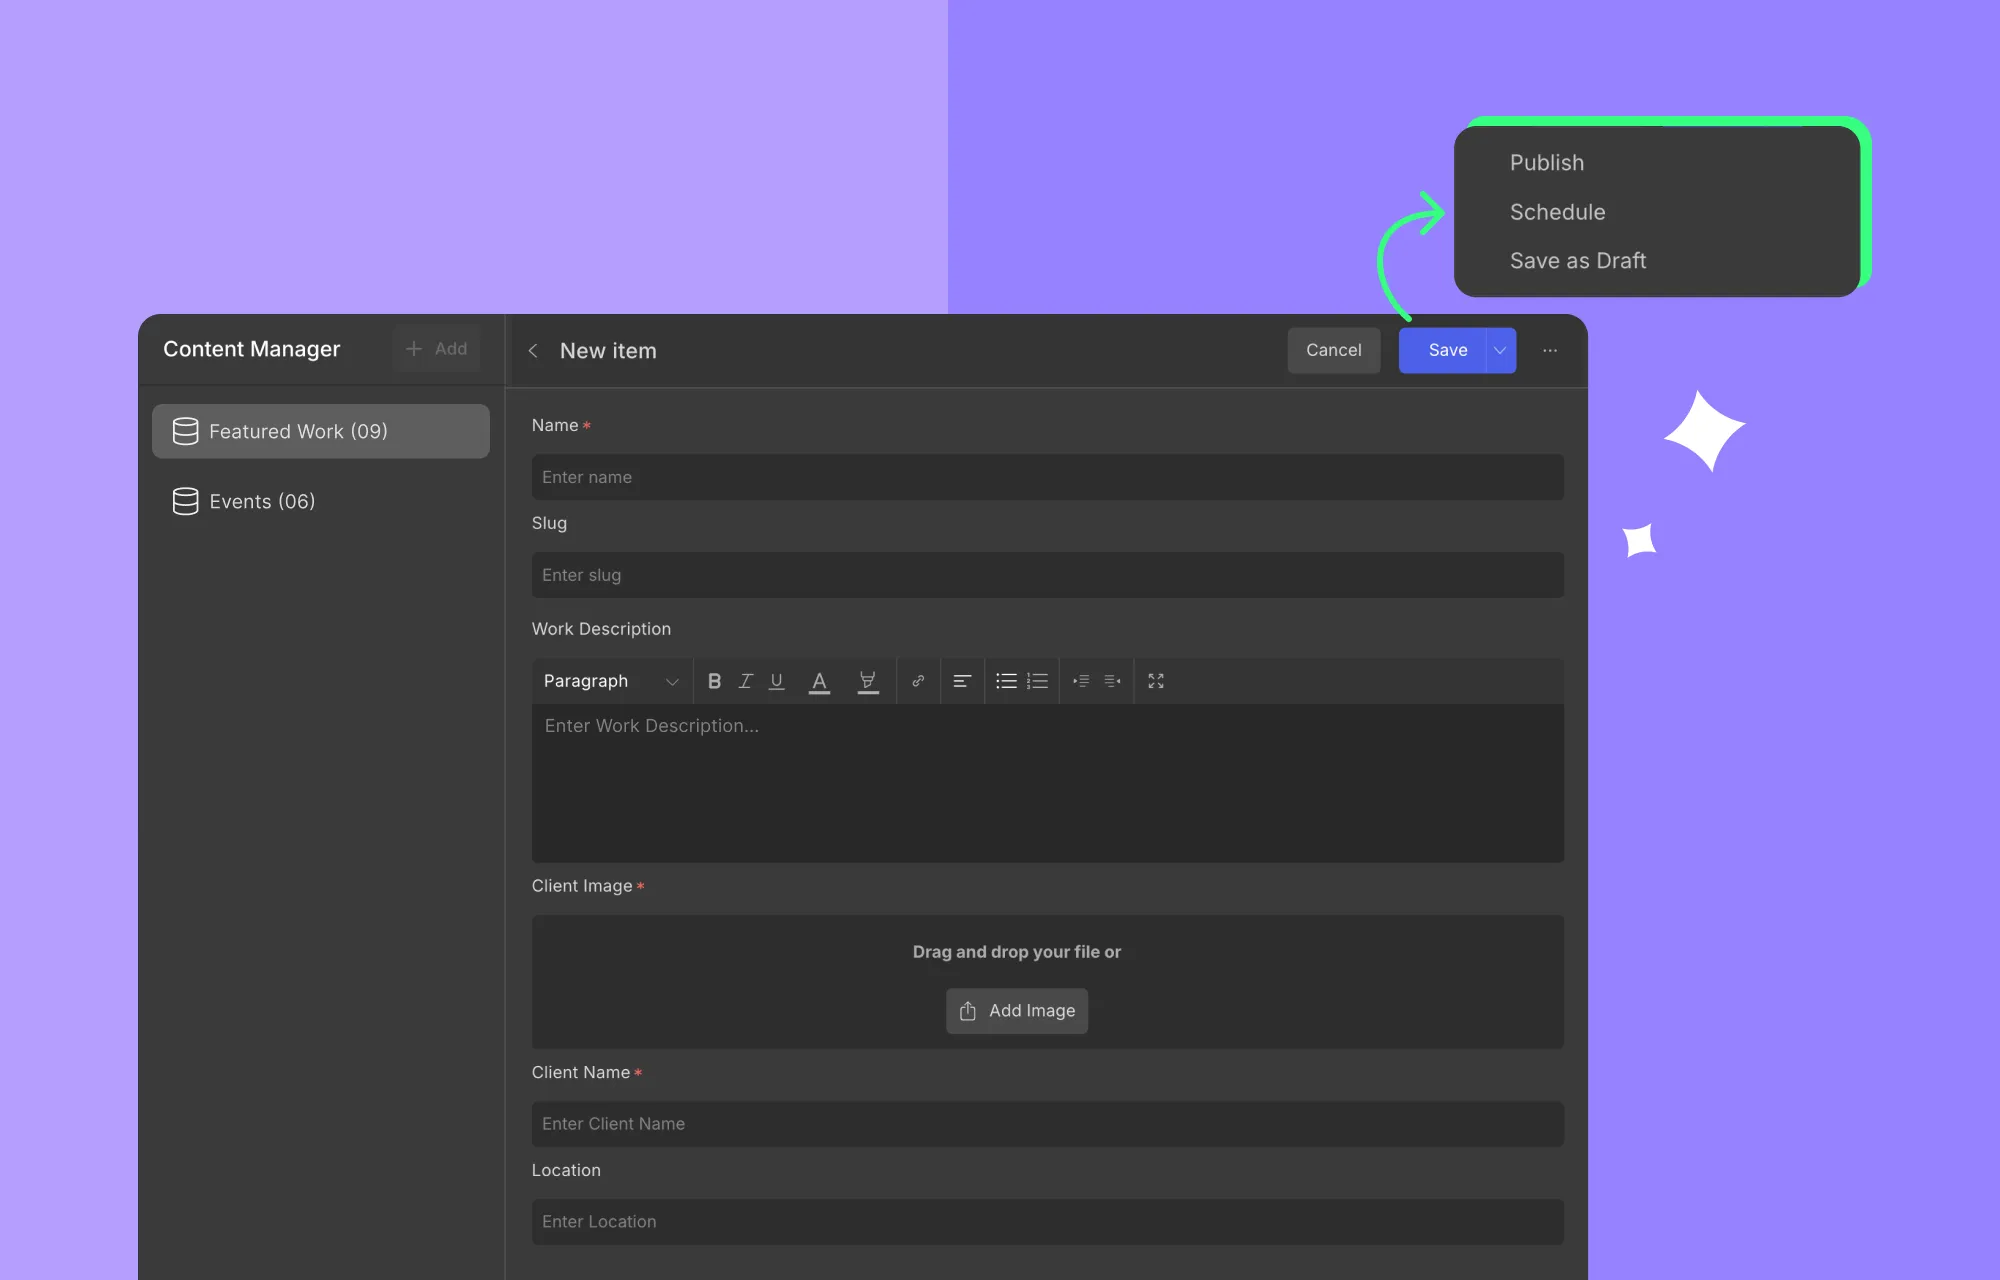
Step 2: Next, fill in the fields of your collection.
Step 3: Lastly, click Save to store your data. This saves it as a draft by default, but you can use the dropdown arrow to choose Publish or Schedule instead.
Repeat these steps until all your items are added.
You’ll see your items listed within the collection, where you can select multiple items at once and perform bulk actions like duplicate, delete, etc. You can also use search and filter the list to quickly find exactly what you need.
Display Custom Content Dynamically on Website
You’ve got your custom content organized. Now, it’s time to display it dynamically on your WordPress website.
In Droip, you can show dynamic content as:
- Listings through the Collection element
- Single-Page Templates for each individual item
To display dynamic content as listings:
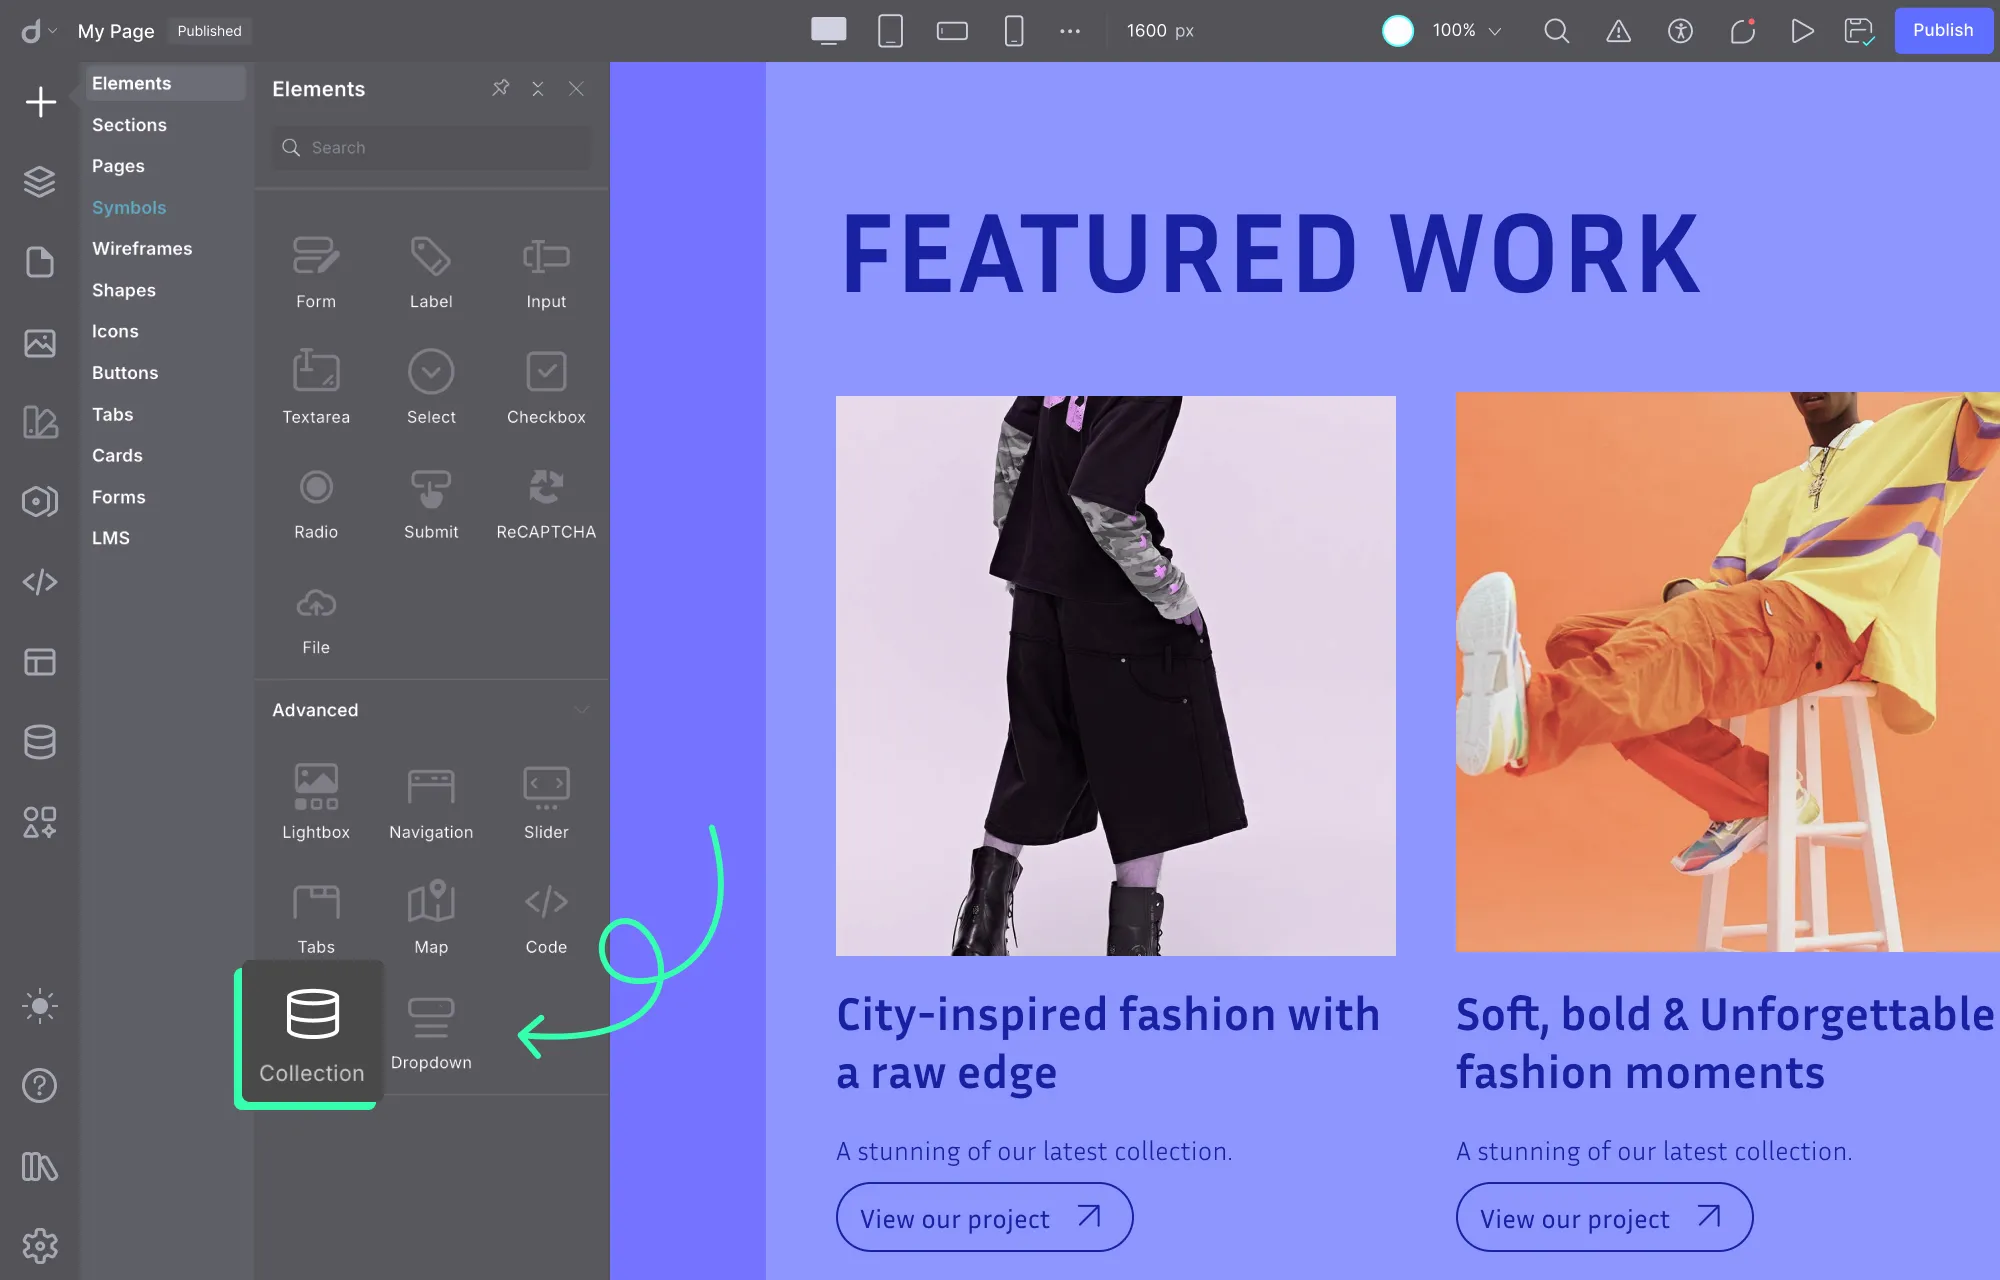
Step 1: Click on the plus icon on the left sidebar and open Elements.
Step 2: Drag and drop the Collection element onto your page.
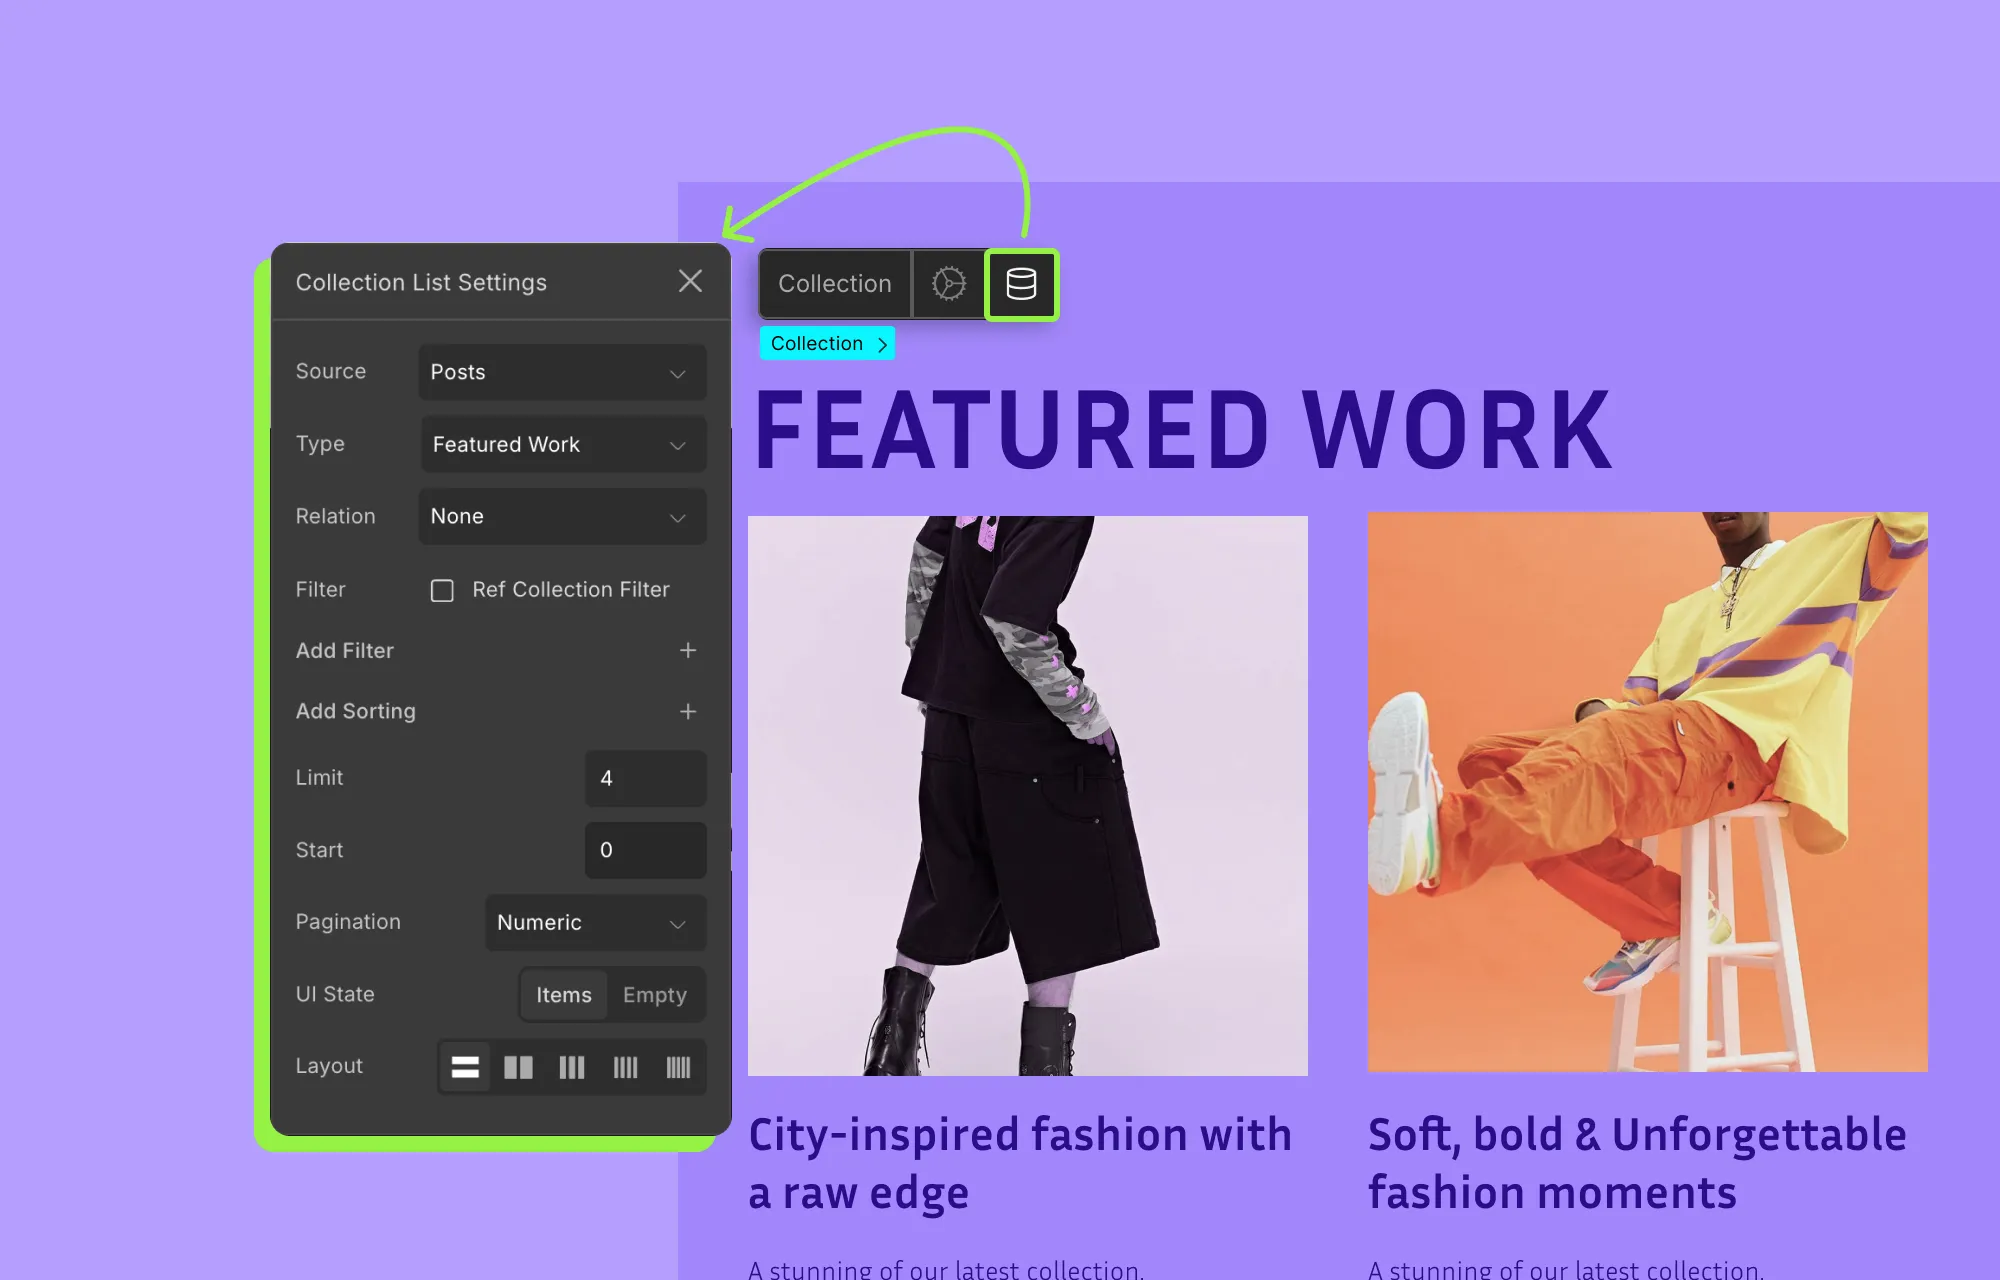
Step 3: From the Collection element’s inline editor, open its settings, set its Source to Posts, and Type as the collection you want to connect to.
From here, you can also apply filters, sorting, and other customizations to tailor your dynamic listing.
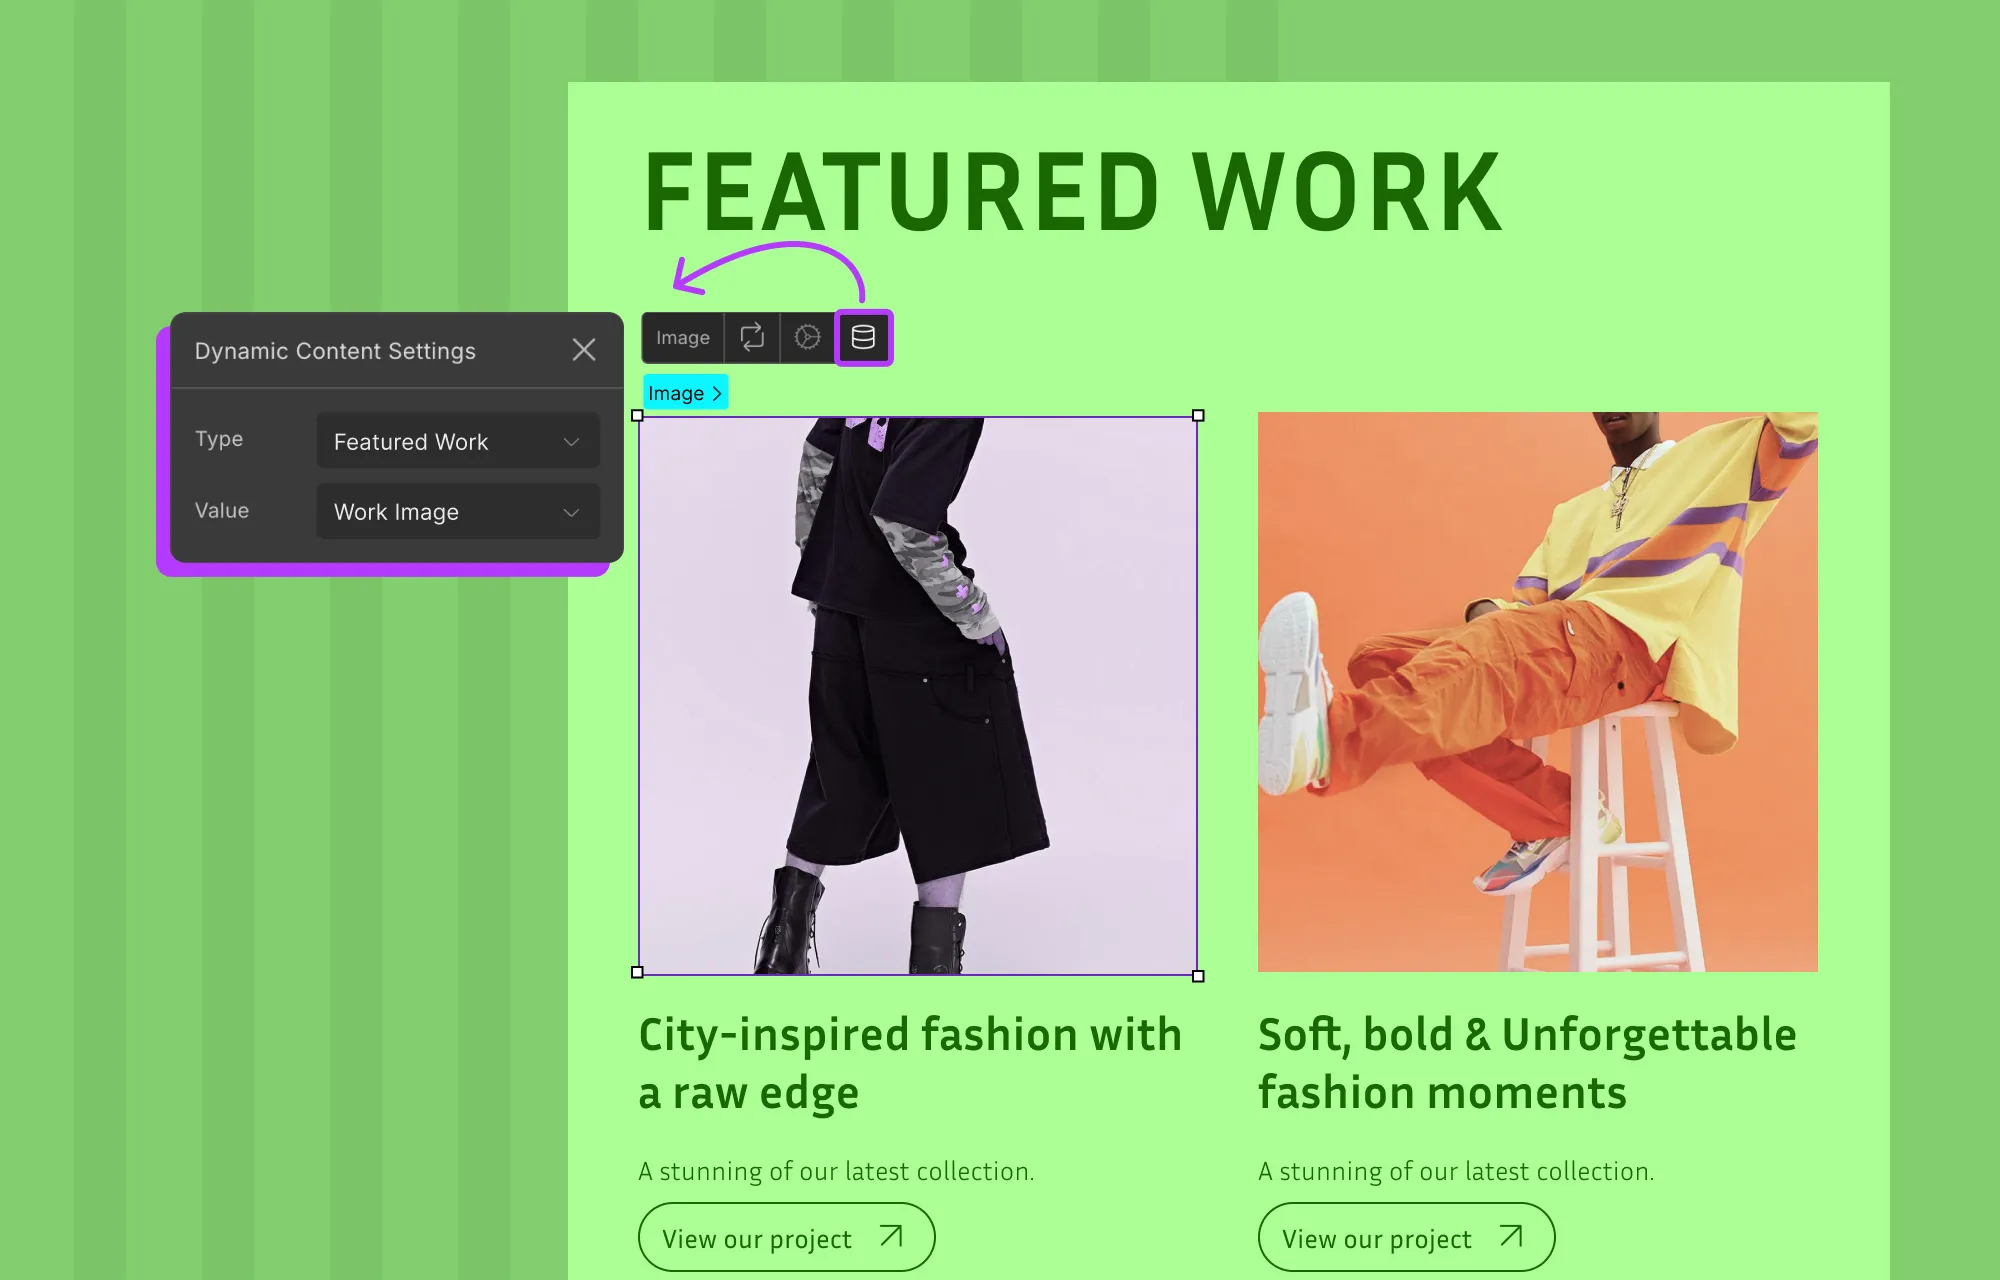
Step 4: Finally, select an element inside the Collection Item element.
From its dynamic content settings, set Type to the collection you want to connect, and Value to the field you want to display.
Similarly, add or select other elements within the Collection Item and connect them to the fields you want to showcase.
To create single-page templates that display each item’s details:
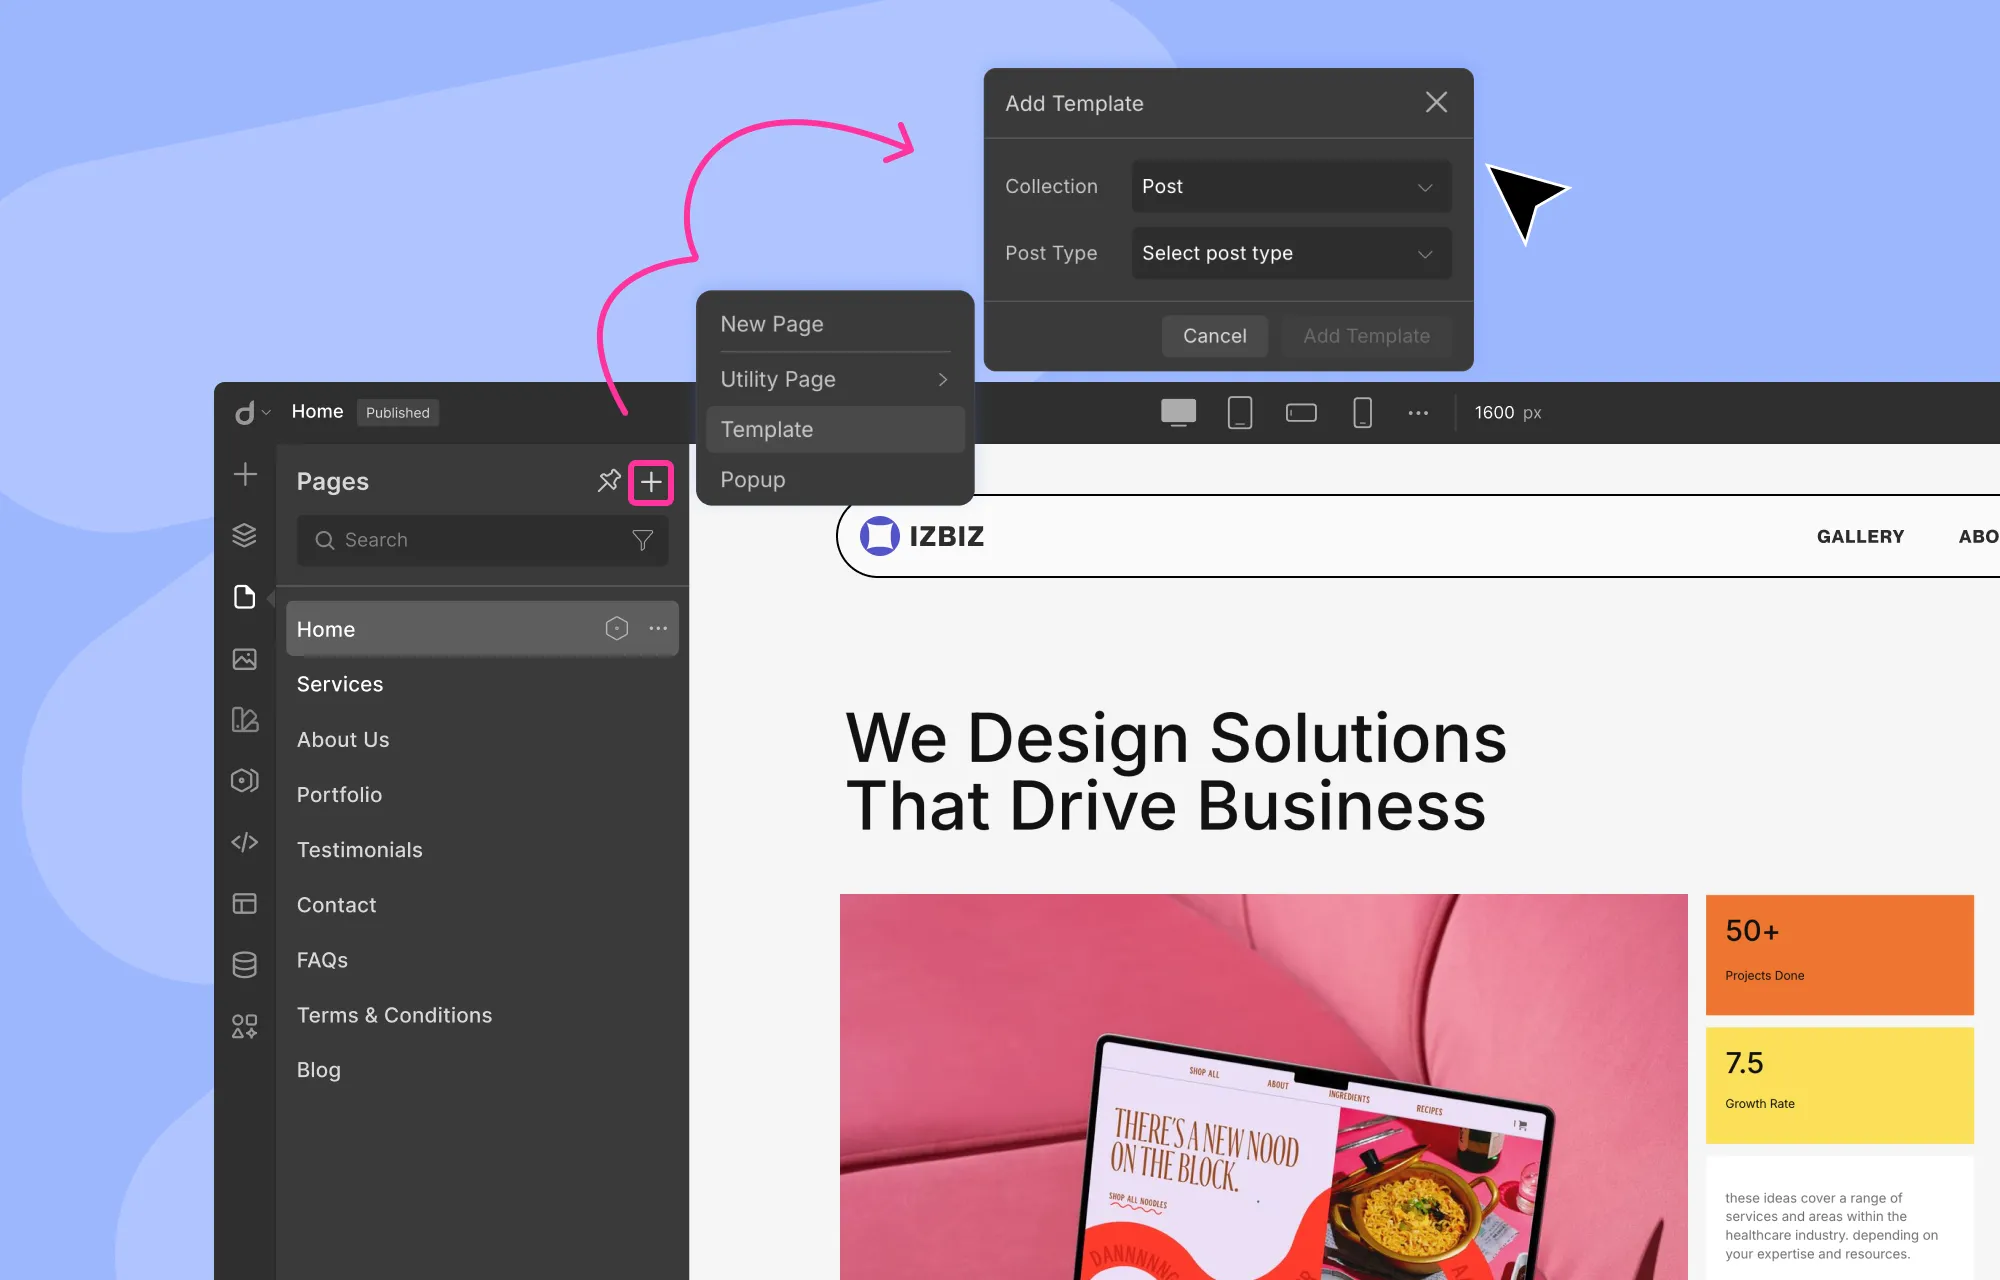
Step 1: Click on the Pages icon on the left sidebar.
Step 2: Click on the plus icon on the top-right corner of this side panel, then select the Template option.
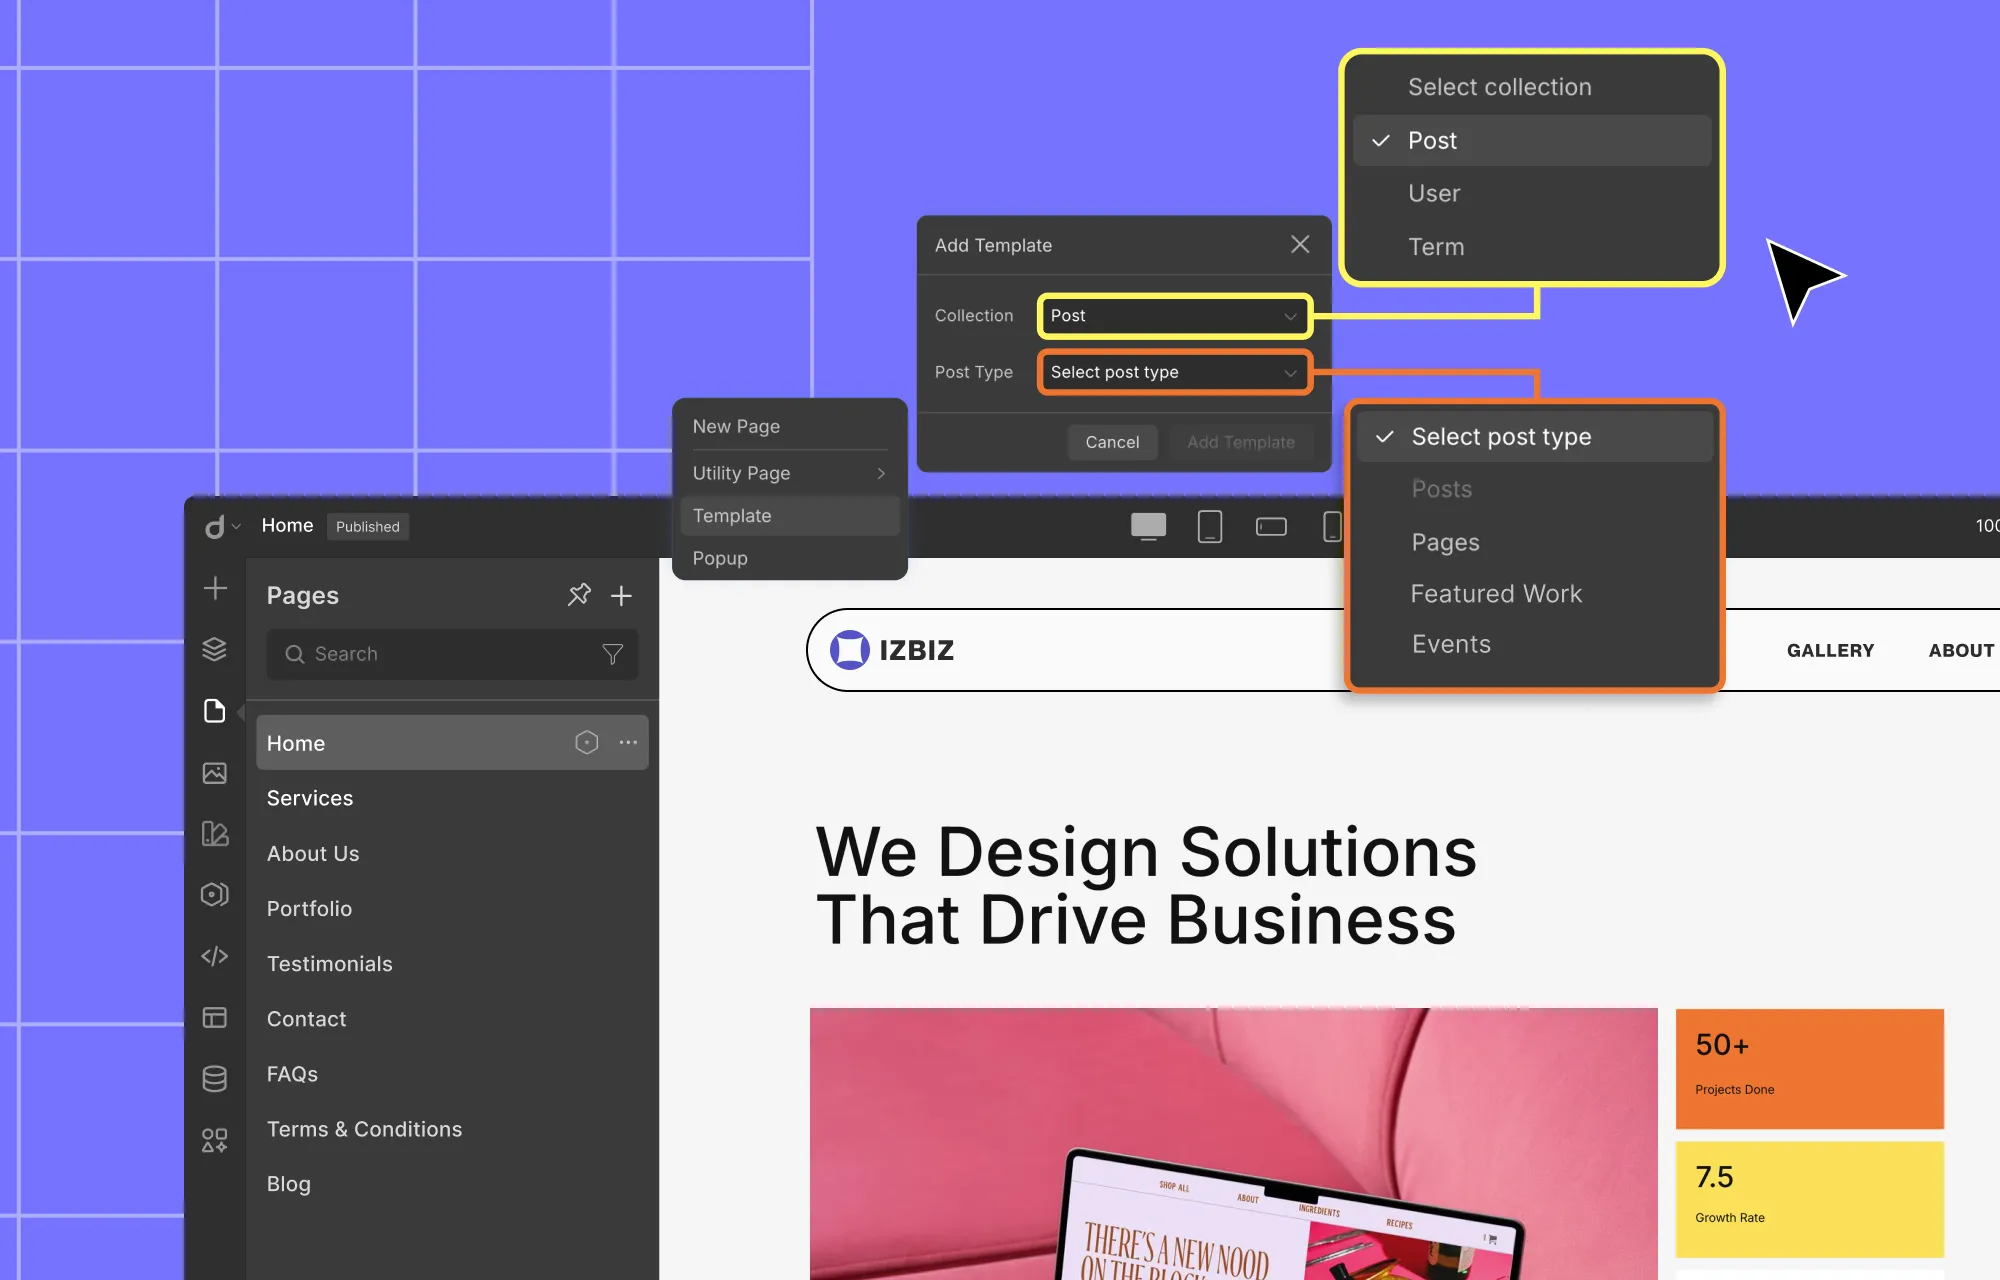
Step 3: Set Collection as Post and Post Type as the collection you want the template to connect with.
Step 4: Design your single-page template as you would any page in Droip.
Step 5: Then, select an element and from its dynamic content settings, set the Type to the appropriate collection and value to the relevant field.
To preview the details page template for each item, use the dropdown at the top of the canvas to switch between items.
💡 Tip: For single-page templates, you can also use dynamic tags to set SEO so it is unique for every item’s page.
Connect Related Custom Content Types
When showcasing related content in one place, it seems harmless to simply repeat the related data across different content types.
But this approach is inefficient and prone to inconsistencies, as every change means manually updating in multiple places.
Luckily, with Droip’s Single & Multi-Reference Fields, you can easily link separate but related collections without duplicating data, eliminating repetition, inconsistencies, and wasted effort.
Here’s how to connect related content using Single Reference Field:
Using single reference fields, you can pair an item in a collection with another item in another collection.
Step 1: Create your collections and add their data in the Dynamic Content Manager.
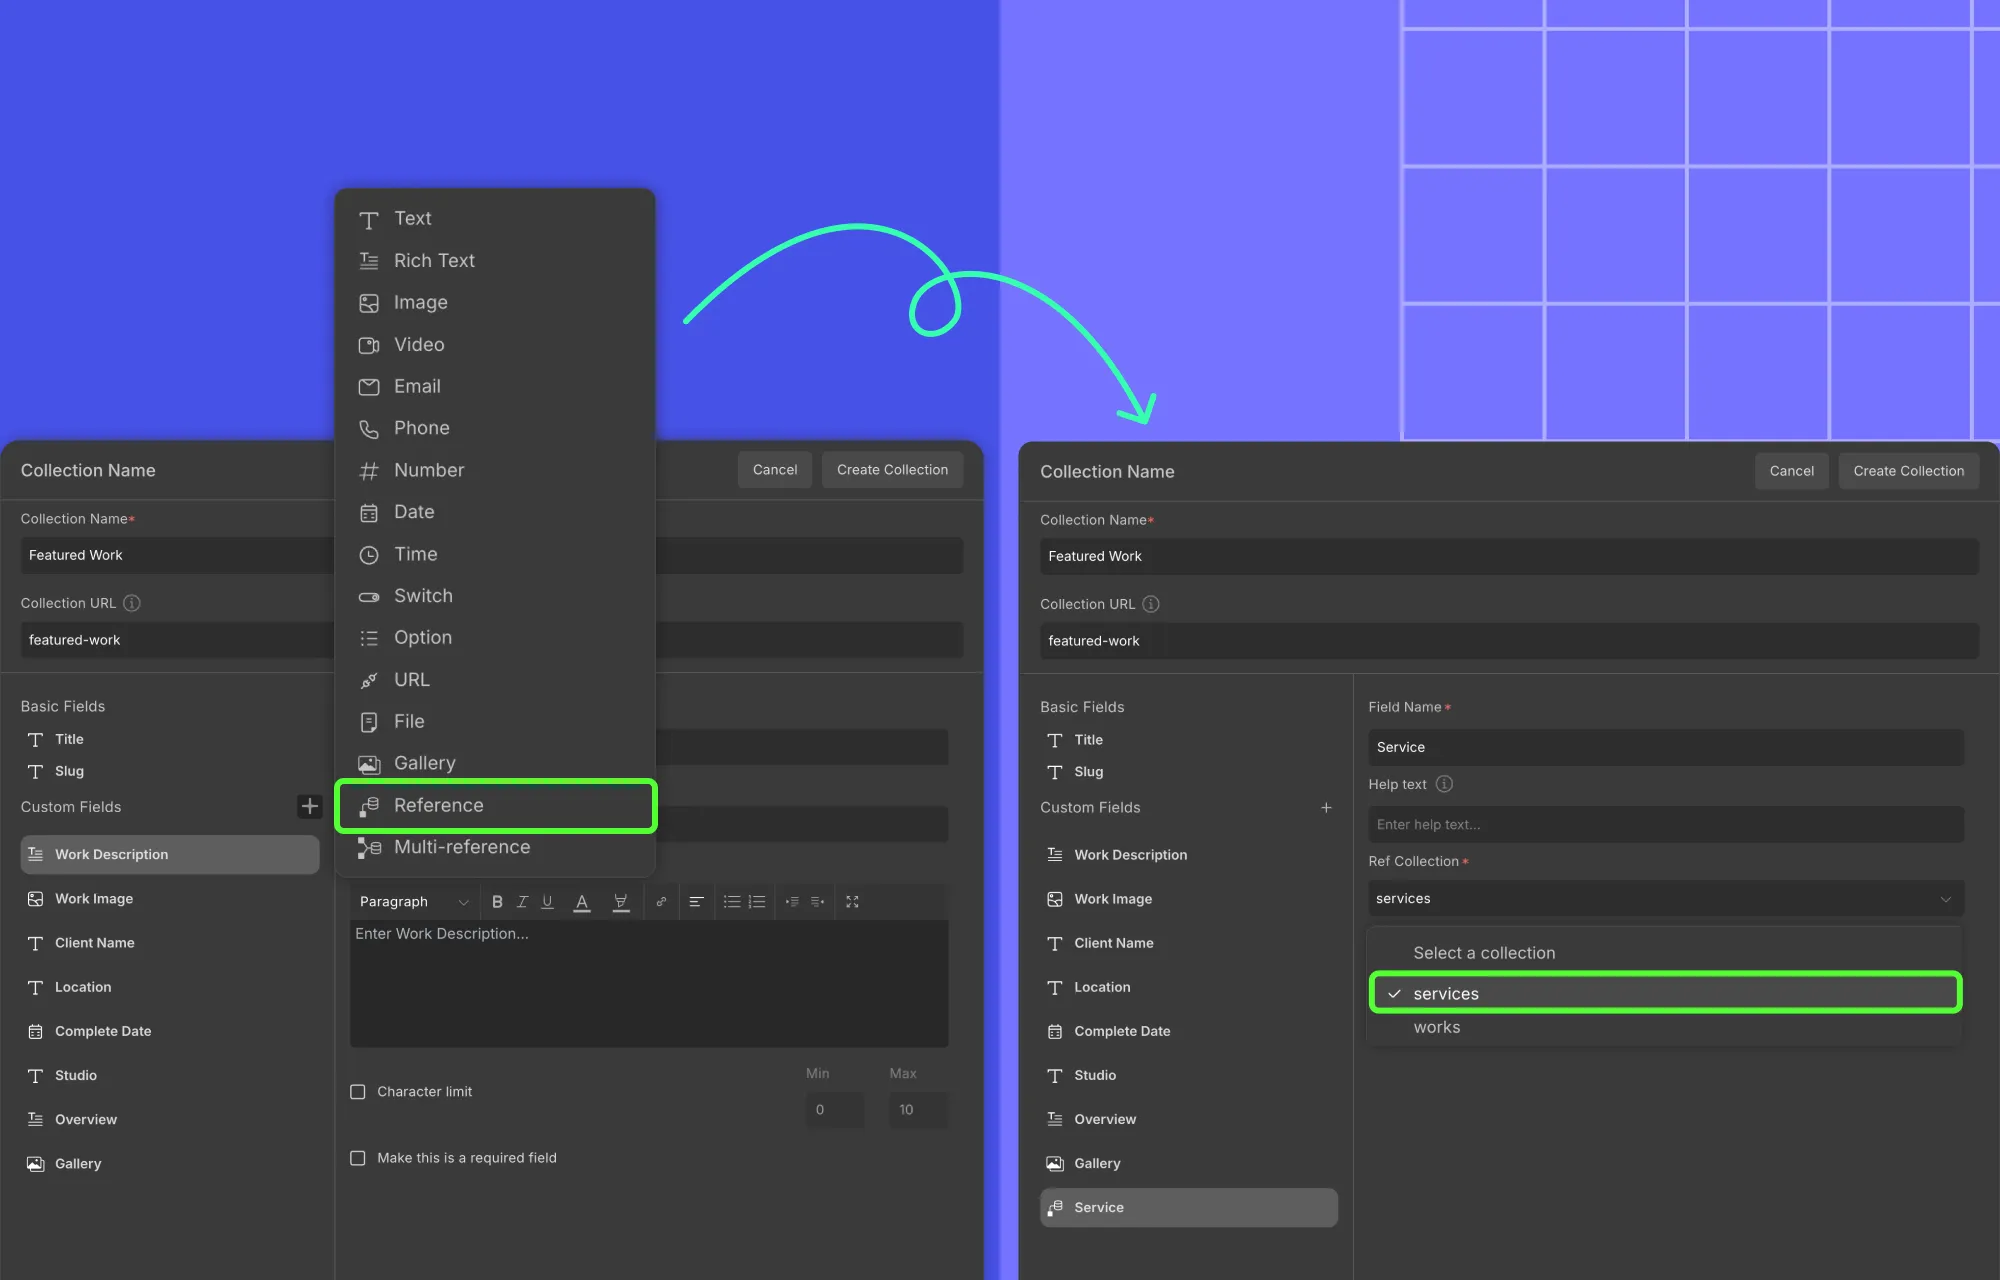
Step 2: In your main collection, add a Reference field, set Ref. Collection to the collection you want to link, and hit Save.
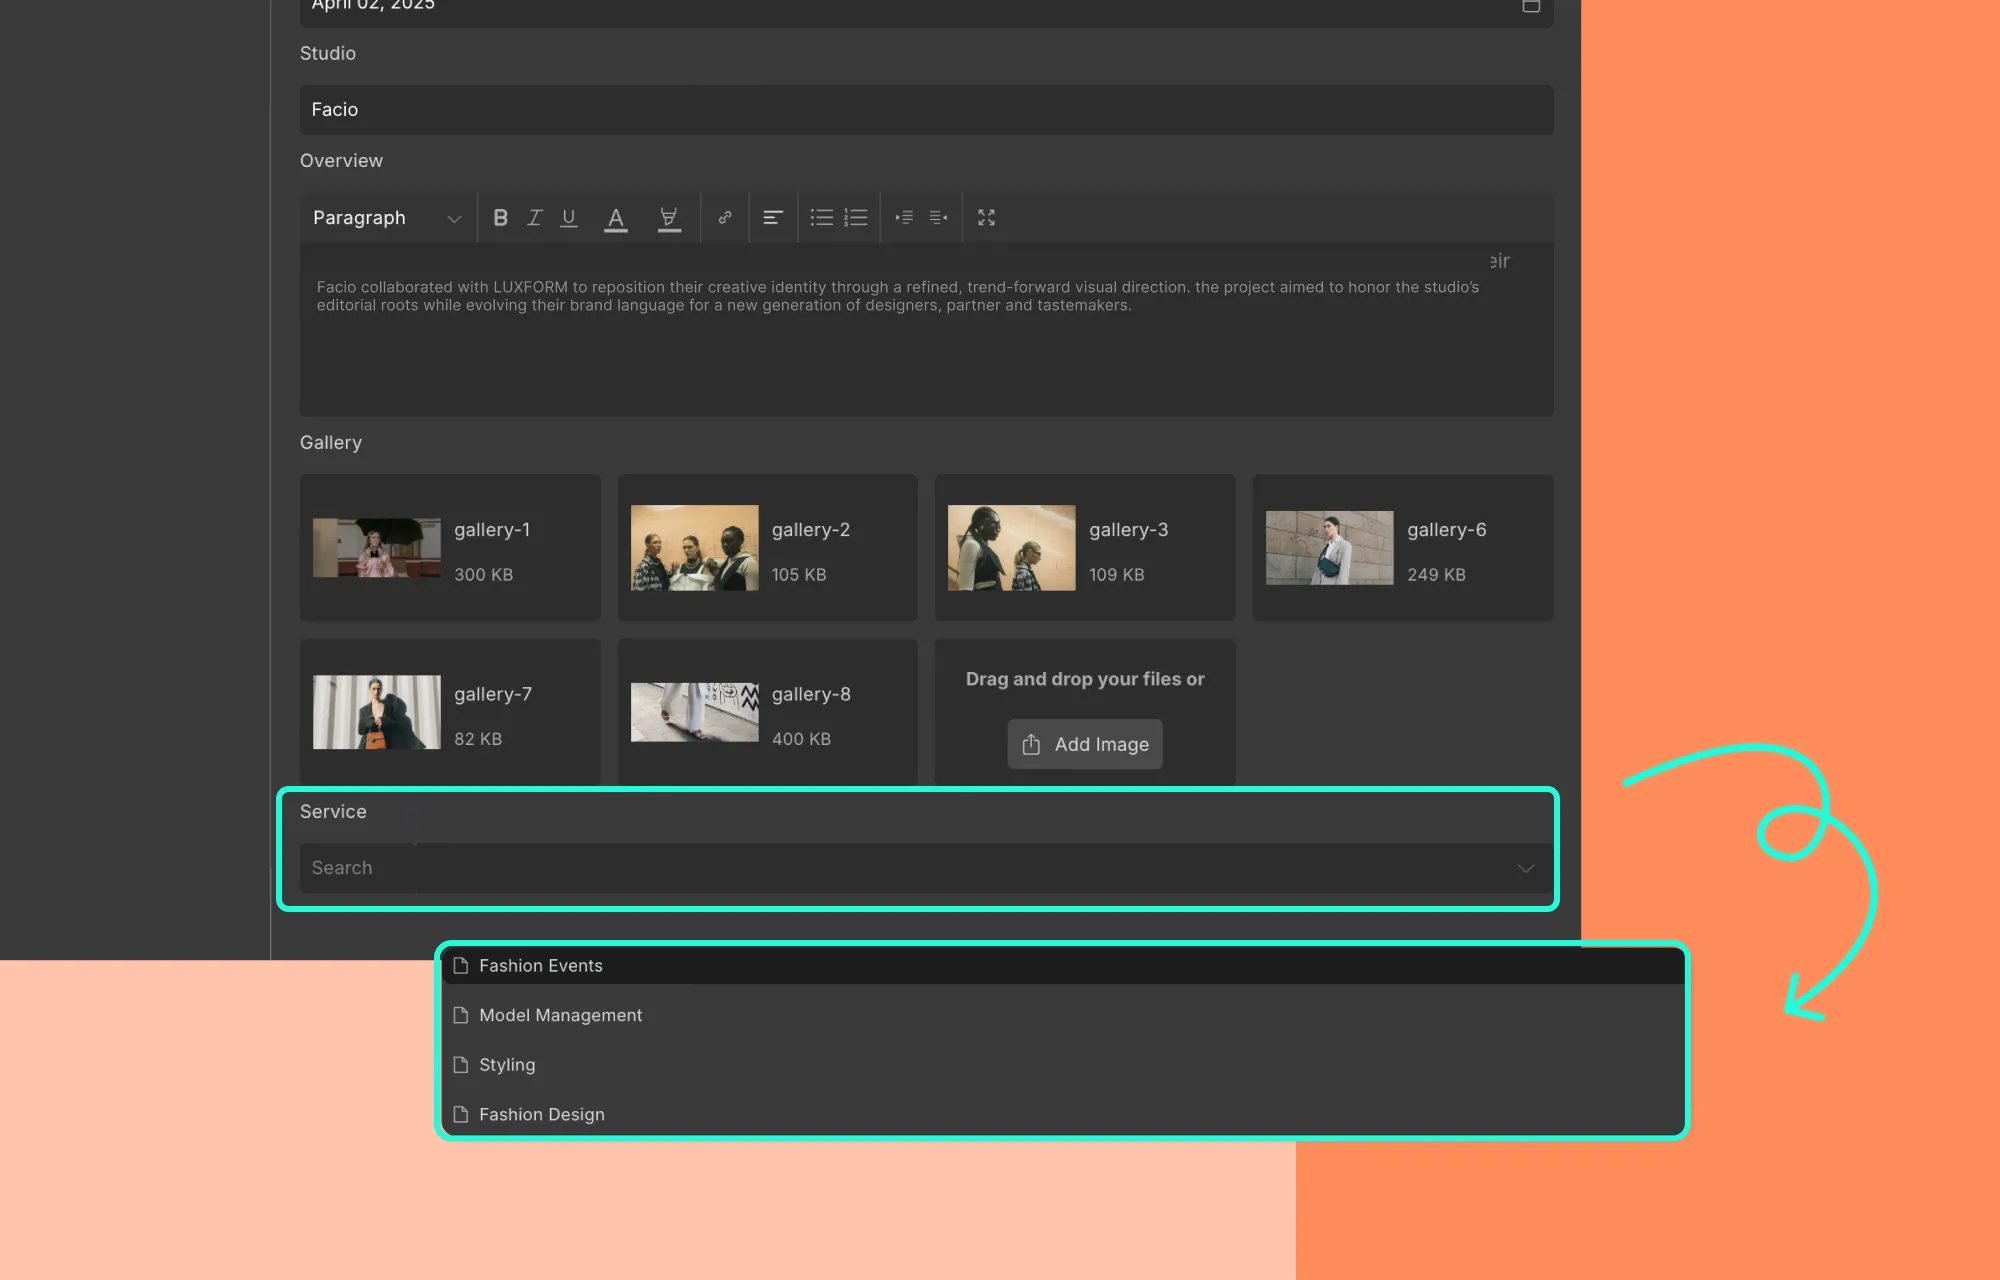
Step 3: Finally, for each item in this main collection, choose a value for the reference field (pulled from the referenced collection), and save.
Here’s how to connect related content using Multi-Reference Field:
Using multi-reference fields, you can link an item in a collection to multiple items in another collection.
Step 1: Create your collections and add their data in the Dynamic Content Manager.
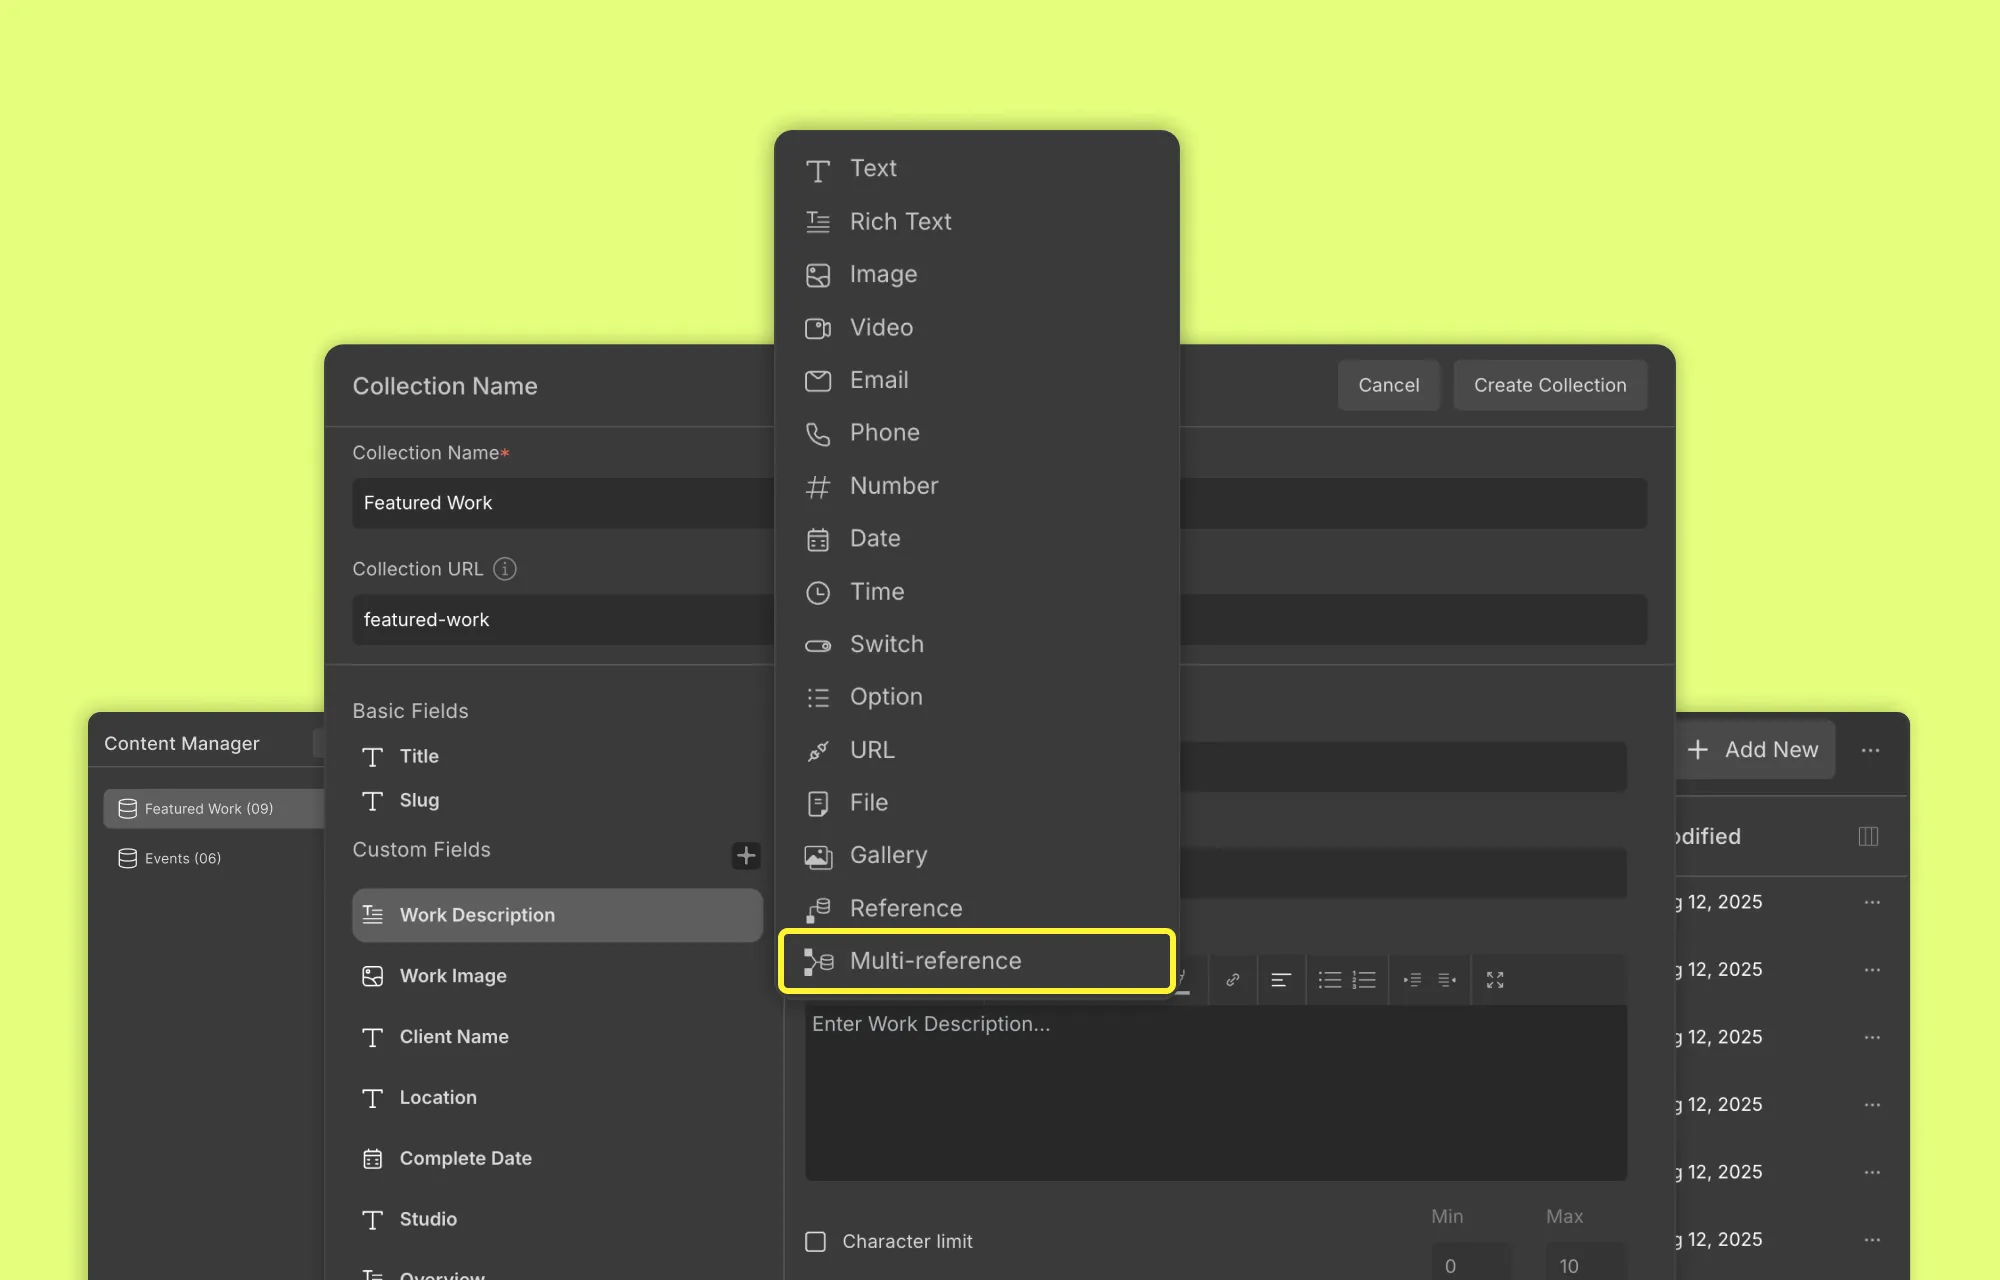
Step 2: In your main collection, add a Multi-Reference field, set Ref. Collection to the collection you want to link, and hit Save.
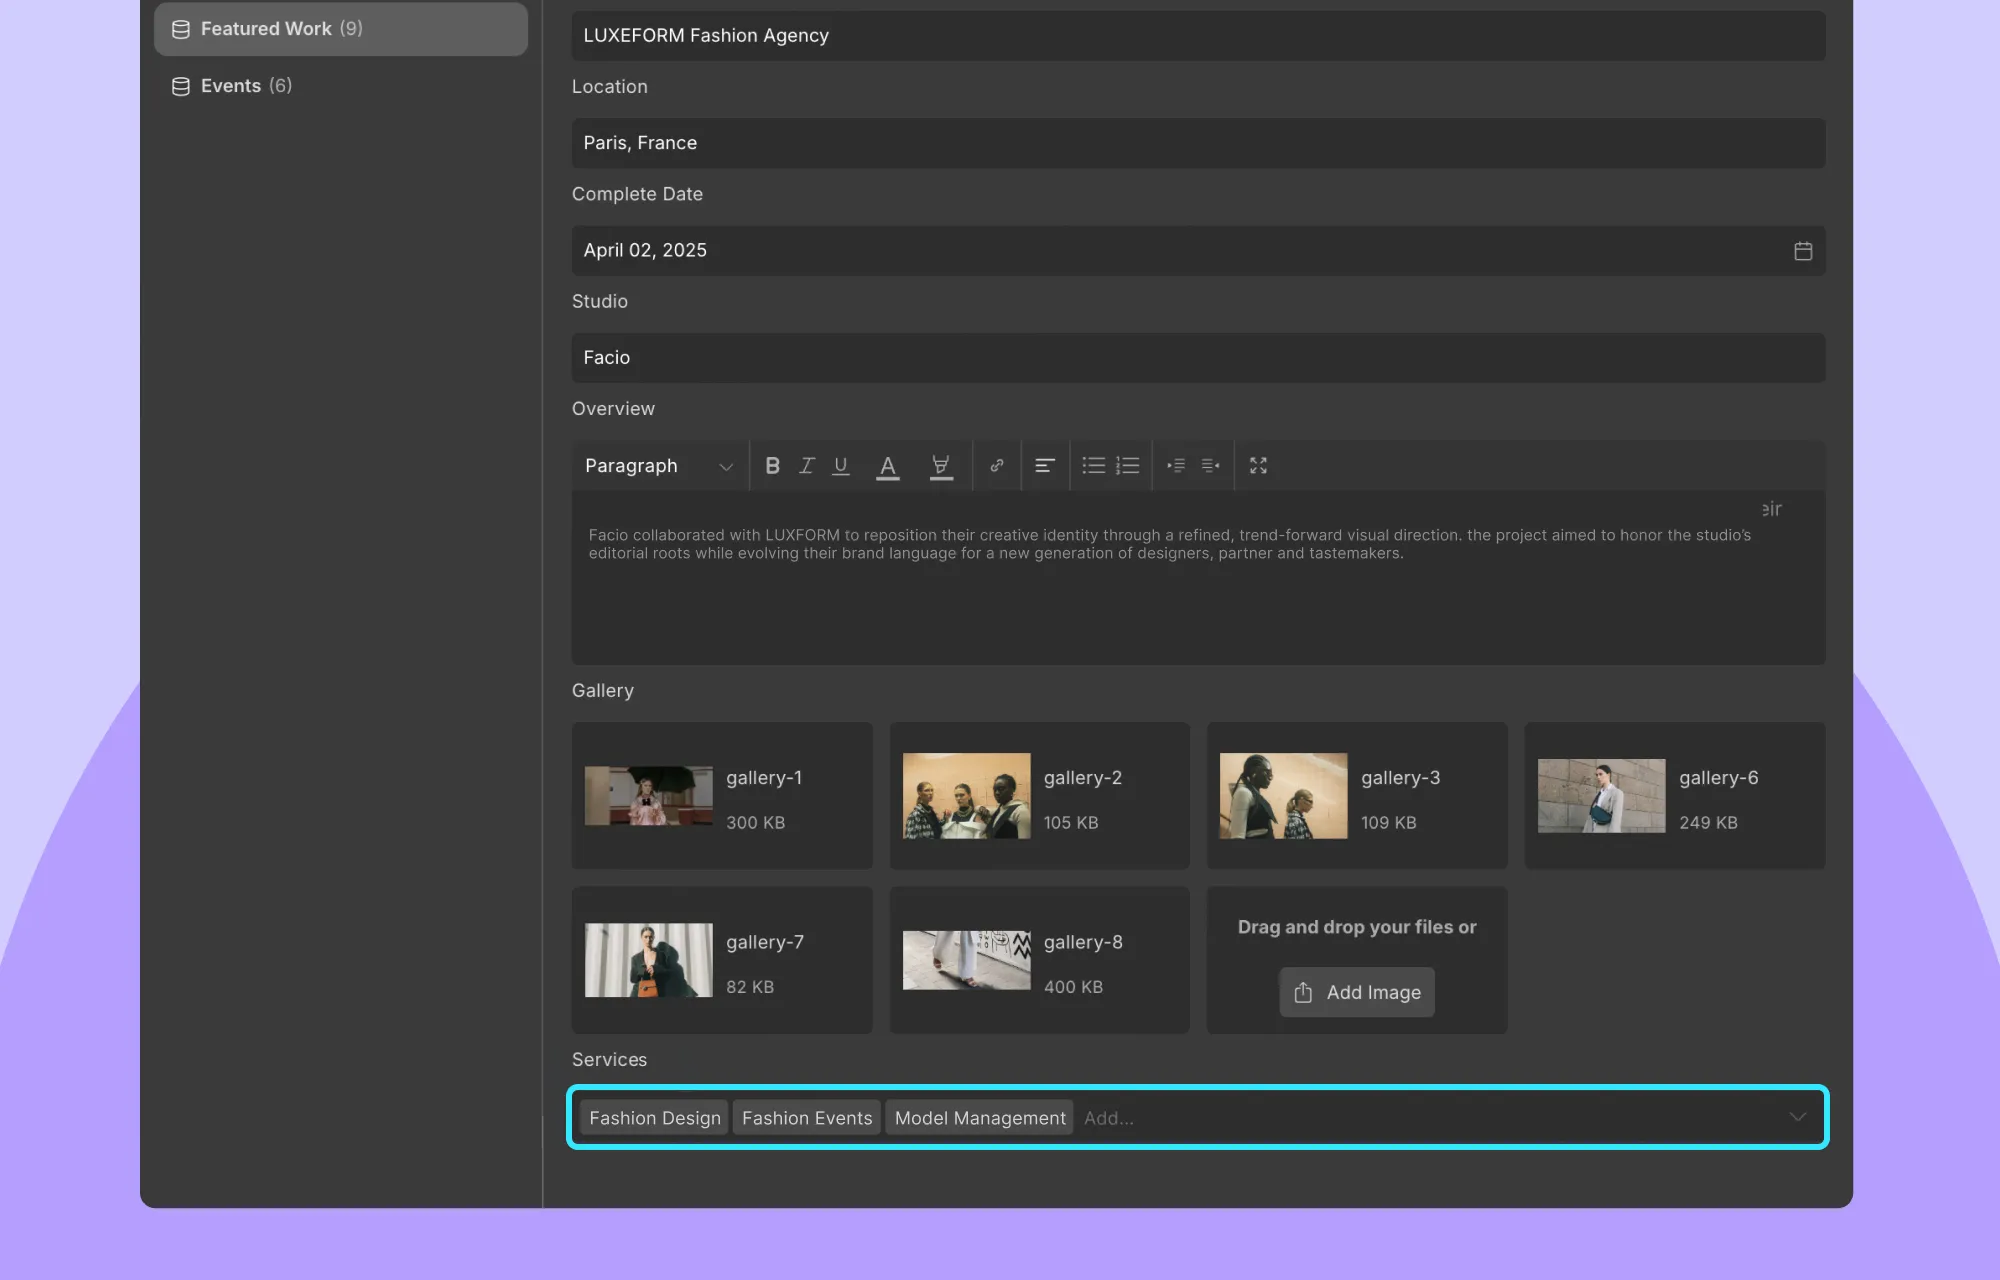
Step 3: Finally, for each item in this main collection, select one or more values for the multi-reference field (pulled from the referenced collection), and save.
To learn more, check out Droip’s Dynamic Content Manager documentation.
Working With Custom Content Types in WordPress
And that’s a wrap on how to create custom content types in WordPress without extra plugins!
With the Droip WordPress website builder, you can not only create custom content types, but also insert, manage, and dynamically display custom content effortlessly with no code.
So what are you waiting for? Get Droip to build stunning, dynamic websites with custom content types tailored to your needs today!
